Showing posts with label artisan. Show all posts

Tuesday, December 29, 2015

January challenge: Buried Treasure

Buried Treasure aka "Use your stash!"

Dig into the treasure you have been hoarding... 

We all have one. Call it a treasure, or a bead stash. Call it loot or inventory. It most likely does NOT look like this: 

Keeping your beads safe? Paranoid? 

It probably looks more like this: 

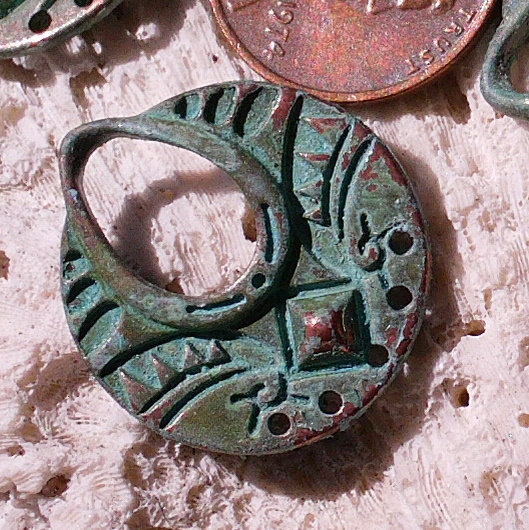
ONE of my 4 artist bead treasure boxes. Can you spot all the pieces by AJE team mates? LOL
What could be better than starting the year off right with new creative ideas? Using a treasures bead or component! Last year we started what may become a tradition here at Art Jewelry Elements - the "Use your Stash" challenge. (Granted, thats not a very poetic name, but it gets right to the point.)

Here is how it works: 

  • Gather your beads and components by any and all of your favorite artisan bead makers. 
  • Fondle. Think. Plan. Design. Dream. 
  • Create! 
  • Sign up here! Leave a comment with your name AND your blog address. 
  • Blog! Buried treasure reveal date is January 31st 2016. 
**Please — only leave a comment if you can commit to creating a finished piece and blogging about it on the reveal date.
**Pull out those pieces you love from your stash and ENJOY them. What are you saving them for? 
** This Buried Treasure challenge is NOT limited to AJE artists - but we DO love you see what you create with our creations. 

Until then - Happy Holidays! Happy New Year! Happy Creating!


Friday, November 29, 2013

Freeform Friday: Black, small, and cyber


The title refers to this weekend of course.
Black Friday.
Small Business Saturday.
Cyber Monday.

And I will be the first to agree that it is of utmost importance to shop local, support artists and craftspeople, and yet honor family and give thanks before the shopping commences.

So I have a three part post for you - inspired by these three days.
Warning: this may be seen as less than serious and a bit irreverent. You have been warned.

Black Friday:  

Special delivery
I admit that after T-day I really get revved up for the rest of the holidays. I start listening to the music, I decorate for Solstice, and winter in general, if you must know. And I make lists and check them, twice, three times...

I am an artist. I make many of the gifts I give. So by NOW if I don't have an idea, haven't started, I panic a little. Add to that that I have to ship things to my family - all scattered across the States... you feeling the panic yet? My plan for Black Friday is to prep for a show I have Sunday (Shop local! Shop handmade!) and start work on presents!!!

If so much of Black Friday is getting more for less, deals, steals, and bargains... I wanted to do the opposite and show you pieces that are more. For more to be sure... but wouldn't you be happy with these in your stocking? ( realistically - some yes. Others... not until after I win the lottery...)


Small Business Saturday: 

I would be remiss if I did not mention sales currently happening at AJE members shops, including mine. And many other small business/sole proprietors I know... 

And I have to mention other friends and "family" having sales... my good friend Marsha who contributes to "Love my Art Jewelry" blog was compiling a list as well!

Cyber Monday: 


Cybermen. I am not going to argue. Resistance is futile - oh wrong Universe....

Have a great weekend! Enjoy the art of giving! Don't let the commercialism taint the true spirit of the upcoming holidays!


Jenny www.jdaviesreazor.com

Friday, January 11, 2013

Freeform Friday - Organic

... from Merriam Webster:  Organic 3 : of, relating to, or derived from living organisms...


...from Albert Einstein: "Look deep into nature and then you will understand everything better. "

Today's post is inspired by nature, and organic texture. I am focussing on texture this month; my friend Cooky Schock and I are doing a collaborative year long exchange on our shared blog at Coast 2 Coast Creative. And natural textures are my absolute favorite. Mother Nature was truly an  inspired artist when she created marvels like sea urchins, tree bark, and seed pods! Oh seed pods... 
Eucalyptus pods from San Diego.
I use these frequently, one of my fav motifs. And such different designs, such diversity! They remind me of Medieval quatrefoils. 
Ocean and sea themed found objects in my studio. 
Plant and pod pieces gathered in my studio.
SO for this Freeform Friday I decided to make some molds. Positive and negative; and share some of my organic inspirations. These type of elements have been used to make impressions since early man was texturing clay pots. (Makes the pots less slippery when wet...) No one can fuss about copying, since we are all inspired by similar items. You can't copyright a peach pit! The trick is using them in your own creative way...
Polymer texture plates pulled from the original objects. When cured these can be texture press plates as is - a "negative" of the original. I will use them in both earthenware clay and polymer.
 L to R: peach pit, acorn cap, star anise, magnolia pod, poppy pod.

Ocean pieces and their "negative" polymer pieces. The sea urchin had to be taped back together for the picture...

When I make molds of my hand carved ceramic pieces, I cast them in plaster. That process ruins the original, as it is forcibly taken from the mold when set. For more fragile objects I have started using various brands of RTV. This "room temperature vulcanizing" mold material is so fabulous! ( I have used Micro Mark's and Alley Goop) Simply mix equal parts, press, set aside. Fifteen minutes or so - there you are! I cast my cured polymer pieces to have a flexible version of my new texture vocabulary. 
With the brain coral and seed pod shown above - I used the RTV on the polymer "negative" - resulting in a RTV "positive" that replicated the item's direct texture. Pressed in design? Raised up design? I can do either... And for one more positive image... I used black polymer to make positive stamps from these three RTV molds. The ideas I am having of that star anise pod! ( far right) pressed into clay, glaze pooling in the design... yummy. And poppy pod earrings? Sweet!


Many of my fellow artists at AJE are also inspired by organic textures. Leaves, sea urchins, shells... in porcelain, stoneware, bronze and copper... Feel free to browse! 
L to R: Kristi BowmanLesley Watt, Karen Totten, Diana Ptaszynski, Kristi, Lesley, Diana.

Until next time...
Jenny
www.jdaviesreazor.com

Saturday, October 20, 2012

Saturday Share...Enameling Pens Trial and Error


Good morning, Art Jewelry Readers!  Since I post every other Saturday, I was trying to think of a snappy post title, and came up with Saturday Share. Today, I thought I would share with you my recent trial and error experiments with enameling pens.


Those of you familiar with my work know that I have a huge love of torch-fired enameling!  I learned from the master, Ms. Barbara Lewis!  Her immersion method really works for me when it comes to instant gratification in creating art jewelry components.  Recently, after reading some posts on Barbara's Ning site, and seeing lots of lovely inspiration, I decided to try some new enameling techniques.  After a little research, I decided to purchase a set of Enamel Pens.  These are made by Thompson Enamels and can be purchased individually, or in a set of 9.

They were a bit tricky to get the hang of at first...you have to squeeze the tube and apply a bit of pressure to the tip to get the liquid flowing.  You also have to make sure you shake the pen quite a bit, as the colors tend to separate.  I found some colors are runnier than others as well.


These were the 1st ones I did...I loved the designs, but my background colors got muddy, and they over torched.

The biggest learning curve was torching the pieces after I applied the liquid enamel.  You can't go directly into the flame or your dried designs will pop right off!   This is where I decided to use the tripod and trivet method, so I could direct the flame underneath of the piece. I didn't really get the hang of that method and reverted back to directly in the flame!

I decided to try some pumpkins and ghouls...here are before firing...


 and after firing!


As you can see, the 2nd firing can be tricky, especially if your base coat is a hard color, like white, to keep from getting muddy!  I still think these little guys are pretty scary cute!  Sorry for the shiny photos!

Next, I thought I would try on some bisque-fired lentils I had from Bisque Bead Supply...they are such cute shapes and the enamel finishes with a lovely crackle.  I enameled them, then used the pens to draw faces...Jenny, here is my attempt at an enameled sugar-skull! (Check out yesterday's post on Dia de los Muertes).  Here is before 2nd firing....

and after...


Unfortunately, not a success!  I think the crackle glaze made the drawing run more than when fired on a smoother finish.  See what I mean by trial and error!

The owl was a total last minute experiment, and he actually turned out better than the others...here he is again!  I will definitely be making a few more of his kind!


While not a total success, I have to say that there are real possibilities with the pens, and I will be playing with them lots more. Then onto water colors!!

Thanks for stopping by and letting me share!  What new techniques are you playing with?

~Melissa Meman

Monday, June 4, 2012

AJE Eye Candy


I'm going for earthy and rustic blues today.


Love these Earthenware Disc Beads by  BHClaysmith

Beautiful Night Life discs by LoriLochner

Rustic Sky Blue Ceramic Discs by JanelGoolsby

Cleopatra's Hoop Verdigris Charm PatinaWorx

Love these Dusty Denim Clay Grid Shards MarshaNealStudio

Raku Bricks from starspiritstudio


And there's still time to join us for Component of the Month and Blog Hop, just leave a comment HERE choosing a Large or Small Component and I'll invoice you. More details HERE.

Kristi