Showing posts with label Halloween. Show all posts

Friday, October 31, 2014

Evolution of the Sugar skull

Happy Halloween! Feliz Dia de los Muertos! 

Dia de los Muertos ofrenda table, San Diego. Photo by J. Davies-Reazor
last years skulls
In honor of the holiday - I wanted to share with you the evolution of my polymer Dia of the Dead sugar skulls. Last year, I shared a tutorial - how I do what I do...


I make a batch every October, for friends, and fall shows. I'll work on them over a few days: sculpt, cure, paint, cure, bead...  This year I was teaching a Sugar Skull workshop as well. I was faced with the challenge of streamlining my process down to an hour and a half. I wanted the students to leave wearing their cured/finished pendant. So how to color and embellish the raw clay and do one simple cure at the end of class? My skulls are usually multiple layers of oils and acrylics, Gilders paste, sealed for durability... Hmm.

And I like to add variety to each batch. New tools, new techniques...


This year's new tool set: leather stamps. I found these on Amazon, pretty cheap, and since I won't be hammering them into leather repeatedly, thought they would do nicely. They are perfect! I love the striped crescent moon shapes especially. 


Naked skulls - a combination of small decorative rubber stamps and the leather stamps. Flower eyes! Heavens! Its too good! I am in love.

Now I mentioned that whole pesky workshop time constraint. Well - the colorant I like to use on raw clay is Mica powder. I have a few colors, they are easy to apply, and cure into the clay. They would be perfect for a single cure piece as color, and decoration.

Brushed on they are a total scary what-have-i-done? mess. 

With the surplus gently blown away, they are less scary, but still smeared and a bit all over the place. The trick to clean up? Clear tape. ( Sorry there isn't a video tut of this. If I could figure out how to hold the camera with my chin... ) Simply use the sticky side, gently pressed on surface, to remove excess powder. Powder remains in the impressed areas. Viola! 


These four are cleaned up and ready for the toaster oven. Wire loops are in the foreheads for jump ring/beading later. Czech glass flowers are applied with a head pin. (Bent at end to prevent it from pulling out. ) There are a few areas I will clean up with a little wet sanding... 

And here is the motley crew waiting to be whisked off to FaerieCon next weekend! 

The class, you ask? Fabulous! See what my students made: 
Student work left and center. ( Mine on right) They got theirs done! 

No tricks. All treats! Enjoy! 

Jenny


Thursday, October 31, 2013

Trick or Treat


Hi and Happy Halloween!

Welcome to today's post where I'm going to share what I'll be doing along with a little bit of history of the day... and of course some lovely handmade treats!


Although it isn't celebrated as keenly as it is in the US, Halloween originates from over here in the UK. The oldest stories reach back to the Celtic festival of Samhain (pronounced Sah-Ween) which marks the final harvest and the end of Summer. The Celts held any time of change or transition in high regard and believed that these times were magical and spirits could wander freely. Those that had died in the previous year could pass across to the otherworld and those already passed could travel back through to earth. Fires were lit in their honour and costumes were made from hollowed out animal heads and skins to represent the Gods of Nature.


Today, I'm going to be busy carving pumpkins with my kids, and they want angry birds... I think they're being a bit hopeful of my capabilities!

The tradition of carving pumpkins or Jack O' lanterns comes from Ireland where there lived a man known as Stingy Jack. He was well known for being mean and playing tricks on those around him and also for being a terrible drunk. One evening in a bar, he met the devil.


Not being easily intimidated, he asked him to join him in a drink. But being stingy, he didn't want to pay for them, so he convinced the devil to turn in to a sixpence to pay the bill in return for his soul. But rather than settle up, Stingy Jack decided to keep the coin and put it in his purse where he kept a cross. The devil was trapped and couldn't return to his original form. Jack agreed to let the devil go free if he promised not to bother him for a year. A year later, Jack again met the devil, this time while walking home. He convinced the devil to climb up in to a tree to pick him an apple. While he was up there, Jack carved crosses in the tree preventing the devil from climbing down again. This time, he agreed to free the devil if he promised to leave him alone for 10 years.


Before his 10 years were up, Stingy Jack died and went up to heaven. He was turned away at the gates due to his mean ways on Earth, so he travelled down to hell. The devil refused him entry as he had promised not to take his soul for 10 years and wasn't happy about being tricked, so Stingy Jack had no place to rest. As he left he asked what he should do... the devil threw him a burning ember, which he put inside a hollow turnip to light his way as he roamed for eternity looking for a resting place.


So with the pumpkins carved, it will be time to dress up, this year we're going with skeletons. Traditionally costumes have been worn to hide from the faeries or spirits alleged to run free on the night of Halloween. Disguised as beggars, they visit houses asking for treats and handouts. They will reward those who give food, but those who refuse will be tricked. Other stories say that pumpkins are left outside houses to guide the souls of those lost through the year home, and the scary faces are carved to scare away evil spirits.

Ours will be going in the garden while we go out looking for ghosts, and bats, and witches on broomsticks.


Witches for modern Halloween are usually portrayed haggard old ladies with warts and green faces, cackling around a cauldron. But the first witches were much kinder people.

The word witch, derives from 'Wicca' meaning 'Wise one'. These women were originally known as wise as they were healers. They practised early forms of medicine, making natural remedies to assist with pain and other ailments and were well respected in their communities.


With the spread of Christianity through Europe, practising medicine was frowned upon and considered to be practising against God's will, so witches were cast as evil, horrible old hags doing the work of the devil, and mass hysteria ensued. Accusations flew and people were accused of witchcraft for things as simple as having a birthmark or mole, considered to be marks of the devil. Those leading the witch hunts would offer the accused salvation in return for their confession and naming of the other witches in their coven. Faced with the choice of a nasty painful death, or being saved by naming a few others, the accused usually put forth the names in order to save themselves. This lead to hundreds of people being falsely accused and many put to death. This spread across continents with the migration of the Irish and led to events such as the Salem witch trials. 


And finally, we can't have a Halloween post without a cat! Now a symbol of good luck, the black cat was once feared as a figure of darkness. It was said that witches could transfer between their human form and that of their familiar to travel incognito, that the devil often appeared as a black cat when associating with witches, and even that they were gifts given by the devil. Cats were accused along with the witches of practising the dark arts and unfortunately many suffered the same fate as their owners. Thankfully we're a little more open minded about our pets now!

Well it's time for me to go and carve some pumpkins...


I hope you enjoyed reading, and whatever you're doing and whatever you believe, I hope you have a very Happy Halloween!


Caroline 

Monday, October 28, 2013

Halloween/Day of the Dead Jewelry Blog Hop Reveal

Halloween is one of my favorite holidays.  To celebrate this year, I hosted a Halloween/Day of the Dead Jewelry blog hop.  The rules were simple; create Halloween or Day of the Dead themed jewelry and make sure each incorporates an art bead/component.  Over 40 people joined in the fun!

If you would like to learn more about the Day of the Dead, then check out Linda's post here.  Last year, Linda and her husband were in Oaxaca, Mexico during the celebration.

To see all the blog hop creations, come join me over at Suburban Girl Studio for the full list of participating blogs.

Have a spooky day!

Diana P.
Suburban Girl Studio LLC

Sunday, October 27, 2013

Earring Challenge Reveal 20 - Weeks 41 & 42/52


Well here we are again with another earring reveal and on the home stretch of this epic year long challenge. Hope you've been enjoying doing this with us and will be here to the end...


In keeping with the season the first pair I'm featuring this week are from Monique of 'A Half Baked Notion". Lovely pumpkin coloured lampwork beads play beautifully on the dark chain and the flash of purple makes them really eye catching.


Next up another pair with a Halloween theme from Sarah Jo at SJDesigns Jewelry with lovely subtle pumpkin images that Sarah has set with Resin in brass bezels...perfect for the whole autumn too.


This final pair by Kiersten Giles also pick up the Autumnal tones but rather than Halloween, these remind me of an event we celebrate here in the UK n early November - Guy Fawkes Night, especially the smoky dying embers of the bonfires...


So that's it for this reveal and just 10 more pairs of earrings to make to see the challenge through...if your on track for all 52 pairs congratulations!

The next reveal will be on the 10th of November so do come back and join us then and don't forget to link your blog posts using the linky tool below...


Lesley
The Gossiping Goddess

Tuesday, October 15, 2013

Pumpkins!

Ever wonder why pumpkins for Halloween?  I did, so I thought I'd write this post about pumpkins - the legend of the Halloween pumpkin, a pumpkin seed recipe, and some pumpkin bead eye candy!

Free Image from google search


According to wiki - A jack-o'-lantern is a carved pumpkin, turnip or beet, associated chiefly with the holiday of Hallowe'en, and was named after the phenomenon of strange light flickering over peat bogs, called will-o'-the-wisp or jack-o'-lantern. In a jack-o'-lantern, the top is cut off, and the inside flesh then scooped out; an image, usually a monstrous face, is carved out, and the lid replaced. It is typically seen during Halloween.

They originally appeared in Ireland and Scotland, with faces carved from turnips to represent goblins.  They were used during the time of Samhain when fairies and spirits were thought to be most active.  In the US the pumpkin was used originally for harvest season, not necessarily Halloween.  While there are many stories associated with jack-o-lanterns, the major story is that they were used to ward off the undead.


A very popular thing to do with your pumpkin guts after carving them is to roast pumpkin seeds.  Here's a recipe you can use -  

Preheat oven to 300 degrees F (150 degrees C). Toss seeds in a bowl with melted butter and salt. Spread the seeds in a single layer on a baking sheet and bake for about 45 minutes or until golden brown; stir occasionally.  You can also add powdered cayenne pepper, cumin, curry powder, etc. to make them different flavors!

And here's a fun link for a free project from Prima Bead - beaded pumpkins!   


Ok, so here's the eye candy!  Pumpkin beads!


Saturday, October 20, 2012

Saturday Share...Enameling Pens Trial and Error


Good morning, Art Jewelry Readers!  Since I post every other Saturday, I was trying to think of a snappy post title, and came up with Saturday Share. Today, I thought I would share with you my recent trial and error experiments with enameling pens.


Those of you familiar with my work know that I have a huge love of torch-fired enameling!  I learned from the master, Ms. Barbara Lewis!  Her immersion method really works for me when it comes to instant gratification in creating art jewelry components.  Recently, after reading some posts on Barbara's Ning site, and seeing lots of lovely inspiration, I decided to try some new enameling techniques.  After a little research, I decided to purchase a set of Enamel Pens.  These are made by Thompson Enamels and can be purchased individually, or in a set of 9.

They were a bit tricky to get the hang of at first...you have to squeeze the tube and apply a bit of pressure to the tip to get the liquid flowing.  You also have to make sure you shake the pen quite a bit, as the colors tend to separate.  I found some colors are runnier than others as well.


These were the 1st ones I did...I loved the designs, but my background colors got muddy, and they over torched.

The biggest learning curve was torching the pieces after I applied the liquid enamel.  You can't go directly into the flame or your dried designs will pop right off!   This is where I decided to use the tripod and trivet method, so I could direct the flame underneath of the piece. I didn't really get the hang of that method and reverted back to directly in the flame!

I decided to try some pumpkins and ghouls...here are before firing...


 and after firing!


As you can see, the 2nd firing can be tricky, especially if your base coat is a hard color, like white, to keep from getting muddy!  I still think these little guys are pretty scary cute!  Sorry for the shiny photos!

Next, I thought I would try on some bisque-fired lentils I had from Bisque Bead Supply...they are such cute shapes and the enamel finishes with a lovely crackle.  I enameled them, then used the pens to draw faces...Jenny, here is my attempt at an enameled sugar-skull! (Check out yesterday's post on Dia de los Muertes).  Here is before 2nd firing....

and after...


Unfortunately, not a success!  I think the crackle glaze made the drawing run more than when fired on a smoother finish.  See what I mean by trial and error!

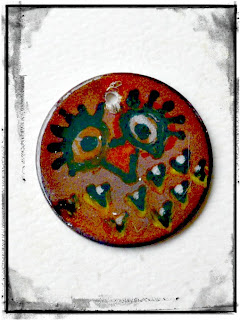
The owl was a total last minute experiment, and he actually turned out better than the others...here he is again!  I will definitely be making a few more of his kind!


While not a total success, I have to say that there are real possibilities with the pens, and I will be playing with them lots more. Then onto water colors!!

Thanks for stopping by and letting me share!  What new techniques are you playing with?

~Melissa Meman