Making new jewelry components always means new jewelry design ideas... so...
Today I'm sharing a new bracelet tutorial with you!
Supplies you'll need:
- 20 gauge wire
- 22 gauge wire
- 24 gauge wire
- lobster claw clasp
- round 6/0 beads or magatama 3-4mm beads (I'm using oxblood magatama.)
- round 11/0 beads (I'm using iris gray.)
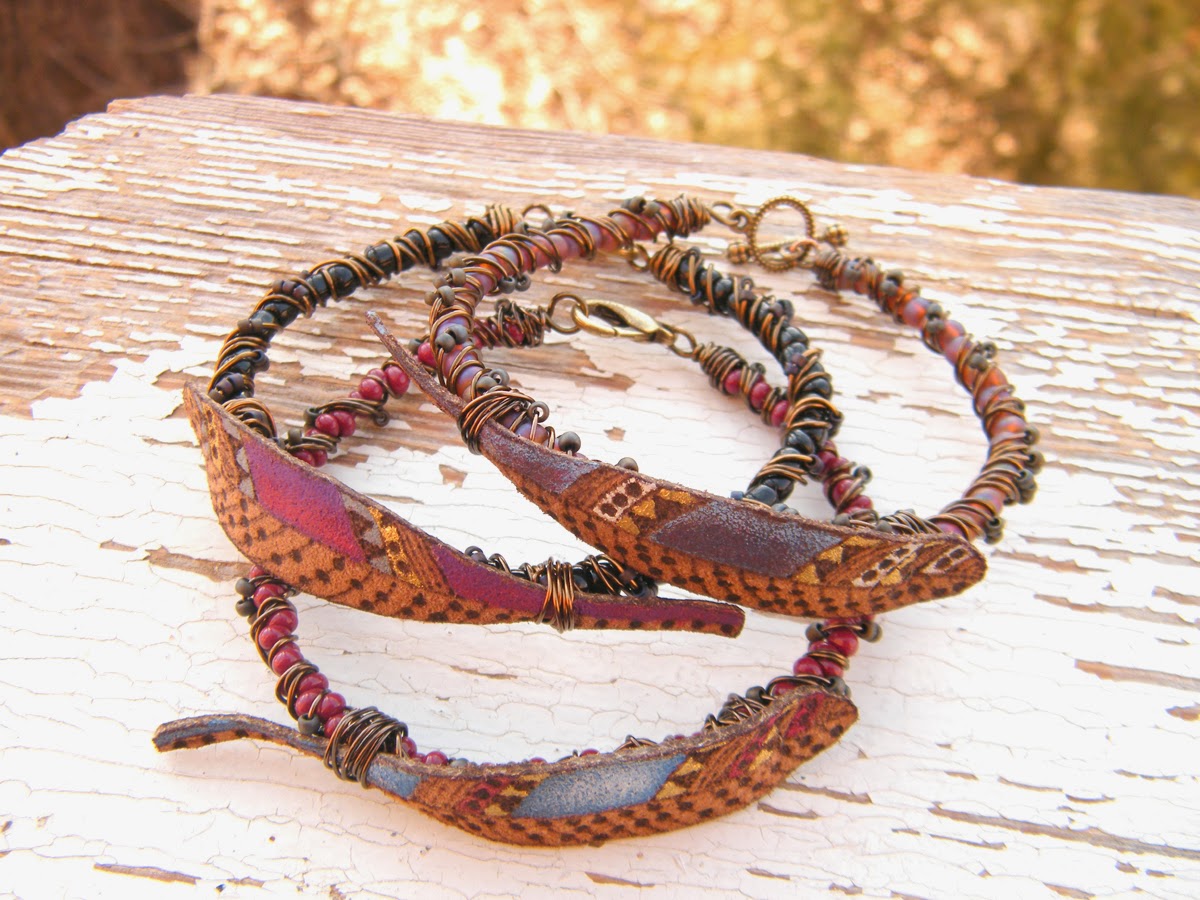
- painted leather feather focal
Tools you'll need:
- wire cutters
- flat-nose pliers
- bent-nose pliers
- large needle
1.
Start by cutting a 20 gauge length of wire, about 3 inches longer than
needed to fit your wrist. Loop one end and add the clasp. Wrap and trim.
2.
String your round 6/0 beads or magatama 3-4mm beads onto the wire. Keep
stringing the beads until you have about 1 inch longer than your wrist
size. Check sizing on your wrist and form a loop and wrap closed.
3.
Next, cut a length of 22 gauge wire about 3 times as long as the
bracelet base you just completed. Starting from the clasp end, wrap the
wire over the beads all the way to the loop end. Do this twice.
4. Here's how it will look after wrapped twice.
5.
Now, cut a length of 24 gauge wire about 4 times longer than the base
and starting again at the clasp end, wrap over the base, this time
stringing a few 11/0 beads with each wrap. Keep the beads even or make
them look more scattered like I did — whatever you like best!
6. You're almost finished!
7.
You can use whatever focal you like, but if you're using a painted
leather feather, you'll need to pierce some holes — 2 at each end.
8. Cut about 5 inches of 24 gauge wire and string through the top holes on the feather.
9. Determine the center of your bracelet and wrap the feather securely in place.
10.
Up until this point you'll probably find it's easier to work with the
bracelet out straight, but now you need to curve it into shape before
wrapping the other end of the feather in place — otherwise the feather
won't lay right.
11. Wrap around the bracelet base and over the top of the feather. And your done!
Enjoy your new bracelet!
Try other colors and different bead sizes too. These are so fun to make and really pretty fast!
And for extra fun and to celebrate the debut of my new painted leather feathers, I'm having a
giveaway and sale!
Go to
my blog for a chance to win your own pair of leather feathers in your favorite color.... and... everything in my
shop ships for free when you use code FLYFREE (international orders too!) through March 5th.
Happy Saturday and happy bracelet making!


.JPG)
.JPG)
.JPG)
.JPG)
.JPG)
.JPG)
.JPG)
.JPG)
.JPG)
.JPG)
.JPG)
.JPG)


Beautiful original bracelet and great tutorial Rebekah.
ReplyDeletewhat a simple but AWESOME design!! and so you, it has that same quality as the wonderful bracelet you made with Jenny's CoM piece. this is just lovely, so textural and so rich with color.
ReplyDeleteAwesome!
ReplyDeleteHoly carp. Dynamite! The feathers are GORGEOUS! And the way you integrated that into the clever design is well, GENIUS! You rock, Miss Rebekah! Enjoy the day. Erin
ReplyDeleteRebekah, I LOVE your leather feathers, and this bracelet is wonderful! The textures and the colors are perfection. Thanks for the the fab tutorial!
ReplyDeleteThe feathers are stunning Rebekah! Great tutorial too. I love your design.
ReplyDeletethanks so much for the tutorial, Rebekah! I love little beads with the leather...so unique.
ReplyDeleteFabulous design!
ReplyDeleteExcellent tutorial and design!
ReplyDeleteI'm so happy you all enjoyed my new tutorial! Be sure to come back and share links if you create a bracelet for yourself—I'd love to see what you're inspired to make. I will definitely be writing more tutorials… one more good excuse to take some time out of my days for jewelry making. :-)
ReplyDeleteGorgeous bracelet, I love your new leaves!! Thank you!!!
ReplyDeleteI'm sorry, I don't understand how you attached the wide end of the feather to the bracelet. The wide end doesn't appear to be wrapped, in the photo and that part is kind of confusing for me. Can you explain how to attach the wider part of the feather?
ReplyDeletePlease disregard my comment about how to attach the wider end of the feather. I see, now! Thanks, this is beautiful!
ReplyDeleteBeautiful feathers, great tutorial. Thank you for sharing, so inspiring. Lyn
ReplyDeleteSimply divine feathers!
ReplyDelete