Showing posts with label lampwork beads. Show all posts

Saturday, October 1, 2016

October Component of the Month - Sugar Skulls


It's my turn to host the AJE component of the month challenge for October. October might be my favorite month of the year because I just love the colors of autumn, Halloween is my favorite holiday, the brisk fresh air, starting up the fireplace again, roasting marshmallows in the fire pit outside, sweaters, doing the final yard clean-up and getting a break from weeding for several months....HA!

So when I was considering what I would offer as the COM, I considered several options. I have a new black kitten in my family to match the black cat we already have. So beads with 2 black cats...very Halloween-ish. I considered an autumn tree so I could kill two birds with one stone and use it for the tree challenge a couple days ago. However, ultimately, I decided I wanted to try my hand at making sugar skulls. There are some beadmakers who create masterpieces of extremely elaborate sugar skulls and they are AMAZING! I am not good at detail because my patience level is pretty low. So I went for a more "primitive" folk art style sugar skulls.

GIVEAWAY NOW CLOSED 

I will be selecting two readers to participate in the design challenge (READ DETAILS BELOW!!!) along with several members of the Art Jewelry Elements team. If you'd like the chance to play along with us here's what you need to know...

  • I will give away two sugar skull beads of my choice to two winners selected randomly from those who leave a comment on this post. Please noteyour comment must include your email and blog addresses so we can contact you should you win. Comments lacking this info will not be considered.
  • Please only leave a comment if you can can commit to creating a finished piece and blogging about it on the reveal date.
  • The names of the two winners will be announced on Tuesday October 4th.
  • the giveaway is open to participants from all countries but please be aware, components will be mailed from the US and international postage can take up to 3 weeks.
  • The blog reveal will take place on Sunday October 30th.
Good luck! And happy beading. 

Friday, October 2, 2015

Giveaway Time! GIVEAWAY CLOSED THANK YOU

We're celebrating here at AJE and once again it's all down to you - our wonderful readers!

Earlier this week we passed the 2000 followers milestone on our Facebook page and we think that deserves a little something special so we're have a mega giveaway. One lucky winner is in line to win this bumper collection of beautiful art beads made by members of the AJE team...


There are pieces by Jenny Davies-Reazor, Caroline Dewison, Jennifer Cameron, Susan Kennedy, Kristen Stevens, Karen Totten, Rebekah Payne and me and yes...all these goodies will go to one person.

To take part in the giveaway all you have to do is leave ONE comment on this post and we will then pick a winner using Random.Org. You have until 12 midnight EDT on Monday 5th October to leave your comment and we will announce the winner on the blog on Tuesday 6th October. Please feel free to share the love on your social media sites.

Once again thank you to all our loyal supporters and good luck!

The AJE team

Wednesday, June 10, 2015

The Magic of Fireflies: the June Theme Challenge

Firefly/Lightning Bug image found here: http://managementscience.biz/lightning-bugs/

As you may recall, the theme for the June AJE theme challenge is fireflies/lightning bugs and is open to all component makers and jewelry designers. I thought it might be fun to learn a little bit more about fireflies. Especially because I knew absolutely nothing about them except how beautiful they're flashing lights are.

It turns out, what we are witnessing is a call to mate. Males fly around flashing their lights hoping to impress a female. The females stay on a perch on the ground or on a shrub. If they are impressed by what they see, they flash back. If they aren't, they don't flash and the male can't find them in the dark.

Example of amazing photography from Firefly Experience. 

According to the Boston's Museum of Science Firefly Watch website, The female decides which male to mate with based on the nuptial gift she receives. The nuptial gift "contains sperm to fertilize her eggs and food to help nourish them. Research on some species, including a local Photinus, suggests that the female is swayed by the brightness and duration of a male's flash. The more robust male firefly can produce a brighter flash and offer a larger nuptial gift, thus making him the preferred choice."

To most of us, the flash of fireflies look the same as every other. However, there are lots of variations. From the same Firefly Watch website:

Each species of firefly has a fairly distinctive flash pattern, which each differ in a number of ways:
-Color
-Length
-Number of flashes
-Interval of time between flashes
-Time of night they are active
-Flight pattern
Flashes can vary for a number of reasons, including temperature, time of night, time of year.

Image found on Backyards for Nature
If you are interested, you can volunteer to watch for fireflies in your backyard to help scientists with their research. For more info, visit the getting involved link, and if it sounds like something you would like to do, there's a link at the bottom to sign up. 

The AJE team have been working on their theme pieces a little bit here and there. I showed a few components last time, but we have a couple new pieces to share.

First up is Lesley's stunning firefly pendant: 

firefly pendant lightning bugs lesley watt art jewelry elements blog

And Caroline tried out some prototypes in glass that are just magical:

firefly lightning bugs lampwork glass beads caroline dewison art jewelry elements blog

We hope you'll join us in this challenge! It's super easy to participate. 

1. Goal - Have fun! Try something different! Be inspired by the magic of fireflies! Make something that fits within this theme. This can be an artist bead, a component, or a finished piece of jewelry.    

       *You are free to use any artist bead/component in your design -
  • from an AJE team member 
  • of your own creation
  • from another artisan bead maker... 

2. Share/Reveal - Reveal date June 30th
If you would like to be included in the blog reveal at month's end, please email Jen at jennifer.glassaddictions (at) gmail.com. Since this is open to all, this is the most efficient way to be included. Emails need to be received by June 27th  to be included. 

Thursday, March 26, 2015

Simple Leather Bracelet Tutorial


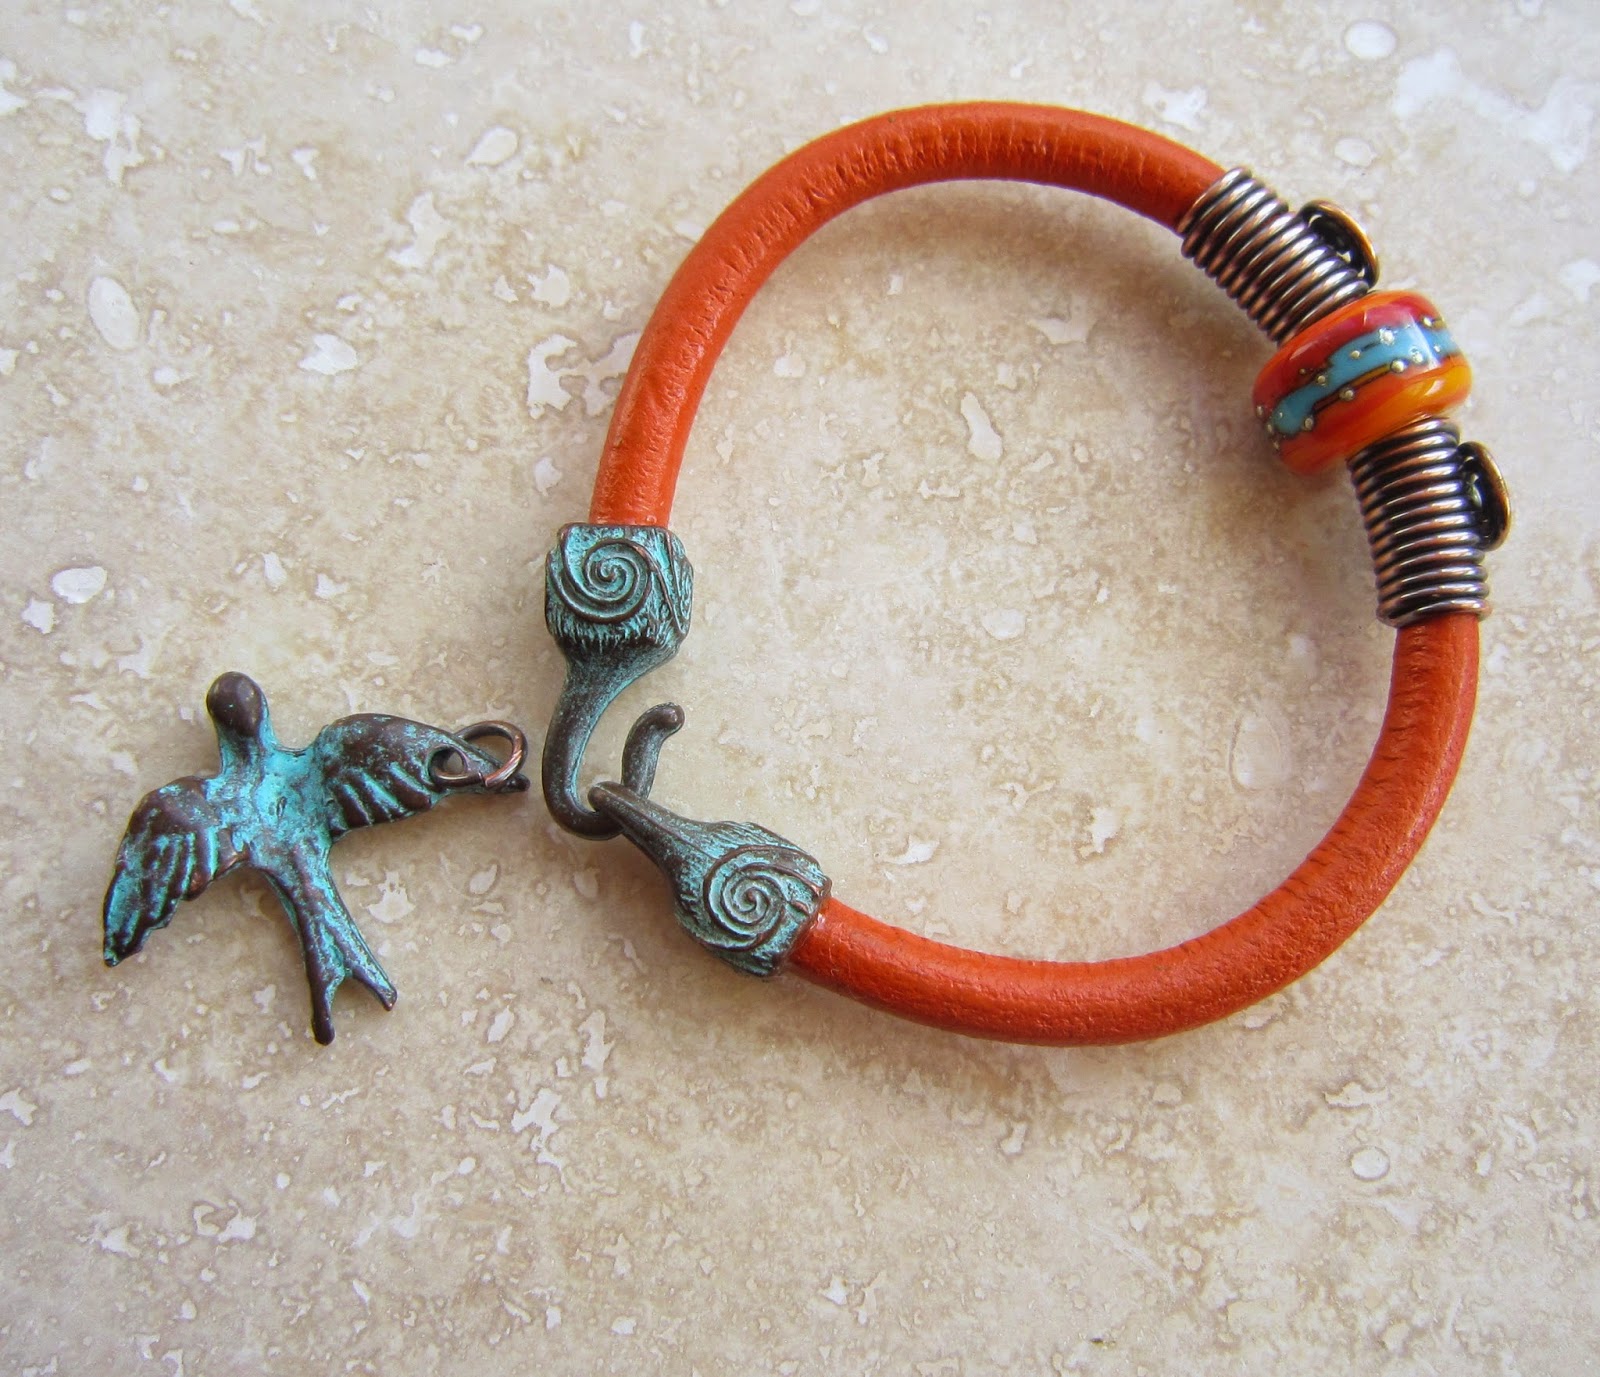
A little while ago my fellow AJE team mate Caroline sent me some gorgeous Greek cast metal closures and charms with a lovely verdigris patina. They just screamed out leather bracelet and I thought I share this simple summery design with you today...

Materials
Mykonos cast hook and eye clasp set
Mykonos Charm (optional)
7" 6mm leather cord (or length to fit wrist)
2 x 14" pieces copper wire 18SWG/16AWG
1 large hole bead
Flat/round nose pliers
Wire cutters
LOS
Clear Epoxy adhesive
6mm mandrel/knitting pin/leather scrap


Step 1
Take one piece of wire and wrap around your mandrel 10 times making sure it's not too tight so that you can remove the wrapped piece from the mandrel and get it onto the leather.

Step 2
Using round nose pliers take the end of the wire and begin turning a coil in the wire. Transfer to flat nose pliers and continue coiling until you have 3 rings.

Step 3
Continue wrapping the wire around the mandrel until the coil is level with it. Press the coil flat against the wrapped wire as shown. Trim the tail end of the wire on the underside with the coil on top.


Step 4
Repeat steps 1 to 3 to create a second piece that mirrors the first.

Step 5
File or sand out any tool marks and use LOS to oxidise both pieces together with a jump ring if you're using a charm. polish back with wire wool, tumble or polish.


Step 6
Thread the bead onto the leather and thread a copper element on either side. Make sure the focal element is centred then gently press the ends of the wires on the underside into the leather to stop any movement, taking care not to mar the leather on top.


Step 7
Use epoxy adhesive to glue the closure fittings onto the leather taking care to line the hook and eye up. Leave to dry.


Step 8 - Optional
Use the jump ring to attach a charm to the eye section of the clasp.


And that's all there is to it...

I actually decided that this particular charm was a little too large and I left it off so this is my finished bracelet...


I've been wearing this since I finished it and it's very comfortable. I really like it as it is but if you want to add a charm there are smaller versions available like these cute little shells.


Supplier list
Mykonos components - The Artisan Bead Compan
6mm leather cord - Cords and Wires
Lampwork Bead - Studio Juls     
Copper wire - Wires.co.uk  

Happy creating!

Friday, October 24, 2014

Hi, my name is Susan...

...and I have a problem!  A bead collecting problem!  Although I don't see it as a problem!  If you're reading this, you probably have the same problem!  I thought today I'd pop in and show you my personal collection of lampwork beads.  This is by no means all of them, but a great representation of amazing talent in glass beadmakers!

 The cardinal bead set is by UK artist Madeline Bunyan .  Cardinals are my favorite bird, so I had to have it!
 This pretty red bird is by Patty Cahill of North Carolina!  I have long admired her beads, and purchased this one at the Berks Bead Show!
 This gorgeous boro (borosilicate, a type of glass) bead was made by Kristan Child.  I purchased this in one of the facebook groups, don't remember which one!

 My collection of JC Herrell beads - I really love her style.  She constantly re-invents what she does in her beadwork and constantly strives to be better and different.  She's an inspiration!
 My one Bronwen Heilman bead - and I just noticed I photographed it upsidedown - see her signature? She does great work painting with enamels on beads.  And she's in a band!  And a generally cool person.
 These gourd beads are so awesome!  Made by Lezlie Belanger of Canterbury Keepsakes Lampwork, I purchased these on eBay.
 My little collection of Sarah Hornick beads - she's from Israel and makes beads in a very distinctive style!
 Cool beads by Sarah Moran of Z Beads - she makes very distinctive beads as well, and she's great with coldwork (carving the beads after they have been annealed).  The green bead has been coldworked, although it's hard to see in the photo.

 This bead is by Melanie Moertel of Germany - I LOVE her beads!

 Beads by Michael Mangiafico of Fig Studios - I have taken classes with him at the Pittsburgh Glass Center and actually took a class to make the ring you see above - but he's the master for sure!

 Gorgeous hollow beads by Andree Kosak of Andie's Glass - she makes the most amazing hollow beads!  Hollow beads are on my list of things to master!
And finally (for today!) a long glass focal by Trey Cornette - he not only makes great beads, he also makes paperweights and marbles with amazing detail!

I hope you enjoyed this tour of some of the glass in my collection.  I don't do anything with the beads except hold them and fondly gaze at them - I don't think I could do them justice by making something out of them.  Do you have beads that you hoard too?

https://www.etsy.com/shop/suebeads

Friday, July 4, 2014

From Across the Pond...Greetings and Beads


To all our readers in the USA from everyone here at AJE we'd like to wish you a very happy 4th of July and hope you're all having a wonderful time with family and friends. It's rather ironic that today of all days it should fall to one of these teams British contributors to host the post when many of you are celebrating having got away from us. But hey, we're all friends now aren't we and nobody would ever go to war over beads would they..?

I thought today was a good day for a nice light type of post and since I've not done it for a while I'm going to treat you to some bead candy from some of my favourite artisans on this side of the pond that you may not be familiar with. So grab a glass of your favourite tipple and follow me (click on the images for links)...

First up we have some stunning lampwork from the hugely talented Madeline Bunyan - a glorious floral goddess focal bead...

https://www.etsy.com/listing/193212875/purple-red-and-gold-flower-goddess?ref=favs_view_13

And a rather sad but beautiful hare focal bead...love him.

https://www.etsy.com/listing/191879354/sad-turquoise-hare-lampwork-focal-bead?ref=related-5

Then we have some simply stunning porcelain pods...

http://www.pinterest.com/pin/493988652847812592/

...and porcelain beads by Lisa Stevens of Seapods. I so covet Lisa's work.

http://www.pinterest.com/pin/381750505884249703/

Moving on we have some fabulous polymer clay beads from Emma Ralph of EJR Beads...

http://www.pinterest.com/pin/325525879288079163/

As well as these polymer lovelies Emma also creates glorious lampwork and ceramic beads.

http://www.pinterest.com/pin/486599934709255000/

Another favourite ceramic artist of mine is Jo Lucksted especially these cute little critter beads...


And these porcelain coastal seascape pendants are just divine - I know because I own one!


If you like your beads with more beads then check out Lynn Davy of Nemeton who, in addition to making the most spectacular bead woven jewellery also makes these gorgeous beaded beads...

 https://www.etsy.com/listing/154521414/small-beaded-bead-kit-18mm-bright-red?ref=favs_view_3

...and sells tutorials and kits so you can make your own.
https://www.etsy.com/listing/51494136/beadweaving-tutorial-no-3-sleek-beaded?ref=favs_view_4

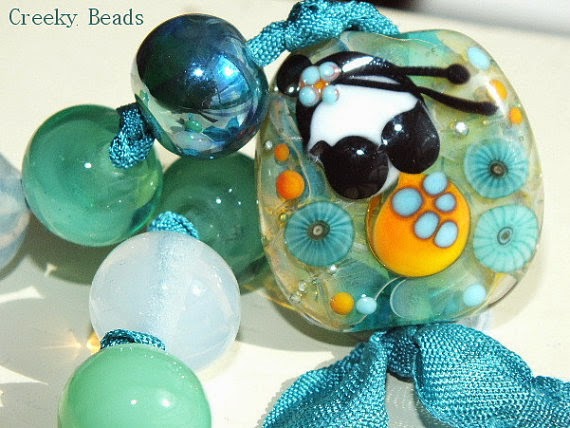
And last but not least we have some adorable lampwork beads from Wendy Willmott of Creeky Beads...

https://www.etsy.com/listing/189332319/handmade-lampwork-beads-turquoise?ref=favs_view_11

Aren't these just so cute and full of character...?

https://www.etsy.com/listing/178457168/handmade-lampwork-beads-creeky-me-creeky?ref=favs_view_1

Well I hop
e that little
tour of British craftsmanship has helped you while away a few pleasant moments and if you are partying today have a great time. I'd also like to wish my stateside AJE colleagues a very happy 4th of July from myself and Caroline...don't worry - we've got everything under control!

Have fun folks.

JULY COMPONENT OF THE MONTH WINNERS


The lucky winners of Francesca's glass cabachons are: Carol Briody, Rita from Toltec Jewels, and Deb Fortin. Congratulations.

Lesley
The Gossiping Goddess


Thursday, April 17, 2014

Throw out that expensive camera

I refer to my iPhone 4S as a camera that is also a phone. With a few easy to learn skills, it's difficult to take a bad photo with an iPhone and several other brands of phones. I'm often surprised when people share bad photos they've taken with their phone, because these phones take such great pics. I share photos of my work taken with my phone all the time. I even use them in listings.

Don't get me wrong. I also use a nice camera to take product photos...specifically a Canon EOS Rebel XTi that I got about 7 years ago with a macro lens I've had for a little over a year. Since I got this phone, I find the process of taking photos, uploading to the computer, editing, then posting them online to be TEDIOUS. I've never had a desk job and find that I have a difficult time working on the computer more than 1 hour at any given time.

For example, I like how my headpins look held as a "bouquet" in my hand using my phone and  natural light, cropped, with no other editing:


Better than the photo of them in the photo tent using a macro lens:


To try to help you take better camera phone photos, I grabbed a couple pieces out of my jewelry box. I purposely took bad photos, then took better photos to illustrate the difference. 

Example #1

The first photo has at least two major problems. While there's natural light, it's direct late afternoon light, which is harsh, casts lots of shadows, and adds a lot of gold to the photo. Since I prefer to do as little editing as possible, the golden glow and shadows are unacceptable. The other big thing that's wrong is that the photo is just plain boring. The shot is too wide. 


These photos were all taken on my kitchen tile. So to correct for the shadows and gold color cast by the sun, I moved to an area that wasn't in a patch of sun. That is the ONLY difference I made. These photos are completely unedited. However, it's still boring (and completely uncropped). 


This next photo, the key is still in direct sun, but I've angled the phone and come in as far as I could for a more interesting shot. It makes a big difference to the interest level of the key, and the glass looks really sparkly in the sunlight. However, I do NOT like the shadows being cast for a product shot. If it was simply an "artsy" shot to share on Facebook or Instagram, this would be totally acceptable. 


The next photo of the key is close-up, slightly angled, and out of direct sun-light. The ONLY editing I did was to crop it into a square-ish shape. 


When trying to get up close and personal with your jewelry (or other product), it's best to get the camera as close as possible then crop further if needed. Do not use the zoom feature. Here's an overdramatized example. 

Original unedited uncropped photo taken too far away:


What happens when keeping the camera at the same distance but zooming in instead:


What happens when you crop the original photo taken at a super wide angle. The quality isn't perfect (because I cropped this an excessive amount as an example of the difference), but it's a heckuvalot better than the photo above.


Do you know how to crop your photos on your phone? 

On my phone, when looking at a photo, it looks like this. Click on the edit button at the bottom. 


Then perform the correct function. Crop is that overlapping square symbol on the bottom right. Flipping the photos (which I clearly did) is bottom left. 


Example 2:

What's wrong with this photo? Golden sun casting shadows. Some areas look washed out. The angle is too wide. 


The color and light is better, but the angle is too wide. And it looks like maybe I didn't focus this one where I wanted the focus to go. 


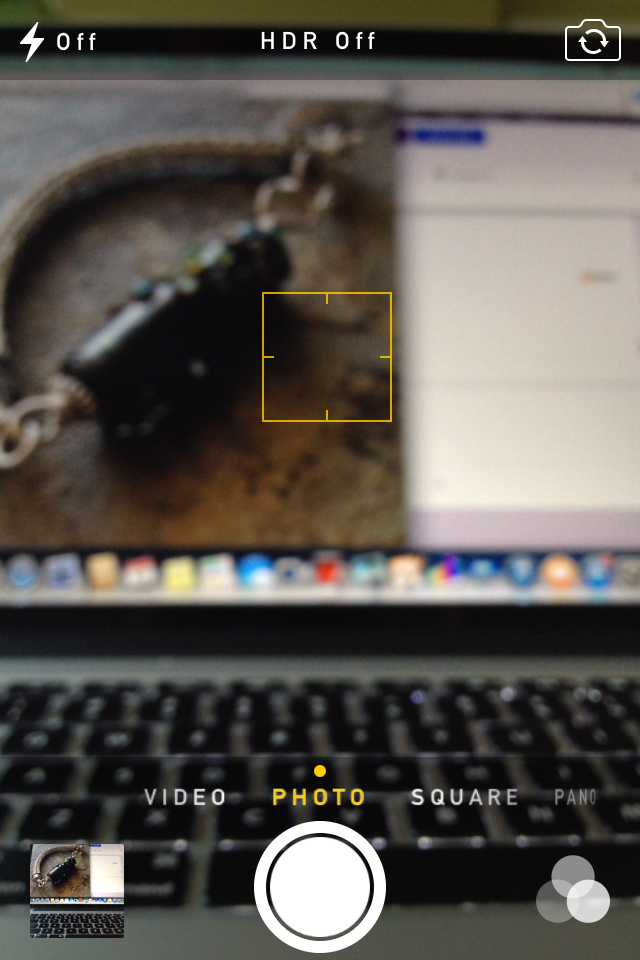
How does one adjust the focus? I can tell you how to do it on my phone, but it's kind of tricky to show it. Use your finger to touch the area of the screen on the object you want to focus on. The other thing this does is automatically adjusts the color/lighting to the object your focusing on to (usually) make it better. 

Here's a screen shot of the camera working on focusing right after I've touched a spot on the screen. The yellow square is the area I am having the phone focus on. Once it's focused, the square goes away. 


The next photo the bracelet fills the frame and isn't bathed in bright golden light. 


And remember that if you do super tight photos, you will want to show multiple views. 


And for the final example, I photographed this gorgeous beaded necklace by Kristen Stevens using one of my Nightmare Insomnia beads. Shadows, sun, too far away to see any of the detail that makes this necklace so special. 


The next one it has been removed from direct sunlight. The lack of shadows helps show a bit more of the detail, but it's still too far away to really draw the viewer in. 


And here is the focal portion with the camera held as close as possible and at a more interesting angle than straight above. You can now see more details in the piece than before. 


The above photo was cropped in Instagram. I used zero filters on it. If I'm selling a piece, I prefer to use no filters so the color looks as accurate as it possibly can. 

However, sometimes I use filters when I'm just showing a piece. I mostly like how the filters highlight certain areas of the photo and add a small border without any actual work. Below are three different filters of the photo above. Having comparisons like this can show you exactly how the filters change the look of the piece you're photographing. The change can be subtle, or striking.  

Mayfair:


Hudson: 


Sierra: 


In the above photo, we get a good look at the focal. But what about the rest? We (your potential customers) want to see the beading. And the clasp. So change the view, rearrange, move the phone. Here's another view of the same necklace above. The focal is blurred and moving off into the distance. The beading is front and center. Notice the empty space in front? All these aspects of the photo work together to create interest, tension, and to keep the viewer's eyes moving. 


And here is the same exact photo, but using the XPro filter on Instagram. It makes the background fade away and adds more emphasis to the beading. I love this look! 


Will I ever really throw out my digital SLR camera? Heck NO! But knowing how to take great photos with a smart phone really makes having an online presence easier. 

Go forth and take great photos!

-Jen Cameron