Showing posts with label art beads. Show all posts

Wednesday, August 24, 2016

Bead Fest: A Feast For The Eyes

Bead Fest was held over the weekend.  It's one of the highlights of my year and I've been attending since 2004.  I've even been a vendor at it 3 times (and might again in the future).  This year I went for fun; to see friends and do some (lots) of shopping.

Welcome to Bead Fest
You need to be careful at Bead Fest.  It's easy to go waaaaaaaaaay over budget in a short period of time (ask me how I know).  I told myself to lay off so many art beads this year...hahahahahahahaha!  Ok, yeah that didn't happen.

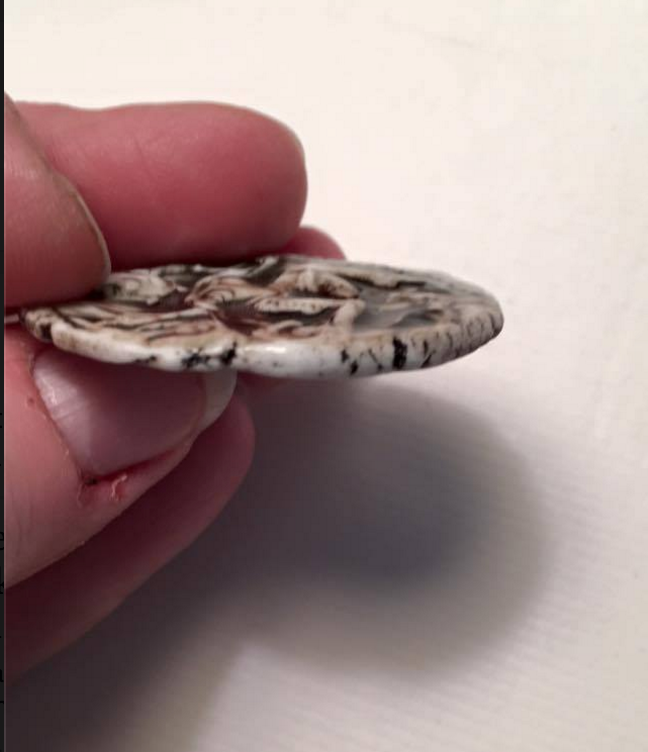
Gardanne Enamel Components
Explain to me how I'm supposed to do that with such fabulousness like Gardanne Beads enameled pieces?

Thornburg Bead Studio
Nikki/Thornburg Bead Studio brought some of her gorgeous lampwork urchins with her.  I ended up buying a bunch of lampwork headpins from her though to assist me with our AJE headpin challenge.

Penn Avenue Pottery
Tracey/Penn Avenue Pottery had oodles of fun ceramic beads to choose from.  I found myself trapped (totally against my will) at her booth for awhile, with my hands stuck (yes, I couldn't pull them out) in those trays.

Staci Louise Originals 
After my escape from Tracey's booth, I ended up at Staci's booth (that's a lie, I'd been there probably 500 times already by Saturday morning...my apologizes to Staci).  Her booth looked like a magic unicorn had visited with all the beautiful rainbow colors.  I added more beads to my gigantic Staci-collection.

Staci's bags
In addition to her beads, Staci also brought some of her hand-dyed and stamped bags with her.  I own a luna moth bag and it was perfect for shopping the show.

In fact, several bead-makers brought other art with them in addition to their beads...

Diane Hawkey
Diane Hawkey had some of her whimsical pot head planters and house sculptures for sale in her booth.

Beaded Chic Fused Glass
Donna/Beaded Chic has been playing with fused glass lately and brought some new pieces along with her table full of lampwork!


Marsha Neal
Marsha Neal had beads, tiny pottery and her needle-felted creations at her booth.  

Jenny Davies-Reazor
AJE's own Jenny Davies-Reazor had some of her gorgeous tiles and needle-felted/bead-embroidery pieces for sale at her table.

Firefly Design Studio
Michelle/Firefly Design Studio had her beach-inspired dishes with her!

And of course there was gorgeous jewelry at the show...

Marcia Balonis and Pam Garbig
Marcia Balonis and Pam Garbig had a table full of beautiful samples and kits for sale.  I brought home one kit and will be writing about it on here in the near future. 

There were also great tools for sale!

Lucet
New AJE member, Cooky Schock had a booth and I came home with a lucet and some cord from her. You might recall the recent blog post that Cooky wrote for us about the lucet.  This great little tool helped make my 5+ hour car ride home go much quicker!

Xuron
Treated myself to a new Xuron plier.  Soooooo comfortable!

Funky Chain, ParaWire, Gemstones
This was just the tip of the iceberg of what was available at Bead Fest!  You're probably wondering what I brought home with me, right?  Let's take a peek...

Pottery Purchases
A bunny pot head planter from Diane Hawkey, a ring holder from Marsha Neal and a dish from Michelle/Firefly Design.

Tools and Kits
The lucet, cord for the lucet, some dyed Stiff Stuff (Bead My Love), spiffy new XBow Series Xuron pliers and a fab kit from Marcia Balonis.

Art Bead Haul
And this is the art bead haul.  So many beads, pendants, headpins and cabochons!  

Bead Fest 2016 was fabulous as always and while I hate to see it end, my wallet requires a year to recover.  See you in 2017, Bead Fest!

Happy Beading!

Wednesday, July 6, 2016

Bird on the Wing Pendant with Embellished Chain - Free Tutorial


Birds are a perennial favourite with bead makers and buyers alike and this easy tutorial can be adapted to work with your own favourite examples.


Supplies

1 bird bead and wing(or similar) pendant.
1 flat/curved/disc bead
2 x 15" lengths of chain with link large enough to thread a double strand of waxed linen through.
8" 20 gauge wire
2 x 30" lengths of waxed linen
Seed beads (larger than chain links)
Charms and/or Czech glass flower beads
Headpins and jump rings
Round nose pliers and cutters

Step 1
Using the wire and round nosed pliers create a wrapped loop to attach the wing pendant.

Step 2
Pass the tail of the wire through the flat/curved/disc bead and the bird bead and make another wrapped loop to create a bail (add a seed bead to stabilise if required).


Step 3
Attach a length of chain to the bail either by opening a link in the chain or by adding a jump ring.

Step 4
Double up one length of waxed linen and attach it to the bail using a larks head knot.

Step 5
Thread a seed bead onto the double strand of linen and pass it through the second link of the chain. Add a second bead and pass the linen back through the chain skipping one link as you go.


Step 6
Continue adding seed beads and threading through alternate link of the chain until you get to the end. Check the tension of the linen and that the beads are evenly spaced.


Step 7
Add a final bead and tie of the linen to secure and then trim.

Step 8
Repeat steps 3 - 7 on the other side of the bail to complete the necklace.

Step 9
Add a clasp and jump ring.


Step 10
Use the headpins and seed beads to create charms with the Czech glass flowers if required.

Step 11
Using a jump ring attache the charms to the wrapped loop of the feather pendant.


And that's it - your necklace is fnished!


By changing up your beads and charms you can vary the effect you get with this design... Here's another example of the design that was published in Jewelry Affaire in 2015.


Hope you enjoyed the tutorial - happy creating.

Bird and leaf set from THEA elements

Wednesday, May 25, 2016

Ceramic Art Bead Buying Guide


A little while ago Jennifer wrote a guide for buyers of lampwork beads and that got me to thinking that something similar would be useful for lovers of ceramic art beads. There is a vast array of these for sale today and a huge variance in quality too. Every day I see beads that are precious little works of art but all too often I see work of dubious quality too so, after consulting with my fellow ceramic bead makers at on the AJE we've come up with this guide

Ceramics in itself is a topic with huge breadth and depth so this guide will of necessity only cover the basics as they apply to jewellery components but, I will add a few links at the end for anyone who wants to investigate further.

Types of Clay 

There are literally thousands of different types of clay on the market so I am only covering the three basic categories and their distinctions: Earthenware, Stoneware and Porcelain. Different clays 'mature' or become vitreous (will not absorb water) at different temperatures and the higher the firing temperature the more vitreous the end product. Whilst water absorption is not as critical for jewellery components as say an outdoor planter, the level of maturity does have an impact on strength.

When buying ceramic beads you may have come across the terms high fire, mid fire or low fire clay or to cones - a term derived from the pyrometric cones used to monitor the  temperature at which kilns fire (see link to video at the end of this post). Commonly used temperature ranges are:

High Fire – Cone 8 – Cone 10 (2305 F -2381 F or 1263C to 1305C)
Mid Fire – Cone 5 – Cone 6 (2185 F – 2232 F or 1196 C to 1222C)
Low Fire – Cone 06 – Cone 04 (1830 F – 1940 F or 999 C to 1060C)

Porcelain

Porcelain, often considered the hardest clay to work with is a fine grained clay that fires to high temperatures to produce a very strong vitreous ceramic. It is usually pure white in colour and can be translucent when used thinly and is therefore often used for delicate pieces.

Stoneware

Stoneware is a coarser grained mid to high firing clay that becomes very durable after firing with little or no water absorption due to the levels of iron and other impurities it can contain.

Earthenware

Earthenware is a low firing clay (includes terracotta) and because of this the most porous of the three clay types and therefore the least durable. Earthenware will melt if fired at higher temperatures.


Note: You may have seen beads made from air dry clays for sale - this is not a fired clay and by it's nature therefore not as robust as fired clays but since I have no personal experience of working with it I am not including it in this guide.

Glazes

When it comes to glazing there is also a basic difference between the different types of clay. With mid to high fire clays the glazes fuse more fully to the clay body further increasing its strength. With earthenware the glaze forms a separate layer over the clay which still strengthens the piece but not to the same degree. Because they are highly vitreous, porcelain and stoneware pieces can be used unglazed whereas earthenware is usually glazed (although outside the bead world you will of course have come across unglazed terracotta where the 'breathability' of the clay can be an advantage for items susceptible to cracking in climate changes).

None of this means that earthenware is not suitable for jewellery components - it is and there are many talented designers working with low fire clays. One of the big advantages of low fire clays is that there is a far wider range of glaze colours available particularly in bright and vibrant shades (as you can see below) that don't tolerate high firing. It just means that there are a few extra things to look out for when buying your beads as I will highlight shortly .

Whilst I've used 'glaze' as general term colour and decoration can be added to ceramic beads in many different ways depending on the clay type and firing technique.

To colour these porcelain pods Rey of Grey Bird Studio mixes her own colours and sealants to her own recipes from pigments, oils, waxes and resins - and to great effect.

Porcelain beads by Grey Bird Studio

These pieces use standard mid range stoneware glazes...
Stoneware components by Lesley Watt
And these use standard low fire glazes...

Earthenware components by Lesley Watt
Underglazes are pigments that can be used with a clear glaze or unglazed as here...


This lovely piece by Jenny uses Oxide stains and underglaze on porcelain for a more earthy effect.


What to look out for when buying beads

Whatever type of clay the beads you are considering buying are made from there are some basic things to look out for but I would like to add a caveat here... I am talking about handmade artisan beads so I am in no way suggesting that beads have to have precise uniformity and no imperfections - that would just stifle creativity and miss the point completely.

The aim is simply to point out some areas to look out for to make sure you're getting value for money.

Strength and purpose

The first thing to remember when buying ceramic beads is that however strong they are they are not indestructible. I've dropped plenty of stoneware beads and had them bounce but I've also had them land on ceramic tiles or granite and break or chip. Porcelain is tough but if your piece is delicate it's not going to withstand rough handling. As a rule if you treat your ceramic beads as would lampwork beads you should be ok.

As the less durable of the clays I would add a couple of caveats when buying earthenware pieces...this is what happens when you drop one getting it out of the kiln...poor puss!


Very thin pieces may not be that strong as you can see from this early bracelet bar of Caroline's which she managed to snap just with her fingers. At 3mm this was a bit too thin, especially for a bracelet bar which is likely to get knocked about about during wear. Pendants don't get so much wear and tear so perhaps don't have to be quite so robust.


If you're planning to use your purchase with jump rings or wire, make sure the holes are big enough and not too close to the edge of the piece. Wire wrapping or opening and closing too tight jump rings will put the piece under pressure and beware those pliers!


Bead holes

Bead holes should always be clean and smooth with no rough edges, no blockages in the holes and no chips to the glaze. The last thing you want is to make a piece of jewellery only to have the beads slice through your stringing medium!

Good holes...


Not so good holes... here you can see bits of clay stuck in and around the holes and chipped edges.


Caroline very kindly supplied these images of some of her bead 'fails'.. and we all have them. Here the glaze has run into the holes and stuck to the wires during firing causing sharp edges and an imperfect appearance.


Another thing to look out for around bead holes is cracking... here are some of my stoneware beads that were fine after the first bisque firing (lower temperature) but when fired to maturity cracks appeared.


The positioning of the holes is also worth taking note of too as badly placed holes can have an impact on how you design with your beads. I made these lentils by joining two halves together but when I put the holes through I missed the centre which means the beads will be heavier on one side and may not hang well.


Wire Attachements

High Fire wire (Kanthal/NiChrome) is often used in component design and again there are a couple of things worth checking. First up make sure that the wire is substantial enough to support the piece and the plans you have for it. Although it is designed to be fired at high temperatures the wire does weaken somewhat during the firing process and if the gauge is too thin it may buckle or break further down the line. 

Wire can also cause cracking in the clay as I found to my cost with these poor bunnies and whilst the wires are still firmly in place I would not sell them in this condition.


Here the wire shank on a button has been pushed too far in and is protruding sharply through the front of the button - not good.


Warping

Warping is a common problem particularly at higher temperatures and with thinner pieces. This is not necessarily an issue if you're looking for an organic design or not too worried about it being flat - then a little warpage can add character. If you're looking for a cabochon to fit in a precise setting that requires a flat back though, it may cause you problems so it pays to think ahead a little.


Rustic style

Rustic or free form designs are growing in popularity and well made they have a wonderful aesthetic appeal but rustic is not an interchangeable descriptor with rough. Artists making this style of component will go to great lengths to ensure that any organic or unfinished detail is safe to the wearers skin and their clothes by smoothing away any sharp edges that can catch. This piece by Jenny is a good example...


Glaze faults

One of the most exciting thing about working with glazes is that you're never quite sure what alchemy is going on in your kiln and what you're going to get when you open it. Glazes often do things you don't expect and things can happen that theoretically are flaws. Sometimes these flaws become a happy accident that creates a whole new look but sometimes they're just flaws and should be consigned to the reject bucket...

Tiny pin holes in a glaze can sometimes create a nice textural effect but not when they look like the ones I got here which are likely to chip and could snag on clothes and skin.


Glaze application should generally be smooth and even unless there is an intentional design element at play and sadly this little fellow has a nasty case of blotchy glaze that has been applied too thinly in parts.


So there are just a few things to look out for when you are buying ceramic art beads and I hope you've found it useful. As I mentioned before we are talking about handmade beads and the very fact that they are all unique is their charm. Good designers will always be aware of the limitations of their mediums and create accordingly with love and attention to detail because they want you to be as happy with your purchases as they are making them.

 Of course, it can be difficult to pick up these points when you're buying online but good clear listing photographs should make any issues apparent (personally I do not buy from poorly photographed listings) and if for any reason you're not happy with your purchase contact the seller as soon as you can to discuss.

If you're new to ceramic art beads and want to see more pop along to the Facebook auction group Ceramic Art Bead Market.

Glossary of ceramic terms