Showing posts with label artisan jewelry. Show all posts

Thursday, April 17, 2014

Throw out that expensive camera

I refer to my iPhone 4S as a camera that is also a phone. With a few easy to learn skills, it's difficult to take a bad photo with an iPhone and several other brands of phones. I'm often surprised when people share bad photos they've taken with their phone, because these phones take such great pics. I share photos of my work taken with my phone all the time. I even use them in listings.

Don't get me wrong. I also use a nice camera to take product photos...specifically a Canon EOS Rebel XTi that I got about 7 years ago with a macro lens I've had for a little over a year. Since I got this phone, I find the process of taking photos, uploading to the computer, editing, then posting them online to be TEDIOUS. I've never had a desk job and find that I have a difficult time working on the computer more than 1 hour at any given time.

For example, I like how my headpins look held as a "bouquet" in my hand using my phone and  natural light, cropped, with no other editing:


Better than the photo of them in the photo tent using a macro lens:


To try to help you take better camera phone photos, I grabbed a couple pieces out of my jewelry box. I purposely took bad photos, then took better photos to illustrate the difference. 

Example #1

The first photo has at least two major problems. While there's natural light, it's direct late afternoon light, which is harsh, casts lots of shadows, and adds a lot of gold to the photo. Since I prefer to do as little editing as possible, the golden glow and shadows are unacceptable. The other big thing that's wrong is that the photo is just plain boring. The shot is too wide. 


These photos were all taken on my kitchen tile. So to correct for the shadows and gold color cast by the sun, I moved to an area that wasn't in a patch of sun. That is the ONLY difference I made. These photos are completely unedited. However, it's still boring (and completely uncropped). 


This next photo, the key is still in direct sun, but I've angled the phone and come in as far as I could for a more interesting shot. It makes a big difference to the interest level of the key, and the glass looks really sparkly in the sunlight. However, I do NOT like the shadows being cast for a product shot. If it was simply an "artsy" shot to share on Facebook or Instagram, this would be totally acceptable. 


The next photo of the key is close-up, slightly angled, and out of direct sun-light. The ONLY editing I did was to crop it into a square-ish shape. 


When trying to get up close and personal with your jewelry (or other product), it's best to get the camera as close as possible then crop further if needed. Do not use the zoom feature. Here's an overdramatized example. 

Original unedited uncropped photo taken too far away:


What happens when keeping the camera at the same distance but zooming in instead:


What happens when you crop the original photo taken at a super wide angle. The quality isn't perfect (because I cropped this an excessive amount as an example of the difference), but it's a heckuvalot better than the photo above.


Do you know how to crop your photos on your phone? 

On my phone, when looking at a photo, it looks like this. Click on the edit button at the bottom. 


Then perform the correct function. Crop is that overlapping square symbol on the bottom right. Flipping the photos (which I clearly did) is bottom left. 


Example 2:

What's wrong with this photo? Golden sun casting shadows. Some areas look washed out. The angle is too wide. 


The color and light is better, but the angle is too wide. And it looks like maybe I didn't focus this one where I wanted the focus to go. 


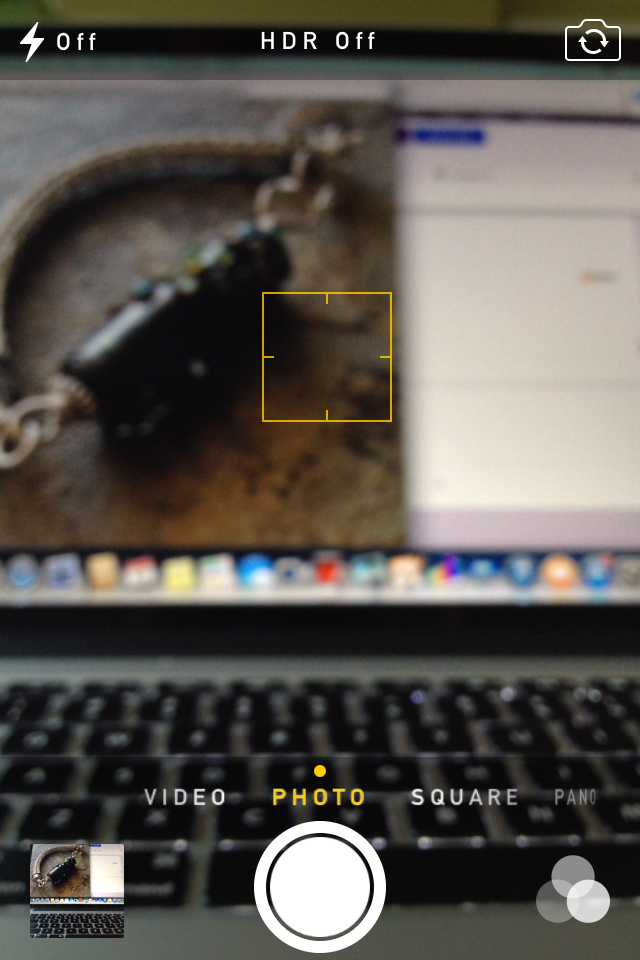
How does one adjust the focus? I can tell you how to do it on my phone, but it's kind of tricky to show it. Use your finger to touch the area of the screen on the object you want to focus on. The other thing this does is automatically adjusts the color/lighting to the object your focusing on to (usually) make it better. 

Here's a screen shot of the camera working on focusing right after I've touched a spot on the screen. The yellow square is the area I am having the phone focus on. Once it's focused, the square goes away. 


The next photo the bracelet fills the frame and isn't bathed in bright golden light. 


And remember that if you do super tight photos, you will want to show multiple views. 


And for the final example, I photographed this gorgeous beaded necklace by Kristen Stevens using one of my Nightmare Insomnia beads. Shadows, sun, too far away to see any of the detail that makes this necklace so special. 


The next one it has been removed from direct sunlight. The lack of shadows helps show a bit more of the detail, but it's still too far away to really draw the viewer in. 


And here is the focal portion with the camera held as close as possible and at a more interesting angle than straight above. You can now see more details in the piece than before. 


The above photo was cropped in Instagram. I used zero filters on it. If I'm selling a piece, I prefer to use no filters so the color looks as accurate as it possibly can. 

However, sometimes I use filters when I'm just showing a piece. I mostly like how the filters highlight certain areas of the photo and add a small border without any actual work. Below are three different filters of the photo above. Having comparisons like this can show you exactly how the filters change the look of the piece you're photographing. The change can be subtle, or striking.  

Mayfair:


Hudson: 


Sierra: 


In the above photo, we get a good look at the focal. But what about the rest? We (your potential customers) want to see the beading. And the clasp. So change the view, rearrange, move the phone. Here's another view of the same necklace above. The focal is blurred and moving off into the distance. The beading is front and center. Notice the empty space in front? All these aspects of the photo work together to create interest, tension, and to keep the viewer's eyes moving. 


And here is the same exact photo, but using the XPro filter on Instagram. It makes the background fade away and adds more emphasis to the beading. I love this look! 


Will I ever really throw out my digital SLR camera? Heck NO! But knowing how to take great photos with a smart phone really makes having an online presence easier. 

Go forth and take great photos!

-Jen Cameron


Monday, March 31, 2014

March Component of the Month Reveal

Today is the big reveal for my component and I'm bursting to see what everyone's made!


These luna moths have been handmade and carved from porcelain clay. After the glaze firing, they were coloured with precious metal lustres in gold, copper, platinum and lilac.

It was as much of a challenge for me as the rest of the team, as I hardly ever use my own components in my designs, but these moths are one of my favourite things to create so I had fun working out what to do with one!

As well as sending moths to members of the AJE team, there were two guest designers chosen to join us in the challenge.

I hope you'll come along and see what we've all created!

Guest Artists
Helen Simon – Helen's had to drop out due to a hand injury - get well soon Helen!

The AJE Team
Caroline Dewison – http://www.blueberribeads.co.uk 
Jenny Davies-Reazor - http://www.jdaviesreazor.com/blog/
Rebekah Payne - www.treewingsstudio.com

Caroline

Sunday, March 9, 2014

Bunny Beads, Pendants and Jewelry

With Easter decorations already in the stores and the White House opening their lottery for tickets to the 136th annual White House Easter Egg Roll, I thought I'd get into the spirit of things by sharing some history about the Easter Rabbit and showing off some cool rabbit themed jewelry, beads and pendants.
The whole thing about a bunny bringing eggs has never made sense to me.  And what in the world does that have to do with the Christian meaning of Easter?  It seems even more far fetched than Santa Claus.  Here's what I found out.

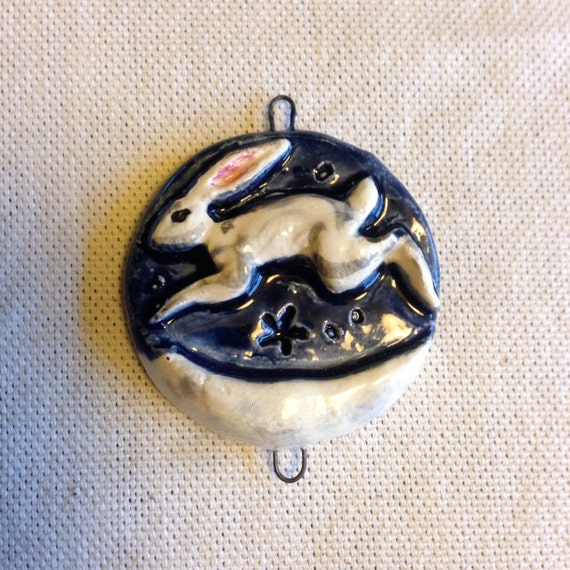
Long ago, people noted the links between a woman's cycles that were linked to birth, and the cycles of the moon. Very old records from Asia indicate that the hare was the symbol of the moon. So it followed that the moon and the hare both became the symbol of birth, rebirth and life after death. 
Lunar Hare by Jenny Davies-Reazor
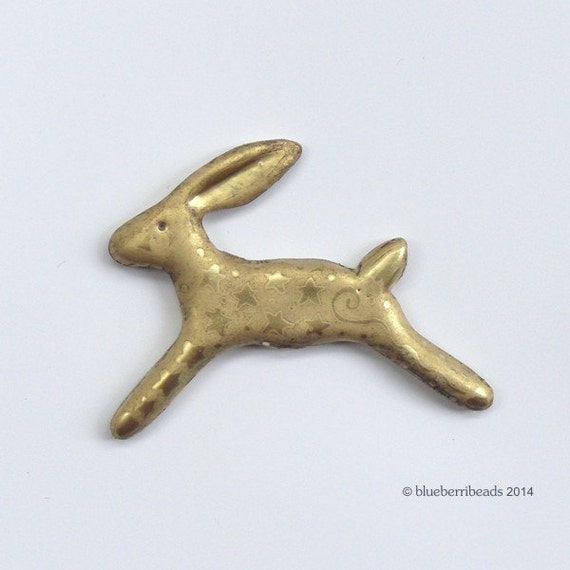
Many ancient cultures held spring festivals to celebrate the renewal of life and to promote fertility. One of these festivals, in what is now Northern Europe, was in honor of Eostre or Eastre, the goddess of dawn, spring and fertility. Her symbol was the rabbit, a most fertile animal and a symbol of new life.  Many people think that the modern feast of Easter had its roots in the springtime feasts to honor Eastre.

 Hare cabochon by Blueberribeads
Later, as Christianity spread, it was common for missionaries to place some of the popular ideas and rituals of the day, within the context of Christian belief.  The Eostre festival occurred around the same time as the Christian celebration of Christ's resurrection, so it would seem only natural that the people would bring the hare and egg images with them to their new faith.  Germanic, pagan, spring traditions and Christian resurrection traditions were quickly melded together as Roman Catholicism became the dominant religion in the region around the 15th century.
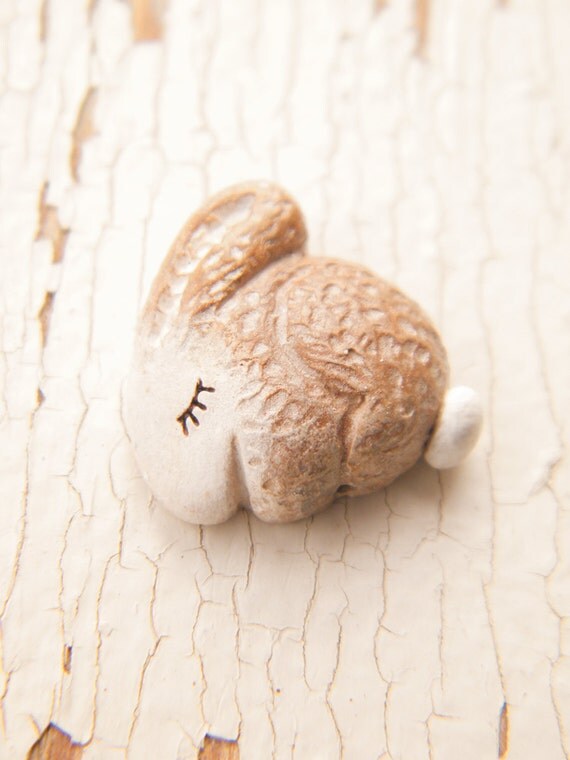
Little Bunny Rabbit Bead by Tree Wings Studio

The first Easter Bunny legend was documented in the 1500s. By 1680, the first story about a rabbit laying eggs and hiding them in a garden was published. These legends were brought to the United States in the 1700s, when German immigrants settled in Pennsylvania Dutch country and brought their tradition of an egg-laying hare called "Osterhase" or "Oschter Haws."  Their children made nests in which this creature could lay its colored eggs. 
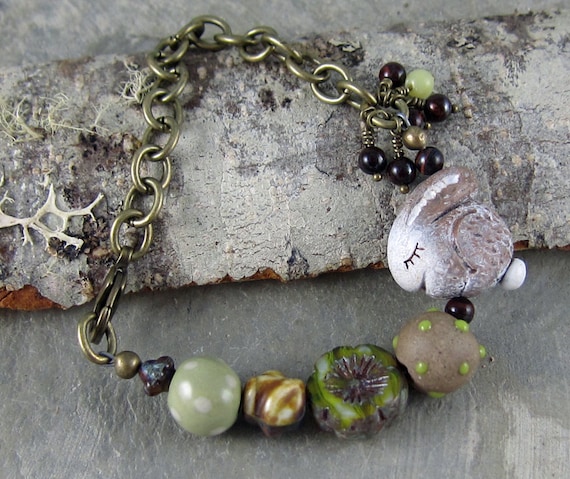
Sweet Bunny Bracelet by Linda Landig Jewelry
The children would build their nest in a secluded place in the home, the barn or the garden. Boys would use their caps and girls their bonnets to make the nests. The use of elaborate Easter baskets would come later as the tradition of the Easter bunny spread through out the country. 
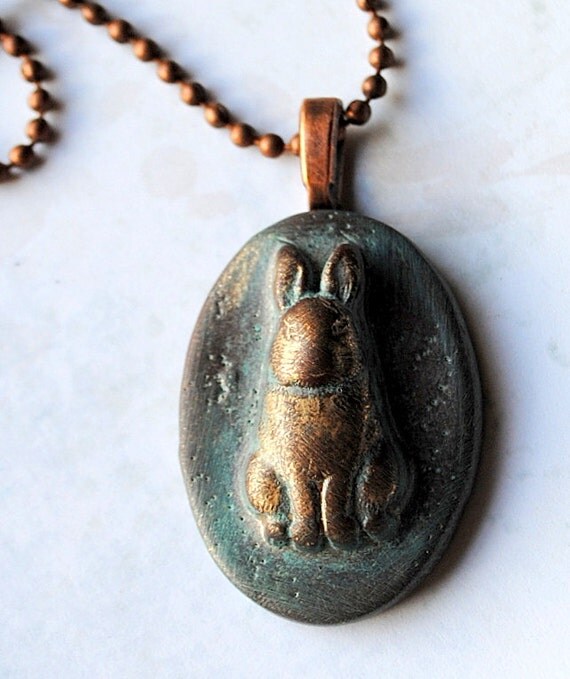
Faux Bronze Bunny pendant (polymer clay) by Studiotambria
I hope you've found this little bit of history interesting and that you've been inspired by the jewelry and components that I've included here.  I put together a Treasury list on Etsy that includes these rabbits and hares, plus many more.  You can check it out by clicking here:  "Hop To It!"

Linda
Linda Landig Jewelry – ArtFire 
Linda Landig Jewelry – Etsy

Friday, February 28, 2014

Playing With Push Molds

My first polymer clay components were all made with textures impressed into them - either commercial rubber stamps or else designs I pressed into them with various tools.  Having created the designs, they were then cut out using cookie cutters or, in one case, the lid from an aerosol can.

So this week, I decided to try making some push molds, using a 2 part silicone compound.
To make molds, you take approximately equal amounts of each color of putty, mix them together and then press your object into the putty.  
In a few minutes the putty hardens into a rubbery silicone mold.  You then remove the object and viola, you have a mold into which you can press your polymer clay.  It sounds easy and fun.

I gave it a go earlier this week, using some buttons that had interesting textures.  But all the molds I made were lopsided.  It turns out that it is a bit tricky to press the button into the molding compound with exactly the same pressure on all sides.  Fellow AJE team member, Kristi Bowman, suggested that I try pressing the molding compound onto my objects, rather than pressing the objects into the mold.

So that's what I tried yesterday.  I used a fun flower shaped magnet and pressed a layer of molding compound onto the flower side.  Then I added more compound and built it up around the bottom and the edges, so it would be thicker, (when I made molds the first time, several were too thin on the bottom and they tore).
  When the compound hardened, I popped out the magnet and this is what I had.
It's certainly better than my first attempts, (for which I have no pictures), but if you look carefully at about the 9:00 position, you'll see that some of the petals have dents in them.  I think this is because I un-molded the magnet too soon and I damaged the still-soft mold while trying to get the magnet out.

Then I went through the same process with a heart shaped faux cinnabar bead.

I'd only worked with light colored polymer clay so far, so I decided to try something darker.  I mixed one part black clay with  three parks purple clay.  The purple was quite bright, so I wanted to mute it a bit.  
I
I pressed the polymer clay into the molds, popped it out, added holes at the top and placed the shapes on a piece of cardboard.
I placed the cardboard on top of a pizza stone that came with the oven, but you can also use an unglazed tile.  Then I covered it with an small inverted loaf pan and baked it for 45 minutes at 275F.

They came out of the oven nice and firm, but quite a bit darker than I had hoped.  I wanted a muted purple, like an aubergine, but these were nearly brown.  So I used some paints, in many layers, including some brighter highlights. That helped, but it is still not quite what I had pictured in my mind.
Its clear to me that I am still in the practice mode, with lots left to learn.  However, I keep reminding myself that I learn a lot when the outcome is less than what I'd hoped for.  Its a process and I'm learning step by step. And, hey, I burnt my first batch of polymer clay and I've never made that mistake again!


Linda
Linda Landig Jewelry – Etsy