Showing posts with label studio design. Show all posts

Thursday, July 10, 2014

Exciting times!

I’ve not much to talk about jewellery wise this week, but that’s not to say I’ve not been busy! After many years of not so quietly complaining about my lack of space, I’ve spent the last fortnight building a new studio in the garden. 

We’re really lucky to have lots of space out the back and up until now we had a chicken shed and my husband’s shed in a space near the fence line. As they were both getting really old and close to falling down we rehoused the chickens in to a great new coop round the side and cleared up ready for my new studio.


First up was paving slabs, all 90 of them. I was a little ambitious thinking I could have this done in a day, but 4 days later, they were all down and ready for building. The studio I decided on is a log cabin, or posh shed. It was delivered in a million pieces all cut and ready for assembly.


Once we’d found the starting pieces (at the bottom of the pile!) They were laid out and squared up. The rest of the pieces then slotted in on top of each other until we reached just above window height.


Superman/Husband!

The windows were added in as one unit and we kept on going up to the roof. 


The roof beams slotted in to tie everything together. It was hard work, but made easier by there not being any screws or fixings to the main building. The wood is cut so that each piece slots in to the next (with a bit of persuasion from a mallet!) 

The roof took a while. Each slat had to be screwed in to the main beams, but once that was finished we added felt and shingles and it was on to the inside. 

The flooring was pre cut, so each plank just had to be screwed down on to the bearers. There were a few finishing touches like beading around the edges, and the building was complete. 


 Monster Assistant

I sat for a couple of days planning out how I would like the inside and I’m still not completely decided. I’m sure it will change and evolve as I start working in there, but for now, I have a table, some worktops, my precious books, my Grandad’s workbench (hopefully moving in tomorrow) and my Grandma’s chair.


A spot to sit and read

And I have room to display the wonderful artwork I’ve collected from friends.


And finally, I have room to get out my pottery wheel! I’ve had it for a couple of years, but there was no space to use it, so it turned into a storage table in the garage. I can’t wait to get on it and have a play!


It really is a dream come true to have such an amazing space to work in, but the best part for me is to have room to create with my kids!


Biggest Cheesy Grins ever!!!

To give you an idea of how excited I am... here's a look at my workspace for the last couple of years... you might be able to see the 4 square foot of space I had just to the left!


I think it will be a couple more weeks until it’s ready to get in there properly, there is no electric or water yet, but while I have daylight, I can go in for a play!


Caroline

Tuesday, May 20, 2014

At last, my love has come along!


Well, OK, maybe that's overstating it a little, but I finished rearranging my working space and I really did feel like breaking out in song at the end. I love it that much.


You may remember that in a recent post, I explained how my space wasn't really working and asked for suggestions about how to make it better. Thanks to everyone who weighed in - several of you in Facebook chats, asking great questions! I spent three full days moving furniture, sorting and tossing, and rearranging all my storage, and I could not be happier about how it turned out. There are a few small things that still need to be done, most of which require a trip to Home Depot or Lowes, but it looks good enough that I can give you a quick tour.

Studio Redo-1
At the entrance to my area. The chair is at my desk, and the table to the left is a new addition, where I'll be able to do mixed media work. To the left of the mixed media center, you can see the back side of my soldering station, which I moved to the middle of that long wall - and now I have access to all that great storage!

Studio Redo-2
Better view of the back side of the soldering station. I have my HEPA air filtration unit on the end (the silver box behind the fire extinguisher) and a fume extractor on top. Need to take good care of my lungs! The shelves underneath and on the cart (under the table) contain mixed media supplies - paints, paper, ephemera.

Studio Redo-3
Behind the soldering station is my metals area. That table under the painting is another new addition, which will hold all my large equipment. (It used to be behind my desk area, which was a serious pain in the butt to get to.)

Studio Redo-4
Continuing around the area, you can see the coffee station that Gail and I share (essential to the creative flow, I tell you!). I put that taller cabinet, which contains a lot of my glass, next to my bead storage and sliding door storage - I didn't dare move those!

Studio Redo-5
Standing in front of the glass storage, looking back at the desk area.

Studio Redo-6
And a little closer. It feels much roomier, I think because I removed the equipment table from behind my chair.

Studio Redo-7
My metals area. Sigh! I just love it - everything is within reach, and yet there's tons of room to lay things out. Underneath the soldering station, on the metal's side of things, I put up hooks and hung all my wire coils up where I could get to them easily. And you can see that the kiln is still there, but the huge table it was on is gone - this is much more accessible for enameling and small glass work.

Studio Redo-8
A better look at the equipment table. You can see that the rolling mill (left) has been bolted to a piece of wood which is clamped to the table. I have to do that with the arbor mill and the bench shear, but need to get the wood first.
Studio Redo-9
I have (from left to right) metals storage, enamels storage, and glass storage underneath this run of tables - it's all on casters and pulls out for easy access. Hanging over the back of my metals chair, you can see my bench apron - it's going to be mounted to the table under the vise, so it will cover the enamels and glass storage, but it swings out for easy access to whatever is behind it. It will keep all my hammers close at hand. (I broke the hinge trying to install it and need to get a replacement. Ugh.)
Studio Redo-10
Another look at all the awesome storage under the soldering station, on the mixed media/office side of things. I am so happy to have a dedicated space to work on non-jewelry things!

So there you have it: a completely reworked space that actually has more working surface area than when I started. I literally giggled when I took these pictures - it makes me that happy. Of course, it won't stay this clean for long. I have a zillion deadlines that slid last week while I was working on this so I have to buckle down and get to work... STAT!

I hope this studio tour inspires you to take a second look at your studio. How can you optimize the space and storage you have? Is there some one storage-related investment you can make now that would be a game-changer? (For me, it was moving that soldering station and adding two more tables around the perimeter of the area.) What would make your workflow better and your space more enjoyable to work in? What's stopping you from taking that step?

Looking forward to hearing about what changes you make in your spaces! 

Until next time -


Tuesday, April 22, 2014

Dysfunctional Studio Tour

I've been "living" in my new Roadhouse Arts studio space for almost four months now, and while there's a lot that I really love about it, there are also some things that aren't working for me.

My little admin area needs to be reworked. I spent a huge chunk of the day yesterday working through the paperwork that had accumulated, both for my own business and the Roadhouse side of things, and everything is caught up. While that makes me happy, I think the backlog started because the workflow wasn't well-organized to begin with.

Admin-Area

I have two file boxes now, and the segregation of things will help. The smaller one contains the stuff I get into more frequently; the larger one is longer-term. But I still don't have the right space to stash either of them - my camera bag and equipment is taking up two entire cubbies in my wall unit. And I don't like the nest of cables and power strips on top of the desk. I just ordered this remote switch and I'm hoping it will solve the problem while still allowing me to turn lights on and off without having to crawl under my desk.

My metals and fabrication area would benefit from a little tweaking. I have an Ikea kitchen island set up for sawing and soldering, so I can see things close up without having to bend over or wear my magnifiers.  The problem is that most of the great storage the unit includes (two metal shelves) is pushed up against the wall so I can't get to it.

Soldering

I also have two old science tables pushed back-to-back that are supposed to be for layout, design and fabrication work, but as you can see from the photo, they wind up being a collection area for all manner of flotsam and jetsam that have little to do with current projects.

Working-Table

I had convinced myself that rolling my chair between the two stations would be fine, but the truth is that the floors in this old building are so unlevel that "rolling" is an exercise in frustration. This also makes pulling the island unit out to get at the long-term storage a serious pain in the neck, because everything (and I mean every.single.thing) has to be shimmed to within an inch of its life in order to avoid punches, beads, wire and any other curved or roll-ey thing from just making a run for it the moment it gets set down.

Glass-and-Kiln

And then there's my kiln and glass area, which just sort of squat in the corner taking up a bunch of room. I don't think it's an efficient use of space, but I'm kind of stuck because that's where I had the dedicated plug installed for the kiln. And I don't think I'm making the best use of the space along the one main wall.

I'm considering a pretty significant reorganization that includes separating the two science tables and using one to create an "L" shape with the island sticking out into the space. This would put the storage shelves on the island facing my admin area, where I could use the extra storage. The other science table would go where the island was and be primarily for mixed media work. (That's a subject for another post. "Living" with mixed media artists is starting to mess with my head, I tell you!!) I could also use it for larger project layouts, when I have multiple or complex pieces going.

So... any suggestions? I'm really open to any and everything - the space just isn't working well, and it's not because I don't have enough to work with. Let me know what you think and I'll update you in a future post.

Until next time -


Tuesday, December 17, 2013

Bricks and Mortar

As most of you know, I've been somewhat preoccupied with the launch of a new business venture. In fact, I am aware that I still owe everyone a followup to my hammer post to discuss the results of my experiments with hammer dressing, but the truth is that shortly after that post went up, the bulk of my studio went into boxes in preparation for the move to the new space.

Bricks-and-Mortar-1
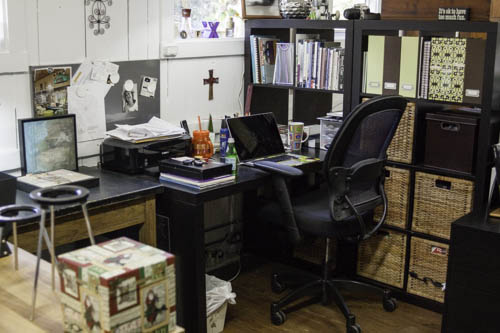
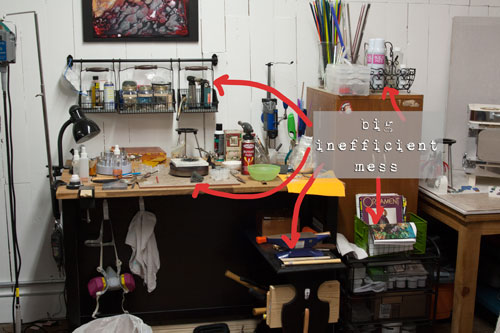
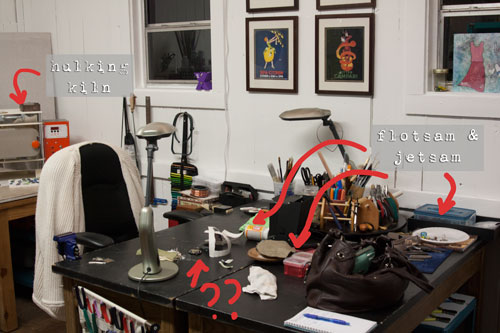
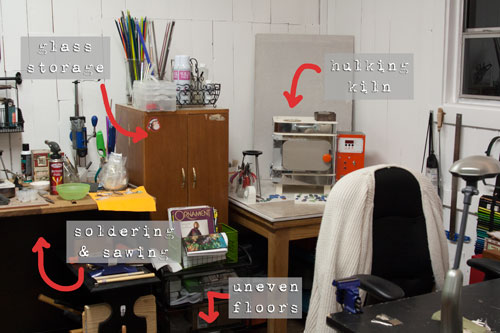
One of the many piles of studio stuff waiting to make the trip.
So I haven't had a lot of creative time lately - it's been 16 hour days of one business related thing after another and I was really stuck about what to write for this post. I put the word out to my AJE peeps and asked them for suggestions - what could I share that they would like to know more about? The response: tell us what's gone into opening a bricks and mortar place.

Now THAT I can do.

1. Why open a studio/gallery in the first place? 

Great question. And there are a couple of answers. First, I love teaching - I didn't expect to, but I really do. Having a comfortable, well-equipped place where students can come to learn was a big motivator. I've been really fortunate to be part of the teaching team at Wired Designs for the last year, but it's been a lot of work for my friend and mentor Gail Stouffer for going on 12 years now. Frankly, the administrative burden of running a retail enterprise was wearing on her and taking a lot of the joy out of the teaching and creating she was able to do. And for a lot of the last year, I've been doing what I can to help - but it's still work that takes you away from the creative things you'd rather be doing. No matter how much stock you have, there will always be some tool or material or supply someone is looking for that won't be on your shelf, and you will always have to calculate the balance between having what people need and tying up too much of your capital in your inventory. Blech. So we're cutting out the stuff we don't like so much in favor of freeing up time and overhead for the stuff we do, which is teaching, creating, and working with other artists.

Enameling Class
Torch-fired enameling class in progress
Second, I do much better with my schedule when I have somewhere to get up and go to. The whole idea of working at home is very appealing, but truthfully, at home I get distracted by phone calls, laundry, Facebook, the dog, errands, the possibility of a nap, etc. If I have to get up in the morning and go somewhere to work, I'm much more likely to get things done.

Finally, there is really no substitute for creative collaboration. At home, it's just me. At a studio, there are like-minded folks who work in disparate disciplines and whose energy sparks my own.

2. Why partners? Isn't that just asking for trouble?

That's a decision you should never enter into lightly, for sure. As I said above, creative collaboration is a huge draw for me personally. There's also the added benefit of pooling resources - and not just financial. My partners have tools and expertise that I don't, and vice versa. We're able to stock a vastly expanded studio because we're all putting our tools and equipment into it - much less expensive (and therefore less limiting) than if I was opening a studio and had to do all that on my own. And honestly, I am grateful for access to alternative perspectives and insight from passionate people who are equally invested in the same outcome.

So if you are thoughtful about choosing your partners and establishing the ground rules ahead of time, you stand to gain a great deal and have a much better chance of it being a successful partnership in the long run. Below are some things I strongly encourage you to consider if you're going to be working with partners.
  • Make sure your strengths are complimentary. My partners and I are all radically different people with varied artistic perspectives, and we bring diverse strengths and abilities to the table. Gail is a vision caster and business wonk, I'm a social, financial and administrative "doer", and Lisa is a planner and organizer. It's unlikely we'll step on one another's toes by exercising our respective interests and gifts.
Roadhouse in progress
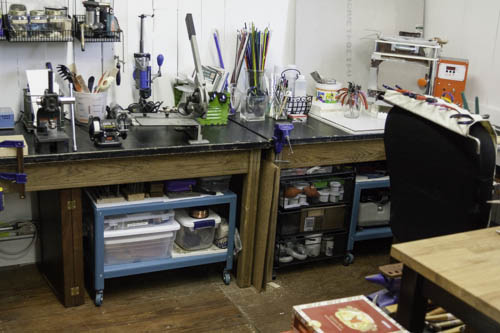
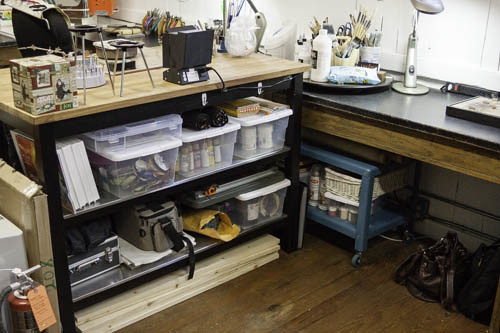
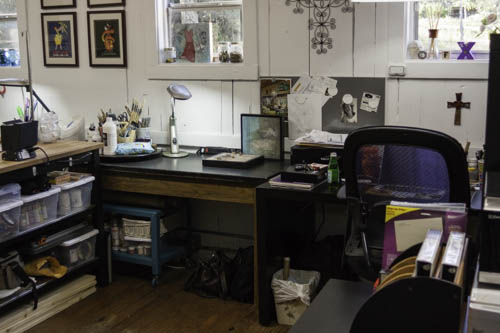
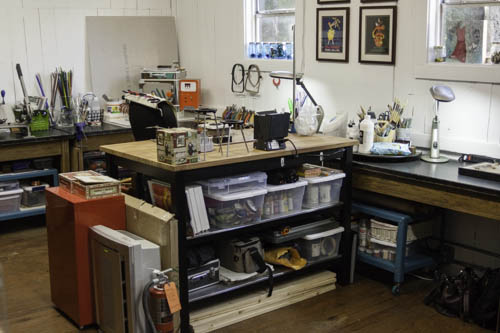
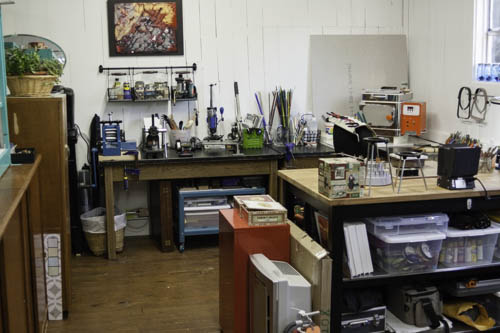
A peek into what will be the teaching workspace, and where we will have room to work together.
  • Commit to keeping business business-like. We're friends, and that's great, but business is business. We have meetings, we take minutes, and we make to-do lists for ourselves and one another. We are really clear on what area each of us is primarily responsible for, and we generally don't make big decisions independently of one another. We've also made an explicit commitment to one another to put relationship first - our respect and affection for one another means that even if we disagree, we are obligated to see one another as people and friends first, and business partners second.
  • Make a business plan. And then stick to it. I know that sounds like the most boring thing ever, but being in agreement with one another before you ever spend the first dollar is vital to making sure you stay on track. The things you're working on today should mostly be the things you discussed and planned for six months ago. We met every week for most of the summer and made up a written business plan to guide today's work, projects and decisions. Once we get the doors open and have caught our breath, we'll start meeting again to review and update it - we know a lot more now about what's realistic and important to us than we did when we started this journey six months ago.
Business plan
The cover of our actual business plan
3. How do you pick a location?

Start by thinking about what the space needs to do and be for you. In our case, we really wanted to have a gallery space, not just where we could sell our own work but where we could offer space to other regional artists. We also wanted a place that was able to support all the various activities each of us is engaged in creatively - teaching, making, experimenting, photographing our work, and doing all the administrative stuff that goes along with running a business. We all wanted someplace close to home (since Lisa and Gail both live in the same general area, they won on this one, but it's an area that Nick and I love and would consider moving to) and we wanted it to be in some kind of artsy, unusual space instead of a strip mall. We wound up renting part of a 100 year old building that used to be a German ninepin bowling alley back in the day - a single long room (almost 1800 square feet!) with wood floors and funky windows. It winds up being large enough that we have room for a modest gallery, plenty of teaching space, and roomy individual workspaces. 

Roadhouse Outside
The outside, before we signed the lease - our door is behind the handicapped sign.
Roadhouse Inside
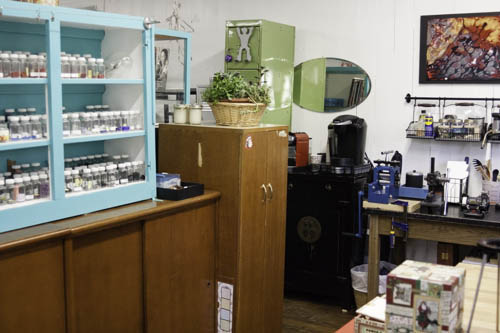
Most recently, it was an antique store - the ship's wheel and the furniture were not part of the lease!
Next, consider the cost. In our case, we wanted to be sure we didn't become obligated to sell, sell, sell in order to cover our monthly "nut" because that just puts us back in the cycle of having to worry more about retail than teaching and creating. We were able to lease this space for a reasonable amount both because of its age and because it had been vacant for a while. And we're located in the same building as a very popular four star restaurant, which means we can gear our gallery hours to their open hours to capture the best foot traffic and spend the rest of the time using the space for teaching and creating.

Maybe most importantly, make sure it's a place you're going to enjoy spending a lot of time in. Any business launch, whether it's a bricks and mortar place or an online shop, is going to require many, many hours of focused commitment. They'll be harder to put in if you can't stand the space where you have to spend your time. So if opening a physical studio or shop is something you are seriously considering, hold out for one that is really right for you - it's out there, and you will really regret it if you settle for something you don't love. For us, we were very drawn to the idea of being "local" - and we're in an interesting old Texas community, with terrific neighboring businesses (a restaurant, a bakery, a co-op art gallery, a small general store/gas station and a wine bar), and a few "pets" already on site!

Donkeys
These guys escaped from up the road and stopped by to say hello!

Bad Ass Chicken
Sadly, this fine fellow hasn't been seen for about a week. I suspect fowl play. (Har har.) There are other chickens, but he was pretty spectacular.

And a last tip from me: EXPECT THE UNEXPECTED.

When we signed the lease and started planning the creative space we were going to be working in, this was not the vision we had dancing in our heads.

Bricks-and-Mortar---Electrical-Panel
This electrical panel has consumed every bit of energy I have for the last two weeks.
I now know more about electrical panels, amperage, breakers, load capacity, and wire gauge (not the fun kind) than I ever wanted to know. (More on all that another time.) Just know going into it that all the planning in the world isn't going to stop Murphy's Law from entering into the picture, especially when you're setting up shop in a 100 year old building. There are just some things you will not have control over, and there's not much you can do about it. Build some buffer into your budget and your timeline, and tell yourself and your partners ahead of time that you're going to roll with the punches when the time comes. Then do it.

* * * * * * * * * *

Lest you think it's been all work and no play, we have been doing a lot of planning that involves some pretty exciting classes and instructors. Among other things coming down the pike is a week-long retreat in the Texas Hill Country with guest instructor Jessica Jordan, and we have more announcements coming! I will say that getting to seek out the artists we want to work with and design the classes we want to teach has been very exciting. And the retreat is the culmination of almost of a year of dreaming out loud about what we would want in a retreat if we could make it anything we wanted - we can't wait to see how it all comes together.

I will be writing more about all this here and on my own blog over the next couple of months - you'll probably be sick of hearing about it by then! In the meantime, I'm eager to get my new studio space set up and get back to work. Not exactly the most traditional way to spend the holidays, but as tiring as it's been, I'm enjoying the heck out of it.

So have I scared you? Does opening a bricks and mortar studio seem more or less appealing to you?

Until next time -


Thursday, June 20, 2013

Colour Me Creative...


Remember the new studio I was planning a few months ago...? Well the builders have been here for the best part of three weeks and I'm delighted to say that within the next few days all the work should be finished and I will be able to take up residence, not to mention cook a meal since I've also been without a kitchen for ten days.

It's been really interesting to watch the transformation take place...sometimes seeming like nothing much is happening and sometimes a whole flurry of activity at once (you can follow some of the developments over on my blog if you'd like to). The bit that got me most excited though was the simple act of putting some paint on the walls because suddenly it sprang to life and I could see my vision really start to take shape.

And this is the colour I picked...It's called "Tadpole' but it's not like any tadpole I ever caught - maybe it's a Disney frog prince tadpole!


Green is my favourite colour - I know this because of the 72 items in my jewellery shop at the moment 31 of them are predominantly green but, when it comes to painting walls I tend to go neutral and accent with colour in soft furnishings and the like. For this creative space  however, I decided that a bolder statement was needed and although I pretty much knew that green would be it, it still took forever picking a shade. Happily I love it and it makes me smile every time I walk in the room even though at the moment it's an empty space.

And then a curious thing happened...I was killing some time online looking for I don't know what when I stumbled across an article from 2012 about the effect of the colour green. It appears that because of its prevalence in nature we associate green with growth and development and thinking about those things has been shown to spur our desire for self-improvement and mastering tasks. During a study in Germany, people were asked to complete a short creativity test online which included different coloured log in screens and when this screen was green participants scored 20% higher ( full article here). It appears that looking at something green even if only for a very short time boosts creativity.

Well needless to say I'm rather pleased about this - I'll take anything (legal) that can increase my creativity and if looking at it briefly can do that just imagine was being surrounded by it could do!

Did I mention green was my favourite colour...well of course I had to take myself off on a little journey of green discovery too and so I've put together an Etsy treasury (just click on the picture) featuring some gorgeous art bead greenness for your delectation which I hope you enjoy but,  if that doesn't inspire you maybe a trip to the nearest paint store will help...!


Lesley
The Gossiping Goddess 

Thursday, May 23, 2013

A New Studio Space

If you read my "Why are you UNinspired?" post last week, you will know I haven't been working much this month. If you were to look at my Flickr stream, you will see it is no longer filled with bead, jewelry, and studio related photos. Instead its mostly dance, knitting (because sock knitting is easy to do on the road!) and outdoor related photos. Because I'm spending my life weeding, planting and nurturing veggies, driving my daughter to dance competitions (finally over!) and track meets (finally over!).

Because my family needed time at the lake to unwind and get some chores done, we've been here all week. Unfortunately I'm not getting many chores done because I'm obsessed with watching the Sandhill Crane family whose nest is in the marshy area next to the tip of our property. They spend most of the day digging up our yard feeding the two babies.


Sandhill crane feeding its baby. I really need to bring my camera up here to get better pics.  #lakejamesindiana


Look who just stopped by to peek in and say hello! OMG! Cuteness overload! #sandhillcranes #lakejamesindiana

This morning I woke up and desperately wanted to make beads. However, my lake house studio hasn't been outfitted yet. Yes, I will set up a torch at the lake too because I plan on being here most of the summer if I get my way.

The space where I will be setting up my small studio is a tiny little alcove in the garage.


Untitled

I bought an oxygen concentrator from a fellow Indiana lampworker named Amy (I can't spell her last name) who makes GORGEOUS, juicy beads. (Like her facebook page for a regular dose of eye candy). I am lazy and don't want to lug my current oxy con back and forth. So I bought Amy's old one for the lake.


Untitled

When we had the house built, I had the builders install a gas line just for my torch. That's one of the nice things about building a house....you can customize what you need and not have to hire someone to come in to install it.


Untitled


I have a Paragon Caldera kiln, with the bead collar, that is currently sitting in my current studio collecting dust, so I don't have to buy another kiln. (If you want a small kiln that is really versatile, I LOVE this kiln and would highly recommend it. I bought a kiln specific for bead making because I needed more kiln space than this one offers).


Caldera-BC Bead Collar
And my view out that window?


Untitled

My next big step is to get another torch. I will be going with another Carlisle Mini CC bench burner, like the one in the photo below.


Studio clean up

I also need a bench to attach it to. Hubs keeps telling me he will build one for me. I'm not sure when he will find time to do that. One step at a time, I guess.

Have a creative week!

-Jen Cameron
Glass Addictions