Showing posts with label bracelets. Show all posts

Friday, January 8, 2016

What Bracelets have to do with Severed Heads in Ancient Assyria

Last summer (which feels like FOREVER ago!) my family spent about three weeks traveling in western European countries. Our first stop was London, where we spent nearly a week. 

We spent a lovely rainy afternoon, including tea, in the company of 2 of the 3 of the British members of the team. From left: Lesley, Caroline, myself, my son Ethan, daughter Chloe. Not pictured is my husband, who is playing photographer. 
We made a list before we left home of "must do," and "would like to do if there's time." The British Museum was at the top of the must do list. This was our third trip there, and we had never managed to make time for it before. 

I was super excited about seeing all the ancient Egyptian art and artifacts. There are SO MANY, it does get overwhelming after a while and I noticed I was getting sort of zombie-like by the end. However, ancient Egypt flowed into Assyrian art and I woke right back up. Previous to this, I do not recall ever being exposed to ancient Assyrian art. It's so detailed and textural. 


Protective Spirit, Assyrian, about 865-860 BCE
From Nimrud, North-West Palace, Room G, door e, panel , British Museum
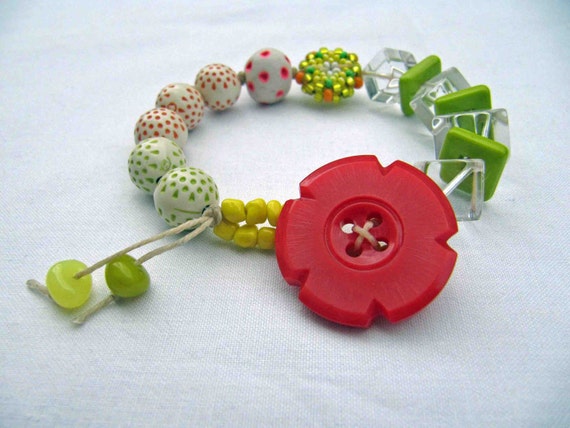
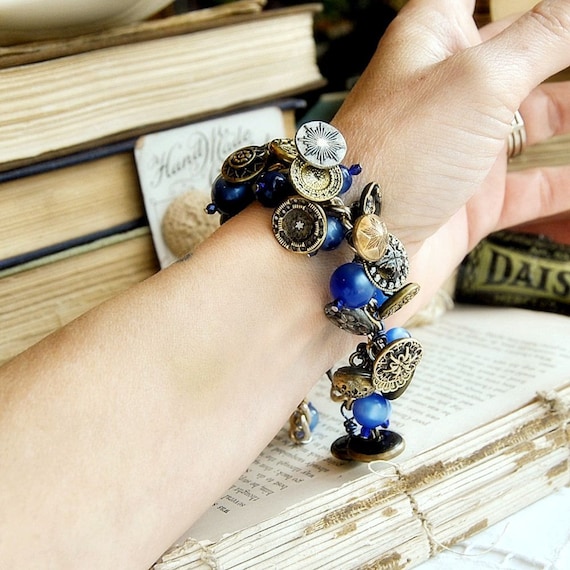
Always on the lookout for a potential blog post, I noticed all the important people; gods, goddesses, and kings, were wearing bracelets or armbands with a flower motif focal. 
Protective Spirit, Assyrian, about 865-860 BCE,
From Nimrud, North-West Palace,
Room S, door c


As you will see as you scroll down and look at the photos, there are several different protective spirits and rules wearing this particular piece of jewelry.

King Ashurnasirpal, flanked by eagle-headed protective spirits.
Assyrian, about 865-860 BC From Nimrud, North-West Palace,
Room F, panels 3-4
British Museum


Pair of female protective spirits with Sacred Tree
Assyrian, about 865-860 BCE
From Nimrud, North-West Palace Room I, panel 16
British Musem


Symbolic scene, Assyrian, about 865-860 BCE
From Nimrud, North-West Palace, Room B, panel 23
British Museum


View of an ancient Assyrian room at the British Museum


However, when we wandered to a room filled with panels that told the story of a great victory in battle, that is where it got really interesting. Because I noticed piles of heads laying in front of the man who was obviously the ruler. And the ruler is rewarding the person who brought him enemy heads with a bracelet. Unfortunately it's a little difficult to see the detail in the photos, but in the next two photos, the pile of heads is bottom center. The photos are clickable, so hopefully you can see the detail better if you click on them. 

Campaigning in Southern Iraq
Assyrian, about 640-620 BCE,
From Ninevah, South-West Palace, Room XXVIII, panels 7-9
British Museum


Campaigning in Southern Iraq
Assyrian, about 640-620 BCE,
From Ninevah, South-West Palace, Court XIX, panels 10-12
British Museum


It's all very gruesome. It also shares important information about their values and culture. The bracelet is an important status symbol. It indicates power, godliness, and apparently it also shows one to be a great warrior and head-taker. I kept thinking of it as the "bracelets for heads" program. I did find an article related specifically to Assyrian war heroes if you are interested in learning more. Rewards for a job well done extends beyond bracelets, but are not as easily depicted in art. 

The British Museum and Google's Cultural Institute have collaborated to bring a virtual tour of some of the exhibits to the web. While visiting in person would be best (because LONDON!), if you can't make it, this is a great way to see some of what the museum offers without the annoying crowds with their cameras and having to pose with every single object they look at. 


Tuesday, June 23, 2015

Large Hole Beads and Leather - Perfect Together! AND a Giveaway!

I have been on this large hole bead-making kick lately, mostly because I love making them.  But they are fairly versatile.  I have customers who use them on dog leads, bracelets, and who just collect them! Here are some of my recent designs.


Today I'm going to show you some bracelets you can make withe the ammonite pressed ones!

My friend Melinda Orr (who lives fairly close to me but I only seem to see at Bead Fest!) makes awesome jewelry and has this amazing ability to just sit down and experiment and come up with really cool things!  She also has a great shop and she was the first person I thought of when I wanted to use leather with these beads.  We did a little swap, and I sent her some ammonite beads sets, and she sent me some leather, clasps and jump rings.

Here's what I  made with the beads and components!

This first bracelet was made with four strips of 2mm leather, end caps and a pretty floral clasp.  I twisted the leather slightly to make it a little bit interesting!  In adding the end caps, I glued one end on first, then added the beads, then cut the leather to length and added the final end cap. I used E6000 glue but Melinda says you can even use super glue! 
This second bracelet was made with 4mm leather, some pretty large hole silver beads in the swirl shape that matches the ammonite shape, and end caps and lobster clasp.  The ammonite large hole beads move a little bit in this design, which is fine with me, but if you don't want them to move at all, you can use larger leather diameter or what I did in the next photo.

For this bracelet, the leather is more like 6mm width.  I had a harder time getting the large hole bead on the leather, but found one that worked.  I used two enameled headpins that I made on the ends of the large hole bead.  You could do this if you didn't want your beads to move like the ones above.  This clasp is a copper magnetic clasp Melinda sent along. I also decided that if I wanted to use the larger, 6mm leather width, I could just double-dip my large hole bead mandrel to make the hole size slightly larger on the bead!

I can't wait to hop over and see what Melinda made with the beads I sent her.  I had a sneak peek so I know at least one is pretty awesome!  Please visit Melinda's Etsy Shop, and her Bandana Girl shop, for awesome leather components and many other items! 

Please visit Melinda's blog here to see what she made!

I am also offering a giveaway - please comment on this post and on Melinda's and you will be entered to win these beads - drawing by Melinda on Friday!


Susan Kennedy


Wednesday, May 20, 2015

Because I'm all bout the sets, no orphans.

Yes I did hear the song in my head and I am sort of sorry if I gave you an earworm.

I am like most when it comes to inspiration to start a piece of jewelry.  I have something that inspires me and go with it.  Sometimes it can be a necklace sometimes it is a bracelet.  I love creating.  Just take a peek at my tray.

Here is where the tricky part is.  When I make jewelry for myself I like having matching sets.  It sounds real easy.  I have found that it can be far from easy.

Like this necklace,

or this bracelet.

Both I loved making and both are so pretty but for some reason there is no spark to create a matching piece.  In fact I have to tell you that I have quite a few orphan pieces as I call them.

I have been in the midst of a medical issue, nothing too serious but does require outpatient surgery, when those come up either my muse disappears or she shows up with a vengeance.  Well she has actually shown up and she had a specific mission.   Pair up some orphans!

I actually did not have a plan when I started.  Then I found some beautiful round beads by Diana of Suburban Girl Studios that happened to match another necklace with a pendant of hers and just played around with the beads.

I used to think sets had to be matchy matchy but to date I have been breaking many of my own rules and I love this set.

I was lucky enough to get some amazing Czechmate Crescent beads a while ago.  I am pretty sure I have told you about them before and from the moment they came out I had a design in mind and it just so happened I also had a orphan begging to be mated.

The cab in the necklace is from Lisa Peters Art and is one of my absolute favorites to where but I have had no bracelet to match it.  I am extremely happy with this set as well!

And finally I recently had the opportunity to work with Erin who is a blogger for Halcraft USA as well as her own blog Treasures Found.  Erin has a monthly challenge she hosts choosing a palette and coordinating beads and asks designers to play along.

The bracelet came first in this set.  And honestly I might have to make a couple more of these in different colors because I really like the way is wears.  I had a heck of a time getting a necklace that would work for me.  Finally I decided to just let it flow instead of fighting and I really love the way the necklace finished.

Do you like having sets of jewelry?

Friday, December 19, 2014

Button Closure Bracelet Tutorial - Re-post

Today I'm re-posting a tutorial from a little over a year ago.  I love making these button closure bracelets and people are always so delighted to discover how easy it is to fasten them!

~~~~~~~~~~~~~~~~~~~~~~~~~~~~~~~~~~~~

I love using button closures on bracelets and necklaces. Customers are always surprised and enchanted by this type of clasp and when they discover how easy it is to fasten a bracelet with a button, they are delighted!


So today I thought it might be fun to share a tutorial on how to make a 2 strand bracelet with a button and loop clasp. You can use any button you want.  I especially enjoy using artisan buttons or vintage glass buttons.  For this tutorial I used a handmade ceramic button by local artist, Terry Nokell, (no website).


Cuppa Joe Button Closure Bracelet

Materials

  • 20 inches (51 cm) beading wire, (I used Soft Flex, medium)
  • About 3 inches (7.6 cm) of scrap beading wire or thin cording
  • 2 sterling silver crimps.  At least 1 of the crimps must be wide enough to accommodate 4 passes of the beading wire
  • 1 crimp cover or a small bead that has a hole large enough to fit over a finished crimp
  • Assorted beads of your choice in different sizes and shapes, including some seed beads or other beads that are 4 mm or smaller
  • 1 button, 1 inch (2.5 cm) or smaller.

Directions


1.  As you can see in picture #1 below, a shank finding has been glued to the back of the ceramic button. Button and loop closures can be made with either shank buttons or 2-hole buttons.

2.  Measure out 20 inches (51 cm) of your favorite bead stringing wire. Set aside. Cut or find some scrap beading wire or thin cording.

3. Using the short piece of scrap stinging wire or cording,  thread the button to the center of the scrap wire.  You are going to use this short wire to grasp onto the button in step 7, when you are sizing the loop.


4.  Set the button aside for a moment and string seed beads or other smallish beads to the center of the 20 inch (51 cm) piece of stringing wire.

5.  Pinch the wire into a loop, as in picture 5, to estimate if the loop is large enough to fit over the button.  Don't worry, you can adjust the loop size in step 7, if needed.  When you think the loop looks like the right size, string a sterling silver crimp bead over both wires, (base metal crimps don't hold well and break easily). Slide the crimp up next to the beads.  Do NOT crimp it yet!

6.  OK, here's my trick for getting the right sized loop every time:  With your dominate hand, grasp both ends of the wire that you threaded through the button shank,  leaving a little slack.  The scrap wire enables you to hang onto the button, yet it allows the button to move naturally, as though it were attached to a bracelet.
With your non-dominate hand, hold the beaded loop, next to the crimp.  See if you can pass the button through the loop.  The best way to do this it to turn the button perpendicular to the loop, as shown in picture 6.  The button should slip through without any struggle or resistance.  Adjust the number of beads in the loop, if necessary and re-check it for size.  The loop should be a little larger than the perpendicular button, but not much larger.  The great thing about doing it this way is that nothing is crimped yet.  You can adjust things as needed before you go on.

7.  When the loop is sized correctly, crimp the crimp bead.


8.  Either cover the crimp with a crimp cover or cover it with a small bead, as I did here. I had a seed bead with a large enough hole.  Pony beads work well, too.

9.  Now for the fun part! Start adding on the beads you have chosen for your bracelet.  Start out with some smaller beads closest to the crimp.  This allows the 2 strands to lay nicely there, without being too bulky.  You can make both strands the same or different.  You can use patterns or not.  You can play with colors or go monotone.  Just have fun!

10. Keep adding beads until the bracelet is about half an inch (1.2 cm) shorter than the final length that you want. I wanted my finished bracelet to be 7.5 inches (19 cm) long, so I stopped adding beads after the bracelet reached 7 inches (17.7 cm).  Check to see if both strands are the same length.  Add or subtract beads as needed.    I had to make some minor adjustments to even out both strands, as you can see in photo 10.

11.  Thread the crimp onto both beading wires. This should be the crimp that can accommodate 4 passes of the wire. Then string on 3-4 small beads, the button shank and 3-4 more beads.


12.  Pass the wires back through the crimp and gently snug the crimp and beads, but not too tightly.  See how mangled my beading wires are?  My crimp bead was barely large enough to squeeze all 4 wire strands through it.  I had to wrestle them through the crimp bead with my pliers!  Crimp the crimp bead and trim the excess wire.

13.  Wear your bracelet proudly.  It looks equally pretty with the button on the bottom or top of your wrist.  Wear it anyway you like!


If you'd like some resources for wonderful artisan made buttons, visit my previous post, Button, Button, Who's Got The Button.

If you use this tutorial to make a button closure bracelet or necklace, I would very much like to see it!  Please either leave links in the comment section here or post pictures of your button and loop closure creations on the Art Jewelry Elements Facebook page.

If you have any questions as you use this tutorial, just ask.  I'd be glad to help.

Friday, October 4, 2013

Button Closure Bracelet Tutorial

I love using button closures on bracelets and necklaces. Customers are always surprised and enchanted by this type of clasp and when they discover how easy it is to fasten a bracelet with a button, they are delighted!

So today I thought it might be fun to share a tutorial on how to make a 2 strand bracelet with a button and loop clasp. You can use any button you want.  I especially enjoy using artisan buttons or vintage glass buttons.  For this tutorial I used a handmade ceramic button by local artist, Terry Nokell, (no website).

Cuppa Joe Button Closure Bracelet

 Materials

  • 20 inches (51 cm) beading wire, (I used Soft Flex, medium)
  • About 3 inches (7.6 cm) of scrap beading wire or thin cording
  • 2 sterling silver crimps.  At least 1 of the crimps must be wide enough to accommodate 4 passes of the beading wire
  • 1 crimp cover or a small bead that has a hole large enough to fit over a finished crimp
  • Assorted beads of your choice in different sizes and shapes, including some seed beads or other beads that are 4 mm or smaller
  • 1 button, 1 inch (2.5 cm) or smaller.

Directions

1.  As you can see in picture #1 below, a shank finding has been glued to the back of the ceramic button. Button and loop closures can be made with either shank buttons or 2-hole buttons.

2.  Measure out 20 inches (51 cm) of your favorite bead stringing wire. Set aside. Cut or find some scrap beading wire or thin cording.

3. Using the short piece of scrap stinging wire or cording,  thread the button to the center of the scrap wire.  You are going to use this short wire to grasp onto the button in step 7, when you are sizing the loop.


4.  Set the button aside for a moment and string seed beads or other smallish beads to the center of the 20 inch (51 cm) piece of stringing wire.

5.  Pinch the wire into a loop, as in picture 5, to estimate if the loop is large enough to fit over the button.  Don't worry, you can adjust the loop size in step 7, if needed.  When you think the loop looks like the right size, string a sterling silver crimp bead over both wires, (base metal crimps don't hold well and break easily). Slide the crimp up next to the beads.  Do NOT crimp it yet!

6.  OK, here's my trick for getting the right sized loop every time:  With your dominate hand, grasp both ends of the wire that you threaded through the button shank,  leaving a little slack.  The scrap wire enables you to hang onto the button, yet it allows the button to move naturally, as though it were attached to a bracelet.
With your non-dominate hand, hold the beaded loop, next to the crimp.  See if you can pass the button through the loop.  The best way to do this it to turn the button perpendicular to the loop, as shown in picture 6.  The button should slip through without any struggle or resistance.  Adjust the number of beads in the loop, if necessary and re-check it for size.  The loop should be a little larger than the perpendicular button, but not much larger.  The great thing about doing it this way is that nothing is crimped yet.  You can adjust things as needed before you go on.

7.  When the loop is sized correctly, crimp the crimp bead.


 8.  Either cover the crimp with a crimp cover or cover it with a small bead, as I did here. I had a seed bead with a large enough hole.  Pony beads work well, too.

9.  Now for the fun part! Start adding on the beads you have chosen for your bracelet.  Start out with some smaller beads closest to the crimp.  This allows the 2 strands to lay nicely there, without being too bulky.  You can make both strands the same or different.  You can use patterns or not.  You can play with colors or go monotone.  Just have fun!

10.  Keep adding beads until the bracelet is about half an inch (1.2 cm) shorter than the final length that you want. I wanted my finished bracelet to be 7.5 inches (19 cm) long, so I stopped adding beads after the bracelet reached 7 inches (17.7 cm).  Check to see if both strands are the same length.  Add or subtract beads as needed.    I had to make some minor adjustments to even out both strands, as you can see in photo 10.

11.  Thread the crimp onto both beading wires. This should be the crimp that can accommodate 4 passes of the wire. Then string on 3-4 small beads, the button shank and 3-4 more beads.


12.  Pass the wires back through the crimp and gently snug the crimp and beads, but not too tightly.  See how mangled my beading wires are?  My crimp bead was barely large enough to squeeze all 4 wire strands through it.  I had to wrestle them through the crimp bead with my pliers!  Crimp the crimp bead and trim the excess wire.

13.  Wear your bracelet proudly.  It looks equally pretty with the button on the bottom or top of your wrist.  Wear it anyway you like!


If you'd like some resources for wonderful artisan made buttons, visit my previous post, Button, Button, Who's Got The Button.

If you use this tutorial to make a button closure bracelet or necklace, I would very much like to see it!  Please either leave links in the comment section here or post pictures of your button and loop closure creations on the Art Jewelry Elements Facebook page.

If you have any questions as you use this tutorial, just ask.  I'd be glad to help.

Linda


Wednesday, August 14, 2013

Button, Button, Who's Got The Button?

If you are of a "certain age", you may remember playing "Button, Button, Who's Got The Button?".  In the jewelry world it appears that many of us have the button or buttons.


About 15 years ago I spent many weekends at my parents' house, lending a hand, when my mom had cancer.  Sometimes I'd take a break and head out to a bead store near their home. This shop had a vast collection of new and vintage buttons.  The owner told me that they had recently bought out the entire stock of a glass button manufacturer in Germany that had gone out of business.  All the buttons were 30 years old or older.  Some of the buttons were on special displays in this shop, but a vast quantity of them filled a large oak barrel. At the time, you could get 4 buttons for a dollar from that barrel!  That's hard to believe now, with even the simplest glass buttons now costing a couple of bucks.

German Vintage Glass Buttons

 I would sit next to that barrel and just run my hand through all the buttons! They felt so silky as they gently spilled over my fingers.  As I'd dig through the barrel, I would set aside my favorites.  This little ritual gave me some peaceful, quiet moments and was quite therapeutic at a time of high stress.  The result was that I grew to love buttons and I acquired a really nice collection of vintage glass buttons.


One time as I was on my weekend commute to my parents' house, I stopped at a different bead shop that specialized in beads and small items from Asia and Africa. There I found these exquisite Thai metal and cloisonne-style buttons.  So amazing!  I bought handfuls of them. The next time I visited that shop, the Thai buttons were gone.  I was sooo glad I'd stocked up on them!


Bracelet with Thai Metal Button Closure

Recently, an artist at the co-op art gallery I belonged to, brought in 2 boxes filled to the brim with mother of pearl buttons that she no longer wanted.  I was able to score a big handful of them.

Buttons make unique and easily fastened bracelet closures.


They also add a unique touch when used as a closure in a necklace.


Buttons can also be used as you would use beads, in the main part of the necklace, bracelet or earrings.

via Pinterest


Here are a few of my favorite resources for handmade buttons:

Shank Button with added hook and eye
Raku Buttons


And for those of you attending Bead Fest, Susan Kennedy of Sue Beads, will have some brand new buttons at her booth there, so be sure to stop by, if you are attending.


If you'd like some more inspiration for using buttons in jewelry, take a look at my Button Jewelry Board on Pinterest.

Do you use buttons in your jewelry creations or would you like to?  Do you make your own buttons?  Tell us more!

Linda