Friday, April 15, 2016

Lampwork Buyer Beware

Note: I originally wrote and published this blog post in October 2014. However, I've recently noticed a large quantity of structurally unsound lampwork beads being offered up for sale in Facebook groups, and I just cringe when people buy them. As much as I secretly might want to call out a beadmaker for selling beads whose dots will probably not survive any kind of jostling, I am not the lampwork police. My goal is to educate those who buy lampwork so they know what to look at when considering purchasing a bead.

------------------------------------------------------------

I did something that I am SUPER uncomfortable with, and I'm about to share it with the world....all because I am looking out for those of you who purchase lampwork beads. What is this shameful thing? I made a bad quality lampwork bead. On purpose. Let's start off with a side-by side of the bead with bad technique (left side) next to the "same" bead using good technique I've developed over the last 9 years of lampworking experience. (as an aside, I wasn't going for good design, just an easy to see example)
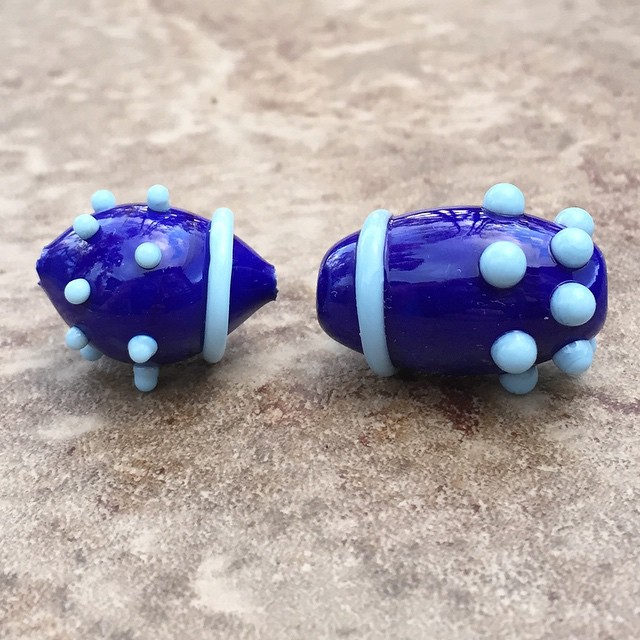
Sample beads

Why is the bead on the left bad technique? Let me count the ways! I tried to cram as many as possible onto a single bead in the hopes it could be inducted into the Fugly Bead Hall of Shame (I'm pretty sure that's a thing). 

First of all. Raised dots that aren't sufficiently attached to the bead. These WILL break off. In fact, you can see the dot that fell off as I tried to remove the bead from the mandrel. 
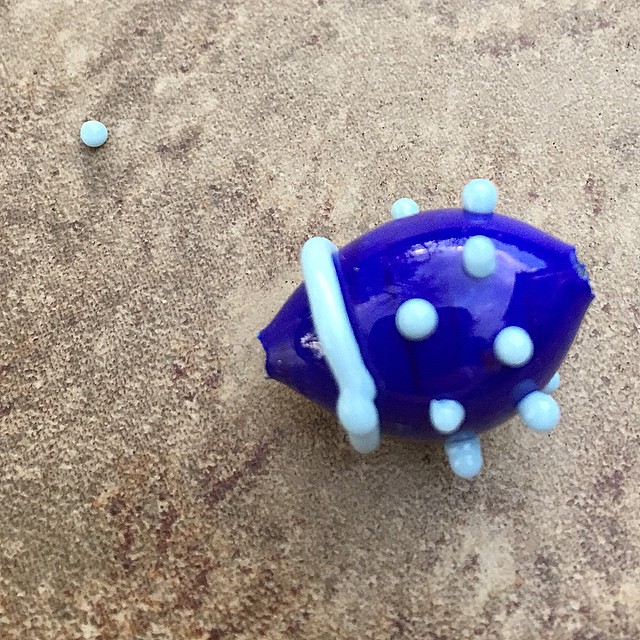
Example of horrible quality lampwork bead.

How can you tell if the dots are well anchored to the base bead? The base of the dot that meets the bead, will not have undercuts....meaning, the base will not be narrower than the body of the dot. See the dots in the "good" bead below. They are firmly attached to the bead.
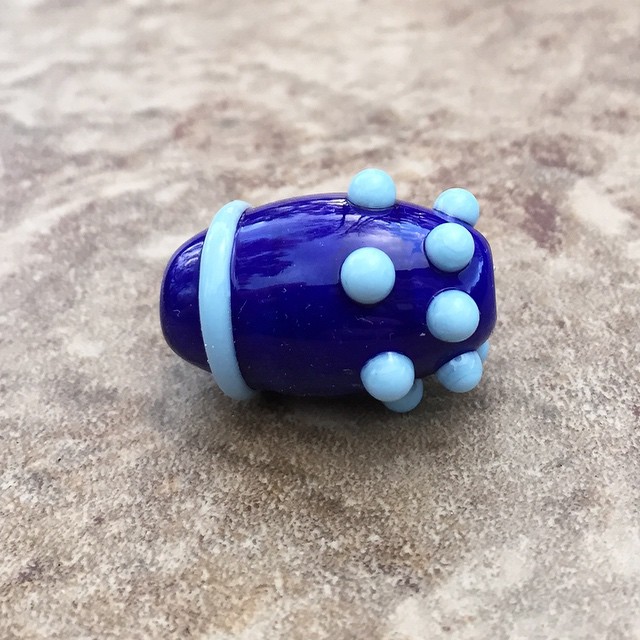

Sample bead

Same with raised stringer designs. If the stringer work has undercuts where the stringer meets the bead, it will break off. See how the stringer below looks like it's just sitting on top of the bead? 
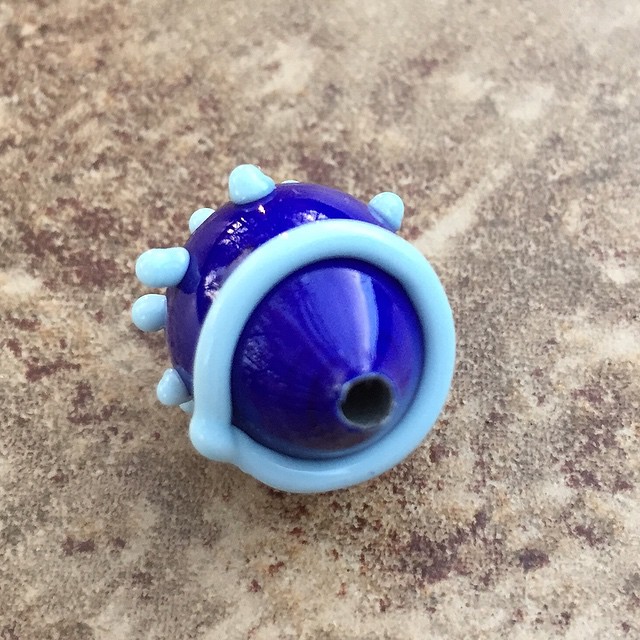

Example of horrible quality bead

The "good" bead below has stringer that is securely attached to the base bead. You can see how it is melted into it rather than still looking fully round in shape. 
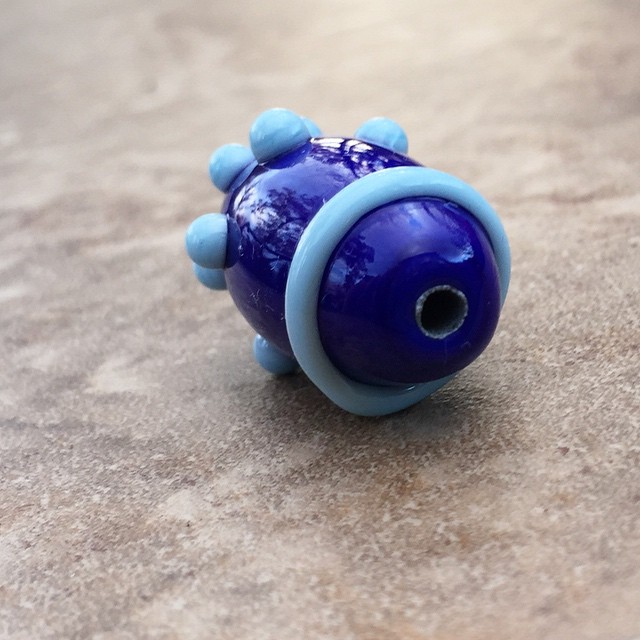

Sample bead

I would like to point out that a HUGE no no is when bead makers leave bead release in the bead holes. Properly cleaning the bead release involves diamond drill bits and a tool to use the drill bits. I personally like my battery powered Dremel for that. Not too powerful, but gets the job done. Unfortunately, the battery was dead and the light was fading. So, yeah, my good example still has bead release. However, beads you buy should have the release already cleaned out for you. So check the holes. If it isn't cleaned out, it will flake FOREVER. Fyi: craft store lampwork beads still have the bead release in the holes. 

The next thing you want to avoid when buying lampwork, is bead holes with sharp pointy edges. Let's take a look at the comparison photo again. 

Sample beads

Those sharp pointy bead holes: #1-are not structurally sound. They WILL crumble, chip, and break. #2-will rip beading wire and cord. #3-sharp and dangerous for skin. #4-ugly #5-proof that the lampworker hasn't learned how and/or hasn't taken the time to properly shape the bead. 

The bead holes should be puckered or at the very least, flat. If they are pointy, they should not be offered up for sale. 

Another thing you can see in the photo above, the bead on the left is VERY off center and looks "pregnant." While an off-center bead can be an aesthetic preference, it should be noted when considering your designs and preferences.

The one thing I couldn't reproduce without possibly causing a total explosion, is the crack that results from improper annealing technique. You have the right to ask the lampworker how they anneal their beads. The proper method is annealing each bead as it's made in a digitally controlled kiln. Some will batch anneal, which means to make all the beads, and cool them in a fiber blanket then place all of them in a kiln at once and anneal them. All I have to say is no. This is NOT good annealing technique and has a failure rate high enough that I would never do it. 
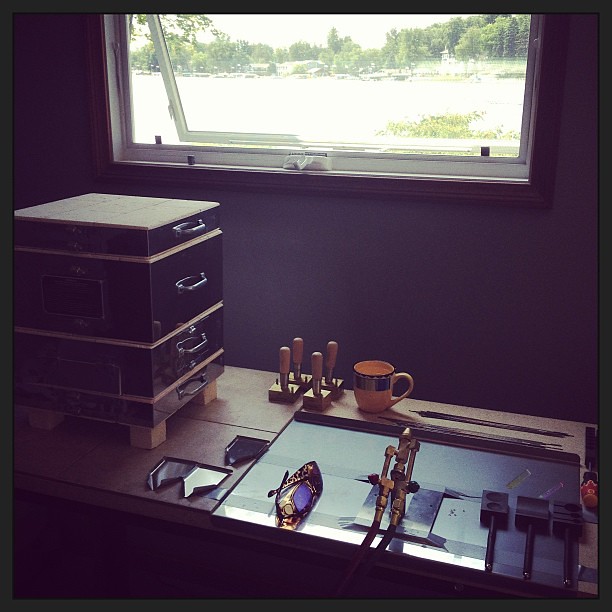

The lake house studio is finally set up and functional! #thisartistslife #glassaddictions

As you can see in the photo above, in my lake cottage studio set-up, my kiln is to the left and held (soaked) at 950F during my entire torch session. As soon as I finish a bead, it gets popped into the kiln and held at that 950 degrees until I force it into the cooling (annealing) cycle. This cycle SLOWLY brings down the temperature, allowing all the molecules in the glass to line up properly. A glass bead properly annealed will not shatter, but rather bounce on concrete (it WILL chip though! So don't try it. It IS glass after all). 

Part of the reason I decided to write this post is that I've noticed a huge influx of lampwork being sold that shouldn't be offered up for sale and I prefer people who are spending their hard earned money on lampwork are able to spot quality beads. Because if they buy beads they are ultimately unhappy with, it poisons them against buying lampwork in the future. 

Some of the sellers of these beads are new beadmakers and super excited to be making their own beads. They should be! But selling them is maybe not the best thing. Here are some of my VERY early beads from 2005. Ugly ugly ugly. 


When I started making beads in 2005, my daughter was only 4 years old and loved every bead I made like it was treasure more precious than gemstones and gold. She is now 13 and was cleaning her disaster area (bedroom) a few weeks ago and unearthed this bracelet she made with some of my first beads. Her tastes have changed (thank goodness!) and she gave them back to me. LOL! I am so glad to have these early beads so I can see how far I've come. And I'm so glad no one BOUGHT these beads...


Wednesday, April 13, 2016

Forgotten Treasure


Have you ever wanted to rummage around in someone else's jewellery box? I know I'm always intrigued to see what other people have in their collections. Since I started making my own jewellery it never seems to make it into a jewellery box but rather hangs around in the studio or my bedroom on and in various racks and receptacles...


But I do have a good sized oak box that houses amongst other things, a lot of the jewellery that I bought or was gifted before my making days began.


 I was poking about in this the other day looking for something when I realised that not only where the contents much neglected and in need of a good clean, but also that my style and taste has changed somewhat over the years. Twenty years ago I lost a lot of my jewellery in a burglary. This was pretty heart breaking at the time as it included everything I had been gifted for my eighteenth and twenty-first birthday. After that I began rebuilding a collection and all my family and friends knew what was at the top of my wish list come Birthdays and Christmas.
At this time I was also very much career oriented and wore jewellery every day with my business suits to complete the corporate image. Working from home and in a studio environment as I do now means that I only wear it when I go out so it's years since a lot of this collection has see the light of day.

Now that I've cleaned it up a bit I thought you might enjoy a virtual rummage so here's some of what's in that box...

Rings... I love rings and at one time used to wear four or five at a time but these days it tends to be one on each hand and maybe a thumb ring. You will also notice throughout this post that I have a penchant for semi-precious stones.


I have a lot more silver jewellery that I do gold, mainly because I like quite chunky stuff which would cost the earth in gold. The gold I do have is mostly inherited or gifts that survived the burglary.

Then we have pendants...and more of the semi precious stones. I didn't really wear beaded jewellery at this time (I hadn't yet discovered art beads) and was much more into chunky pendants on a substantial silver chain as you can see here. Carnelian, Labradorite, Fluorite, Blood Agate, Mother of Pearl and others I don't recall right now.


This collection is from my Amber phase (still ongoing) and includes pieces I was gifted for my fortieth birthday and some of my mothers.


You will see from these images that I tented to go for matching collections and usually had matching earrings and pendants and sometimes rings. I don't tend to do this today and tend to go for a more eclectic look when matching jewellery.


Garnet - my birthstone is one of my favourite stones and I still use it in my own designs...I think these pieces in particular will be seeing the light of day a little more often now I've rediscovered them.


Sets in Moonstone, Jade, Turquoise and Labradorite.


Years ago I wore a lot more stud earrings, particularly for work where I had t be a little more conservative in my appearance.


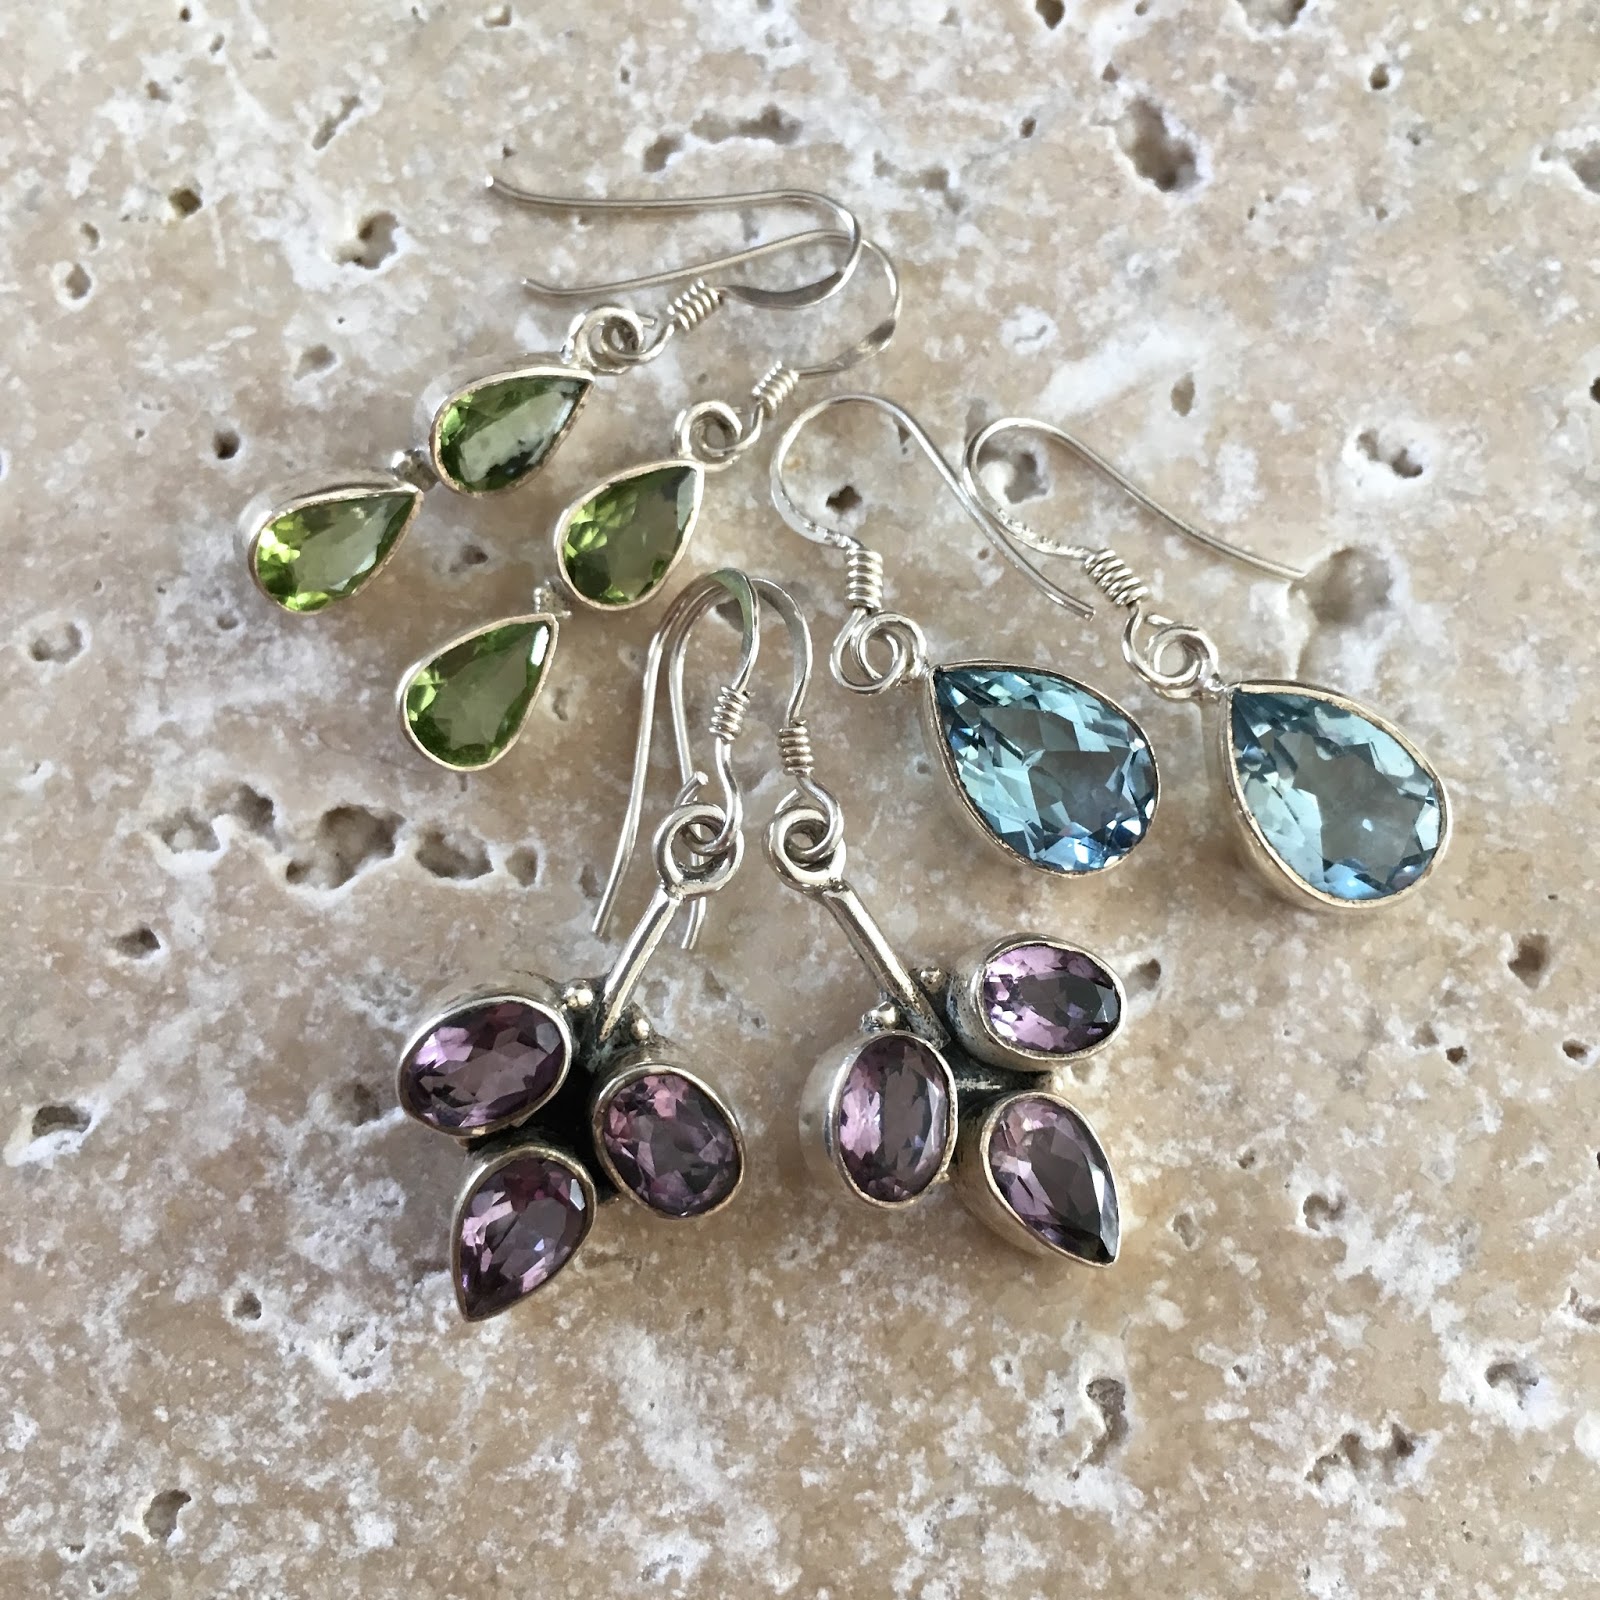
But still went for a bit of gemstone bling form time to time with Peridot, Blue Topaz and Amethyst.


With the exception of the sun and the copper piece this brooch collection is inherited and the crystal brooch on the left is the first gift I bought for my mum when I started working full time. I remember my father buying her a new coat for Christmas and me going off to find a brooch to match.


Grandma's jewels... Cultured pearls and a silver bangle. The bangle I did wear a lot but I've never been one for traditional pearls.


When I started making jewellery I did intend to go more down the silver-smithing route and if the price of silver hadn't shot through the roof my design style may have stayed much closer to this collection. But once I discovered other mediums and in the jewellery I make today there is a big difference in style and material and that's no bad thing - I've learnt a lot and grown over time.

But I think maybe I'll be digging some of these pieces out to wear again or perhaps see if I can give them a new lease of life.

What do you have lurking at the back of your jewellery box? Go have a look - you might find something exciting in there.


Monday, April 11, 2016

Carving Clay

Carving in clay isn’t as difficult as it sounds, it’s really easy to get a good result with minimum tools and simple skills.
If you took part in the last AJE Theme Challenge blog hop, you will have seen my Egyptian eye cabs. Today, I’d like to share how I made them.

Eye of Horus Ceramic Cabochon

Firstly, you will need an image. I drew they eye using images of artefacts from the internet. When choosing an image, pick something that can be turned in to a simple line drawing. 

Initial Sketch

Trace the design in pencil on to baking paper.

Tracing the image

If your image has a left and a right side that’s different, flip over your tracing and draw round the lines again in felt tip pen. Flipping the image will transfer it the right way round in the next step. I pinched a pen from the kids art box, it’s water based washable. You might need to test different felt tips to see what works for you.

Retracing on the reverse in felt tip

Next take some clay rolled out to the thickness you want your finished piece to be. I like to use porcelain for carving as it’s smooth, firm, and holds a lot of detail. 

Prepared clay

Put the tracing felt tip side down on the clay and give it a good rub with you finger tip.

Transferring the image

When you lift the paper, your design should be transferred on to the clay.

Magic!

Cut the excess clay from around the edges.

Taking shape

And then with a sharp knife, cut into the lines of the drawing. You don’t want to go all the way through, just a couple of mm.

Scoring the design

To start sculpting, decide which areas you want raised, and which you want in relief. Use a flat ended tool to gently press up to the line. Depending on your design, you may want to press on either side, or just one.

Carving the relief

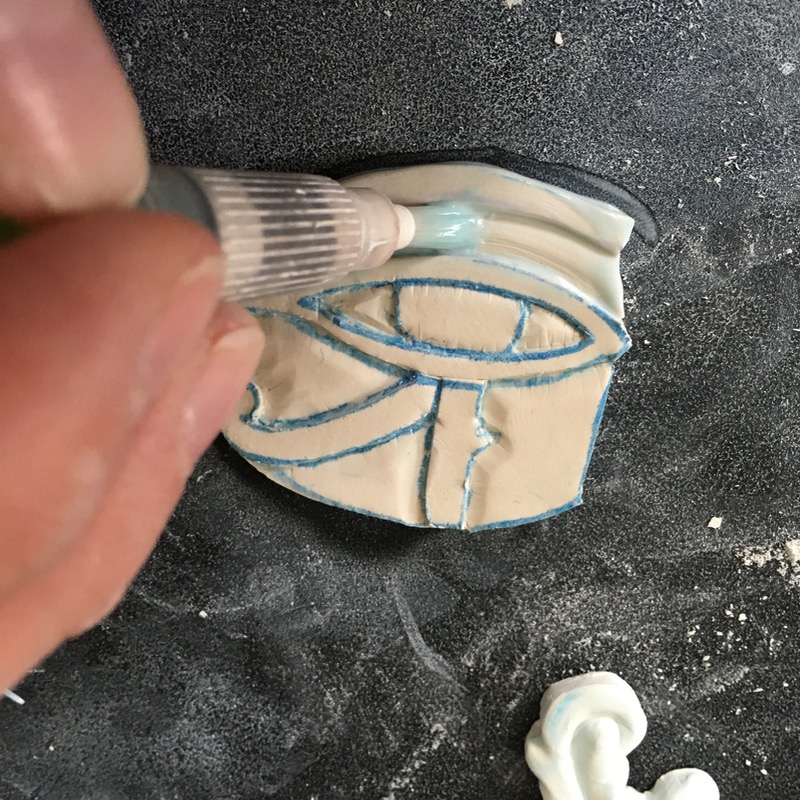
When you’ve done this along each line, take a paintbrush and smooth over the design until you have a nice finish.

Tidying up

Ready for bisque firing

Once bisque fired, the design was painted with underglazes and a clear top coat before going in for a final firing.

The finished cabs


Friday, April 8, 2016

Interview with Cathy Mendola - seed beads, Buddha and goddesses

This post I wanted to introduce you to a bead artist friend of mine - and my inspiration. I met Cathy Mendola via Instagram and what started as a business relationship quickly evolved into an online friendship. I look forward to meeting her in person some day! 
Pendant from Cathy's current seashell series and detail of one of the 12 Buddha tapestry pieces from 2014. 
I met Cathy while she was working an a beaded monthly goddess project - the same project that I have undertaken for myself this year. She has inspired me to bead larger pieces, wall hangings and the like and encouraged me to play and explore the bead embroidery realm. So without further ado - Cathy in her own words and images: 

Introduce yourself. Do you have a descriptive term that encapsulates your style?
Hi, my name is Cathy Spivey Mendola. I think my style is eclectic. Sometimes my designs take on a life of their own. It tends to vary with each piece I work on relative to the materials I’m working with. 
Work in progress shots from Cathy's Buddha and Goddess projects. 
For anyone new to you and your work-how did you get started in beading/jewelry making? Are you formally trained? Is this your full time job? What is your day job? Previous career?
I am mostly a self-taught artist. In my past life I was a nurse and worked for over 12 years before becoming a stay-at-home mom. My life has revolved around arts/crafts and lots of fabric for most of my life so it was only natural that I played with my art supplies and fabrics while my daughter napped. I made my first beaded bracelet around 1996. It didn’t take long to become hooked so I continued to make bracelets, necklaces and earrings. But I still didn’t consider myself a jewelry artist, I considered myself a fiber artist due to my love of fabrics and creating art quilts. I thought of jewelry making as something to while away the hours until I created some magnificent piece of fiber art and became famous-haha!

Well, after almost 20 years of making jewelry I have finally realized that I AM a jewelry artist. Making jewelry comes much more naturally to me than creating art quilts. I have sold many more pieces of jewelry than fiber art. I still love making art quilts and incorporating beads but my passion IS beading. I don’t know why I was so reluctant to call myself a jewelry artist or why it took so long for me to see that beading is what I was meant to do.
Pendants: incorporating antler, shell and a stunning MAKU raku cab! 
What are you favorite mediums/materials to work with? Do you have a favorite or unusual tool? 
I love nature, especially the ocean/beach. So seashells and driftwood find their way into my beaded designs. I also like to incorporate deer antlers and fossils. And of course I love a beautiful stone cabochon to be the centerpiece or one of Jenny’s clay goddesses!  I think my favorite tool if you can actually call it a tool is KO thread. I have tried numerous beading threads and this one wins my vote as the best. 

I am currently doing a series of beach themed necklaces using my extensive seashell collection. I am also fortunate enough to have an article featuring three of my beach themed necklaces in Belle Armoire Jewelry’s summer edition coming out in June.
I do a personal beading challenge every year and this year I have chosen to do the Five Elements. Doing just ‘five’ pieces is much easier than a monthly project for me right now since I will be moving out of state in the spring. I am still in the design stage of my element project so I haven’t started yet but it’s on my work-table. (Since Cathy was interviewed she has begun... see below) 
Cathy's theme this year: pieces inspired by the 5 elements.

What is currently sparking your new ideas? Do you ever suffer from creative droughts and if so how do you deal with it to stay inspired?
I don’t have any problems coming up with ideas. My problem lies in not having enough hours in a day. (And not having a personal assistant!)  There is such an abundance of inspiration. So many of my ideas are sparked by nature. Sometimes all it takes is a walk outside to refresh my creativity.

What short piece of advice would you give someone trying to find their creative voice and push forward?
My advice for anyone who needs some direction would be to create as much as possible. For me, creating a year-long art journal really opened up my eyes to what I like to do vs. what I love to do. Also, when you look back on a year’s worth of projects you can see progression in your work and you start to develop your own style. I also learned that you will not love everything you make but it’s all part of the process. The more you create the greater probability you have of creating pieces you love.
Four detailed shots of Cathy's Buddha pieces from her monthly project in 2014. 
What has been your greatest creative achievement to date?
My greatest all-around achievement has to be my daughter! She is graduating from the University of Florida College of Veterinary Medicine in May and I couldn’t be prouder. My beading doesn’t compare to the time & work I put into raising her & being a stay-at-home mom. But it is certainly paying off.

What artist (living or dead) would you most like to meet and have dinner with?
If I could meet & have dinner with any artist I would love it to be Frida Kahlo. She was certainly a free spirit. I think she’d be a lively dinner companion.

I met Jenny online while I was working on my Goddess series last year.  I was in my 3rd year of doing a year-long project. Here is how it started:
In January of 2013 I embarked on a year of creating an art journal. I did this with a friend of mine in order to keep myself accountable. We thought it would be a great way to figure out some things about our art-try new techniques, new mediums and see things in a different way. I was at a point where I wasn’t sure about what I really wanted to be when I grow up! Again, I was making a lot of jewelry but thought I was supposed to be making art quilts. I was confused about my creative direction. The year of the art journal set me straight. We had a theme for each month. We could do whatever we wanted with the theme. The sky was the limit. It was that first month that set me on this beading path. I taught myself peyote stitching and that was the beginning of my love affair with bead embroidery. I continued to play with other mediums throughout the year but when I wasn’t working on my art journal pieces I was doing bead embroidery.

In January 2014, the same friend and myself invited a small number of our fiber art friends to join us in creating a little bead group. We only had a color theme & a size limit of 8”x8”.  You could do as much or as little beading as you wish as long as it was in the color of the month and stayed within the 8x8 size.  At the same time, I wanted to join Robin Atkins’ Bead Journal Project so I created the ‘12 Months of Buddha’ challenge for myself along with the other project our bead group was doing. I kept the Buddha challenge the same color scheme as the 8x8 challenge. At the end of the 12 Months of Buddha I stitched them all together to create a quilted wall hanging. 
I wanted to continue with the Bead Journal Project in 2015 so I decided to do another 12 month challenge-that was the year of my Goddess Project. I have completed the beading of the goddesses but I have yet to mount them onto 8x10 canvases for displaying. It’s on my list of to-do’s. 
Four pieces from the Goddess series. Cathy used my polymer goddesses in a few of these pieces! (my cabs are pictured here top right, bottom left)
You can see examples from my art journal and the Buddha & Goddess series on my Facebook page as well as my blog.
Blog is www.cmendola.blogspot.com (which doesn’t get updated as frequently as FB.
I’m on Instagram as cathdola and on flickr - www.flickr.com/photos/csdola/


Favorite Word:  Just do it (sorry I don’t have just one word-this is my favorite phrase)
Least Favorite Word: Can’t
What turns me on creatively, spiritually, emotionally? Being with a group of like-minded, creative people. I am in 4 different fiber/bead/art groups. It’s always energizing to be with these people.  Being at the ocean is also a huge turn on for me on all levels. It relaxes me and brings me a sense of peace.  I usually come home from the beach with a whole new set of ideas plus tons of seashells, stones and driftwood.
What turns me off? Negativity and hearing someone say they can’t do something
What profession other than my own would I like to attempt?  Hmmmm. I really love what I do, but once upon a time I wanted to be a veterinarian. Having my daughter become one makes it even sweeter.  I do think it would have been fun to be a musician in a rock band. Of course you need to be able to sing or play an instrument, so I guess I’ll stick with beading.
What profession would I NOT like to do?  Work for the IRS or be President of the US
If Heaven exists what would I like to hear God say when I walk through the Pearly Gates?    ‘I’m so glad you’re here. I have a huge beading project for you to do!’

Thank you Cathy! It is a pleasure to get to know you better and all the best on your upcoming move! I have thoroughly enjoyed any reason to pore over pictures of your bead work. I am continually inspired by your bead shape selections and your palettes! Im going to go start my April goddess now...