Showing posts with label wire wrapping. Show all posts

Friday, October 16, 2015

Headpin Cuff Tutorial

A couple of months ago I designed a necklace for our component of the month challenge featuring Diana’s stoneware disc, and came up with a way of using leather and headpins as fasteners in the design. I really liked how this looked, so I decided to explore it a little further and design a cuff bracelet. 

Component of the month by Diana Ptaszynski
The leather used is 5mm x 1.5mm flat strips and is available in loads of colours. I had quite a few lengths of it in my stash as it was one of those things that I bought because I loved it, not because I had an idea to use it for anything. 

Supplies

So now I have an idea, I’m going to run with it… If you want to follow along and make one of your own, as well as the leather, you need some headpins (mine are from Jen Cameron) an awl or as I’m using a bead reamer, large and small jump rings and a clasp.

Measuring

Start by measuring your leather, you need enough to fit your wrist leaving a gap for a clasp + 40mm. Fold one end over with a 15mm overlap and pierce through both pieces of leather. Once each side is marked open it out and enlarge the holes.

Piercing

Thread the headpin through both pieces of leather holding the head firmly against the leather.

Threading

Wrap the wire around one side...

Wrapping

Then pass the wire across underneath and wrap the other side, trim off any excess. How many times it wraps on each side will depend on the length of your headpin. Mine wrapped 3 times on each. 

Wrapping the other side.

Repeat this on the other end of the leather.

Ends completed

Fold the piece in half and mark the centre, pierce the leather and wrap the central headpin.

Adding the centre.

Fold one end to the middle pin and mark the centre, add another headpin. Then fold the other end to the centre and repeat.

Finished wrapping

You should now have 5 equally spaced headpins. If you’re not comfortable folding to find the centres, you can always measure with a ruler. 

Add a large jump ring at each end.

Jump rings for the clasp.

And finish with your clasp. 

The finished design

These look great finished with just the headpins, or add a charm or some other dangly bits for some more movement. This charm is also from Jen and was swapped in the Art Charm exchange.

Adding embellishments.

The finished bracelets.

I think they would also look great with flower head pins, maybe some wrapped wooly wire and plenty of copper charms. They're a great foundation to let your imagination take over!


Saturday, November 8, 2014

Make Your Own ~ On Wild Autumn Winds Earrings


It's no big secret that autumn is my very favorite season! I love everything about it—the bright colors of the changing leaves, the grey skies, the first frosty mornings, the bright starry night skies, and… even the bitter cold winds. For me, one of the most magnificent wonders of autumn is seeing the trees swaying in the gusty winds and watching their leaves take wing. Oh! And don't forget the flocks of migrating birds flying in the wild winds. Yes, the name of my studio was inspired by those gorgeous moments!

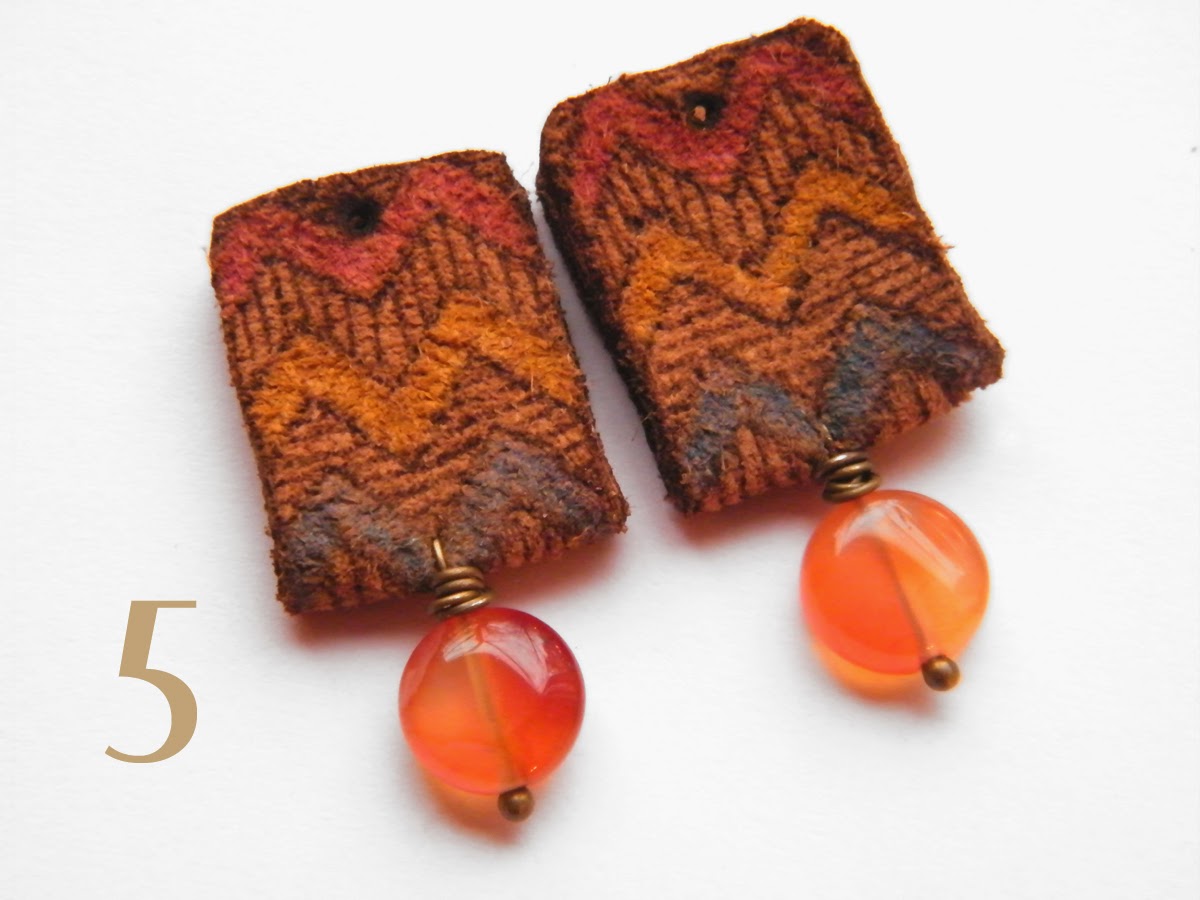
Today I'm making earrings again—care to join me? Good! And today, I'm working with a brand new component in leather made by my uber talented sister, Bethanne. If you don't know already, she joined my shop and the ranks of art jewelry element creators just a few months back—such exciting times!!

Okay, lets get creating…


Supplies you'll need:
- 22 gauge bronze wire
- 2 headpins
- 2 earwires
- 2 10mm carnelian coins
- 2 rustic chevron leather rectangles
- 2 raven black aster wheel disc beads
- 2 rustic tribal white seabird beads

* The chevron rectangles, aster wheels, and seabirds are available in my etsy shop.

Tools you'll need:
- tape measure
- wire cutters
- round-nose pliers
- flat-nose pliers
- bent-nose pliers
- large needle


1. Put the carnelian coins on headpins.


2. Fold the chevron rectangles in half and using a large pointed needle, pierce a hole going all the way through both sides of the fold.


3. Pierce the second chevron rectangle.


4. Put the headpins through the holes and bend straight down, leaving a little space above the carnelian for wrapping.


5. Wrap both carnelians drops.


6. Cut two 14 inch lengths of 22 gauge wire.


7. Sandwich the aster wheel between the chevron rectangle and put them at the center of the wire.


8. Wrap several times through the aster wheel and chevron rectangle to secure them in place. The holes are a bit smaller on the chevron rectangle than the aster wheel, so I wrapped two times around the aster wheel first… and then through the holes of the chevron rectangle a few more times to give me enough wraps to keep everything together.


9. Bend one wire up straight and wrap the other tightly around once just above the aster wheel. Place the seabird just above the wrap.


10. Form a wrapped loop at the top of the seabird. Don't wrap the wire beneath the seabird yet!


11. And now, wrap the wire at the base of the seabird. Wrapping the top loop first makes it easier to make the base wrap tight and consistent. Do steps 7 though 11 to make the other earring… add earwires, and you're done!

Enjoy your new earrings!!


Have a fabulously creative weekend!


Rebekah Payne

Sunday, July 20, 2014

Dahlia Pendant and Ribbon Tutorial

Back in March, Monique of A Half Baked Notion designed a necklace using some fossilized coral that she had purchased from one of my destash sales.  I was intrigued by the hand dyed, tubular viscose ribbon she used in her necklace.  It came from a shop called Colour Complements on Etsy.  So I made an inquiry about the ribbon, with the shop owner, Lorraine.  Lorraine was kind enough to send me a sample of her hand-dyed ribbon to try out.


Isn't it beautiful?  I loved the luscious colors and I envisioned threading wire through the center of the tubular ribbon and then wire wrapping it.   Upon receiving the ribbon, I realized that I had the perfect match for it, in a ceramic flower pendant that I had received from Marla James of Marla's Mud.
Marla's pendant reminds me of the dahlias that are blooming in our front yard now.  So I've called today's tutorial the Dahlia Ribbon Pendant.
Here's what you will need:
  • Approximately 6 inches of 20 gauge wire (length will vary depending on the size of the pendant you are using)
  • 7 inches of  hand-dyed tubular viscose ribbon, plus 9 inches more, if you want to add a bow above your pendant
  • A pendant of your choice that has a hole large enough to accommodate the ribbon.
Tools:
  • Cutters
  • Flat nose or chain nose pliers
  • Round nose pliers
  • Scissors
1.  Make sure that both ends of your wire are flush cut.  Sand them so they are as smooth as possible. The smoother the ends are, the less they will snag on the ribbon and the easier it will be for you to thread the wire into the ribbon tube. 


2.  Find the opening in the tubular ribbon.
3.  Carefully and gently thread the wire into the ribbon tube.  This is a little tedious, so go slowly and be patient.  Its only a short length of ribbon, so it won't take long, unless you try to force it.
3.  Scrunch the ribbon together, so it all fits on your wire, with bare wire on either end.
4.  Decide which end of the wired ribbon you want to face forward and then carefully thread your pendant onto the wired ribbon. 
5.  Gently curve the wire up around your pendant.  Make sure you leave enough room above the pendant so the pendant can move a bit.
6.  Make a wrapped loop above the pendant.
7.  If you would like to have a bow on your pendant, tie it over the wire  wraps.  You may want to add an small, inconspicuous touch of glue to the bow, so it does not come untied.

8.  Make another wrapped loop above this, to form the bail.  


9.  Create a necklace, or simply string your pendant on leather or chain.
After taking these pictures, I decided that I liked my pendant better without the bow and I removed it.  I don't have a photos of it without the bow, but I liked the simpler version better.
The tubular viscose ribbon adds a soft touch to the necklace.  It also adds an interesting texture and a pop of color.  I hope you will give it a try and post links to your creations here or on the AJE Facebook page.  You know how much we'd love to see what what you create!
-Linda

Saturday, May 24, 2014

Make Your Own ~ Beaded Drop Feather Earrings

Hello again! I don't know about you, but certainly for me, every time I have a lot of work that needs doing, I find there are so many other things I'd like to do instead. That "lot of work" right now is a big heap of beads that's waiting for paint. Not that I don't like painting—I absolutely love it! But it's a big job and involves many hours of meticulous work. And while I'm busily painting away, my mind wanders on to all those other ideas I have for new beads and jewelry.

One thing is for sure, I really want to make more jewelry! Happily, I've been able to consistently work towards that goal this year and it's been so wonderful to get back into it again… but equally as fun, is sharing how I make my new jewelry with others!

So… here you go! Another tutorial for you—this time for earrings…


Supplies you'll need:
- earwires (a very minor ;-) detail that I left out of my photo!)
- 24 gauge wire
- 11/0 beads (I used iris gray)
- two 6mm round beads (I used turquoise howlite)
- two 8/0 beads (I used oxblood)
- two tiny brass spacers
- a pair of painted leather feathers


Tools you'll need:
- tape measure
- wire cutters
- round-nose pliers
- flat-nose pliers
- bent-nose pliers
- glue


1. Start by cutting a length of 24 gauge wire about 10-12 inches long. Make a wrapped loop on one end and string on a 6/0 bead, a brass spacer, and a 6mm round.

2. Cut a second length of wire and repeat step 1. I like to work my earrings simultaneously to keep them matching.

3. Decide how long you want your finished loop to be and string the 11/0 beads onto both wires. I went 2 inches long with the 11/0 beads, but you can go whatever length you prefer, just be sure to cut a long enough wire to complete the next steps.

4. Bend the wire at a right angle about 5mm from the last bead—this will give you some wiggle room to form a nice loop without the beads looking all bunched up.

5. Bend the wire around to form a loop and wrap a few times.

6. Using the same wire, wrap down over the top of the beads about halfway down the loop.

7. Wrap back over the top, creating two layers of wire wrappings. Cross over to the other side, again wrapping down halfway and then back up. Finish off by wrapping tightly beneath the 6mm round and trim.

8. Follow steps 4 through 7 to create the second beaded loop.

9. Add the feathers—put a dot of glue on the tip, fold over and wrap tightly with 24 gauge wire. Hang from earwires and your done!


Wishing you a happy and creative Saturday!


http://www.treewingsstudio.com/