Showing posts with label how to. Show all posts

Monday, November 9, 2015

Jewelled Ear wires

I love ear wires! Not those boring pre-made mass produced ones, but handmade artisan ones that really enhance or become part of the design, so I thought I would show you how to make some of my favourite!

Will o the Wisp earrings

You will need:
0.8mm sterling silver wire 
pair of 5mm stones
easy solder paste

Tools:
Wire cutters
Medium bail making pliers (or 5mm and 3mm knitting needles!)
Saw
Pair of flat nose pliers
Soldering block
Buntain torch 
Safety pickle
Bicarbonate of soda
Wire brush
Dremel with a burr cup or files
Tumbler or polishing papers
Something round to form ear wires like a pen

Cutting the wire
  • Cut two 3inch pieces of 0.8mm wire for each pair of ear wires you are making (in the photo's I am making 3 pairs as it's always easier to work in batches) File one end flat and put to one side.
  • Take another length of 0.8mm wire and wrap it tightly around the large side of your bail making pliers forming a coil and then do the same with the small side of the pliers. (These will be cut to form jump rings and you will need two large and two small jump rings per pair of earrings).
  • Using your saw cut the coil into rings (I find it helps to use the wire cutters to make a small grove where I want to cut first or my blade just goes every where, it is also easier if you stick a small amount of tape on your coil before cutting to hold them together and go slowly as these can get really hot when sawing in a hurry).
  • Once you have sawn your jump rings use your flat nose pliers to close he rings neatly together (you just need to gently twist the ends together).
Soldering together Cut eight 1cm lengths of wire per pair of ear wires and file one side of each flat.
  • Arrange all the pieces on the soldering block as shown, making sure that the cut edges of the small and large jump rings are touching and that the filed ends of the wires are the ones that will be soldered to the jump ring. (it is important to make sure all pieces that are going to be soldered are spotlessly clean, so as I assemble this I wipe each piece with polishing paper or sandpaper).
  • Apply small amounts of solder paste at all of the joints (this can be rather fiddly).
  • Following all safety precautions (hair tied back, goggles on, apron, no long sleeves etc) solder the pieces together (go slowly as the wire is rather thin and can melt rather easily). Once soldered pickle for a few minutes to remove any fire scale and then rinse in Bicarbonate of soda and water to neutralise the pickle and brush over with a brass brush.
Shaping the prongs
  • Once clean and dry (using your stone as a guide) bend the prongs up with your flat nose pliers.
  • Once the prongs are in place cut them to the desired length (mine are between 2-3mm depending on the hight of the stone being set).
  • Check the stone fits and adjust as needed
  • Using the burr cup in a Dremel neaten up the cut wires (If you do not have a Dremel you can buy a handheld burr cup or you can just use a file to neaten up the edges.
Shaping the wire
  • Once you are happy with your prongs use something round to shape your ear wires (I normally use a pen or a wooden spoon)
  • File or burr the ends of your ear wires and either tumble for 30 minutes or hand polish with polishing papers
  • Place your stones in the settings and use your flat nose pliers to gently squeeze the prongs down onto the stones until the stones are secure. This can be a little fiddly but go slowly because some stones (especially faceted stones) are easy to chip or break if you are too heavy handed (been there)!!!
  • Add your choice of embellishments to finish the earrings....
Selection of finished earrings


Monday, April 6, 2015

Simple Headpin on Headpin Earrings

It's no secret that I love headpins, they are just so versatile and come in so many diffrent shapes and sizes. This is one of my go to desgins for a simple but beautiful pair of earrings using two pairs of headpins.

Pair of Headpins
Here I used a pair of lampwork headpins (from Creeky Beads on Etsy) and a pair of sterling silver 'fancy' headpins that I made, Click here for a tutorial on how to make these.

Bent into Earwires
First bend the fancy headpins on something round to form earwires, I use the handle of a small paintbrush but a sharpie pen or wooden spoon work just as well.

Forming earwires
Then using flat nose pliers slightly bend the end of the wires outwards, this adds a nice little detail and makes it easier to put them in your ears.

Hammer
Next useing a hammer and anvil, lightly tap the wires at the top of bend you just formed and at the bends at the end of the wire. You want to work harden the metal so it keeps it shape and makes it stronger, you could use a tumbler to do this if you have one. Then file the ends so that they are nice and rounded, this can be done with either a file or a cup burr.

Add Lampwork Pins
Using round nose pliers make a small hoop at the top of the lampwork headpins and then thread them onto your earwires, continue to wrap the wires around the lampwork headpins and tuck the ends in neatly using a pair of pliers.

Almost completed
When this is done I give them a quick dip in a LOS solution to darken the metal and then I give them a really good buff with some polishing papers.

Finished Earrings
And there you have it simple but beautiful earrings from two pairs of headpins.

Monday, March 23, 2015

Simple Soldered Prong Set Earrings

Some times simple really is best, so I thought I would show you how to make a pair of simple prong set earrings.

Tiny Prong Set Moonstones
You will need:

Something to prong set (I have used rough tourmaline)
Sterling silver wire 20 gauge
Sterling silver ready made earring posts
Sterling silver butterfly earring backs
Wire cutters
Hammer and anvil
Safety glasses and apron
Solder block
Easy solder paste
Pickle
Brass brush
Reverse action tweezers
Gas torch
Flat nose pliers
Flat file
4 way nail buffer

Materials needed
Choose what you wish to set, here I have used rough tourmaline, but you can use what ever you please, but you do need to make sure that what you use is strong enough. Measure and cut your wire so that it is about 3 times the length of what you wish to set. You will need 4 pieces per pair of earrings.

Hammer flat
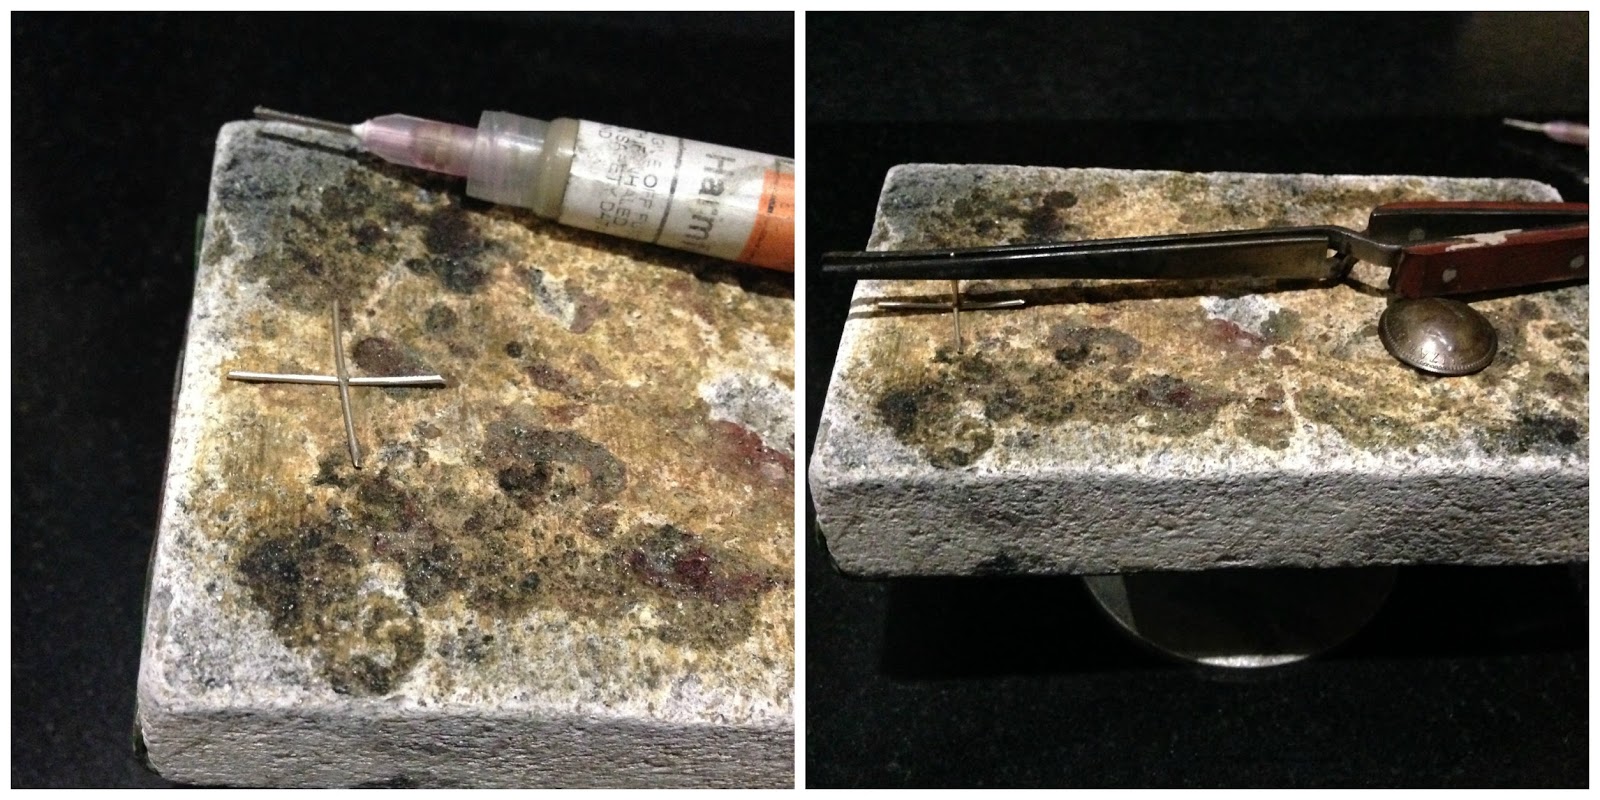
Lay two wires on your anvil so that they cross in the middle, then give them a tap with the hammer. The idea is to form little groves in the wire so they lay flat while you solder them together. It is important that they stay clean so that the solder flows so I normally give them a little rub on the ridge file on a nail buffer and then place them on the soldering block.

preparing to solder
Once on the soldering block, make sure you are all dressed up in your wonderful safety goggles and apron, then add a small blob of easy solder onto the hammered area. Using your reverse action tweezers grip the ready made earring post and prop it on the area you just applied the solder to. Take time to make sure that it is all positioned correctly (I use a coin to hold the tweezers in place). Solder carefully so that you don't melt the thin wires!

Prongs made
After soldering quench and pickle and then repeat to make the other earring. When both are made rinse and brush over with a brass brush. Using you stone as a guide and the pliers to do so, bend up the prongs so that the stone fits snugly into the prongs (not too tight you don't want to put too much pressure on the stone and risk breaking it).

Measuring the prongs
With your stone in place trim your wires so that are just long enough to curve over the top of your stone. Take your time to do this is is better to leave them a little long and have to re-trim them then cut off to much and not be able to set the stone! When you are confident you have the right amount of wire left, using your flat file, file the ends flat so that they will be nice and neat.

Prong set tourmaline earrings
Use the flat nose pliers to squeeze the prongs over your stone, do this very slowly and very gently, a little at a time, until you are sure that the stone is held firm and will not come out. Then I use my nail buffer to buff over the earrings and give them a beautiful shine. Simple as that!

Niky Sayers
Silver NikNats

Saturday, November 8, 2014

Make Your Own ~ On Wild Autumn Winds Earrings


It's no big secret that autumn is my very favorite season! I love everything about it—the bright colors of the changing leaves, the grey skies, the first frosty mornings, the bright starry night skies, and… even the bitter cold winds. For me, one of the most magnificent wonders of autumn is seeing the trees swaying in the gusty winds and watching their leaves take wing. Oh! And don't forget the flocks of migrating birds flying in the wild winds. Yes, the name of my studio was inspired by those gorgeous moments!

Today I'm making earrings again—care to join me? Good! And today, I'm working with a brand new component in leather made by my uber talented sister, Bethanne. If you don't know already, she joined my shop and the ranks of art jewelry element creators just a few months back—such exciting times!!

Okay, lets get creating…


Supplies you'll need:
- 22 gauge bronze wire
- 2 headpins
- 2 earwires
- 2 10mm carnelian coins
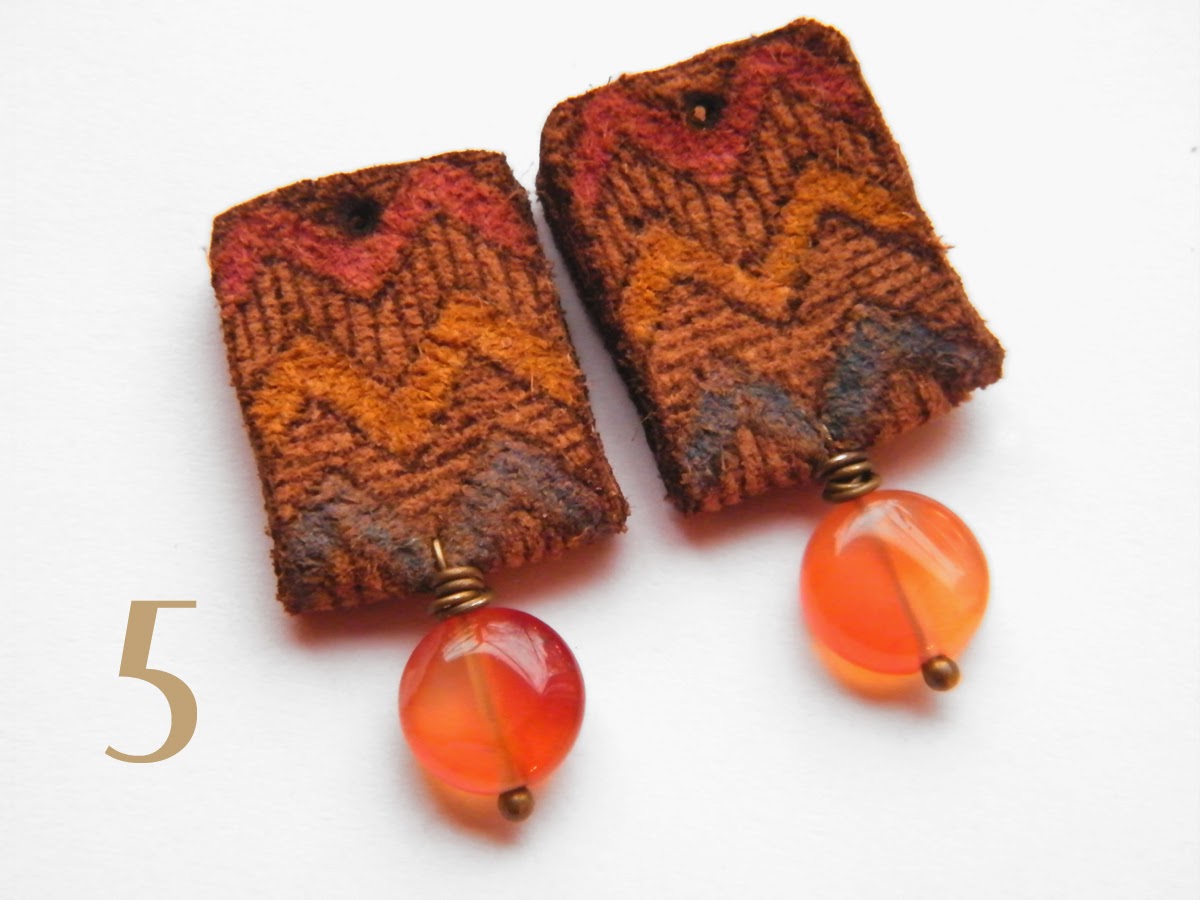
- 2 rustic chevron leather rectangles
- 2 raven black aster wheel disc beads
- 2 rustic tribal white seabird beads

* The chevron rectangles, aster wheels, and seabirds are available in my etsy shop.

Tools you'll need:
- tape measure
- wire cutters
- round-nose pliers
- flat-nose pliers
- bent-nose pliers
- large needle


1. Put the carnelian coins on headpins.


2. Fold the chevron rectangles in half and using a large pointed needle, pierce a hole going all the way through both sides of the fold.


3. Pierce the second chevron rectangle.


4. Put the headpins through the holes and bend straight down, leaving a little space above the carnelian for wrapping.


5. Wrap both carnelians drops.


6. Cut two 14 inch lengths of 22 gauge wire.


7. Sandwich the aster wheel between the chevron rectangle and put them at the center of the wire.


8. Wrap several times through the aster wheel and chevron rectangle to secure them in place. The holes are a bit smaller on the chevron rectangle than the aster wheel, so I wrapped two times around the aster wheel first… and then through the holes of the chevron rectangle a few more times to give me enough wraps to keep everything together.


9. Bend one wire up straight and wrap the other tightly around once just above the aster wheel. Place the seabird just above the wrap.


10. Form a wrapped loop at the top of the seabird. Don't wrap the wire beneath the seabird yet!


11. And now, wrap the wire at the base of the seabird. Wrapping the top loop first makes it easier to make the base wrap tight and consistent. Do steps 7 though 11 to make the other earring… add earwires, and you're done!

Enjoy your new earrings!!


Have a fabulously creative weekend!


Rebekah Payne

Saturday, April 6, 2013

Saturday Share:Spring Flowers...Eye Candy and Tutorial

Well, I don't know about you, but I am so ready for Spring to finally show her face!  Today, in my neck of the woods it finally is supposed to be warm and sunny.  This weekend is the noted Cherry Blossom festival in DC, but my cherry blossoms in the Maryland suburbs are definitely not festival worthy! Pretty, yes, but not quite there!


So, I decided to live vicariously by enjoying some Spring flowers created by some of my friends and colleagues and continue the Springtime tour started by Rebekah last Saturday!


All these wonderful components would be perfect to add to your AJE Earring Challenge creations!

Next are some gorgeous floral finished pieces...


Another way I have been satisfying my flower craving is to create some of my own..I have been playing with copper sheet and making some fun ones...here is one I created for my Bead Soup partner...


Here is a quick "how-to"...especially for metal newbies like me, who haven't gotten the hang of using a jewelry saw yet.

Tools/materials needed:
Copper sheet or discs - any size
set of needle files
sanding block
steel bench block
flush cutters or metal shears
texturing hammers or stamps
metal punches 
round nose pliers
dapping/punch set
patina of choice


  • use straight edge and draw lines for as many petals as you would like...they don't have to be perfect...
  • use metal punch and punch on the lines, making sure to be right on the edge...I usually do several passes until I get the depth I want.
  • with flush cutters or shears, snip the edges off to get the basic shape you want


  • repeat snipping on other side
  • using needle files, start filing...the triangle one works great in the beginning.
  • I like to finish with a soft sanding block...you can get them at the hardware store.  You can see mine is pretty well used!


  •  Using texturing hammers of your choice and steel bench block, add whatever texture  you like.  Alternatively, you can stamp designs, use brass design plates, run it through a rolling mill...I use my Big Shot! 
  • For the center, I used my center punch and made a bunch of divots
  • I usually dome mine at this point, and use my round nose pliers to curve the petals
  • These are center punched, antiqued with LOS and tumbled for a nice sheen.  
As you can see, there are all sorts of variations you can do with these...I hope you will give it a try.  I promise to keep practicing with my jewelry saw and will share that progress with you at a later date!  I am anxiously awaiting Melissa Cable's new book "Metal Jewelry in Bloom" to learn some new flower techniques! You can read a great review by our own Jen Cameron here.

Thanks for reading!  Happy Spring!

Melissa Meman


Saturday, March 2, 2013

Polymer Clay How To - exotic bloom kaleidoscope cane

Probably my most favorite technique in polymer clay is sculpting, but every so often I'll do some caning too. I'm all about intricate detail so of course, I love the fine details that can be achieved in caning.

My most favorite cane design I've done so far was a kaleidoscope "Exotic Bloom" cane. I actually first made it a couple years back… I think it was maybe my 4th or 5th cane. Beginner's luck possibly, but I was so thrilled with how it turned out and it ended up fueling so many more cane designs.


So, for your enjoyment today, I'm going to share it again! I hope it inspires you to get out your polymer and try something new!


It all starts with a skinner blend - this one is going to be the bloom's center. The blend is rolled up, reduced and cut into 8 pieces.


The arranged center. This kaleidoscope cane is made up of 8 identical pieces, so I only need to make half of the floral design.


Next I make the bloom petal blend and reduce it.


I roll the reduced blend through the pasta machine to make thin stripes. I wrap them over one side of the center and the bloom is finished.


Now for the leaves - another blend this time in greens and yellow. This is my favorite leaf blend.


I add veins and shape one half of the leaf - remember I only need to make half the design.


Here I've reduced the bloom and leaf so they're the same length.


And now for the brain cane! This one is my first. I have to say it turned out pretty well, but then again a brain cane is a bit hard to get wrong - unless of course you don't like the color arrangement ;-).


A quick run through the pasta machine to put the blend and green together. Then I fold up the cane, reduce it and cut it in thirds.


Fitting the brain around the bloom and leaf.


Almost finished.


One last blend to fill it in.


And now it all goes together - I cut the original "half" cane in half and put the two pieces side by side to form a whole. Then I cut this "whole" cane in fourths and put the pieces together forming a square.


A border of brown completes the cane.


So now you'd probably like to see what I made with the finished cane, right? I actually didn't have any finished creation in mind when I originally made the Exotic Bloom, but at that time I was in a decor making craze (yes, that was before I did lots beadmaking!) so naturally it quickly became a vase:


And then a pen. (Second one on the left.) My brother is a woodworker and convinced me to make some pen blanks for pen turning. We had so much fun creating these together!


And of course, I also eventually made some beads and jewelry.


What new things have created in polymer clay recently?