Recently, I ventured into the land of viking knit. It was fun and I enjoyed watching my piece grow longer and longer, then be compressed into a pretty chain after pulling it through the draw plate. The one thing that sort of stumped me was how to finish the ends. Hmm.
There are a lot of mass-produced end caps for just this sort of thing, but you know me...why use something so mundane when you can create something special for your design!
I looked around for handcrafted end caps and tried a few that I found...
You know I love wire...here is a simple and pretty way to end your piece with wire from our own Sue Kennedy...
I also love working with sheet metal. Keirsten Giles rocks the sheet metal end components and cones! Have you checked out the last tutorial she shared? So pretty and versatile...these can be used so many different ways! Take a few moments to drool over this necklace she created using her hand-fabricated metal ends for our Component of the Month for June. Amazing!
In the end, for my 1st ever viking knit, I chose to do metal sheet...they are much plainer than Keirsten's and turned out a bit big, but I like the effect and will play with that concept more in future work!
The next bracelet (created for our Component of the Month challenge for April), I decided to enamel some small brass caps I had that fit perfectly over the ends...
For my next bracelet...yet to be created/design still in my head, I want to use these! Just created them from copper metal clay. They were pretty difficult to form...you can see they are a bit wonky! I will definitely work on some more!
What do you like to finish your viking knit with? Would love some more ideas!
Originally my post idea was just going to cover cones. When I asked my team mates to show me their cones, of course, Madonna and the Coneheads sprang to mind! I decided to change the focus!
Melissa Meman
Melismatic Art Jewelry
Art. Life. Love.
Showing posts with label kumihimo. Show all posts
Saturday, July 19, 2014
The End Zone
Labels:
cones
,
end caps
,
kumihimo
,
melismatic art jewelry
,
melissa meman
,
viking knit
Wednesday, June 25, 2014
A Kumihimo Book Review via Photos of Finished and In Progress work
Way back in the cold despair of January, I mentioned one of the things I wanted to try for 2014 was kumihimo. I really never had any interest in kumihimo before. But then Kalmbach sent me the book Kumihimo Basics and Beyond to review. As I thumbed through it, I suddenly had the urge to try it. Also, that green necklace on the cover? I coveted that necklace. Bad.
After ordering the basic toolkit, I played with the technique using leftover sock yarn. I am honestly not a fan of rattail. I don't like the name, I don't like how it looks. That's how I ended up using sock yarn instead.
After braiding this really long cord out of sock yarn, I wanted to play with beads. So I started on this one.
I had very specific plans for it to hold a very special ceramic luna moth created by our very own Caroline (Blueberri beads).
Here it is completed
I used Vintaj cones and a toggle by Lesley Watt that she sent me as part of my bead soup a couple years ago when we were partners.
The amazing thing is that it has such presence, but is nowhere near as heavy as it looks.
The next one I did ended up not working for the purpose I had in mind (Lesley's darling ceramic shank button), but it's sitting on my bench waiting for the perfect project.
Instead I made this solid black kumihimo bracelet for Lesley's button and I think it's actually my favorite of all the braids I've made
I started this braid, then ran out of the Czech glass beads. I just got some more, so plan to finish it soon. The Czech glass is alternated with a hematite like size 11 square seed beads. I don't have anything in particular planned for this braid. Time to search my stash or make a special bead for it.
While waiting for my Czech beads to come in for the piece show above, I started another braid. This one is going to get torn apart. I was impatient and used the very thin cord I have on hand and the beads just aren't laying nicely enough for my taste. They look to loosey goosey. I should have just waited for the correct size cord to arrive.
I was making this braid specifically for Rebekah's gorgeous polymer clay bead.
While this post was supposed to be a review for Kumihimo Basics and Beyond, I thought showing what I've made using the book (and only the book) for instruction would be review enough. I went from knowing absolutely nothing whatsoever about kumihimo to making what you see here.
If you're a beginner trying to figure out whether this book is for you, I think the most important fact to note is that the author, Rebecca Ann Combs, liberally sprinkled the book with helpful tips. Honestly, kumihimo isn't difficult to do. The tips she provides makes all the difference in the world.
If you're experienced in kumihimo and wanting to do advanced techniques, use different numbers of strands or something other than the round kumihimo disc for braiding, this book is not for you. If you're a clueless beginner or someone who has done a little bit of kumihimo and wants to build on your skills, I highly recommend this book.
-Jen Cameron
Glass Addictions
Labels:
art beads
,
book review
,
jen cameron
,
kumihimo
Thursday, February 20, 2014
Kumihimo with Wire
Reading Susan's post
earlier this week about her technique for finishing kumihimo ends
gave me a push to try something I've had on my 'to do' list for ages.
Kumihimo with wire.
I visited the Stitch &
Hobbycraft fair in Manchester about 15 years ago and was lucky enough
to meet Jacqui Carey who was demonstrating the art of Japanese
braiding. I was instantly mesmerised. She explained the origins of
the art before going on to demonstrate on a beautiful wooden marudai
with wooden bobbins and miles of gorgeous hand dyed silks.
Kumihimo braids were
originally used by Samurai soldiers. They were used to connect the
various pieces of armour. Being made from silk, they were strong,
light and allowed the soldiers to move freely.
With the abolition of
the Samurai class, the focus then shifted to fashion. The braids were
used to make obi-jime, the ties used around the fabric sash of a
kimino.
And more recently, the
marudai has been adopted by jewellery makers for making cords in
their designs.
Sue's beautiful
necklace - http://www.suebeads.blogspot.co.uk/
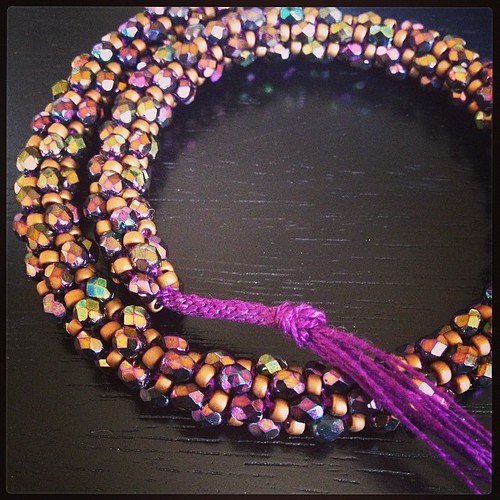
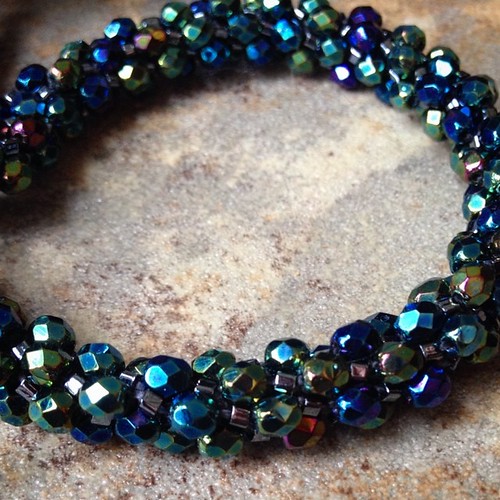
One of my own kumihimo
creations with beads.
After the
demonstration, we were given the opportunity to have a go of the
Marudai and purchase our own. My budget at the time wouldn't stretch
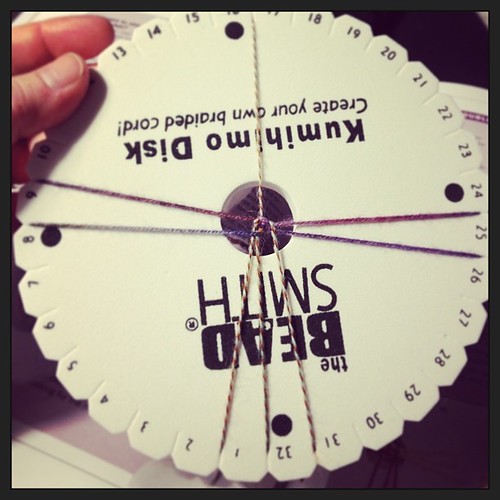
to the traditional wooden design (it was gorgeous, but a fortune!), but I absolutely had to have one, so I got an acrylic version with plastic weights.
It's really difficult
to take a picture of with it being see through, but hopefully you can
make it out.
It did have a pretty
satin bag for adding stones to weight down the cord from the centre,
but that has been misplaced, so I've repurposed and old knitting
machine weight that has the same effect.
I've used 0.4mm copper
wire and wrapped it around the spools, these are connected in the
centre and the weight added to draw the finished cord through the
centre hole of the marudai.
To start, I tried with
a simple weave, square braid. It's not quite as easy with wire and I
found that to get a neat finish, you had to be careful to keep an eye
on the centre of the cord as it makes up. The process of weaving is
to place your bobbins in pairs at North, South, East, and West. They
are then moved into different positions across each other to create
the cord.
Here you can see it appearing below the Kagami (mirror) of the marudai.
As the weight touches
the bottom, the cord can be wrapped up to keep the tension.
After trying a simple
weave, I got a bit braver and decided to try a more complicated flat
weave. You don't need to set up the marudai again with the wire, just
start in the new pattern and then snip the sections off when you're
finished.
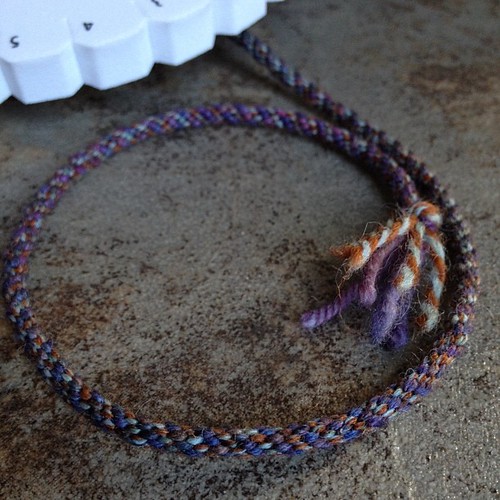
I really like how the
flat weave turned out, it's not the neatest, but reminds me of Celtic
knots. I think a thicker wire could make a better finish. I need to order more wire and experiment!
The top weave here is
the square braid. If you look closely, you can see on the left hand side where I changed
the weight. The heavier the weight, the more it will draw the wire
through and the longer the stitches in the weave, a lighter weight
will make them closer together.
The final square braid
ended up around 2mm thick. I snipped the ends and pulled it through a
drawplate to pull in any loops that were a bit wider than they should
have been.
I raided my stash for
anything with a hole large enough to fit over the braid and found
some ceramic beads I've been hoarding from Lesley Watt. They were
perfect. A Bit of liver of Sulpur to darken the copper and a bit of a
polish and here's the (nearly) finished design.
I was hoping to use Sue's technique for finishing the ends, but the weave was tighter than if it had been done in thread, so unfortunately the wire wouldn't push through. To hold the ends, I've just wrapped them with more wire for now.
If you'd like to find
out a bit more about using a marudai, I can recommend Jacqui's book,
Beginner's Guide to Braiding.
Her UK shop with
marudai's, supplies and more books can be found here
http://careycompany.com/
Thanks for reading!
Caroline
Labels:
blueberribeads
,
geisha
,
japanese braiding
,
kumihimo
,
marudai
,
samurai
,
weaving
,
wire kumihimo
,
wire wrapping
Subscribe to:
Posts
(
Atom
)