Showing posts with label glass headpin. Show all posts

Wednesday, February 5, 2014

About my not-so-secret addiction: Murrini

I have a problem....an addiction. I'm pretty sure if my family knew the extent of my addiction, they would probably have an intervention. Until they discover my secret, I have no intention of ever giving it up. Because I'm not a quitter.

What am I talking about? Murrini. 

What is murrini? Basically it's a glass cane that can be simple, or very complex pictures in glass. When the cane is cut, the design is revealed. These little slices of glass cane are used in the creation of glass beads, pendants, rings, or even dinnerware. 

Here's an uncut cane by West County Glass on Etsy
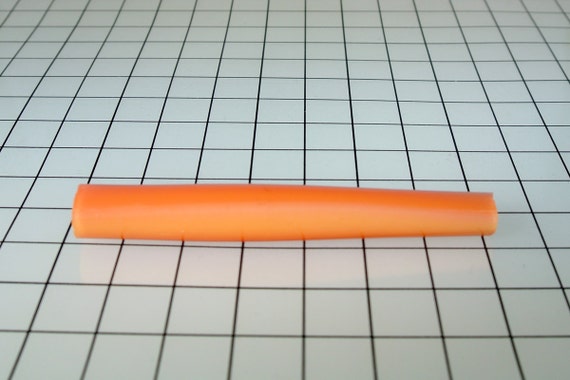


Here's what the design looks like through the entire length of the cane: 
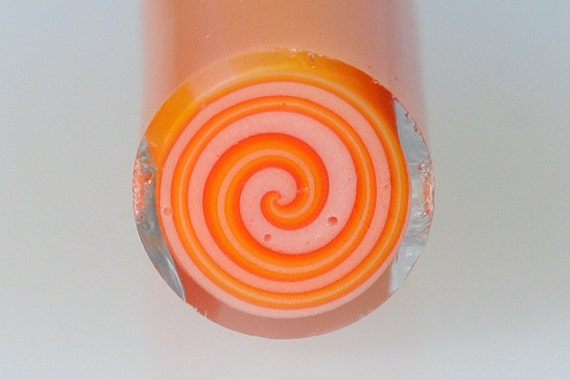


Even if you aren't a glassworker, you can tell that these things would take patience. More patience than I possess. That's why I buy murrini already made and cut up for me so I can make the beads and not mess around with making cane to make beads. 

My current obsession (and one that has been going strong for a while now) is to make headpins with the murrini. Here's a recent batch:


Newest headpins. Really love the pop of bright color during this really cold snowy winter. #lampwork #glassaddictions #thisartistslife

I also used them on the charms I made for the charm swap and Beads of Courage benefit auction:


Jen Cameron 2013 Art Charm

How about using some on a skeleton key? But of course!


Lampworkified key from yesterday's very short torch session. #glassaddictions #lampwork

I thought maybe I would show how I work with these little guys.

First of all, when introduced to an 1800 degree flame, they have a tendency to pop apart. When working with "soft" glass (my glass of choice), it is a little cranky about being cold then put into a flame.

So to start with, I will pre warm them on a candle/mug warmer or even on top of the kiln when it's heated up to the temps (950F) that I garage my beads at before doing the anneal cycle.


Murrini warmer aka candle/mug warmer.

oooh! Look at all the pretty murrini (and no, this is nowhere near how much I really have on hand any given day...).

When I have the base ready to go for a murrini slice, I pick up these angled forceps


Angled forceps

Grab the murrini by the edge (this is kind of tricky). And hold the side I want to put onto the bead above the flame. Even though I've pre warmed the murrini, they will still pop and crack apart. I hate it when that happens. So the intro has to be slow and gentle.


Murrini next to flame

But it's a dance. While I'm getting the murrini warm, I also need to spot heat the base so the glass is sticky and adheres to the murrini slice. If the murrini slice gets too warm while holding it with the forceps, it will stick to the forceps and possibly get distorted (depending on how hot I let it get). If it isn't warm enough, it will crack when put on the base or not stick at all.

One of the skills vital to a lampworker is learning heat control and how to "read" the glass. And just like anything else, it gets easier the more you practice and the more mistakes you make. And trust me, I've made a lot.

These little slices of glass make me so happy. And when I make a bunch of them, it's like a bouquet of tiny round flowers.


Headpins I made a week ago that still need to be pickled. #lampwork #glassaddictions

Glass headpin bouquet #lampwork #glassaddictions

Stay warm, friends!

-Jen Cameron

Wednesday, December 11, 2013

Easy Earring Tutorial

I made these super easy earrings a few months ago and thought I would share how to make them.


Earrings using my headpins and Diana P (Suburban Girl) ceramic discs.

I adore these very rustic discs that Diana P makes (find some here and here, here and here.). After making these earrings, I bought a couple more pairs because I love them so much.

To make these, you will need:

-Glass headpins by moi (Jen Cameron) that look their best when viewed from the top down (some look better from the side). I have no headpins listed right now, but probably about 50 of them sitting in a box in my studio if you're interested.

-Ceramic Discs by Diana Ptaszynski (Suburban Girl Studio)

-Ear wires (I used Vintaj)

-plus basic pliers, hammer and bench block. Possibly wire cutters 


Earring tutorial #aje #artjewelryelements #glassaddictions #lampwork


Instructions:

Just a warning, it will take longer to read the directions than to make a single earring.

-If you are particular about length, measure about 3/4" to 1" length of wire from behind head. Otherwise, eyeball it. The length is determined by personal preference and also how far from the edge the hole of the disc is.


Measure twice bend once. #aje #artjewelryelements #lampwork #glassaddictions


-Bend wire at the length determined in the last step. Gently fold wire into a U with the disc at the bottom of the U and glass head on the short wire side in the front of the disc.


Earring tutorial #artjewelryelements #aje #lampwork #glassaddictions

-Bend the end of the wire containing the glass head and cross it over the other leg of the U. Decide where you would like the wrap would be. Grasp both legs with needle nose pliers and wrap the head around the other leg until it's facing the front again.


Earring tutorial #aje #artjewelryelements #glassaddictions #lampwork


-It should now look like this:

Earring tutorial

-Then you will make a loop to hang from the ear wire. Bend wire to one side.


Earring tutorial #aje #artjewelryelements #glassaddictions


-Make loop using round nose pliers.


Earring tutorial

-Once you've done that, you will make messy wraps above and below the glass head. This adds an interesting design element and locks the head into place.


Earring tutorial #aje #artjewelryelements #lampwork

-I hammered the loop holding the discs and the loop holding the ear wires for this pair.

-Repeat for the 2nd earring.

-Wear them. Or gift them, if you can stand to part with them...

Earrings
What do you think of the bark? It's my new photo prop. 

Have fun with this and show me what you make!

-Jen Cameron

Glass Addictions