
A couple of weeks ago I went to IKEA with a friend of mine and found several things that I will be re-purposing for use with polymer clay. My best find was a large set of cookie cutters that cost way less ($6) than the cutters that are made especially for polymer clay. Some of the cutters are too large, but most of them will work quite nicely. They come in a great, round, plastic storage box to keep them organized when not in use.


I didn't know if I should apply the colors before or after I cured (baked) the clay, so I tried it both ways. I built up layers of colors on the earring pair, using various shades of blue and purple chalks.
Then I cut out a rectangular and round shape for pendants. I used rubber stamps on these for texture, but I planned to add color to them after curing.
I placed all four pieces on a cookie tray, inside the toaster oven and set the oven for 275F for 30 minutes. After 30 minutes, it was still really bendy, so I baked it for another 10 minutes and ended up blackening all four pieces. :(
At first I thought the earring pair might be salvageable. I could see the color layers on them and I liked what I saw. I made them into earrings, but from even a short distance they looked just plain black.


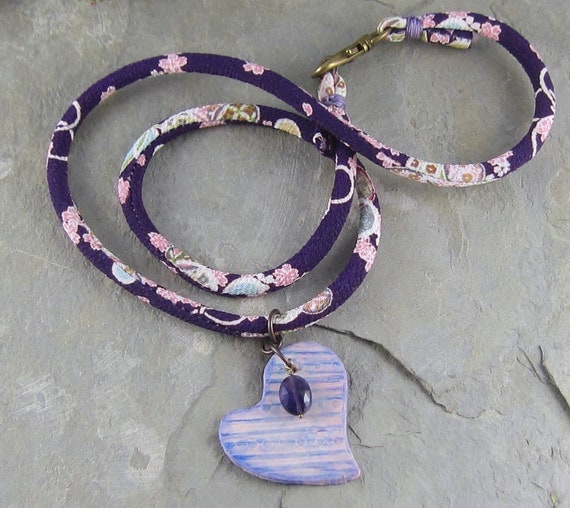
I did some more reading online and in a few days, I tried again. This time I decided to use the heart shaped cookie cutters from IKEA, since Valentines Day is rapidly approaching. I textured the clay with a stripe and dot rubber stamp and cut out one large heart for a pendant and two smaller hearts for earrings. I built up layers of pink, purple and violet chalk and edged the sides with the darkest purple.
A friend had suggested that I bake my pieces on cardboard, as sort of a buffer to the direct heat. I also read that covering your clay helps prevent browning. So I placed a piece of cardboard on the cookie tray and put the clay on top of that, then I placed an inverted foil loaf pan over the clay and baked it at the same temperature. Perfect! I was ecstatic!
After baking, I used Prisma colored pencils to highlight parts of the hearts and then sealed it.

What new techniques are you excited to explore this year?
Linda
Linda Landig Jewelry – ArtFire
Linda Landig Jewelry – Etsy

