Since Bead Fest is in a mere few days, I am rerunning this popular post!
When I posted my necklace design with Jenny's Component of the Month, I used
kumihimo braid. I made a thin braid with C-lon and didn't want to use a bulky
end cap, so I decided to figure out how to wire wrap the ends. Some people were
interested in seeing a tutorial on how to do this, so here it is! The one I
made for the piece was a messy wrap - here I'm going to demonstrate a fairly
neat wrap!
This tutorial
is really similar to any wire wrapping you would do with ball chain, rhinestone
chain, or any material that doesn't have a clear and viable
loop.
Materials Needed: Kumihimo braid, 6-8" patinated copper
wire
Tools Needed: Two pair chain nose pliers, round nose pliers, wire
cutters, embroidery scissors
Here is the braid and the wire. I think I
used 22 gauge wire - it needs to be strong enough to hold your cord, but
workable too!
Slide your wire
into the middle of the braid - make sure that you get it in between strands of
the cord, because that will be important to hold your work. Here you should
have a sort piece of wire at the top (maybe 2 inches total), and a longer piece
at the bottom for more wraps.
Make a bend in
your wire so you basically have a loop. Here you can really see where I
inserted the wire.
Take your chain
nose pliers and grasp the cord and wire - make sure that the pliers are in
between the two sides of wire.
Hold
the cord and wire tightly with the chain nose pliers - use your second pair to
start wire wrapping the cord. If you want it neat, make sure you get the wraps
as close together as possible. You can also use your fingers to do this step -
this will result in a more messy wrap.
Keep wrapping
until you're happy with the length of the wrap. You can use the chain nose
pliers to tighten up the wrap and make the loops closer together.
Next, cut off
the braided cord above the loop you made initially with the wire using
embroidery scissors. You can tidy this step up later.
With the round
nose pliers, make a wrapped loop with the top section of wire.
Wrap the short
end of wire down to meet the other wraps you already made - again, it's up to
you how many wraps you wish to make.
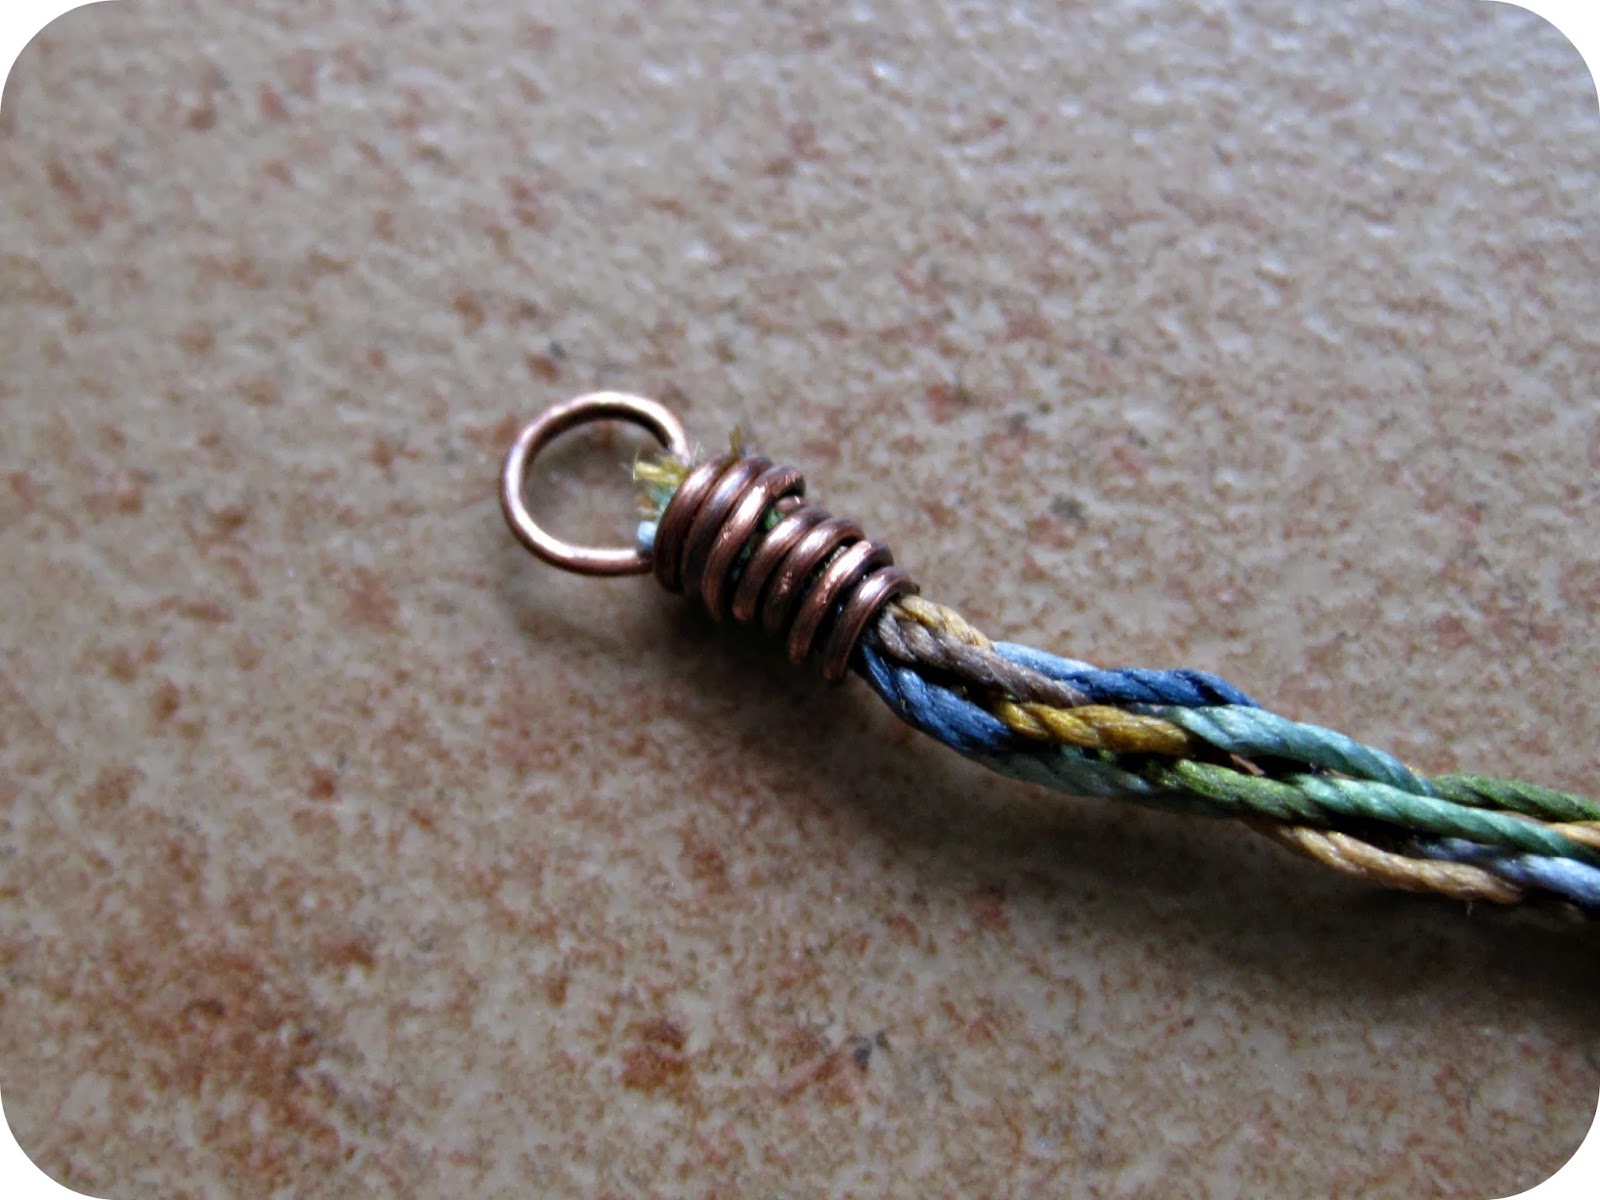
Here's your
finished wire wrapped end. Not really too hard! I would use my thread burner
to just tidy up the little pieces of braid that stick out through the wrap. You
can finish your wire any way you want - I like to hammer the loop to give it
some strength and character, the way Deryn Mentock does.
And
there you have it - another way to finish a kumi brain end without having to use an end cap!


I have done something similar for viking weave ends too - especially since I made the necklace out of copper and at that time copper bead caps/cones were fairly scarce.
ReplyDeleteI would also dab a spot of jewelers glue on the ends and bit of wire 3rd photo from the bottom.
But VERY clever and I am sharing this post with my other kumihimo fan friends!
So great looking. A fabulous way of ending kumihimo handcrafted & gorgeous! So much nicer than using commercial endcaps. Thank you, Sue.
ReplyDelete