Showing posts with label studio organization. Show all posts

Saturday, January 10, 2015

Saturday Share - Recycle, Re-Purpose, Re-Use!

If  you are like me... a jewelry designer, component maker, art bead hoarder, project procrastinator with lots of unfinished pieces, and on a bare-bones budget, you may find affordable storage to be a challenge.  I have lots and lots of bead boxes and shelving, but since my main studio is upstairs, and my family is downstairs (and I like to spend time with the fam), I do a lot of portable creating.  

After looking around for an affordable solution, I found that going through the recycling bin or the kitchen cupboards led to some great storage/organizing solutions, especially for the short term! I thought I would share a few with you today.  Pardon my mess;)


Above are plastic food trays in 2 different sizes.  These are so versatile and useful.  I have one that has scrap silver, one for scrap copper, some have unfinished projects, some just have odds & ends from cleaning up my work space.


Plastic trays from frozen entrees for kids are cool, since they have little compartments for several things.  Unfortunately, different types are different sizes so they don't stack.


These are some of my favorites..they are from Lunchables and they stack so nicely!  You can use these to separate different projects that might be in different stages of completion. I have quite the collection of these hiding here and there!


These are also from Lunchables, but a different type. Perfect for small collections or projects. Okay, don't judge...my 13yo really likes the pizza ones and you know how picky they can be sometimes!


Another favorite, water bottle caps.  Perfect for tiny beads that you don't want to get mixed up with everything...they are small enough to put into one of the above trays to add another level of separation!  I like adding one to my project trays to collect little wire snips, especially sterling!


Here we have the ultimate poor woman's organization tray...the styrofoam egg carton!  Again, totally stackable, perfect for when you are cleaning your area and are separating stuff.  I put these in a couple of drawers on my rolling work station in the kitchen.  Its always fun to pull them out and find little treasures you forgot you stashed there. Obviously, this is not for heavy beads, but once a tray gets bent or broken, just recycle it and eat some more eggs for the next tray!


Ferraro Roche, anyone?  No, not fine assorted chocolate confections...


The perfect little nooks for unfinished things, or little collections of beads you hope to work with, and bonus, there is a lid! This and the egg carton scenario were actually inspired by Heather Powers'  Muffin Tin Challenge, but I like to actually use my muffin tins for baking!


Hubby and I shop at Costco a lot and buying things in bulk leaves you with a lot of pretty sturdy boxes.  These 2 top my aforementioned rolling shelf and hold my tools.  The square box also has an anvil and a steel block that makes it heavy enough to stay put!

When I decided my post today was going to cover this topic, I polled my AJE teammates to see if they used any recycled or re-purposed items in their studio.


Lindsay loves using the plastic lids from Dannon yogurt cartons to keep those pesky tiny seed beads corraled.  After she is done, the lid is flexible enough to fold and pour the beads back in their bag without creating a mess!


Linda repurposes these little flexible silicone cups intended for cooking for tiny beads as well.


Linda also uses these adjustable spice racks for storing glazes.

Several folks like using inexpensive cookie sheets for beading - they stack nicely!

Jenny uses antique dishes and cigar boxes for all types of purposes in her studio.


Lesley likes to recycle these tubs that used to hold washing liquid tabs - perfect for 1 lb of clay!

How about you?  Do you have an interesting use in your studio for recycled or repurposed items?  We would love to hear!


Tuesday, May 20, 2014

At last, my love has come along!


Well, OK, maybe that's overstating it a little, but I finished rearranging my working space and I really did feel like breaking out in song at the end. I love it that much.


You may remember that in a recent post, I explained how my space wasn't really working and asked for suggestions about how to make it better. Thanks to everyone who weighed in - several of you in Facebook chats, asking great questions! I spent three full days moving furniture, sorting and tossing, and rearranging all my storage, and I could not be happier about how it turned out. There are a few small things that still need to be done, most of which require a trip to Home Depot or Lowes, but it looks good enough that I can give you a quick tour.

Studio Redo-1
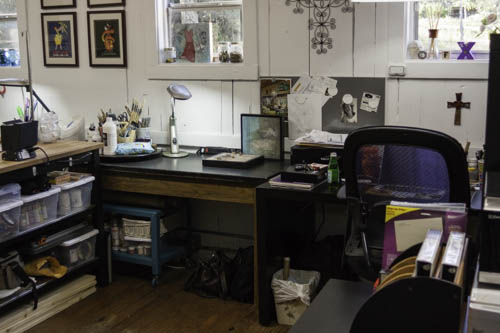
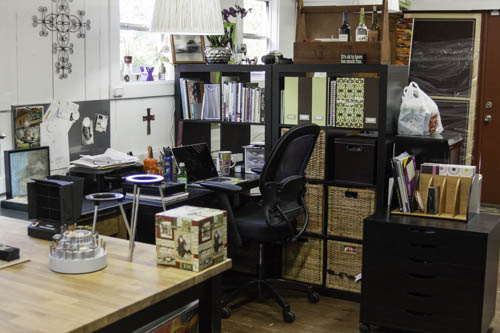
At the entrance to my area. The chair is at my desk, and the table to the left is a new addition, where I'll be able to do mixed media work. To the left of the mixed media center, you can see the back side of my soldering station, which I moved to the middle of that long wall - and now I have access to all that great storage!

Studio Redo-2
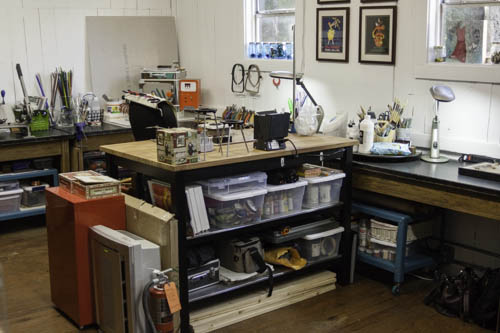
Better view of the back side of the soldering station. I have my HEPA air filtration unit on the end (the silver box behind the fire extinguisher) and a fume extractor on top. Need to take good care of my lungs! The shelves underneath and on the cart (under the table) contain mixed media supplies - paints, paper, ephemera.

Studio Redo-3
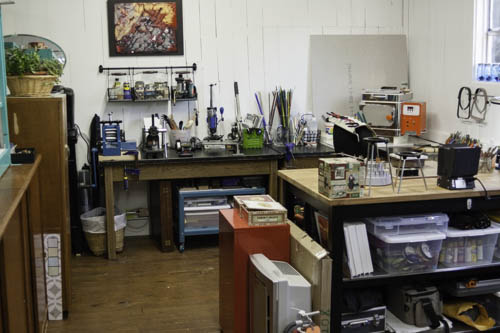
Behind the soldering station is my metals area. That table under the painting is another new addition, which will hold all my large equipment. (It used to be behind my desk area, which was a serious pain in the butt to get to.)

Studio Redo-4
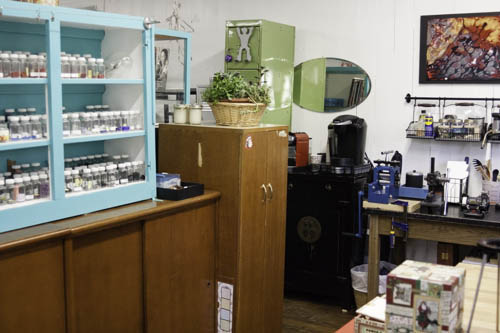
Continuing around the area, you can see the coffee station that Gail and I share (essential to the creative flow, I tell you!). I put that taller cabinet, which contains a lot of my glass, next to my bead storage and sliding door storage - I didn't dare move those!

Studio Redo-5
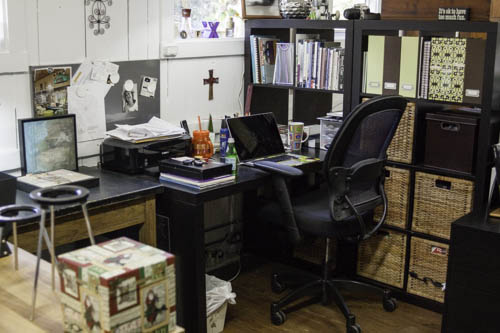
Standing in front of the glass storage, looking back at the desk area.

Studio Redo-6
And a little closer. It feels much roomier, I think because I removed the equipment table from behind my chair.

Studio Redo-7
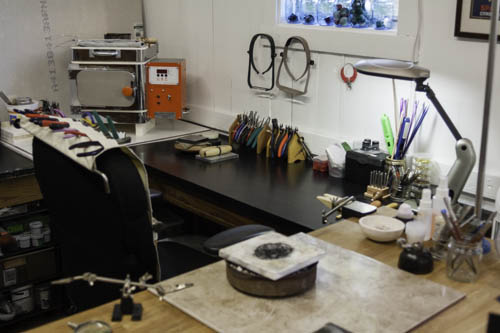
My metals area. Sigh! I just love it - everything is within reach, and yet there's tons of room to lay things out. Underneath the soldering station, on the metal's side of things, I put up hooks and hung all my wire coils up where I could get to them easily. And you can see that the kiln is still there, but the huge table it was on is gone - this is much more accessible for enameling and small glass work.

Studio Redo-8
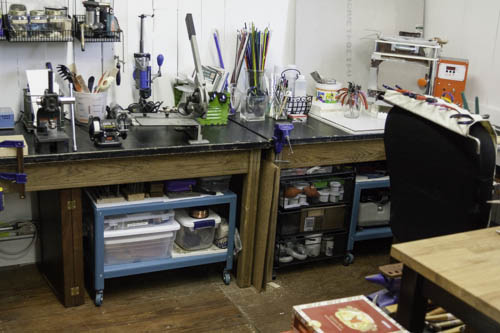
A better look at the equipment table. You can see that the rolling mill (left) has been bolted to a piece of wood which is clamped to the table. I have to do that with the arbor mill and the bench shear, but need to get the wood first.
Studio Redo-9
I have (from left to right) metals storage, enamels storage, and glass storage underneath this run of tables - it's all on casters and pulls out for easy access. Hanging over the back of my metals chair, you can see my bench apron - it's going to be mounted to the table under the vise, so it will cover the enamels and glass storage, but it swings out for easy access to whatever is behind it. It will keep all my hammers close at hand. (I broke the hinge trying to install it and need to get a replacement. Ugh.)
Studio Redo-10
Another look at all the awesome storage under the soldering station, on the mixed media/office side of things. I am so happy to have a dedicated space to work on non-jewelry things!

So there you have it: a completely reworked space that actually has more working surface area than when I started. I literally giggled when I took these pictures - it makes me that happy. Of course, it won't stay this clean for long. I have a zillion deadlines that slid last week while I was working on this so I have to buckle down and get to work... STAT!

I hope this studio tour inspires you to take a second look at your studio. How can you optimize the space and storage you have? Is there some one storage-related investment you can make now that would be a game-changer? (For me, it was moving that soldering station and adding two more tables around the perimeter of the area.) What would make your workflow better and your space more enjoyable to work in? What's stopping you from taking that step?

Looking forward to hearing about what changes you make in your spaces! 

Until next time -


Tuesday, April 22, 2014

Dysfunctional Studio Tour

I've been "living" in my new Roadhouse Arts studio space for almost four months now, and while there's a lot that I really love about it, there are also some things that aren't working for me.

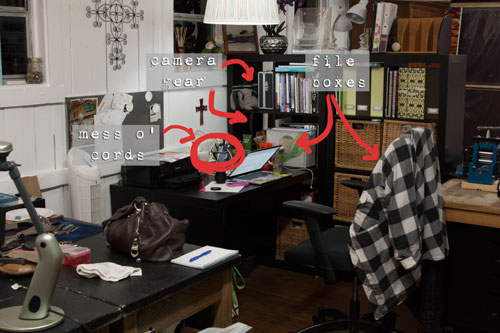
My little admin area needs to be reworked. I spent a huge chunk of the day yesterday working through the paperwork that had accumulated, both for my own business and the Roadhouse side of things, and everything is caught up. While that makes me happy, I think the backlog started because the workflow wasn't well-organized to begin with.

Admin-Area

I have two file boxes now, and the segregation of things will help. The smaller one contains the stuff I get into more frequently; the larger one is longer-term. But I still don't have the right space to stash either of them - my camera bag and equipment is taking up two entire cubbies in my wall unit. And I don't like the nest of cables and power strips on top of the desk. I just ordered this remote switch and I'm hoping it will solve the problem while still allowing me to turn lights on and off without having to crawl under my desk.
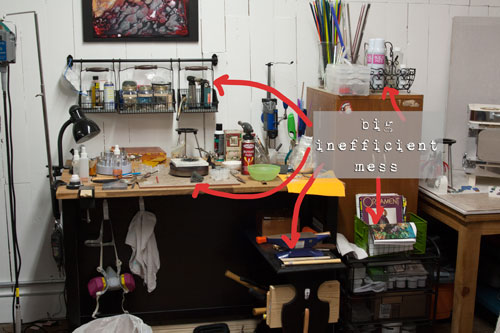
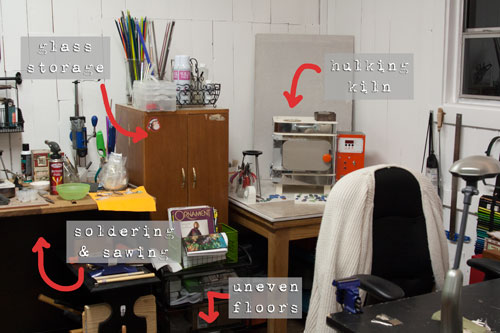
My metals and fabrication area would benefit from a little tweaking. I have an Ikea kitchen island set up for sawing and soldering, so I can see things close up without having to bend over or wear my magnifiers.  The problem is that most of the great storage the unit includes (two metal shelves) is pushed up against the wall so I can't get to it.

Soldering

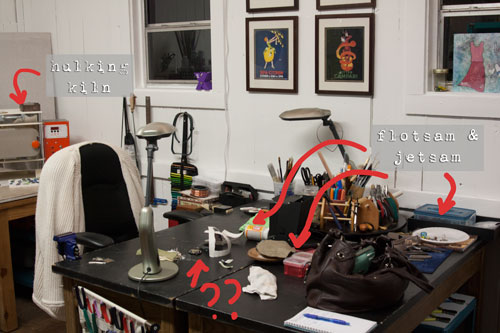
I also have two old science tables pushed back-to-back that are supposed to be for layout, design and fabrication work, but as you can see from the photo, they wind up being a collection area for all manner of flotsam and jetsam that have little to do with current projects.

Working-Table

I had convinced myself that rolling my chair between the two stations would be fine, but the truth is that the floors in this old building are so unlevel that "rolling" is an exercise in frustration. This also makes pulling the island unit out to get at the long-term storage a serious pain in the neck, because everything (and I mean every.single.thing) has to be shimmed to within an inch of its life in order to avoid punches, beads, wire and any other curved or roll-ey thing from just making a run for it the moment it gets set down.

Glass-and-Kiln

And then there's my kiln and glass area, which just sort of squat in the corner taking up a bunch of room. I don't think it's an efficient use of space, but I'm kind of stuck because that's where I had the dedicated plug installed for the kiln. And I don't think I'm making the best use of the space along the one main wall.

I'm considering a pretty significant reorganization that includes separating the two science tables and using one to create an "L" shape with the island sticking out into the space. This would put the storage shelves on the island facing my admin area, where I could use the extra storage. The other science table would go where the island was and be primarily for mixed media work. (That's a subject for another post. "Living" with mixed media artists is starting to mess with my head, I tell you!!) I could also use it for larger project layouts, when I have multiple or complex pieces going.

So... any suggestions? I'm really open to any and everything - the space just isn't working well, and it's not because I don't have enough to work with. Let me know what you think and I'll update you in a future post.

Until next time -


Friday, February 14, 2014

Reorganizing My Jewelry Studio

If you've been following my posts then you know that I've been experimenting with polymer clay and torch fired enameling recently.  I've also been slowly adding a few metalsmithing techniques to my skill set.  This is all wonderful except.... When I set my studio up in our spare bedroom I had mega-tons of beads, but no torches, hammers, enamels, polymer clay, pasta machine etc.  Well you get the picture.

As I added more things that didn't have a designated space, my computer desk got overwhelmed with junk tools, metal and clay.  My computer got ousted to the living room, my studio floor became littered with papers, magazines and whatnot.  Add this to the fact that I am  not a naturally organized or orderly person and you have chaos! 
It was getting so bad that I couldn't even find space to work. I was becoming annoyed and thus began avoiding my studio. I finally had enough!  So I began burrowing out of the mess.  Unfortunately I didn't take "Before" pictures right away.  The pictures I do have were taken about a week after I began Operation Studio Renewal.  You know how things actually get worse before they get better?  These pictures attest to that.

I'm not all done yet, but I thought I'd post some mid-project pictures.  Maybe it will motivate you to tackle whatever organizing your studio may need.  And I know it will help me follow through to the end of the job.

I'm actually typing this post at my desk, but here's what it looked like near the start of the project.
And this evening it looks like this.
Here's a daytime shot from Wednesday this week.  I've got the polymer clay pasta machine on the left side of the desk.  It can stay set up there, but out of the way. 
The  polymer clay and tools were scattered all about, but they are now nicely corralled on shelves to the left of the desk. Here's what the shelves looked like before I went to work on them.
The shelves were not a complete disaster, like my desk was.  They were somewhat organized, but I needed to make room for the polymer clay and enamels without having to invest in new shelving or expensive storage items.

Another goal I had was to reduce visual clutter, as well as physical clutter.  I think I've accomplished both goals here.
Let's start with the top shelf.  My before picture shows that I had the same white plastic storage drawers up there initially, but they were all stacked at varying heights.  And then there were smaller purple storage boxes stacked up on the right side of the shelf.  Its hard to see in the before picture, but on the left side of the top shelf was also a round plastic jar of furnace glass beads.

I removed the purple boxes and the furnace glass and I spread out the white drawers so they are all the same height.  Now the eye can rest on that shelf comfortably and not be jarred by all the conflicting heights, colors and storage boxes.  The only non-white item now is a wood and papier-mâché diorama from Mexico that is on top of one of the storage drawers in the corner.

The 2nd shelf down is mostly empty right now, but that's OK.  I'm not done cleaning the whole studio yet and I might still need the space.  One trick to give yourself extra space for smaller items is to use hanging wire baskets that hook onto the shelf above.  You can see that I've used one of these above the second shelf.
I'm quite pleased with the 3rd shelf.  I picked up a number of these inexpensive, white cardboard boxes at IKEA.  They are a bit tedious to assemble, but they are sturdy, come in at least 3 sizes and are white, to go with the other things on the shelf, (though they come in colors too).

I moved all my polymer clay supplies into these boxes and used my trusty label machine to label each box.  There is still extra room in the boxes for more, as I expand my stash.
 I've also organized a shipping station for items purchased in my online shops.  I used to keep padded envelopes, bubble wrap and tissue paper in baskets under my work table.  Thank you cards were next to my work table.  Business cards were on my antique printers cabinet, postal tape was in the kitchen.  Oy vey!  One of the cardinal rules of organizing is to put like with like.  This is so much better!
You are probably curious about where I actually make my jewelry.  I've just barely started organizing it, so its mostly still a wreck.  But you will notice that I've cleared a small bit of real estate in the center of the table and even this little work space has re-sparked a creative drive in me that I welcome.

So that's it for now.  I'll do an update when I finish the task.  Do you have any handy organizing tips to share with us?  I know that many creative types struggle with organization and we can all benefit from one another's hard won tips!  Do share!

P.S.  Happy Valentines Day.  AJE loves our readers!


Linda
Linda Landig Jewelry – ArtFire 
Linda Landig Jewelry – Etsy