Showing posts with label beginning ceramics. Show all posts

Friday, June 12, 2015

Glaze Day With A Natural

In my last blog post I wrote about creating stoneware pendants with my sister in law.  I shared the process for forming the pendants and today I'll be sharing her glaze process and the outcome.
 Ceramic work involves 2 (or more) kiln firings.  The first firing is called the bisque fire. Bisque refers to ware which has been fired once and has no chemically bonded water left in the clay. Bisque is a true ceramic material, although the clay body has not yet reached maturity.  It still has a bit of porosity left, which is needed to help bond the glaze to the ceramic ware.  The picture above shows the bisqueware which my sister-in-law, Heike, made.
We were working under a bit of a time pressure. We had to get the bisqueware glazed, dried, fired and cooled all in one evening and the next day, because my sister and brother-in-law were flying home to Germany the next morning. After dinner that evening, I covered the dining room table with a big sheet of plastic that had once covered a large item that we had ordered.  I decided that Mayco Stroke & Coat would be an easy glaze to begin with.  The picture below shows my Stroke & Coat glazes lined up on the plastic covered table.
Heike got right to work.  She was a natural and needed no guidance with regard to ideas for glazing.
 (By the way, the necklace she is wearing is one that I had made her several years ago.)
 I took the picture below when she was part way through her glazing.  Glazed stoneware has a kind of chalky look to it before it is fired, as you can see here.
When Heike was done painting on her glazes, we placed the bisqueware on an old cookie sheet, to bring it out to the garage, where my kiln resides.
The next morning we arranged the bisqueware in the kiln. The pieces that are lying on the bottom shelf are unglazed on the back. The glazed parts cannot touch anything else or the pieces will fuse together in the heat of the kiln. The five items on the rod were mine and had glaze on all sides.  The rod keeps them from touching anything else.
Its always hard to wait until the kiln is finished firing and starts to cool down.  Heike could hardly wait to see how her pendants had turned out.  When the kiln had finally cooled to about 300F, we cracked open the top, just bit, to speed the cooling a bit.  Heike peeked in, as excited as a little kid at Christmas!
 After what seemed like forever, the stoneware was finally cool enough to handle. Unfortunately this next picture is out of focus, but I've included it anyway, because you can still see the look of pure delight on Heike's face as she unloads her creations!
 Heike placed her pendants on the old cookie sheet and brought them into the house to show her husband the results.
And here's how it all turned out!
 Heike plans to mount some textiles behind the 3 pendants shown below.
 Heike has reason to be proud, these turned out nicely for a first time experience.  I feel especially inspired by her ombre colored designs and want to give that a go in my own work.  I hope to be able to share where this has led me when I post here again in two weeks.
Linda Landig  
Linda Landig Jewelry

Thursday, June 4, 2015

New Toy = More Beads

It's a little over 18 months now since I started my ceramic bead making journey and I think now it's safe to say that unlike some things I've tried, this is not going to be a passing fad - I am so in love! Every book I've read and every experienced ceramicist I've spoken to has told me that working with clay is a life time learning process and I think that's part of the reason I'm so smitten - no chance of me getting bored with this medium.

That said, over the last few months I do feel that things have really started to click as I've gained a better understanding of clay and glaze properties and how they work together during the firing process. I've only scratched the surface of course but I'm beginning to gain confidence and develop an original design style - not that easy in field that is already crammed to the rafters with extremely talented artists but, well worth pursuing for the creative satisfaction that results.


Fortunately, my lovely lovely customers seem to like what I'm doing too and the last few months have been very busy.  The range that developed out of the Spring Hare challenge AJE held earlier in the year has proved to be very popular and my tiny little table top kiln has had to work incredibly hard to produce enough stock for me. So much so in fact that it's actually awaiting some first aid to have it's burnt out elements replaced and that's another part of the learning curve - DIY kiln repairs...never thought I'd be doing that!

My little tabletop Paragon Caldera kiln photo courtesy of Paragon Industries

But with this all this going on and the new ideas I want to try I out I have been thinking that maybe I needed a kiln that was a just a little larger. Being a bit concerned about going bigger I didn't want to rush into anything and discussed the options with my fellow AJE team mates who of course were 100% behind me going out and shopping for new toys... they really are so helpful when it comes to spending money. I decided I needed to actually see a kiln for myself to be sure so on Tuesday I took myself off to see a supplier who had one I was interested in in stock and the rest as they say is history. Said kiln is now in the boot of my car waiting for some musclebound assistance to help me set it up at the weekend.

How much bigger is it I hear you ask...um, well maybe more than just a little - my current kiln has an internal capacity of 7 litres and the new one is 43 litres! Eek - what have I done... that is a helluva lot of beads and I am currently lurching between feelings of delight and sheer panic! Of course a really big advantage is that I'm not limited beads and can now make some bigger pieces too and my little kiln will still be kept busy with smaller runs and bisque firings.

My new grown up Rohde Ecokiln image courtesy of Scarva
So I may be a little quiet over the next few weeks as I start the process of making up enough bisque beads and components to keep this little monster fed (it is still little in the wider world of kilns) . Hopefully while I'm doing that new more new ideas will come to the fore to complement mu existing ranges. I definitely want to develop more mixed beads set like these that I've auctioned recently over at Ceramic Art Bead Market...


It's an exciting time for me and I owe big thanks to all the muddy friends who've encouraged and supported me in my creative endeavours and again to my followers and customers who make it all worthwhile (cue Qwyneth Paltrow moment). Hopefully in a few weeks I'll be back here showing you what me and my new kiln buddy have produced...I can't wait.

Tuesday, October 28, 2014

All Fired Up


In my last post I wrote about receiving a new kiln for my birthday.  I've had a chance to put it through its paces since then.  Before using the kiln to fire any actual ceramic work you are supposed to fire it empty one time and check to see if the heat work, (heat over time) is accurate or needs adjusting.

You do this use by using cones - no, not the kind that you want on a hot day.  The cones you see in the picture below measure if your kiln is heating properly.  There are different cones for different heat levels.
I wanted to do a cone 5 firing (2205F), so I placed a cone 4, cone 5 and cone 6 in my kiln.  After a cone 5 firing, the heat should cause the cone 4 to bend completely over, the cone 5 (my target) should bend quite a bit and form a sort of hook and the cone 6 should be straight or only very slightly bent.

I was online chatting with AJE team member, Karen Totten,  during my test firing.  We could both hardly wait to see the outcome.  I opened my kiln and Wha????  None of them were bent at all.  Panic!  We tried to figure out what had gone wrong.  Turns out that in my excitement I had set the temperature wrong.  Without going into a long explanation, there is a huge temperature difference between cone 05 and cone 5.  I'd set it at cone 05.  I knew better, but goofed up anyway.  Well better to have an operator error than a flaw in the kiln!  Here are the cone results, from the second firing.
Here's what the cone 5 looked like.  It needed to bend just a tad more, which means my kiln is running just a bit on the cool side. So I am now holding the temperature an additional 5 minutes to account for that.
 Ceramics are usually fired twice.  The first firing is at a lower temperature and the ceramic is called bisqueware after that firing.  The second firing is at a higher temperature and it bonds the glaze to the clay and makes the clay hard and strong.  The actual temperatures vary by the types of clay you are using and the effects you are aiming for.

I did a firing this week with 2 different clay bodies.  There were some earthenware beads that can be glazed at cone 05 and some stoneware that is bisque fired at 05. 

The red clay is stoneware that is ready to be bisque fired. Unfortunately I accidentally broke the large snowflake wall hanging when I lifted it off this tray to place it in the kiln.  The glazed pendants are also stoneware.  I had glazed fired them last week, but hadn't put the glaze on thickly enough and they needed touching up.  Because they had been glaze fired already, I had to fire them at a lower heat for the touch ups (with Mayco Coat & Stroke glaze).  The glazed earthenware beads can be glaze fired at cone 05, too.

 My kiln is built in layers, so it is easy to load.  I took off the top layers (see above) and put some of the pieces on the bottom shelf.    These pieces do not have glaze on their backs, if they did, the glaze would fuse to the shelf, ruining both the shelf and the pendants.
The earthenware beads have glaze on all sides, so they are suspended on a bead rack.  Notice how they are spaced.  If they touch one another, they will fuse together.  Once everything was in place, I replaced the top two layers of the kiln and started the heat.
The results?  The rounded triangle pieces didn't turn out very well.  They are fine structurally, but boring looking.  They will get banished to this tin.
 The red clay snowflakes look promising. I've used white Mason Stains on some of them.  I still need to wipe back a bit more of the white from the raised areas, but you can get an idea of what they will look like when they are glaze fired.

And here are the glazed beads.  Some of the beads, especially the brown ones, still need more coats of glaze.  Obviously its a matter of learning as I go.  I made a few simple beads in Christmas colors, but I especially like the blue color.  I went to a pottery store yesterday and got *more* colors of glaze.  Oh my, I see the beginning of a new color addiction...
-Linda

Friday, October 10, 2014

A Kiln Of My Own

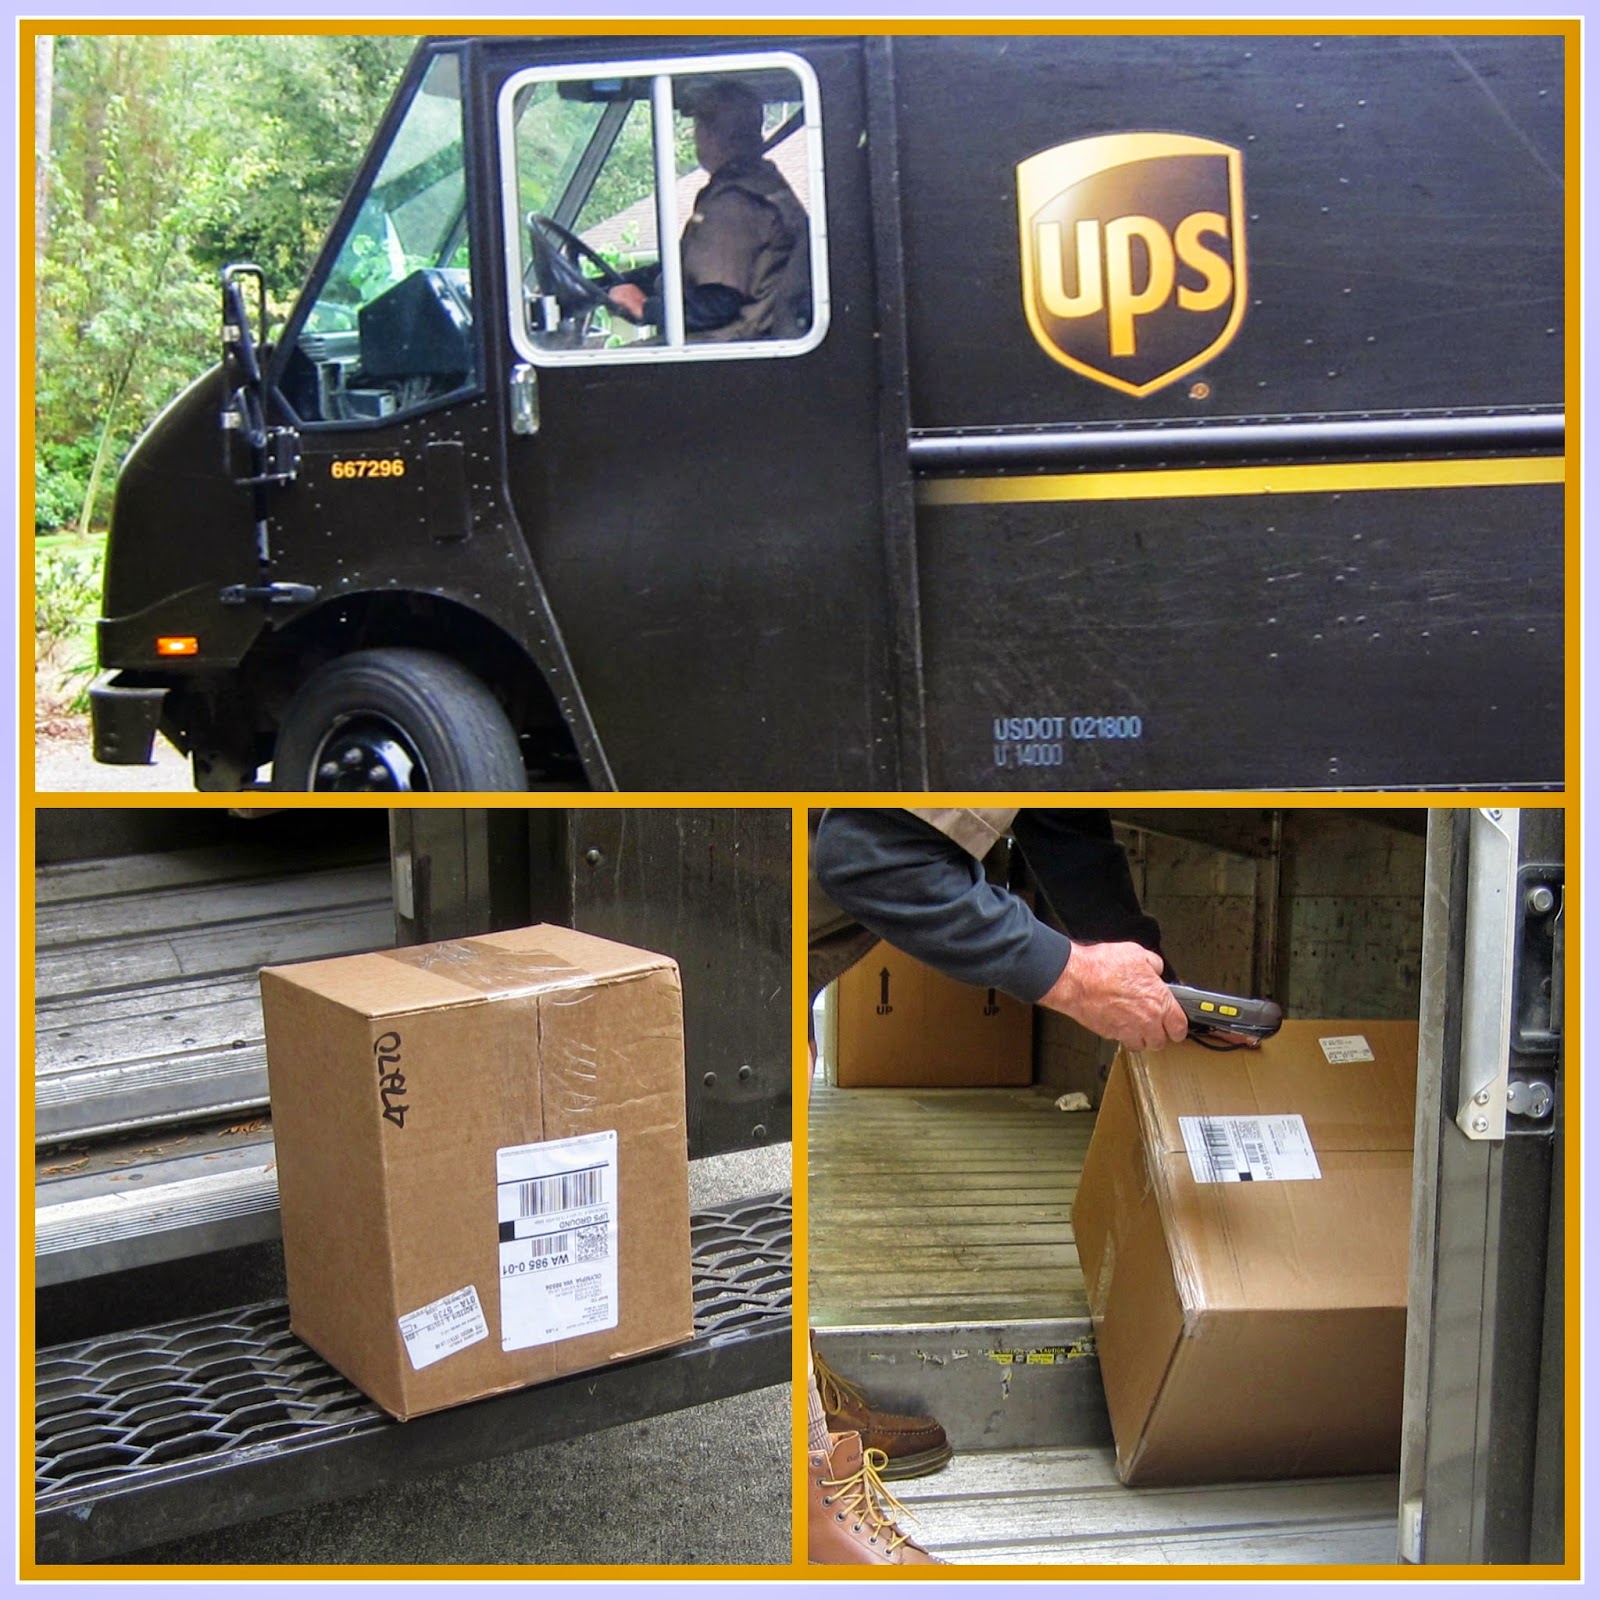
I had a birthday recently and the whole family pitched in to set up a ceramics studio for me.  It took a few weeks for the kiln to arrive, but guess who pulled up in the driveway today?
The driver was grouchy, but I was sure glad to see him!  There were two boxes: the little one on the left and the larger one being scanned in the picture on the right.  I opened the large box right there in the driveway, to make sure it had arrived safely.  The picture on the right (below) is the smaller box, which I opened later, in the living room.
My husband and I carried the boxes inside and carefully withdrew the contents.
My father's birthday gift to me was this beautiful Paragon Caldera Digital Kiln! (Thank you, Dad!)
My husband gifted me with a kiln shelf, which I forgot to photograph, and the contents of the smaller box, shown below.  Going clockwise, there is a bead rack, for firing glazed beads and pendants.  Next are a set of pyrometric cones which will help determine if the kiln is firing accurately or if I need to make adjustments.  Kiln wash is applied to the kiln shelves to help prevent any glaze drips from sticking to the kiln shelves.  The last picture just shows all the instruction manuals, that I now need to wade through.  But fortunately, Paragon has some good instructional videos on their website and YouTube has a lot of resources as well.
I have to apologize for the poor picture quality in the last two pictures.  For one thing the lighting was pretty dim, plus there was a lot of extraneous clutter around which I attempted to remove (not very successfully) via Photoshop. My daughter and her boyfriend gifted me with the inspirational and instructional material on the top photo below.  Reading these magazines and books helped me bide my time while I was waiting for the kiln to arrive.  I'll be referring to them often for inspiration and new ideas. My daughter gave me the cool stamp, with the interchangeable caps that you can see in the bottom picture on the far right.  They are the perfect size for adding textures to earrings.  My husband gave me a gift certificate to a local ceramic supply store where bought several glazes, (though I just included one in the picture), the texture rolling tool with interchangeable textures, a pony roller and a cutting tool. (Many thanks to Naomi, Vann & my DH!).

I will do a test firing this weekend and then I'm off and running.  I'll keep you posted!
-Linda


Friday, August 15, 2014

Book Review: Surfaces, Glazes & Firing

Sometimes Lady Luck is just on your side, you know?  I had checked out a book from the library called,  Surfaces, Glazes & Firing by Angelica Pozo.  It is part of Lark Book's Ceramics For Beginners series.  I liked the book so well that I wanted to add it to my personal library, so I went online to purchase it.  I don't know if the book is out of print or what, but Amazon is asking $75 for a new copy!  The list price is $25. I looked at other online book sources and there were all asking $75 and up! One site was asking over $200!  I liked this book, but no way was I going to pay $75 for it!
So I just decided that I'd have to check the book out from the library whenever I wanted to refer to it.  A couple of weeks later I was at Barnes and Nobles looking for a puzzle for my dad's birthday and low and behold, there was one copy of the book on the clearance table for only $13.00!  I kid you not!  Yea!

So here's why I wanted this book.  Information about glazes and surface treatments can get overwhelming to a novice and many of the books I looked at seemed more like chemistry textbooks than an intro to ceramics. I needed something like the equivalent of a Ceramic Surface Design For Dummies book.  Nothing I saw fit the bill.   I started to feel like I would never be able to get the hang of this new clay addiction of mine.

When I first started out, things like the difference between a cone 06 and a cone 6 firing were confusing.  I wondered if it was just another way to write the same thing.   I didn't know if I could use a low fire glaze at cone 6.  I wondered if earthenware was mid-fire or low fire.  I was unclear about the difference between an underglaze and an overglaze? What did it mean when people said that a particular glaze "moved"?  The questions bombarded me like a meteor shower. Surfaces, Glazes & Firing started to help clear up the muddle in my head.
The book starts with an overview of the ceramic process and the techniques to be covered in the book.  Next Ms. Pozo follows the ceramic process from wet ware and leather-hard, to greenware and bisque, to glaze firing and beyond.  At each step of the clay sequence, she explains techniques that can be used, at that stage, to develop texture and design on the surface of the clay.  There are lots of pictures to help demonstrate the techniques, however, despite what are intended as step-by-step pictures, I sometimes, still had difficulty following some of the techniques being explained.  I think it is difficult for someone who is a master in a skill, to realize how much you have to break down the steps and sub-steps for someone who has no prior experience.  This would be my only criticism of this book and it wasn't a problem for most of the techniques.  It was only an issue in a few cases.

The book has instructions and suggestions for exploration in carving, stamping, using slips, glazes and oxides.  It goes into sgraffito, brushwork, majolica, and the use of color, shape and pattern.  Lastly it takes a look at kilns and firing.

Although not specifically aimed at the bead artist, there is a treasure trove of information and ideas here, that can be applied to our specific niche. Its unlikely that you'll be as lucky as I was and get a brand new book at half price.  However, I would suggest looking in a used book store, borrowing it from a friend or checking it out from your regional library system.  It is well worth a little extra searching.

-Linda