Showing posts with label UK. Show all posts

Friday, September 18, 2015

Ceramic Art York

I’m playing roving reporter for today’s post… I decided a while ago, I wanted to explore creating larger work and have been waiting patiently for a ceramics show to happen within a couple of hours of where I live so I could go and check out the whole scene. Looking at people’s work on the internet is good, but there’s nothing like seeing something in real life to really appreciate the depth of glaze, texture and skill that goes in to creating beautiful works of art. 

A few months ago, I read about Ceramic Art York, a showcase of some of the best contemporary ceramic artists from the UK and beyond, to mark the opening of a new permanent Centre of Ceramic Art (CoCA) at the York art gallery. I booked a ticket immediately.

On Entry I received this beautiful program featuring all of the makers.


On Friday morning I set off up the M62. Other than it being one of the worst motorways in the country, it’s a beautiful drive. I couldn’t take pics on the road, but here’s a couple of the views you get to take in along the way.

Scammonden bridge

Across the moors.

The weather is notorious up on the moors and changed from blazing sunshine to low cloud, but by the time I arrived in York, the sun was shining again. 

York is a beautiful city, full of history and amazing buildings, so I took a detour on the way there to check out some of the sights. 

Micklegate Bar - The main medieval entrance to the city of York.

Ancient wood beam & brick building.

York Minster.

And after getting a bit lost and finding my way again, I arrived at the marquees in the museum's 10 acre botanical gardens. 


Ceramic Art York exhibition marquees.

Rather than babble on about how brilliant and lovely and amazing everything was, I will let my pictures do the talking! I've included links to each of the artists below their pic if you'd like to find out more...

Ashraf Hanna - ashrafhanna.net

Chris Barnes - www.morvernpottery.co.uk 

Clare Wakefield - clairewakefieldceramics.com

Debbie Barber - www.debbiebarber.co.uk 
Jin Eui Kim - www.jineuikim.com

Karin Hessenberg - www.karinhessenberg.co.uk

Kathleen Standen - www.kathleenstanden.com

Lara Scobie - www.larascobie-ceramics.com

Peter Beard - www.peterbeard.co.uk

Chiu-i Wu - www.chiuiwu.co.uk

Lisa Katzenstein - www.lisakatzenstein.co.uk


After a few laps and chats with some of the makers, who were all lovely, I decided I couldn’t go home without a souvenir or two. First up I visited Peter Beard and bought a copy of his latest catalogue and some postcards. I would have loved to buy a pot from him, but I don’t think the kids would have been impressed with eating beans for the next 6 weeks! I’m just going to put the postcards up on my shed wall and use my imagination.

Catalogue & Postcards from Peter Beard.

These reduction fired beads were from London based Karen Bunting.

Beads by Karen Bunting

And I couldn’t pass by the book & tool stand, run by the Craft Potters Association, without a good browse. Here, I purchased Kathleen Standen’s ‘Additions to clay bodies’  It’s a really informative book, full of unusual techniques to create texture in your work. (Kathleen made the stunning buoy vessel pictured above.)

Bookshop & tool purchases.

And I was good in the tool section, and only came away with a couple of serrated ribs.

I’m currently obsessed with reticulation glazes and have been doing some actual testing to try and create interesting surface textures, so seeing Paul Wearing’s beautiful bowls, I knew I had to have one. 

Paul Wearing and his beautiful work. www.paulwearingceramics.com

Paul is based in Cardiff and takes his inspiration from urban and rural landscapes. I could have taken everything on his display, but I settled for this bowl. 

Paul Wearing glazed bowl

The base is just as stunning!


It’s beautiful, the more I look at it, the more I see. The depth of the texture and colours is incredible, I’ve stared at it for hours!

Loaded up with my purchases, I took a slow stroll back through the gardens, around the medieval ruins of St. Mary’s Abbey.

St. Mary's Abbey

Another view of the remains.

And then it was back on the M62 for home.

I had a wonderful day. It was so inspiring to meet some of the leading ceramic artists and to see their work up close, every piece was simply outstanding. And although I still have a long way to go, I’ve come away eager to continue on my own path to creating something worthy. 


Thursday, May 16, 2013

Finishing projects

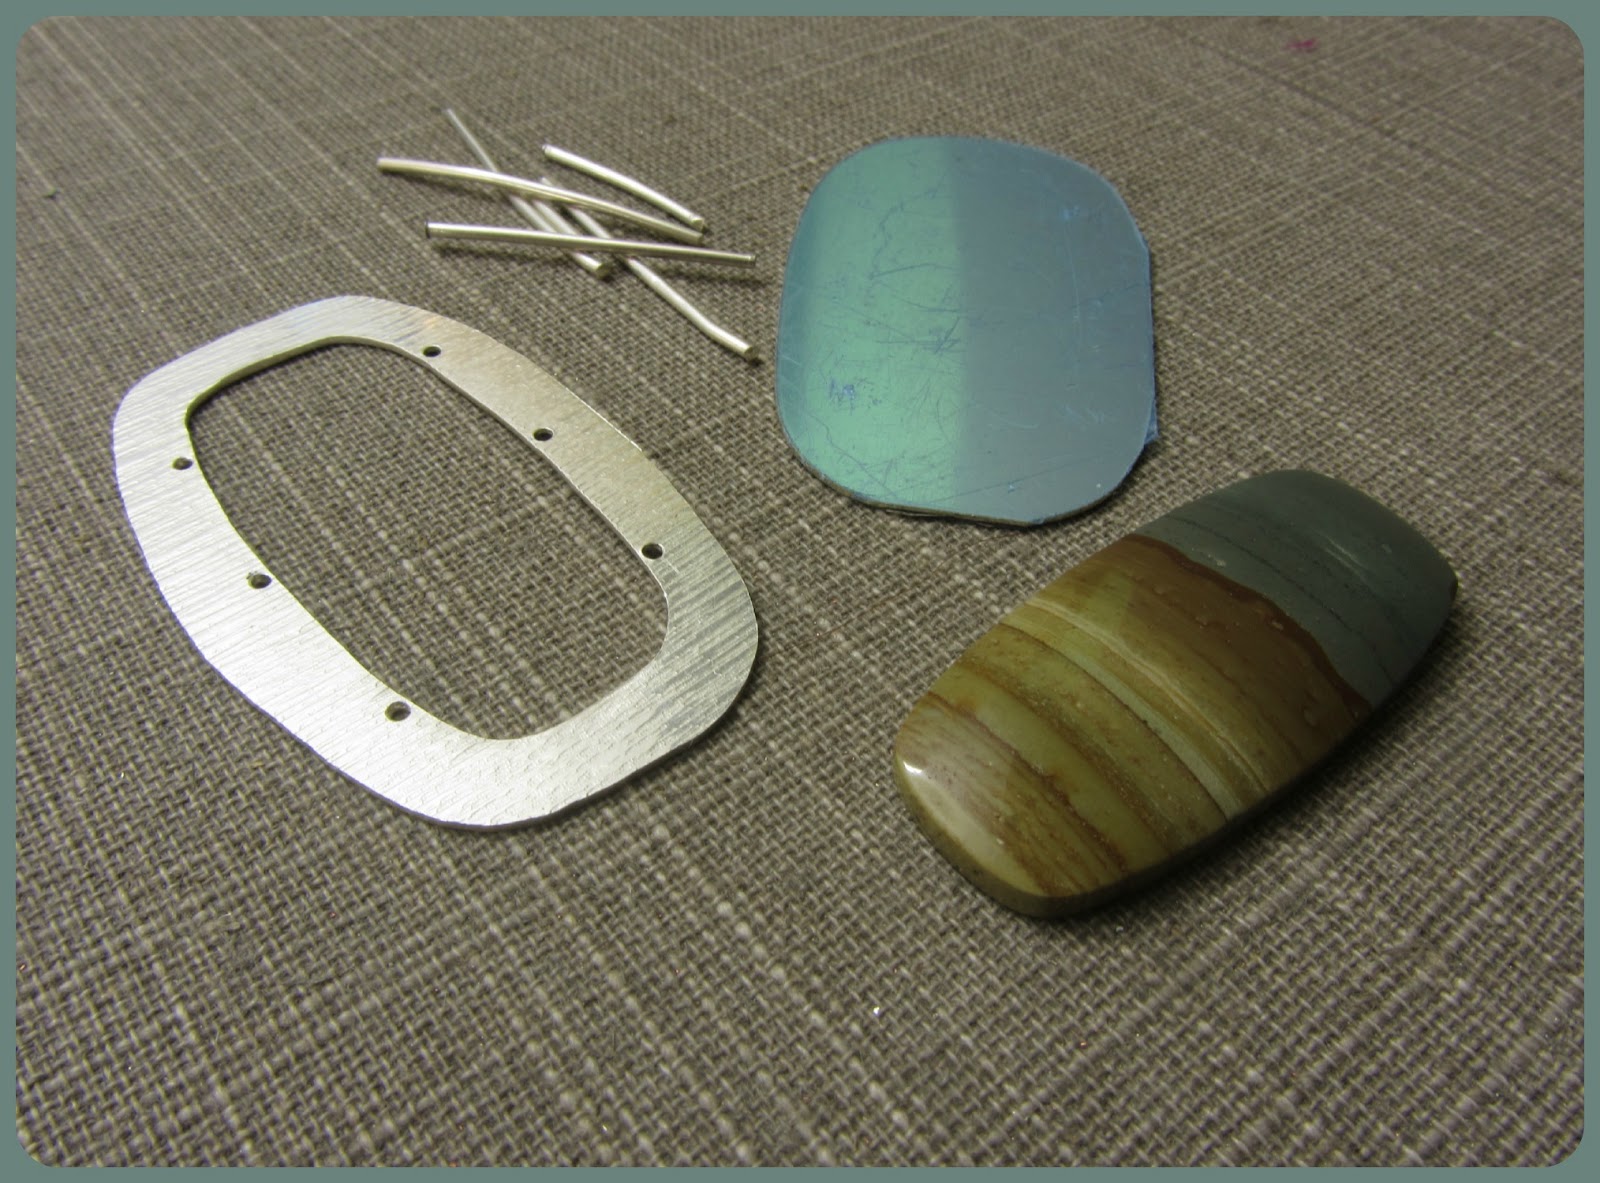
I have a growing pile of projects in every stage of creation from sketches in little boxes with the components I need to make them, to rings and pendants with the settings complete and polished and just waiting for the stone to be set. It has got to the stage that I am almost out of room on my desk, and it's not a small desk!

Two of the many cabochons that I've started to make settings for! I'll often make lots of bezel settings to fit some of my growing collection of stones and then they are ready for when inspiration strikes - and time allows!

I've always used the excuse that, because I teach jewellery making, I need part made projects to use as examples with my students, but as I have a pendant that has been waiting for its stone (the beautiful Botswana agate in the picture above) to be set for nearly three years now I think it safe to say that things have got a bit out of hand!

Beautiful picture jasper to be set in pring setting - may not completely finish this one as I am still using it for teaching!

So, I was quite relieved to read Melissa's post two weeks ago this coming Saturday talking about this very problem, and challenging us all to join her this coming Saturday to show off the projects that we had (at last!) completed. I've challenged myself to finish all the projects that you can see here - fingers crossed! I hope I do it, as believe me, this is a small part of my collection!

Mystery lengths of square wire - any guesses as to what these will turn out to be?
My questions to you are, will you be joining me in Melissa's challenge, and do you have any part made projects older than my poor three year old pendant?!

Thursday, May 2, 2013

Spring organisation - and some butterflies!

Spring has finally sprung over here in the UK! We're actually having beautiful weather for the time of year, probably nature's way of making up for all the rain we've had over the last year, and even better the forecast says that the weather is due to continue over the Bank Holiday weekend this weekend (we get Monday off for May Day) - although my apologies in advance to our UK readers if I have now jinxed the weather and your planned BBQ gets rained off!


Spring has also brought out the bulbs in the gardens and the park we walk through on the way to my eldest son's school, and the trees are now suddenly coated in beautiful greens. I even saw a couple of early butterflies in our garden this morning, much to our kittens excitement, and some bees busy pollinating the flowers too - don't worry, they didn't catch them!


Spring always makes me look afresh at everything in my life. Everything always looks so much better in the sunshine with the birds singing, and I get renewed energy to organise and generally make my life (and my family's life!) brighter and run smoother. One of the changes that I have made this week to make my Daisychain Extra etsy shop run more efficiently is to change it from a "made-to-order" shop to one where everything listed is ready to ship out. It means that when you put an order in you can be certain that everything will be posted out to you within 2 working days, often that same day, and it also means that I can make batches of designs rather than one or two of a design at a time to fill and order - far more efficient! It has already allowed me the time to create some new clasps that I have had sketched out for a couple of months, and I will have regular shop updates every 10 days or so with new stock and new designs.


So, I'd like to know what changes Spring makes in your life - do the changes you see around you in nature give you new energy and new inspiration for your jewellery making? Have you made changes in the way you work as I have? And while you're thinking about that I hope that you will enjoy the butterflies and bees I've found in the AJE team members shops!

Sunday, April 21, 2013

A Rose for love

This coming Tuesday, 23rd April, is St George's Day. In the UK the Welsh celebrate St David's Day, the Scots celebrate St Andrew's Day and, well, everyone celebrates St Patrick's Day along with the Irish, but strangely enough the English (I'm mainly English with a bit of Scottish, Welsh, Irish and German blood in the mix!) don't really celebrate St George's Day.It apparently fell out of fashion when England and Scotland united, but there are attempts to get the day celebrated more.


George needn't worry though - there other places that claim him as patron saint that celebrate in far better style, most noticable the beautiful city of Barcelona! Barcelona is the capital city of Catalona, a region of Spain that once was a separate kingdom, and I was lucky enough to go there last weekend with my other half for a wonderful birthday treat. I love Barcelona! So full of colour and so vibrant, and never more so on
La Diada de Sant Jordi (Saint George's Day). Also known as El dia de la Rosa (The Day of the Rose) or El dia del Llibre (The Day of the Book) the Catalonians holiday on 23 April in a similar way to St Valentine's Day. Men give women roses and women gave men a book to celebrate the occasion—"a rose for love and a book forever." Red roses have been a symbol of St George since medieval times, but the giving of books is a more recent tradition originating in 1923, when a bookseller started to promote the holiday as a way to commemorate deaths of Miguel Cervantes and William Shakespeare on 23 April 1616.
 

In Barcelona's most visited street, La Rambla, thousands of stands of roses and makeshift bookstalls are set up for the occasion. By the end of the day, some four million roses and 800,000 books will have been purchased. Most women will carry a rose in hand, and half of the total yearly book sales in Catalonia take place on this occasion. The city is always full of music and street performers but even more so on this day.


I thought I'd join in the celebrations by showing off some of our roses, both finished pieces and beads and components for your own creations. Enjoy St George's Day!

Barcelona is also home to lots of bead shops! I have a post on my blog that I wrote after my second visit in 2008 (I told you that I love Barcelona!) that you can see here, and I'm in the process of writing another updated one - it'll will be ready soon!

Thursday, April 18, 2013

Hearts and Flowers - a tutorial for you!


The weather is finally starting to get warmer here, the tulips are starting to bloom in the garden, and I'm finding myself making more bracelets. I do find that my jewellery designs have seasons - earrings and pendants more in the winter, bracelets in the warmer weather as shorter sleeved tops show them off better! This is a tutorial I wrote for my blog, and I thought you might like to see it too. It uses one of my embossed heart connectors with colouful micro-macrame - if you still think of macrame as being something that should be left firmly in the 1970s with potted plant hangers and spooky owl hangings then you obviously haven't seen the beautiful knotted work that designers such as Malin de Koning and Rebecca Anderson have been producing! You can tie macrame knots with ribbons, silks, cords, wool, leather as well as good old string, but my favourite is C-Lon, a nylon cord that is just under 0.5mm in diameter. I love it because it comes in an amazing range of colours that don't fade and it's easy to work with. The first few knots that you tie with it may slip a little, but this slipping disappears as you continue working and each knot is held firmly in place by the next.

So, you will need the following:


You will also need round nosed pliers, nylon jaw pliers, wire cutters, scissors and either clear glue or nail varnish to secure the last few knots on each side of the bracelet.

Click on any of the pictures to see a large view of them in a slideshow.


1. Use your fingers or nylon jaw pliers to curve the heart slightly. Turn a wrapped loop in 0.6mm wire and thread this through one of the holes in the heart. Thread a bead onto the wire and turn another wrapped loop. Repeat for the other two holes. Use wrapped loops to attach another bead so that it links the two beads at the top of the heart together as shown.

2. Wrap the cord around your wrist and cut this length off the reel. Cut another length that is 8 times longer than the first. Hold an end of both pieces together and fold them to find the middle of the shorter piece. You will now have three short lengths and one longer one, much longer than you really need but it's better than having too little left at the end! Tuck the fold at the middle through a wrapped loop and pull the ends of the cords through the fold to tie a Lark's Head knot.

3. The three shorter cords are your filler cords, and the longer one (the working cord) will be knotted around them with a Half-Hitch knot. To start pass the working cord over the filler cords....

4. .....and then tuck it underneath and through the loop formed.


 5. Showing you the Half-Hitch again from a different angle! Tuck the working cord over and around the other three and back up through the loop formed and pull the knot tight. Try to keep an even tension - like knitting, this will come with practice!

6. You can see that the knots have started to spiral around the filler cords. They will spiral in the direction that the cord is pointing as it comes through the loop. If you make a mistake and tie the knot in the wrong direction C-Lon is easy to undo. Keep going until your knots reach to the mid-point underneath your wrist as you hold the bracelet in place. Don't cut the cords yet!

7. Cut the same lengths of cord as you did for the first side of the bracelet. This time start the Half-Hitch knot with the working cord tucked underneath the filler cords and then back down through the loop.

8. This will make the spiral turn in the opposite direction, a nice (but optional) touch for the two opposite sides of the bracelet.


 9. Finish knotting when both sides of the bracelet are about the same length.

10. Thread the clasp onto all four cords at one end of the bracelet. You may wish to trim the longer cord so it's the same length as the other three to make the rest of the knots easier to tie.You will be tying a Square knot around the end of the spiral to hold the clasp in place. A Square knot is just a double knot that you use to tie your shoe laces but with something else (in this case the spiral) in the middle of the knot, and is knotted in two halves.

11.  Divide the cords into pairs. Pass the left pair over the spiral and under the right pair of working cords. Pass the right pair under the spiral and up through the loop formed on the left (over the left cords) and pull tight. Hopefully the lines and labels make that easier to follow!

12. To tie the second half of the knot, pass the left pair under the spiral and over the right pair of working cords. Pass the right pair over the spiral and down through the loop formed on the left (under the left cords) and pull tight. Repeat the last two steps with the ring at the other end of the bracelet. Glue the knots and trim them when dry.

And there you have it!


I do hope that you enjoy making this bracelet, or your own version of it. Please do let me know if you post pictures of this or anything else that you make with one of my tutorials as I'd love to link to them! The bracelet would work equally well with any of the beautiful bracelet connectors and focals that you can see below.


Left to right: Ceramic Curved Textured Bracelet Bar by Bohulley Beads
Ocean Tea Bracelet Focal by Starry Road Studio


And if you'd like to learn more macrame techniques I'm currently having a short birthday sale in my Daisychain Extra shop until midnight tonight (I finally hit the big 4-0 on Tuesday!), and that includes 15% off my "Macramé, Art Beads and Wire" ebook with 6 lovely tutorials for bracelets, necklaces and earrings. Just use "BIRTHDAY" at checkout! One of the projects shows you another way of using the beautiful focal made by Karen Totten (Starry Road Studio) shown above.

Monday, April 1, 2013

March Component of the Month REVEAL!


I hope that you had a restful Easter Sunday with your families yesterday, and that you're not too full of chocolate! We delayed the reveal for a day because of Easter, but it's now time to show you what everyone made with the components I made them for the March challenge.


To remind you, I had fun making lots of lovely copper hollow beads and sent one to each of my fellow AJE contributors and to readers who were chosen at random. If you'd like to see how I made the beads follow this link to the last post I wrote. I'm really looking forward to seeing what everyone has come up with as although I've been making hollow beads for a while it's the first time that I've sent them to anyone!

The guest designers this month are:
(Kathy  (Northern Light) hasn't been able to take part due to her mother's illness -
I hope she gets better soon Kathy!)
And the AJE contributors taking part are:


Thursday, March 21, 2013

Making hollow beads

As the reveal for the Component of the Month challenge is getting close I thought I'd use today's post to show you how I made the copper hollow beads that are this month's challenge. I love reading posts showing work in progress, so I hope that you do too!


Each bead starts out as two equal sized discs, which I cut out using my trusty Pepe disc cutter. I love this tool! The discs are then textured, some with a hammer, some with decorative metal punches before being domed in my doming block. Each disc is domed the same to make sure that they still match.


Next comes lots of filing! This has to be done to give each disc a flat rim so that each pair of discs sits neatly together with a crisp join.


Then it's over to the soldering table. When I'm doing a batch of beads like this I use solder paste as I just find it quicker to use. I put a generous helping of solder paste inside the rim of one discs and then place the matching disc on top. I'm generous with the solder as its not easy to go back and add more if its needed, and any untidy excess solder is hidden inside the bead anyway.


After soldering and pickling to clean the beads up I then drill the holes. This is the fiddliest bit! The first step is to use a triangular needle file to file a small groove in the edge of a bead so that the drill bit has somewhere to sit and doesn't slip along the join. I use a stone setting burr to neaten up the edges of the hole.


The last step is to use Liver of Sulpur to give the beads a lovely antiqued finish and to highlight the texture - and there you are! I love how tactile these beads are.


The reveal for the March CoM challenge will actually be Monday 1st April as 31st March is Easter Sunday. I hope that you will come back and join us then and see what everyone has made! And if you fancy creating something lovely with your own hollow bead then I'm currently making a limited supply of them to go in my Daisychain Extra shop!