Showing posts with label Sue Kennedy. Show all posts

Friday, July 10, 2015

A Touch Of Sari Silk Earring Tutorial

Last week I purchased some gorgeous lampwork beads from fellow AJE writer, Sue Kennedy, of SueBeads. I couldn't wait to get started, once they arrived. I made these earrings right away and today I'm going to show you how I did them.
               
Materials:
1 pair of earwires
About 8-10 inches of 20 gauge wire
1 pair lampwork beads (These are from SueBeads)
I pair of ceramic charms (These were made by me)
About 8 inches of sari silk, ribbon or fabric
Bead caps to fit the lampwork beads.
Tools:
2 flat nose or half round pliers
1 pair round nose pliers
Cutters
1. Cut the wire in half. Take one of the wire pieces and begin making a wrapped loop at the widest end of your round nose pliers.
2. Slide the ceramic charm onto the wire and complete the wrapped loop with just one complete wrap. Cut the excess wrapped wire and pinch it down with your pliers.
3. Cut the length of sari silk or ribbon in half. Some people prefer the sari silk to have a very rustic, frayed appearance. Others like it a bit tamer. I'm in the latter group, so at this point, I trimmed the frayed sides a bit. Still frayed, but a bit neater. Go for whatever look you like best.

4. Poke one end of a piece through the wire about a quarter of an inch in from the end. You can leave it a bit longer if you prefer and then trim it to your liking once the earring is complete. If you have trouble poking the wire through the fabric, cut the tip of the wire at an angle, to give it a sharper, narrower end.
5. Slide the ribbon up toward the top of the wire. You are basically going to fan-fold it now. So fold the ribbon over and punch it through the wire again. Now fold it back the other way and punch through once more. When you are done, you will have 2 folds and the sari silk will have been pierced 3 times through the wire. Trim the remaining end of the sari silk.
6. Slide one of the lampwork beads onto the wire and then place the bead cap on the wire and slide it down onto the bead.
7. Gently snug all the components together and make a wrapped loop. Attach the earwire and repeat for the other earring. If you wish, you can put a little FrayCheck on the ends of the sari silk, to prevent them from fraying near the wire.
8. Insert earwires in your ears. Go forth and look amazing!
These earrings are available in my web shop, and similar charms are available here.
Linda
 

Saturday, June 13, 2015

Beach Vacation Jewelry Designing

I'm getting ready to leave tomorrow with the boys on a much deserved trip to the beach!  Yay! Fun in the sun, or not, as the weather report seems fraught with clouds, rain and storms. (sad face)  As much as that seems like a downer, I don't really care.  If I can look at the waves, and hear them thunder to the shore and walk with sand (wet or dry) under my bare feet, I think I will be okay!

From our trip to the same beach a couple years back!
If you are like me,  when you go on a family trip, you need some creative things to keep your hands busy when you are bored or the rest of the fam wants to do something you are not particularly interested in.  What to bring, though?  Lately, my jewelry creation interests have been in the fabrication mode...soldering, enameling, metal clay and polymer clay firing. Can't bring the kiln, torch or toaster oven!  So, I usually resort to...beads and wire.

This trip I have decided to focus on some unfinished projects first...

My mixed-media pendants and metal clay pendant in various stages.
These are in various stages of completion...some just need a clasp, some need to have more links added, etc.  They have been in my "to do" pile long enough.

I also want to start a new "rosary" project.  I put quotations, because this will not be a traditional Catholic rosary in the sense that I am going to use my metal clay components, and I may or may not do the full 50 Aves with 6 Pater beads.  I guess we'll see.

My white copper components and gorgeous tiger-eye!
This is a perfect beach project for me, as all I need are wire, beads, pliers and a cutter.  How to pack it, though, so it doesn't take up much room and is all in one place?  I found these cool boxes at The Container Store ages ago and I like the flat, briefcase-like design.

Nice and flat, so it can stack in your suitcase.
Just add your materials, toss in your new favorite jewelry magazine for beach reading and for stabilization of the contents and you are all set!
I do have a couple of projects I wanted to get done before I leave...something new for me to wear!  My beach jewelry wear is usually very simple...just earrings, and maybe a bracelet or necklace at night.

I hoped to get a couple new pairs of earrings made for me...these are on my table right now:

Gorgeous stoneware by Diana Ptaszynski of Suburban Girl Studio, ceramic flowers by Joan Miller, and my favorite Czech glass beads.  Combinations to be decided and probably changed 20 times!
I would also like to create a beachy-themed bracelet with these gorgeous beads and maybe some leather...love Diana's starfish connector....I have been saving it! Don't Sue Kennedy's ridged lampwork beads fit with Diana's mix perfectly?

Yummy mix of beachy colors!
So, this is my rainy day beach plan!  Who knows, if we have wonderful weather, there may not be any free time to sit and do any of this, but at least I am prepared!  I'll try to follow-up and show any finished pieces next time!

How about you?  What kind of creative projects do you like to take with you on vacation?  We would love to know!!!!


Tuesday, November 11, 2014

My Metal Addiction!


Last time, I showed you my personal collection of glass art beads!  Today, I'm going to show you my metal addiction!

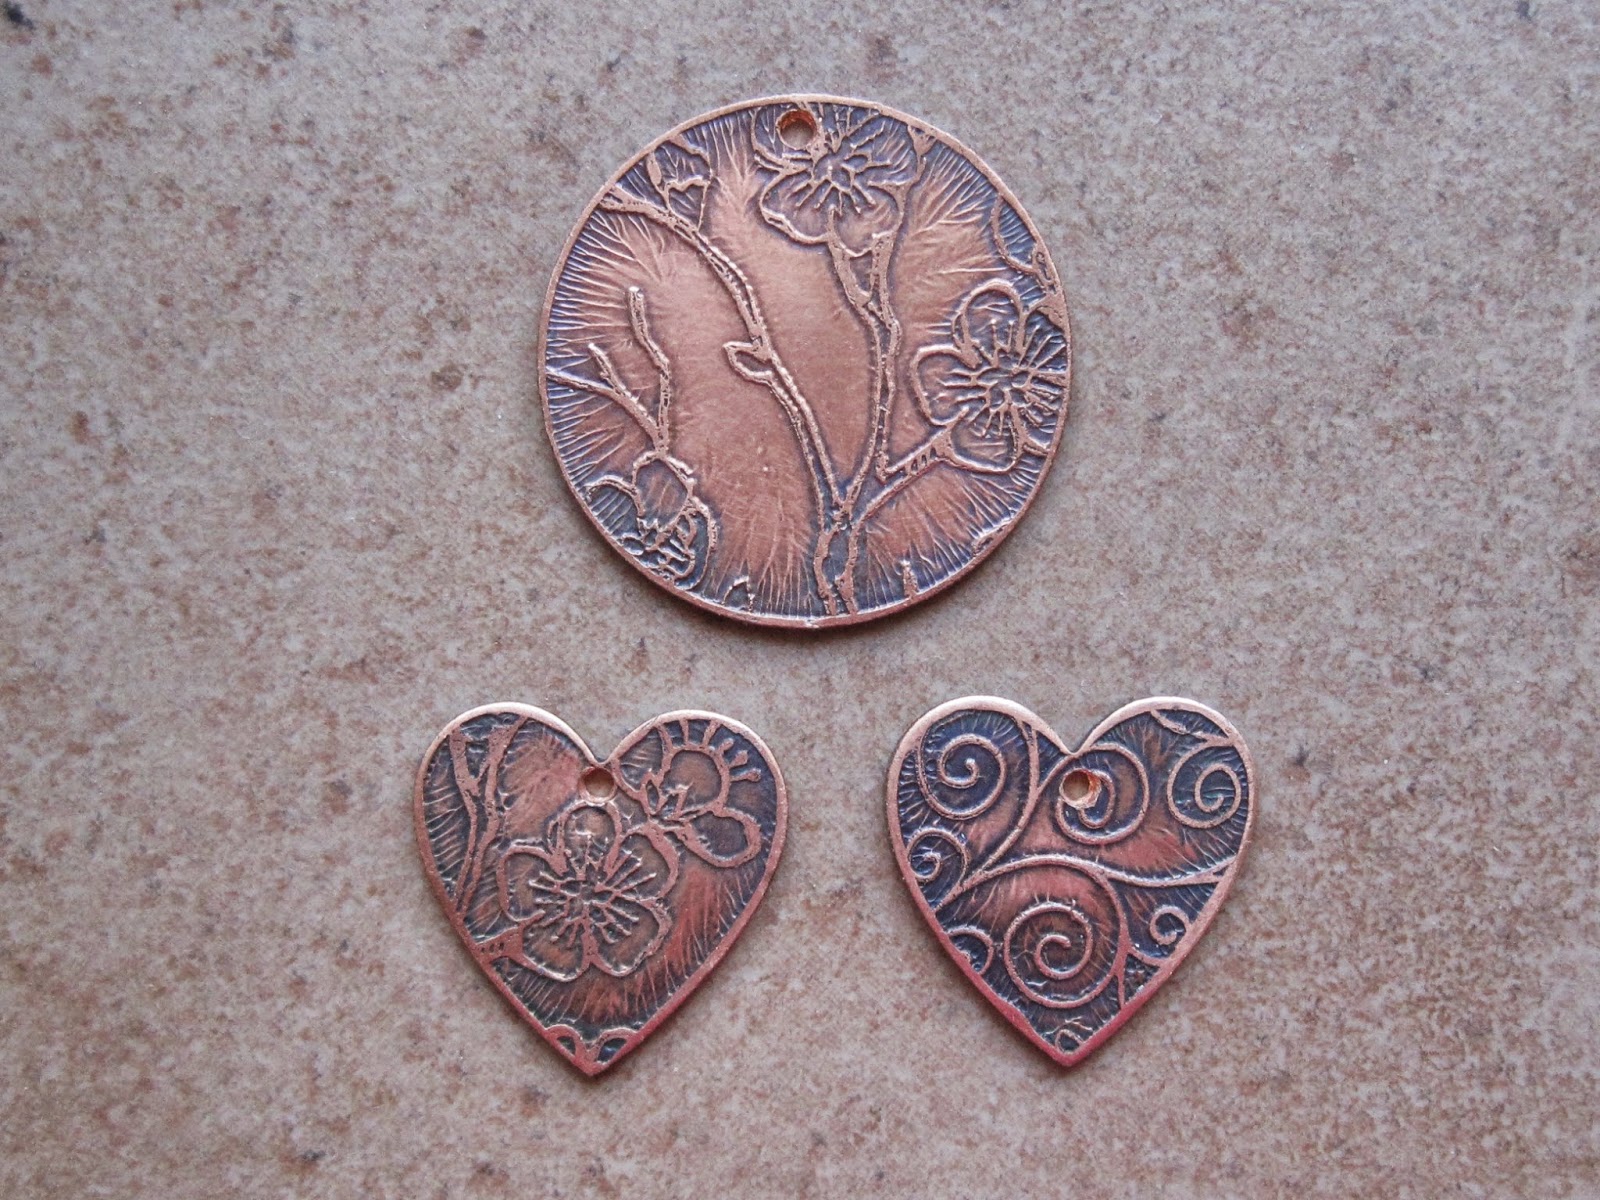
These first charms are from Nancy Adams (Round Rabbit) - she did these quite awhile ago, I don't even know if she etches metal anymore!

 This next piece is a prized possession!  My boyfriend purchased it for me from Staci Smith of Staci Louise Originals, at Berks Bead Bazaar when I wasn't looking!  He saw me admiring it and bought it secretly! I am afraid I can't do it justice, so I haven't made myself anything with it yet!

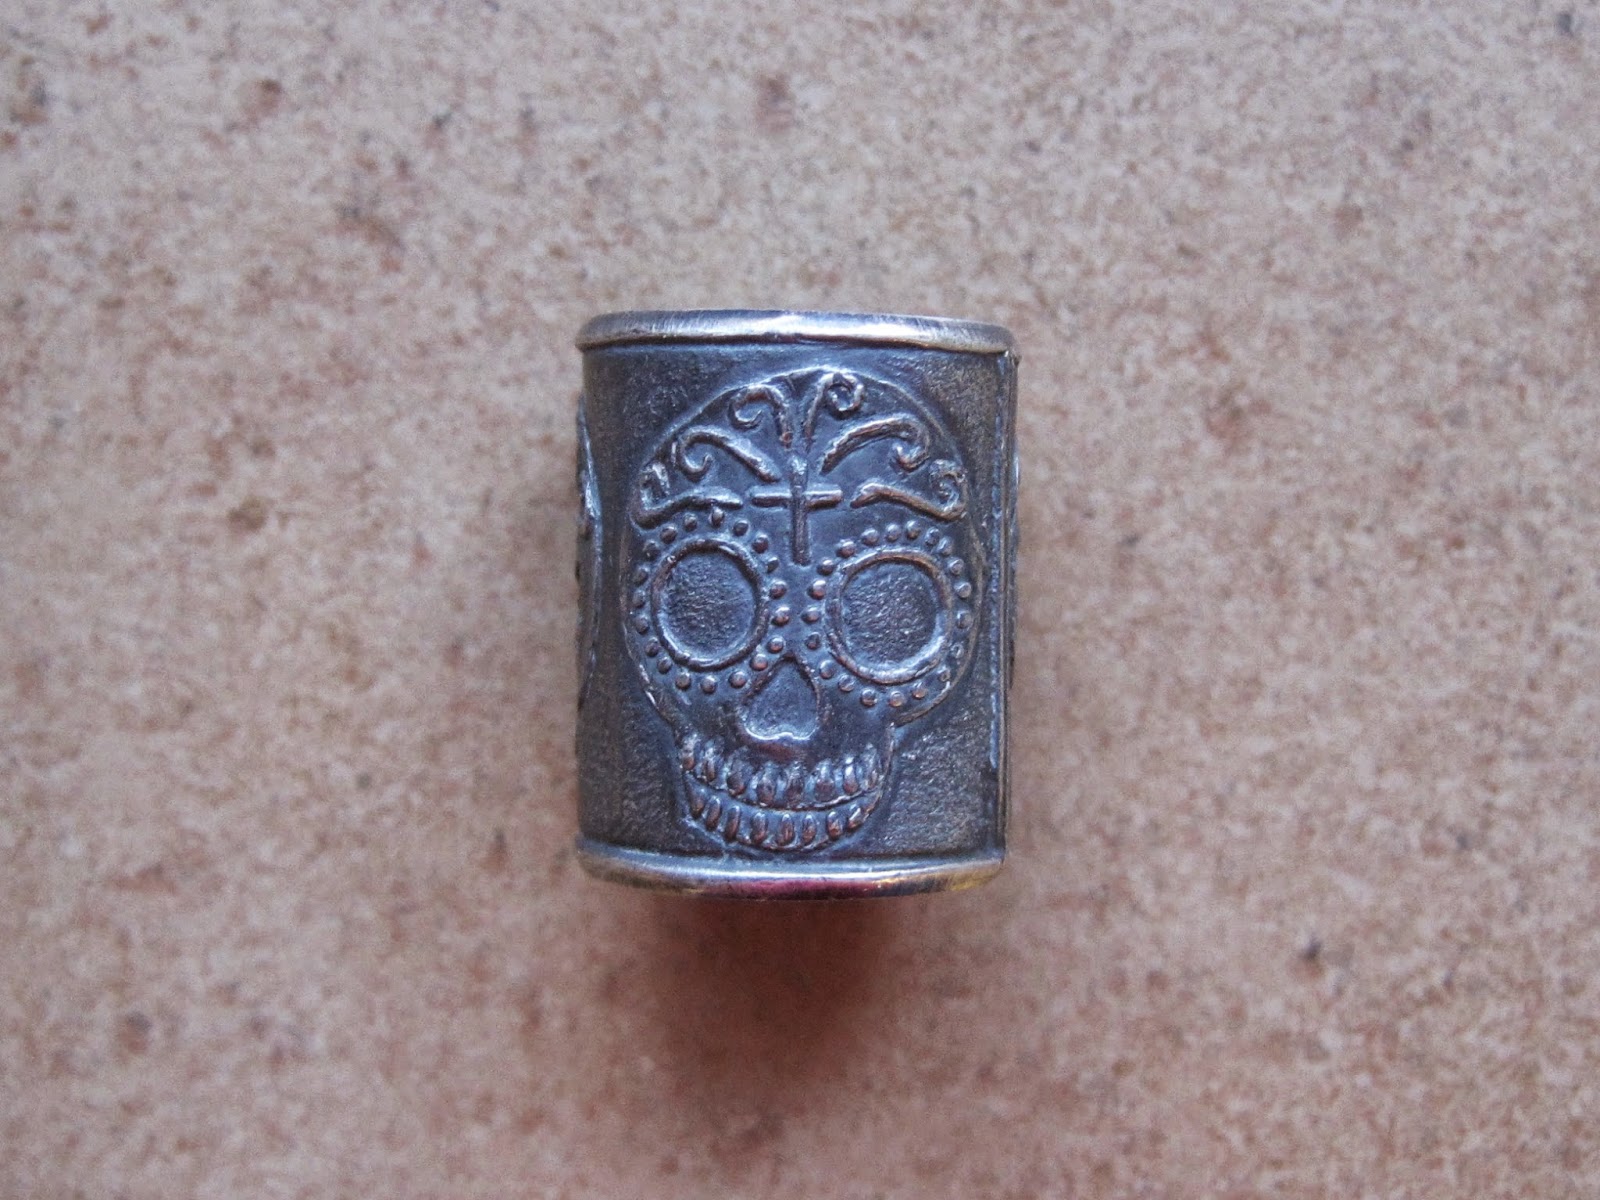
 This next bead is a day of the dead barrel bead from Anne Choi - I do have another barrel bead from Anne with a quotation on it, but can't find it at the moment.  I know it's in my stash.

 These charms are from Jade Scott - it's a wonder I have any of these!  Usually when she has a shop update, they fly out the door and you're just too late.  Again, I have a few more little baby charms, but they are in another container somewhere!

 Although LeAnn Weih of Summers Studio mostly makes ceramics, she also makes metal clay beads.  I have a small obsession with all her beads, but these are the metal ones I have.  My faves are the turtle and the hollow nugget beads.  I'm sure the nuggets are very hard to make! She hasn't been making beads of late, so I feel lucky to have such a collection!
 Next up, metal charms and headpins from Andrew Thornton!  He dabbles in many things, but I particularly like his owl charms! Andrew also has a brick and mortar shop in Ligonier, near me, so I'm lucky I get to see him from time to time.  He just had a grand opening of a new location for his shop, I need to get up there to see it!
 These charms are all from our very own AJE member Kristi Bowman-Gruel - when I used to make jewelry for shows, I did a lot of buying and trading with her!  These are some of the things I have left! These are by no means the extent of the collection I have from Kristi, either!
 And finally, charms and headpins from our own AJE member Lesley Watt of Thea Elements.  I love hearts, in case you couldn't tell, and I absolutely love the headpins.  I haven't used them yet either, because I'm afraid if I mess them up, they will be gone forever!

 I hope you enjoyed the little tour of my metal beads!  These tours are actually helping me, because it is forcing me to organize some things before I forget who made them! 

Susan Kennedy
SueBeads etsy
SueBeads web site


Saturday, September 27, 2014

Beads Of Courage

I recently wrote about 7000 Bracelets and Ears to You charities, and today I'm writing about Beads of Courage! 
 Bumpy beads made by Susan for a specific request.
From their web site, Beads of Courage is "...a resilience-based intervention designed to support and strengthen children and families coping with serious illness. Through the program children tell their story using colorful beads as meaningful symbols of courage that commemorate milestones they have achieved along their unique treatment path."  

"Program beads" are commercially produced beads due to the volume of beads needed.  They are tied to the color chart children receive when they first join.  The color chart is tied to specific treatment events in a child's journey.  "Act of Courage" beads are beads made by glass artists that represent milestones in a child's treatment journey.  Here are some guidelines about donating beads:

What is an Act of Courage Bead?Act of Courage Beads can take almost any form that you would like to make-it's an opportunity for you to let your imagination go! The 3/32" mandrel is preferred but other sizes are also usable.

Special Requirements for Act of Courage Beads: Please have nice 'puckers' on the ends of the beads, sharp edges on the bead holes cut fingers and can not be sent out. Overly frilly bits sticking out may break off and leave sharp edges on the surface, be sure that raised dots have solid connections (no undercuts) and that surface decorations are robust enough to take some knocking about.

We ask that you refrain from using reduction frit or glasses that give a metallic sheen on the surface due to heavy metal issues with these materials. We can't send metallic reduction surface beads to the kids.

Anneal your beads properly in a kiln to ensure they don't crack. Cracked beads have to go in the waste basket.

Please make sure that the bead release is cleaned out. Beads with the release still inside take more time for our volunteer staff to clean and this tremendously slows down turnaround time to the hospitals.

When you send your beads please fill out the Bead Donation Form, it helps us to expedite sending you a receipt and certificate for your donation.

Polymer Clay Beads are used in many of our programs including Creative Courage Journal, Beads of Courage Program for Siblings, Arts-in-Medicine Workshops and as a Member's Choice bead in the Beads of Courage Program.

Special Requirements for Polymer Clay Beads: Any size or shape is acceptable. The kids love bright colors! Our preferred hole size is 3/32" with no sharp corners, edges, or protrusions that would easily break off. Please remember that they beads are worn and handled by children and should be sturdy enough to stand up to wear and tear.

Other Manufactured Beads are used in many of our fundraising activities and workshops. We welcome your donation of miscellaneous beads, they all find a perfect home to further the mission of Beads of Courage, Inc.

Bead Delivery to Hospitals: None of our member hospitals are set up for direct donation. All beads distributed in our programs are our responsibility, we need to see every Act of Courage bead before it goes out.

How do Donate Beads

Print and fill out this Bead Donation Form and send with your beads.

Mail to:
Beads of Courage, Inc.
Attn: Bead Donations
3230 N. Dodge Blvd. Suite J
Tucson, AZ 85716

Questions?
Robert Simmons, PhD, our Director of Bead Donations is available to answer your questions. His email is rsimmons@beadsofcourage.org. 

AJE's own Jennifer Stout-Cameron holds a Beads of Courage Charm Swap/Auction every year.  Participants are asked to make charms to swap, related to a specific theme, and one to auction on eBay.  All proceeds are directly donated to Beads of Courage.  This year our theme is "Soar". While the function is quite fun, it's also very worthwhile - last year, $1500 was donated to Beads of Courage.  Most people donate more than one charm to be auctioned.  While this year's signups are closed, you should look for our auction on eBay on November 14th! And please consider joining next year, it's lots of fun!


https://www.etsy.com/shop/suebeads

Thursday, September 18, 2014

Things to do with headpins - 2 for 1 Tutorial

You may of heard on the blog… Beadfest happened recently! My friend, and AJE team member Lesley, kindly offered to take some of my beads across for swaps so I could share in the beady goodness! I got some amazing swaps back, some of which were headpins. 

I’ve been curious about glass headpins ever since I saw them while scrolling through Facebook, so I was thrilled to get some beautiful millefiori pins from Jen, and pretty green drop pins from Sue (which make me think of little jester’s hats!)


As with a lot of things I covet, once I got my hands on them, I had no clue what to do with them. I just wanted some as they were pretty. So they sat in my box of special things while I pondered. I’ve come up with a couple of ideas which I am going to share today. The demo’s are using Jen’s headpins as I think their shape works really well for these ideas.

The domed clear glass on Jen’s headpins give them such a wonderful depth that I thought they would make a pretty ring. 

Start by taking a headpin and holding it a couple of mm from the glass, bend the glass up so it sits at 90 degrees to the wire.


I used one of my existing rings to get the size. Put it on to your ring mandrel and mark with a felt tip where you need to wrap.


Hold the headpin on the mark with your thumb and wrap the wire around the mandrel, and loop it around the glass.


Keep looping until all the wire is around the head, tuck in the end of the wire and straighten the shank.


Put it on... cute!


Afterwards, I did think about adding seed beads around the shank and was going to make a second, but I couldn’t find anything that I liked that had a large enough hole… time for more bead shopping! If you do want to use beads, you would need put them on to the wire before sizing your ring on the mandrel.


Secondly, I decided to make a clasp. For such tiny heads, they make great focals, so my next design features the pin right in the middle. 

As with the ring design, hold the pin and bend the head to 90 degrees.


With bail making pliers wrap a wide loop on one side of the head.


Fold it round the top of the pin to hold it securely.


Do the same on the opposite side.


Wrap the remaining wire around either side of the head, tucking the end in neatly so it doesn’t catch.


Left as it is, it would make a great connector


Or you could do as I did and make a hook to turn the piece into a clasp.


With both designs, due to the heat needed to make the pins, the wire is quite soft, so it's nice and easy to use. But you may find that you need to harden your work when it's complete!

I hope I've inspired you to get wrapping with those headpins! To get some for yourself, visit Jen or Sue!


Thanks for reading!

Caroline


Tuesday, June 24, 2014

Bead Fest Prep - My Newest Obsession

I'm vending at Bead Fest in August, as you know, and I need to be in full Bead Fest prep mode.  However, between my other job, my house, my kids and all the day-to-day things that need to be done, it's hard to get time.  Maybe that's why I'm so obsessed with headpins!

 At the end of a beading session, I take my short rods, my leftover stringers, and use my color imagination and make headpins on 20 gauge copper wire!  It's really a lot of fun.  In fact, it's so much fun to me that I may have many many more headpins for Bead Fest than I'll ever need! 

 I'll be using these cute little cups to display them in.  You know those cute little orchids in Home Depot, the ones that are mini orchids?  Well, they don't last, and you are left with these little ceramic containers.  I plan on getting some floral foam, you know, that green stuff, and stick the headpins in so they are nice and visible.  At least, that's my plan at the moment.  I am really challenged when it comes to making a good table display.  I think it's my biggest challenge!


Here's an example of some of the headpins you'll be able to find at the market at Bead Fest in Philadelphia August 22-24!  Please join me and fellow AJE team members Diana Ptaszynski, Jen Cameron, Jen Davies-Reazor and Karen Totten for shopping.  Linda Landig and Lesley Watt may have a few things available for your shopping pleasure as well!