
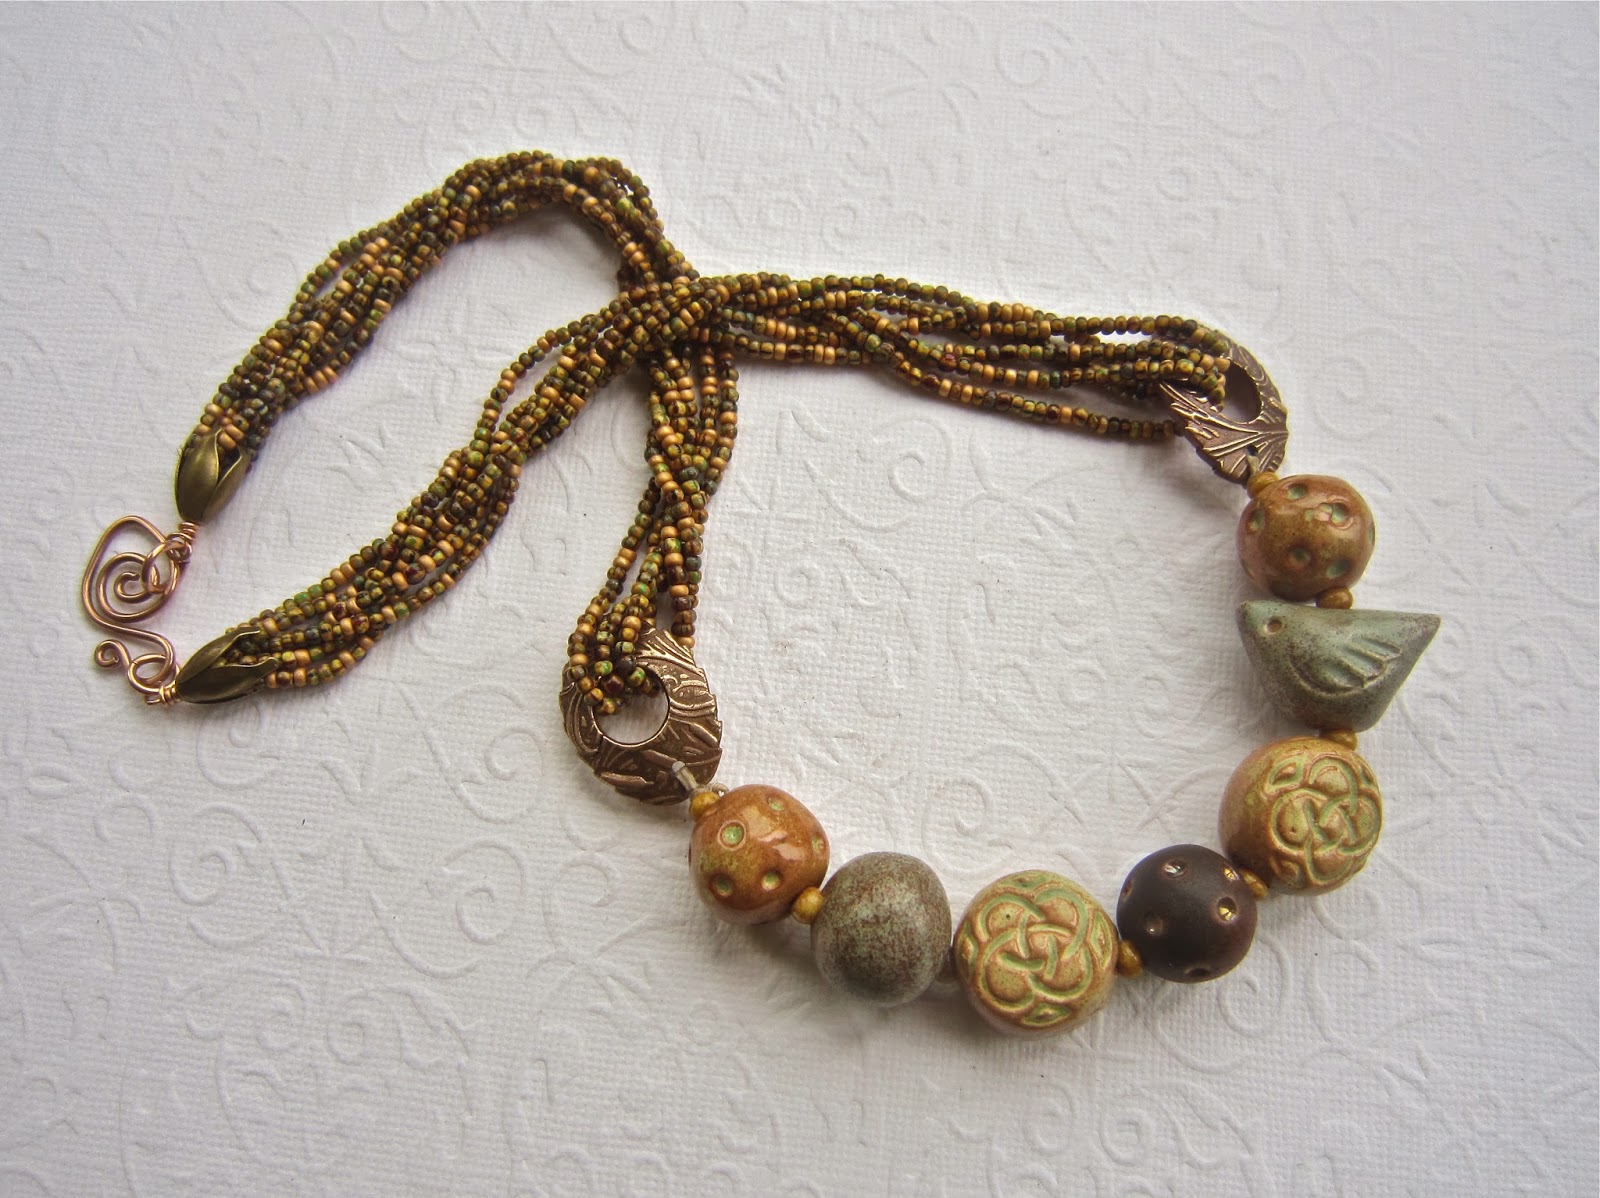
A couple of months go I made this necklace for a design challenge I was co-hosting and one of my AJE team mates asked me if I would write a tutorial for the braided rope element, so that's what I'm doing for you today. In my design the rope elements are attached to a simple focal bead section by means of decorative links but it is easily adaptable for you own necklace and bracelet designs.
To make the braided elements for a necklace of this style you will need:
Seed beads of your choice
2 decorative rings/connectors
2 bead cones/caps
20 gauge wire
Bead thread
Glue
The seed beads I used were size 10/0 (2.2mm by 1.5mm) opaque Aztec gold and aged striped picasso mix Czech glass seed beads which came in hank of twelve 12 inch strands - approx. 18 beads per inch from Beads and Babble on Etsy.

Step 1
For each plaited element I used 3 strands from the hank. If you can remove the strands in their entirely and the thread is strong enough you may be able to use them as they are are without restringing but I prefer to restring them onto new thread with a collapsible beading needle...

Step 2
When your have your strands threaded pass one end through your decorative ring or connector.

Step 3
Tie the ends of the thread together taking care not to pull it too tightly - the strands need to be loose enough to braid and for the final rope to be able to drape softly. Add a dab of glue to the knot, leave to dry and trim the thread.

Step 4
Repeat steps 1 - 3 twice more so that you finish up with 3 strands threaded through your rings/connectors and closed into loops. Make sure each loop is separated and not tangled and that the knots are at the opposite end for your rings/connectors.


Step 5
Start braiding by taking each looped strand over the previous one and keeping an even tension that creates a pleasing effect - how tightly you braid will affect the length and drape of the finished
element.

Whilst braiding make sure you keep your knots at the end of the loops.

Step 6
when you get to the end of the braid lay each strand on top of each other lining up the knots as closely as possible.

Step 7
Take your wire and create a loop as you would if you were making a wrapped loop.

Step 8
Slip the wire through the beaded strands and gently ease the bead thread into the loop at the point where they are knotted. Leaving some slack when stringing your beads will help here.

Step 9
Using your pliers to hold it, wrap the end on the wire around the loop 3 times to close it and trim the excess from the wrapped end of the wire.

Step 10
Thread the other end of the wire through your bead cone or cap taking care to ensure the knots are enclosed and the strands are hanging correctly.

Step 11
Create another wrapped loop with the wire extending from the bead cone/cap and adjust the cap to fit.
Step 12
Repeat steps 1 - 11 to create your second braided element and then add a clasp of your choice.

And there you are - job done!
 |
| Ceramic beads by Blueberri Beads, Bronze connectors by THEA Elements |
As an alternative to the decorative rings/connectors you can also use this technique with bead cones/caps at both ends of the braid.
I hope you enjoyed this tutorial and I look forward to seeing it in some of your designs.
Lesley
Gorgeous necklace and a great tutorial, I love the colours you've chosen!
ReplyDeleteThat's awesome, thanks for sharing. I'll have to give that a try :-D
ReplyDeletethank you lesley - I did wonder how the strands were secured in the cone
ReplyDeleteNice tutorial Lesley - very clear! and I do love that necklace ... so earthy
ReplyDeleteBeautiful, thanks for the tut.
ReplyDeleteFantastic tutorial, thank you so much!
ReplyDeleteWhat a beauty Lesley!
ReplyDeleteThanks so much, Lesley! I'll definitely give this a try. And love the muted tones in your necklace.
ReplyDeleteHonestly, I seem to learn something new from you every day!!
ReplyDeleteSimple, elegant construction! You're good at clear, concise instructions. This makes me want to break into my seed beads!
ReplyDeleteBeautiful necklace---love the colors you picked! Thanks for your great instructions---I'll have to try it. :)
ReplyDeleteThank you for this tutorial. I always wondered how this was done. Lovely necklace!
ReplyDeleteI love this tutorial. Thank you for sharing. I've been struggling with how to add strands of seed beads to my designs. Sometimes an idea or technique seems so obvious I wonder how it is I didn't figure it out before but that's why I love your blog.
ReplyDeleteGreat tutorial Lesley, thanks for sharing (hope you're feeling better)!
ReplyDeleteLesley, what a beautiful necklace--and a wonderful tutorial. Such a simple and elegant design. Thank you for sharing! (And I too hope you're doing better and better every day.) <3
ReplyDelete