Monday, March 11, 2013

Polymer Clay Imprints

Today I'm going through the Basic Imprint Technique in Julie Picarello's book Patterns in Polymer.
I've been playing with Polymer the last few weeks and having a blast but I want to try some techniques other than molding clay and using Alcohol Inks to paint and color them so you will join me at my first attempt at this technique warts and all.


I chose 4 colors from my clay that had high contrast but went well together. 
Condition each separately.


Then making sure the you put colors that contrast well with each other together and put them each separately through the pasta machine.


Then stack them (again keeping in mind contrast) all 4 together through the pasta machine.


Then cut in half and stack, and in half again and stack. Then trim and clean up the edges.


Find tools or whatever you have that you can press in to the clay to make impressions.


Take the tissue blade and slice along the top. Obviously I need some practice getting a nice even cut but for my first time I'm ok with this. You can see the potential with this technique.


2nd slice, not much improvement but cool looking.


3rd slice, no comment!


4th slice. At this point I was loosing the impressions so I went in and made them again.
Honestly I don't know what Julie says to do at this step but I'm a fly by the seat of my pants kind of girl, once I followed the steps to get me to slicing I wasn't referring to the book any more (sorry Julie).


Cool!


Here they all are from start to finish in all their imperfect glory!!

I am happy with my results for my first try, even though I can't use them as nice pendants I'm sure I can use them to make imperfect beads and that kind of thing.

FUN FUN!!!

The author goes in to much more detail of course in the book, this is a highly abbreviated version and I recommend you get the book not only for this technique but for many others.
Julie's book is great, I'm really looking forward to trying many more of her techniques.

I put this all together in a big hurry so I apologize if it seems rushed.
 Hopefully you can find some value in it!


Kristi

Saturday, March 9, 2013

Saturday Share - Playing with Torch-fired Enamel Compound Elements

You all know of my love for torch-fired enameling by now!  There are so many techniques to learn and master with this immersion style of enameling, a la my guru, Barbara Lewis.

This week I have been playing with combining enameled components by firing them together.  There is a learning curve, for sure!  Once you have the pieces you want to combine fired, putting them together so they form one cohesive element is the tricky part.

If all components have holes, it is a bit easier...just line them up on your mandrel and re-introduce in the flame until the enamel starts to get glassy and use your pulling station or tool (pliers/tweezers) to make sure they come into contact and stick.

Here are few sets I put together...


When one or more of the elements don't have a mandrel hole, it gets a bit more complicated...if one piece has a hole and you can get it hot enough and turn it around on the mandrel just so, you can add the other component with tweezers/pliers.  You can also use a firing tripod and trivet if you don't mind the bottom piece sticking a bit.  

Here is a pair I am happy with that I did in this fashion...


Another set I tried, I just couldn't get the top component to stay where I wanted, and the bottom layer overfired while I played :(  Practice, practice, practice!!

For more information on combining enameled components together in this manner, check out Barbara's Ning site...she has some great video tutorials.

Our own Sue Kennedy has become a master of this technique....here is a pair of her cool compound beads.

From our own Sue Kennedy of SueBeads
So, all you torch-fired enamel artists out there?  Have you tried making compound beads?  Any tips or issues?  Success? I would love to hear from you!

Happy Saturday!

Melissa Meman

Friday, March 8, 2013

Freeform Friday: My take on transfers...


Do you ever have those moments, those smack-on-the-forehead moments, where you ask yourself - "Why didn't I do this sooner!?!?!?!?"

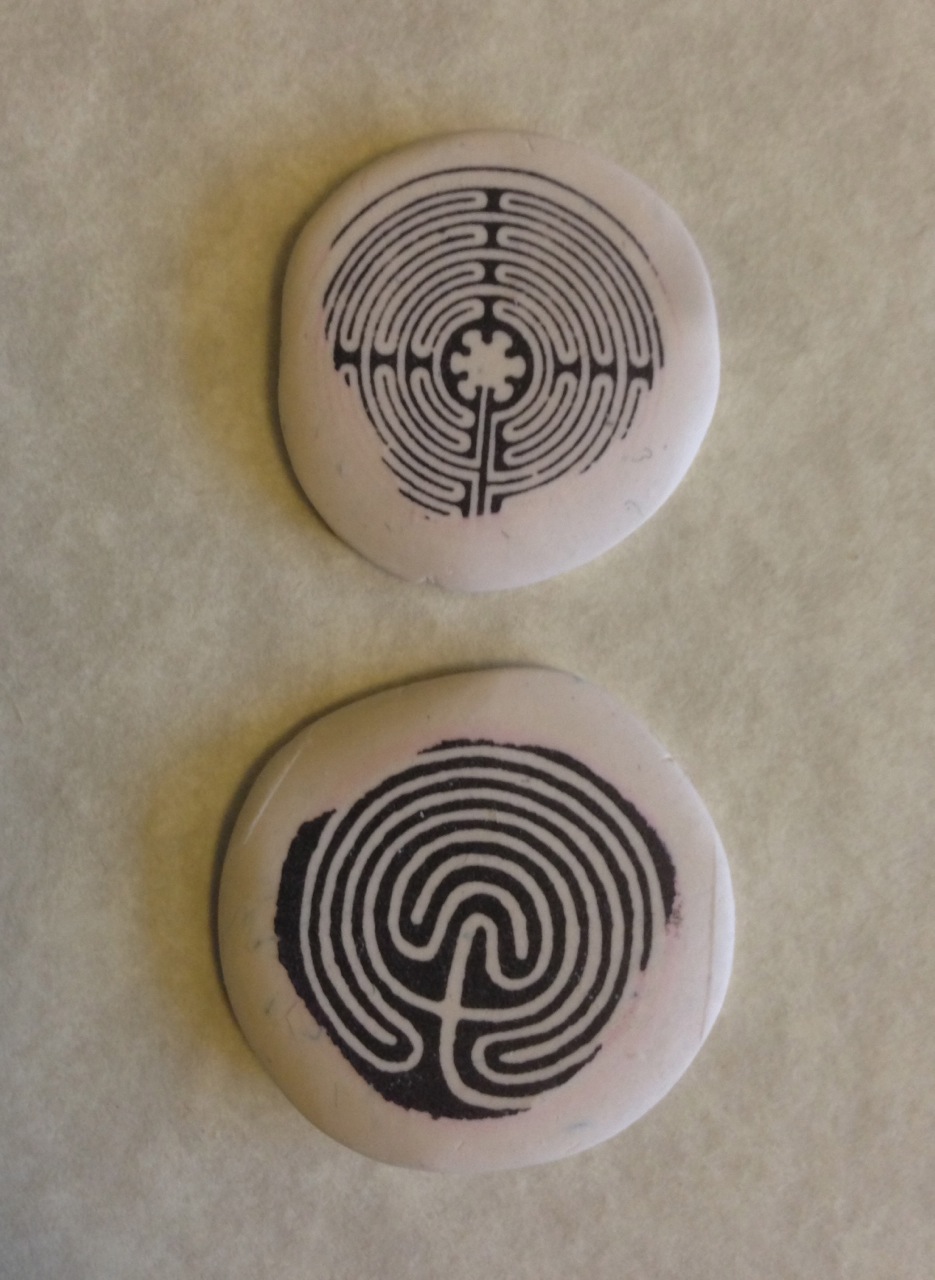
I had one of those last week. Loud and clear. It involved images, toner copies to be exact, and polymer.
(I apologize in advance if this is old news to the polymer people out there. I know I am writing about a versatile, oft used method, and I am not adding any new earth shaking twist on the technique...)

Two years ago - I had an aside conversation with Robert Dancik in his Faux Bone class. He mentioned how easy polymer transfers were to do - press, bake, peel. I was skeptical. His fabulous book "Amulets and Talismans" describes the process the same way. I always have toner copies  in the studio, sorted into folders;  I use them often in mixed media collages. So - I was working in polymer ( which I do in sessions as I have to set up the oven etc...) and I tried it.

Heavens! Press, peel, bake! (Smooth polymer surface, rub image onto clay to stick it down, cure in oven with polymer on top of paper. Peel while warm. )So clean, clear, easy to read! 
I am excited with the possibilities! I used up all the rest of my conditioned clay: 

Plethora of pretties!
Color copies work! Reverse your image if you have text... 
  •  I rubbed the dragons tail while it was hot from the oven and it smudged a bit. After cooling everything seems stable, but I am testing a few glazes. I cant use this technique in a piece for sale until I am confident that it will hold up to wear.
  • The polymer piece used for the mermaid had a few wrinkles on the surface. Those areas didnt transfer well. 
  • I tried an image that had grey halftones ( the hippocampus or mer-horse below) and it wasn't as sharp and clear as I would have liked. 
  • I tried labyrinth images on slightly rounded organic shapes - only transferred where directly touching.
  • I plan to test some images with watercolors and alcohol inks, as well as the acrylics and heat-set oils I usually use on polymer. 


I have since my A-ha moment googled "image transfer on polymer" and there are a million hits. People talk of Lasertrans transfers, and printing onto T shirt transfer paper, using liquid Sculpey or Modge podge & wet rubbing the paper off the image after transfer... During my next polymer session in the studio I plan to try Laurie Mika's technique found in this clip. It seems fair to test other more traditional ( yet more labor intensive) methods. I personally think that streamlining the process is good. If I am creating a polymer image cab to set in a metal bezel, and then bead/wire wrap a necklace... the longer a piece takes to create - the more I will have to charge. But I want it to be with-out-a-doubt stable...


I would love to hear any thoughts from people who have tried other methods.  What methods have you tried? What worked? Did not work? What do you use to seal your images? 


PS: the results from the three sealants pictured above. I like all three and can see them each being the right choice in different applications. From L - R: satin, glass, matte. They are each very secure - I scratched rather hard at each image with my thumbnail!


Jenny 

www.jdaviesreazor.com


Thursday, March 7, 2013

Favourite Creative Spaces...

You might remember a few weeks back that I wrote about the frustrations of outgrowing my creative workspace and that the time had maybe come to think about doing something about it. Well this is one issue I didn't procrastinate over for too long and earlier this week I took a deep breathe and hired a contractor to do the work for me. All being well it will start on April 15th and I'll be in by May 1st.

This is a very rough plan ( not very techy and a bit off scale) I did when I was getting my head around the idea but it's changed a little now, mainly because I tried very hard to focus on the practical aspects and this will lead to a slightly smaller studio design (now in the hands of the builder) which allows for my ridiculously small, dog leg shaped kitchen to be squared off and enlarged a little.


I will lose the area at the back indicated by the freezer but although the studio will be a little smaller I won't have to have appliances in there so that's a bonus and, I have to think of the resale value of the house since it's unlikely that any future buyer will be a bead freak who'll prefer studio space over kitchen space...unless I sold it through here of course!

For me the most exciting thing is the simple prospect of a sink with running water, a workbench long enough to have several activities on the go at once and a design desk with natural light from a big window. And then of course there is the fun of fitting it all out. As it links to the kitchen and both areas need to be functional, the plan is to refit both spaces to match so needless to say I have been pouring over designer kitchen websites looking at cabinets work tops, sinks (I so want a butlers/Belfast sink), flooring etc. The layout will pretty much be determined by the space itself but the style could be anything and I have no idea which way to go yet.

It's inevitable then that I've also been surfing the web for other studio ideas and there are some fantastic spaces out there, all-be-it that many of them are totally beyond anything I could do. It seems some of my AJE team mates are also avid collectors of 'studio porn' ( I hope that doesn't have connotations I'm unaware off...) so I thought for today's post we'd take a leisurely stroll through some favourite creative spaces and ideas...just click on the photos to find out more.

Linda has a Pinterest board dedicate to this subject with some pretty aspirational finds - who wouldn't want to work in surroundings like this and how cool is that light shade...?


This is one of my favourite finds and I just love the utilitarian, urban feel it has with a pinch of shabby chic thrown in for good measure. Great colours too.


Jo's favourites included some great ideas for small spaces. This muffin tin idea is such an ingenious and practical way of storing all those bits and bobs you need close at hand but (in my case) can never find when you need them.


 And how about this for maximising space in a small area...?


Another one from Linda here that's much closer to what most of us are probably used to and the little things that catch my eye here are the fabric swatches wrapped around the table legs and that huge rack for pliers...I NEED one of those!


This next one is from Jenny and I love it for two reasons. I really like storage that keeps your work surface clear of clutter but has everything close at hand and I want to make use of the wall above my new workbench in this way. But also, this really reminds me of my Grandfathers shed where he took pride in keeping all his cabinet making tools in pristine condition and with a place for everything and everything in it's place.


Here's another one for those who are very short on space - a omplete creative nook in a closet!


Some more great utilitarian storage here from Linda's collection...This appeals to me for storing small items because I hate having to move things around to get to the item I want...just far too disruptive to the creative flow!


My final selection comes from Jenny and is my favourite because this is where I see myself in my daydreams - in a proper jewellers workshop surrounded by amazing tools for every conceivable need that are worn and polished from years of dedicated creativity...good lord just look at those bench blocks! Ah well, what would life be without dreams...


Will my new studio have any of these concepts in them? I don't know yet but I will be posting a daily blog throughout the development over at the 'The Gossiping Goddess' and I'll be sure to keep you updated here to.

In the meantime - happy creating.

Lesley