Showing posts with label AJE guest contributor. Show all posts

Wednesday, September 17, 2014

Guest Blogger Shirley Moore: Tis the Season

Today we have guest blogger Shirley Moore talking about designing jewelry for the season without getting too kitschy if that isn't your style.

---------------------------------------------------

Hi everyone! I’m Shirley Moore, and I’m thrilled to be your guest blogger today.
I’m sure many of you already have a stock of seasonal designs ready to stock in your store. But what if you don’t, what should you create?

Personally, I’m not a fan of ‘themed jewelry’. I adore wearing my jewelry, and it irritates me if I have a piece that I love wearing, but can only wear it at certain times of the year.

Mummies by DonnaTrull Glass
These little mummy beads are adorable, but can’t really wear them in September, now can I?

Necklace by For the Cross Jewelry

But this beautiful pumpkin bead can be worn all throughout the fall.

I try to think outside the box on theme colors as well. Red and Green are the staple colors for Christmas. But you don’t have to stay with the traditional dark red and forest green….

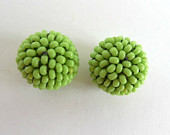
Bead pair by SueBeads

Pair these green transparent beauties from Sue with some of these:

Copper Shard pair by Kristi Bowman
And, voila! You have a perfect pair of earrings for the Christmas season, that you can also wear throughout the year!

Don’t box yourself in with descriptions either. Diana has these listed as chili peppers, but….
Chili pepper charms by Diana P

paired with these cuties from Kristen, you now have Christmas colors with your own style!


Valentine’s Day is a tough one. Hearts and Roses abound! But, what if cutesy just isn’t your bag? I am slowly learning the lesson...don’t create for the market, create what you love. Nothing sucks the creativity out of you faster than to make something because you have to…

You can still create pieces for the season, just do it your way!

Heart by Aunt Matilda's Jewelry Box

Roses are Red by Eridhan Creations

Thanks for reading!

-Shirley Moore


Wednesday, August 20, 2014

Guest Post: Lampwork Tutorial - Make a Father Christmas Bead

Today we have a lampwork tutorial written by guest blogger Laney Mead, the creative mastermind behind Izzy Beads. She's helping us prepare for Christmas gift giving. In August. Enjoy! -Jen

--------------------------------------------------


Don’t shoot the messenger but…just 126 days left until the 25th December. That’s not many weekends to get your shopping done, so why not make fabulous Santa’s to hang on the tree instead? Make two little ones and have earrings, a pendant, a bookmark?  


Here's a tutorial on how to make Santa beads using lampwork glass and lots of fire.  Make them and sell them at craft fairs or give them as gifts, or if you get the chance a few for Beads of Courage, the arts in medicine charity that supports the families and children. Please visit their website for more info.  

Glass needed
page1image1864
One rod of red – I used Effetre Deep Red
One rod of pink – I used Effetre Light Pink
One thick stringer in pink
One thick stringer in black – I used Effetre Black 

One stringer in clear
One stringer in white
One Filigrana stringer in white and clear – I pull my own,. or you can buy them from your glass supplier


To make a filigrana stringer for this project, just wrap a small amount of white glass onto a mandrel, without bead release, marver into a small barrel shape, allow to harden slightly, encase in clear glass, melt in and pull into a stringer, you might need to pull several of these to make sure you have enough.

Remember that red glass goes very black during the heating process, so all these pictures show the red glass as being black.

Step 1. Wrap a small base bead in pink. I make a nice sized spacer bead size. This is the head. 


Step 2. Wind on the red glass above the pink head. This will be for the hat, which we will shape in a minute, look at my photo, I don't wind the red glass onto the pink head, but leave a small gap, this is so I get a neat cone shape adjoining the head.


Step 3. Heat up the red glass, try to keep the pink glass as stiff as possible, gently marver the red glass into a cone shape. This may take several heat and marver steps to get a nice join to the head, without squishing the pink glass.


Step 4. Add another wrap of glass to the other side of the pink bead. I add just a bit more of the red than the pink at this stage, this is for the body so you will want a slightly larger shape. Gently marver the red body glass, into a longer round shape, a cross between a round and a barrel, a Santa shape!


Step 5. Now you have your basic Father Christmas shape, its time to decorate! Add the eyes next. Using your black stringer melt in two dots, melt flat. Add white dots on top of the black, melt flat, add clear on top of the white and melt nearly flat, then add a small dot in the middle and melt flat.


Step 6. Using your filigrana rod, start to give Father Christmas his beard, using simple dots, melt gently to stick them fast, but not enough to flatten them.


Step 7. He is looking Santa like now! Using the pink stringer, give Santa his nose. Melt to stick fast, but not to flatten.


Step 8. Finish the hat. Still using the filigrana rod, add two dots and a nice white brim. Again melt to stick, but not to flatten.


Step 9. Using the black stringer, add two nice sized dots to the bottom of the body, heat gently and press onto either a hand held marver or torch marver. He now has feet!


Step 10. Nearly done. Using the thick red stringer add two swipes, one either side of the body for his arms. Heat to stick. 


Step 11. The last step I forgot to photograph! Using the thick pink stringer, add two dots, one on each arm end for his hands. Heat thoroughly, check all joins are secure and pop into the kiln to anneal.
  
Additional ideas: 

- Add a stringer line of black glass all around his middle with a dot of yellow/gold, for a belt. 
- Add more white filigrana to his head for hair. 
- You don't have to use filigrana, you could just use regular white, I like filigrana for this bead I think its looks more Christmassy.
- Make little ones and use as earrings. 

-------------------------------------------------------

You can read more by Laney on her Blogshop for her beads on Etsy and on Ebay under the ID izzy-beads, and find her on Facebook.


Monday, May 5, 2014

What Inspires...Louise Goodchild

Today we are delighted to welcome to AJE a guest contributor - jewellery Designer and Artist Louise Goodchild to tell us a little bit about what inspires her beautiful and immaculate wire work.


Hello, I’m Louise Goodchild and I work full-time as the designer/maker at Louise Goodchild Designs. I’ve been working with wire for a few years now. Anyone who follows my work will know that I’m a confirmed bead addict as well as a wire worker – I have a lampwork ‘problem’, which I daren’t indulge too often! Luckily, I can squeeze quite a lot of colour into my wire pendants, which are mostly made with coloured wire and seed beads, so I don’t get bored.

I work from two desks in the corner of our guest bedroom, and I have to confess, as much as I love it when my desks are tidy, I often work in utter chaos! 

 
What Inspires You?

I’m often asked this question. Sometimes I think it may be easier to reply with what doesn’t inspire me! My imagination is usually in overdrive, so it often only takes a chance phrase or glimpse to prompt an idea. Like many people, for me visual inspiration is a great trigger – just going outside can be a good kick starter if I’m in a bit of a creative slump. This small laburnum in my front garden is in bud and will be flowering soon. It wasn’t a great stretch to imagine a laburnum pendant, so out came the wire and beads.


Admittedly, I do make a lot of pictorial wire pendants, so the vision in front of me is often translated fairly literally when it’s in my hands. Although, of course, artistic licence is a wonderful thing! Those who know my work may also know I have a slight obsession with ‘sheepsies’ – this photo of distant sheep in the fields was taken on Sunday, but my Springtime Splendour was not the first – nor likely to be the last! – featuring sheep.


Colour – and all the delicious combinations found in nature – are a great inspiration to me. The sky seen from my front door gave me the most beautiful palette for my Setting Sun pendant.


Inspiration doesn’t have to be translated directly, of course. My flowering honeysuckle last year inspired this bracelet – the colours were just so vibrant. I couldn’t resist putting together a palette of beautiful beads in the same colour scheme.


I also take inspiration from stories and fairy tales – several of my pendants, and many of my drawings are based on myth, legend and folklore. Here are two variations of one of my most popular designs – the wire goddess (originally created as an entry into the logo challenge for the Wire Goddess Team on Etsy – I didn’t win!).  When I'm asked to make these as commissions it's often to represent the wearer or a departed loved one, which is really quite humbling.


So what inspires you? What do you do to kick start your creativity if your muse has done a vanishing act?

Louise


A few more of Louise's lovely pictorial wire pendants available from her Etsy shop.
https://www.etsy.com/shop/LouiseGoodchild