Showing posts with label wire work. Show all posts

Wednesday, March 16, 2016

Working With Wire

One of the things I have been enjoying recently is wire wrapping, so I thought I would share my wire wrapping journey and some amazing sites for anyone else that would like to learn or improve their skills with wire.

It started way back in 2012 when I happened upon a tutorial by the amazing Nicole Hanna for a key pendent, I liked it so much I brought it regardless of the fact it was designed for intermediate wire wrappers and I had next to no experience. It was so beautifully written and with such clear photos that after a few attempts my key looked pretty much well like a key!
Key Pendent Design By Nicole Hanna
If you have not been to Nicole Hanna's web site then you are really missing out. She always goes above and beyond in her generosity to the wire wrapping community, in so many ways!
Every first Tuesday of the month Nicole has a tutorial treasure hunt for one of her tutorials on the site, if you can find it you get to download it for free (click here for more information). There is also introductions into wire weaving and types of weaves, information on pricing you work, photo editing, contests and so, so much more!!!
Fast forward to January 2015 and my next attempt at wire wrapping comes from the book Timeless Wire Weaving by the amazing Lisa Barth you can read my review and how much I love that book here.

from the book Timeless Wire Weaving by the amazing Lisa Barth
Although I really wanted to try every single design in the book for some reason I have not got around to it yet but I had better get a move on as Lisa is already writing a new book!
So my next attempt at wire wrapping came after a very inspiring demo at the 2015 October Big Bead Show, Sandown where I got to see James Ferris of Lonely Soldier working his magic with wire, I was so impressed that I had to buy one of his tutorials....

Design From LSDesigns Prong Wrap Project Booklet

This booklet is jam packed full of GREAT tips for wonderfully neat wire work, and I just love the beautiful swirls.
Then, as seems to be the way months pass until I get around to another project. This time it was the amazing work of Nicole again, as well as her amazing web site Nicole also has a You Tube channel called Go Art Yourself (where dose she find the time?) where she posted a tutorial for a wire wrapped Crowned Hair Fork and oh my goodness I HAD to give that a try, Unfortunately in my haste to get started I cut my wires too short and got half way through the design before noticing so had to improvise the ending, but I still quiet like it.

Crowned Hair Fork
I of course had to add art beads (I am so over excited that I can now wear art beads in my hair, so I shall be making lots more of these)! The lampwork shell is by Mandrel Beads and of course the lampwork head pin is by our own wonderful Glass Addictions by Jen Cameron. 
Then after a few hours were lost skipping around on You Tube (where I stumbled upon OxanaCrafts, another MUST see channel, I love her Heady Style Wire Wrapped Pendent Tutorial and her 3 stone Asymmetrical Wire Wrapped Pendeant Tutorial).
Then I got to thinking I would try my own design, now I don't know how others go about designing things but most of mine is done through playing/trial and error, but mostly I sit and I play with my beads, see what goes nicely and see where that leads me. Well that's what I did and this one just happened....

Wire Wrapped Lampwork
The center bead is by Moogin of course and lampwork head pin by Jen Cameron (I am steadily working through my stash). 
Now I like this but it is not neat enough and needs more swirls! 
My eventual plan is to build up enough confidence with wire to then be able to try the STUNNING tutorial by Imnium. 
If you are interested in wire work (and are on facebook) then Wire Wrap Tips & Tutorials is a great place to visit with lots of tip and a wonderfully helpful crowd!


Saturday, June 13, 2015

Beach Vacation Jewelry Designing

I'm getting ready to leave tomorrow with the boys on a much deserved trip to the beach!  Yay! Fun in the sun, or not, as the weather report seems fraught with clouds, rain and storms. (sad face)  As much as that seems like a downer, I don't really care.  If I can look at the waves, and hear them thunder to the shore and walk with sand (wet or dry) under my bare feet, I think I will be okay!

From our trip to the same beach a couple years back!
If you are like me,  when you go on a family trip, you need some creative things to keep your hands busy when you are bored or the rest of the fam wants to do something you are not particularly interested in.  What to bring, though?  Lately, my jewelry creation interests have been in the fabrication mode...soldering, enameling, metal clay and polymer clay firing. Can't bring the kiln, torch or toaster oven!  So, I usually resort to...beads and wire.

This trip I have decided to focus on some unfinished projects first...

My mixed-media pendants and metal clay pendant in various stages.
These are in various stages of completion...some just need a clasp, some need to have more links added, etc.  They have been in my "to do" pile long enough.

I also want to start a new "rosary" project.  I put quotations, because this will not be a traditional Catholic rosary in the sense that I am going to use my metal clay components, and I may or may not do the full 50 Aves with 6 Pater beads.  I guess we'll see.

My white copper components and gorgeous tiger-eye!
This is a perfect beach project for me, as all I need are wire, beads, pliers and a cutter.  How to pack it, though, so it doesn't take up much room and is all in one place?  I found these cool boxes at The Container Store ages ago and I like the flat, briefcase-like design.

Nice and flat, so it can stack in your suitcase.
Just add your materials, toss in your new favorite jewelry magazine for beach reading and for stabilization of the contents and you are all set!
I do have a couple of projects I wanted to get done before I leave...something new for me to wear!  My beach jewelry wear is usually very simple...just earrings, and maybe a bracelet or necklace at night.

I hoped to get a couple new pairs of earrings made for me...these are on my table right now:

Gorgeous stoneware by Diana Ptaszynski of Suburban Girl Studio, ceramic flowers by Joan Miller, and my favorite Czech glass beads.  Combinations to be decided and probably changed 20 times!
I would also like to create a beachy-themed bracelet with these gorgeous beads and maybe some leather...love Diana's starfish connector....I have been saving it! Don't Sue Kennedy's ridged lampwork beads fit with Diana's mix perfectly?

Yummy mix of beachy colors!
So, this is my rainy day beach plan!  Who knows, if we have wonderful weather, there may not be any free time to sit and do any of this, but at least I am prepared!  I'll try to follow-up and show any finished pieces next time!

How about you?  What kind of creative projects do you like to take with you on vacation?  We would love to know!!!!


Saturday, November 8, 2014

Make Your Own ~ On Wild Autumn Winds Earrings


It's no big secret that autumn is my very favorite season! I love everything about it—the bright colors of the changing leaves, the grey skies, the first frosty mornings, the bright starry night skies, and… even the bitter cold winds. For me, one of the most magnificent wonders of autumn is seeing the trees swaying in the gusty winds and watching their leaves take wing. Oh! And don't forget the flocks of migrating birds flying in the wild winds. Yes, the name of my studio was inspired by those gorgeous moments!

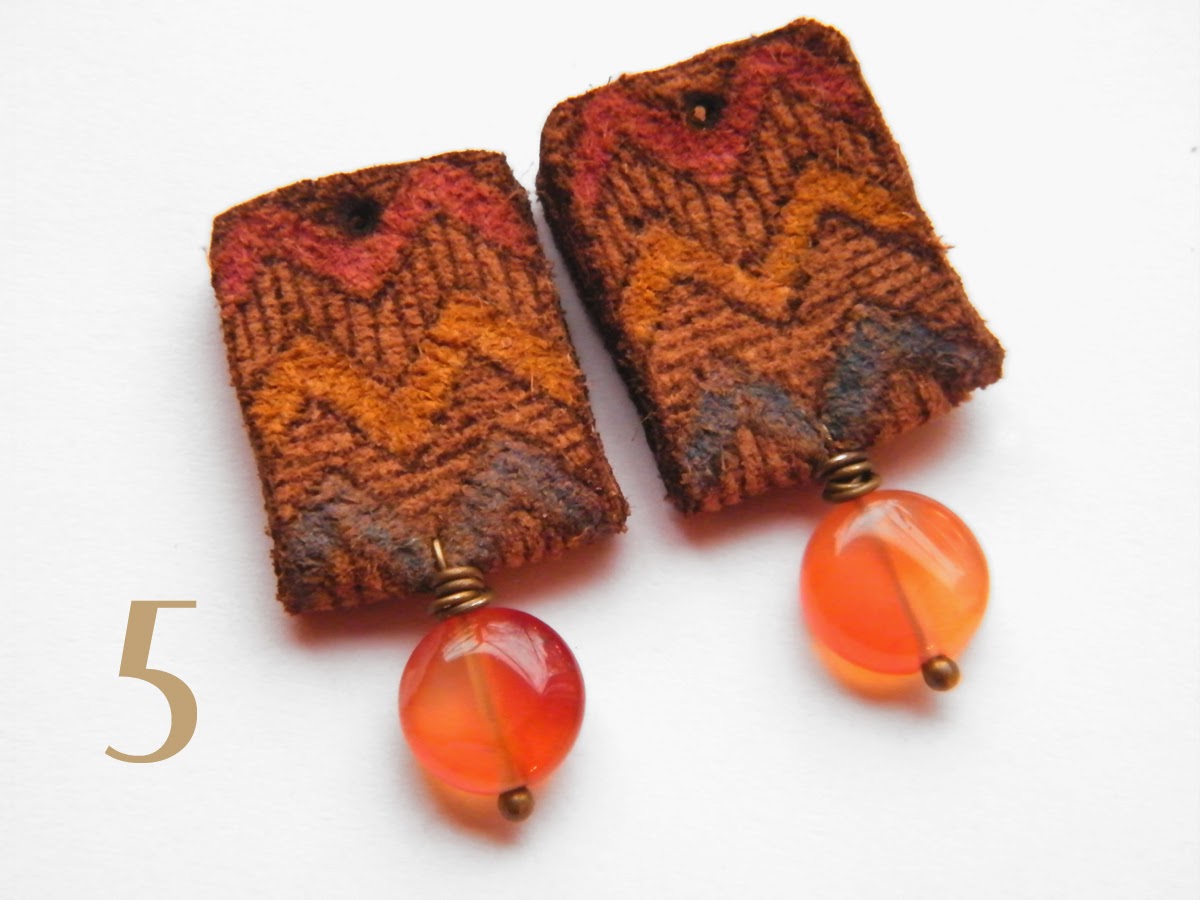
Today I'm making earrings again—care to join me? Good! And today, I'm working with a brand new component in leather made by my uber talented sister, Bethanne. If you don't know already, she joined my shop and the ranks of art jewelry element creators just a few months back—such exciting times!!

Okay, lets get creating…


Supplies you'll need:
- 22 gauge bronze wire
- 2 headpins
- 2 earwires
- 2 10mm carnelian coins
- 2 rustic chevron leather rectangles
- 2 raven black aster wheel disc beads
- 2 rustic tribal white seabird beads

* The chevron rectangles, aster wheels, and seabirds are available in my etsy shop.

Tools you'll need:
- tape measure
- wire cutters
- round-nose pliers
- flat-nose pliers
- bent-nose pliers
- large needle


1. Put the carnelian coins on headpins.


2. Fold the chevron rectangles in half and using a large pointed needle, pierce a hole going all the way through both sides of the fold.


3. Pierce the second chevron rectangle.


4. Put the headpins through the holes and bend straight down, leaving a little space above the carnelian for wrapping.


5. Wrap both carnelians drops.


6. Cut two 14 inch lengths of 22 gauge wire.


7. Sandwich the aster wheel between the chevron rectangle and put them at the center of the wire.


8. Wrap several times through the aster wheel and chevron rectangle to secure them in place. The holes are a bit smaller on the chevron rectangle than the aster wheel, so I wrapped two times around the aster wheel first… and then through the holes of the chevron rectangle a few more times to give me enough wraps to keep everything together.


9. Bend one wire up straight and wrap the other tightly around once just above the aster wheel. Place the seabird just above the wrap.


10. Form a wrapped loop at the top of the seabird. Don't wrap the wire beneath the seabird yet!


11. And now, wrap the wire at the base of the seabird. Wrapping the top loop first makes it easier to make the base wrap tight and consistent. Do steps 7 though 11 to make the other earring… add earwires, and you're done!

Enjoy your new earrings!!


Have a fabulously creative weekend!


Rebekah Payne

Friday, October 3, 2014

The Versatile Wrapped Loop

Those of you that are familiar with my jewelry style know that this classic link is a go-to technique of mine.  In fact, I don't think there is a piece of jewelry in my shop that doesn't have at least one wrapped loop connection!

Recent earrings featuring my new copper clay morsels and Czech glass beads connected with wrapped loops!

I remember first learning to do these a million years ago.  I had been making earrings...you know, the old "bead on a headpin" style and just doing a single loop at the top, never really knowing where to cut the end and how big to create the loop.  They tended to come off the ear wires a lot...let's just say, they weren't my best work!  A fellow opera singer/jewelry maker had been mentoring me and one night in our dressing room, she showed me the wrapped loop.  It was really difficult and my initial tries were truly ugly using those same cheap, hard headpins I had been using, but I was hooked!

Fast forward through a lot of wonky, misshapen, kinked work.  I graduated to sterling silver soft wire and cut it myself to make links rather than relying on bought headpins.  Wow, what a difference! It was so much easier to make the wraps and get them to lie straight and tight.  Around this time, a friend asked me if I could repair an old broken rosary and I thought, "wow, I bet it would last a whole lot longer if I did wrapped loops instead of these single ones".  A heckuva lot of rosaries and wrapped loops later, here I am.

One of my Melismatic Rosaries with carnelian and sterling.

My recent COM piece featuring Kristi Bowman's gorgeous copper clay focal and a beaded chain of wrapped loop serpentine.
The thing about wrapping loops for rosaries or beaded chain, is that it seems like it will take forever, wrapping each of those beads until you have the right length!  It can be very monotonous and hard on your hands!  I mean, gosh, there are 53 Ave beads and 6 Pater beads in a rosary, plus the wrapped connectors/spacers!

My solution has been to do sort of an assembly line so that I do all of 1 step for all my links at a sitting.  Here is my process...a little crazy, but it works for me!  My rationale is that all of these steps require a different grip of the pliers or my hands/fingers and I can go quicker if I can do some  or all of the repetitive things at a time.

My assembly process for the COM piece.
Now, I am sure most of you know how to make a wrapped loop...I mean, there is a tutorial in almost every beading or jewelry-making book out there.  If you have a specific way that you bend the wire or form the loop or even make the wrap, they will all work with this quick assembly process I have with some tweaking.
  • Measure length of wire you need using your beads of choice.
  • Cut a couple of pieces at the measured length.  Using 1 of the cut pieces, complete an entire link.  This will ensure that you have enough wire to wrap both sides consistently, ie, same number of wraps, similar loop size, etc.  You want to have an almost exact amount.  Too much, then you have to cut off small pieces for the scrap pile.  Not enough...well, you pretty much have to start over!  I know a lot of people say work from the spool, but that sort of throws a wrench into the assembly line concept.
  • Once you are sure of your length, cut as many pieces as you will need for your project, or at least one sitting.  I use a previously cut piece to measure the next piece, so they might not be exact, but pretty close.
  • Make your 1st loop on all your pieces. You can slide a bead back on the get a feel for where you want to make that first bend.  Once you have done a few, it becomes second nature.
  • Do all the wraps on the 1st side.  For rosaries, I usually do 3 wraps and stop at one layer for a more simple, refined look.  For my beaded chain, I tend to do 2 wraps and leave wire for a 2nd layer.
  • Put beads on all looped pins
  • Do the initial loop on the opposite side.  DON'T wrap them yet! We are going to connect them by inserting the open loop through the wrapped loop of the previous bead.  If you are working with multicolored or different beads, this gives you a chance to pick and choose which one to go next and change it before the point of no return!
  • Once you are satisfied with the layout, you can go ahead and make the wraps.  I always wait until both sides have been wrapped before doing a 2nd layer on either side...the bead provides some stabilization.


  • Once you have your wraps done to your satisfaction, snip the extra wire as closely as possible.  I like to cut at an angle so the wire flattens against the other wraps and doesn't just come to an abrupt stop like flush cut wire, especially if you are using larger gauge!
  • Use your pliers to make sure there are no ends sticking out.  A huge pet peeve of mine is to see finished wrapped loops with unfinished ends!  Here is where I also take the time to make sure the loops are straight and as centered as possible on the bead. 
  • My last step, and this is just my preference, is to make sure both loops of the link are turned the same way.  This keeps the chain from kinking too much, and to me just looks more cohesive and thought out.  


Here are a few more helpful tips...
  • I mark my pliers with a sharpie to get my loops a consistent size. 
  • I use thumb and index finger of my left hand (pliers in my right) to make my wraps..sometimes with harder wire (bronze) I may have to use pliers to finish.
  • My go-to gauge for rosaries and most beaded chain in 22g. The bigger the beads, the larger the gauge of wire you should use for strength, however.
  • Obviously, if you are working in sterling, save those snips!
Here's a variation I did a few months ago with some double-hole Czech glass beads I had, or twins.  I wanted to do wrapped loop links, but use both holes.  I folded the wire in half and put each leg through a hole of the bead, then made the wrapped loop at the top.  These had to be done 1 at a time in order the insert each link in the previous loop before it was wrapped.


There you have it!  Hope you give a beaded chain with wrapped loop links a try.  Would love to see what you create :)

Monday, May 5, 2014

What Inspires...Louise Goodchild

Today we are delighted to welcome to AJE a guest contributor - jewellery Designer and Artist Louise Goodchild to tell us a little bit about what inspires her beautiful and immaculate wire work.


Hello, I’m Louise Goodchild and I work full-time as the designer/maker at Louise Goodchild Designs. I’ve been working with wire for a few years now. Anyone who follows my work will know that I’m a confirmed bead addict as well as a wire worker – I have a lampwork ‘problem’, which I daren’t indulge too often! Luckily, I can squeeze quite a lot of colour into my wire pendants, which are mostly made with coloured wire and seed beads, so I don’t get bored.

I work from two desks in the corner of our guest bedroom, and I have to confess, as much as I love it when my desks are tidy, I often work in utter chaos! 

 
What Inspires You?

I’m often asked this question. Sometimes I think it may be easier to reply with what doesn’t inspire me! My imagination is usually in overdrive, so it often only takes a chance phrase or glimpse to prompt an idea. Like many people, for me visual inspiration is a great trigger – just going outside can be a good kick starter if I’m in a bit of a creative slump. This small laburnum in my front garden is in bud and will be flowering soon. It wasn’t a great stretch to imagine a laburnum pendant, so out came the wire and beads.


Admittedly, I do make a lot of pictorial wire pendants, so the vision in front of me is often translated fairly literally when it’s in my hands. Although, of course, artistic licence is a wonderful thing! Those who know my work may also know I have a slight obsession with ‘sheepsies’ – this photo of distant sheep in the fields was taken on Sunday, but my Springtime Splendour was not the first – nor likely to be the last! – featuring sheep.


Colour – and all the delicious combinations found in nature – are a great inspiration to me. The sky seen from my front door gave me the most beautiful palette for my Setting Sun pendant.


Inspiration doesn’t have to be translated directly, of course. My flowering honeysuckle last year inspired this bracelet – the colours were just so vibrant. I couldn’t resist putting together a palette of beautiful beads in the same colour scheme.


I also take inspiration from stories and fairy tales – several of my pendants, and many of my drawings are based on myth, legend and folklore. Here are two variations of one of my most popular designs – the wire goddess (originally created as an entry into the logo challenge for the Wire Goddess Team on Etsy – I didn’t win!).  When I'm asked to make these as commissions it's often to represent the wearer or a departed loved one, which is really quite humbling.


So what inspires you? What do you do to kick start your creativity if your muse has done a vanishing act?

Louise


A few more of Louise's lovely pictorial wire pendants available from her Etsy shop.
https://www.etsy.com/shop/LouiseGoodchild