Showing posts with label mold making. Show all posts

Thursday, November 13, 2014

20 minute moulds


 Whenever I’m brainstorming for new ideas, it seems that I usually need to make a mould. Being incredibly impatient, the thought of getting out plaster, mixing and waiting days for it to dry really doesn’t appeal to me. I’ll do it, but only if I can’t find a quicker way of getting the result I want. 


In my mould collection I have loads of rtv silicon moulds, looking for some seasonal ideas. I pulled out one full of snowflakes. It has some lovely designs, but they are so detailed and close together, it’s difficult to press the clay in and get a good impression. I also wanted to be able to stamp the design so that a cavity was left in the clay rather than a raised impression. This way if I used a coloured transparent glaze, it would pool in the recess and show the pattern.

I needed to make a reverse mould. If you want to try this yourself, you will need some rapid set resin, scales or measuring cups, a wooden stirrer, nitrile gloves (resin can melt vinyl or latex gloves), and an empty syringe. 

To start, make sure your mould is clean and dry. This one is made from silicon. This technique might work with other types of mould, but do a test on the edge first, there’s a chance that the resin will stick and ruin it.


Put your gloves on and measure the resin following the instructions. Mine is 50/50 so I added equal amounts in weight, then stirred with the wooden lollipop stick. You need to make sure you do this gently but thoroughly so that both parts are well combined, but you don’t add any air bubbles. You also need to be fairly quick. The resin has a 5 minute pot time and after this will start to cure. For small projects like this one, I usually only mix about 10 grams at a time.


Fill the syringe with the mixed resin and put a couple of drops in to the mould. Using the wooden stirrer, poke the resin in to all of the gaps in the cavity and then continue to fill until the resin covers the whole of the pattern. 


In a couple of minutes, the resin will start to change colour as it cures. 


After 15 minutes, they are ready to remove.


You can use them straight away. Just roll out some clay and stamp them on. If you find them a bit fiddly to use like this, you can make a handle from a cork and glue the resin casting on to the end.
I'm going to make these into individual moulds that I can use more easily. To do this, I've pressed them in to polymer clay and baked them. I now have an inny and an outy design for each snowflake.


There would have been a picture of the finished fired and glazed charms here, but due to an unfortunate incident with my cat being accidentally locked in the studio overnight, I’m afraid I have nothing to show… they would have been lovely!


Tuesday, March 25, 2014

A new appreciation


I had the great privilege of spending the better part of my week last week with award-winning artist Barbara Becker Simon.

Screen Shot 2014-03-17 at 3.13.04 PM

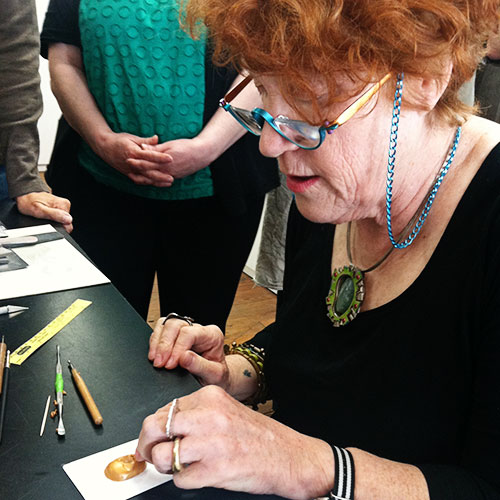
Barbara is loads of fun. She is an engaging, knowledgable, and patient teacher and she takes great care to ensure that every student in the room is successful, regardless of his or her experience level. We hosted two workshops with her at Roadhouse Arts, and I was able to multi-task so that in addition to serving as a co-hostess, I got to be a student!

BBS-Teaching

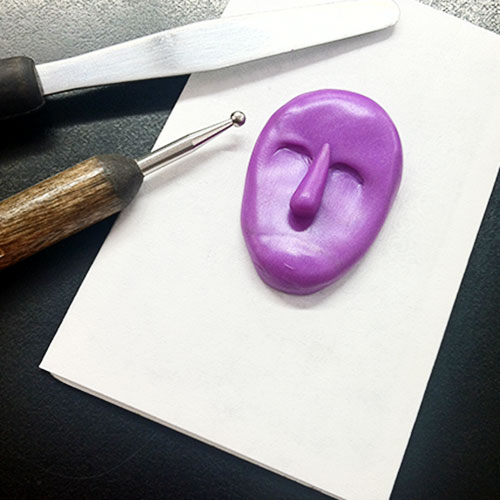
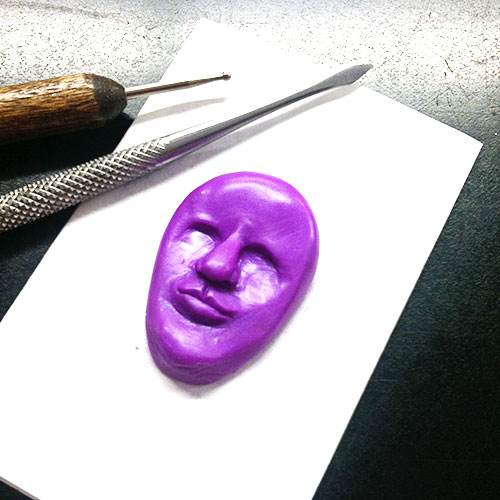
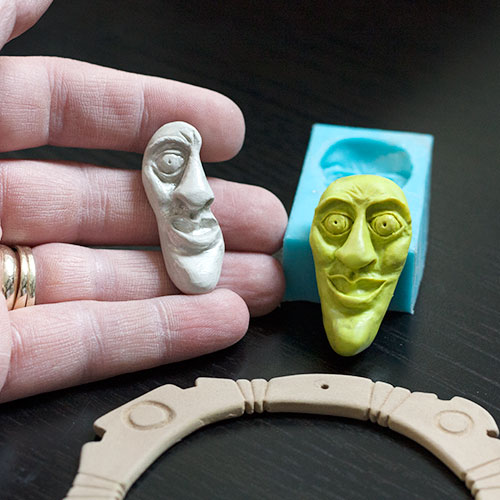
Although I dabbled in polymer clay years ago, I was never very good at it. The first workshop last week was all about creating faces in polymer clay so we could create molds to use with metal clay. Since I have never been good at literalism - seriously, I can't draw a round circle to save my life - the idea of creating anything resembling a face seemed a little far-fetched to me. To my great surprise, Barbara's expert tutelage walked me through a process resulting in a little polymer creation that actually looked a lot like a face!

Face-1

Face-2

Face-3

Unmolded

I have to tell you I have a whole new appreciation for the work of the clay and polymer artists who are part of the AJE team. The careful, painstaking effort required to make the polymer model clean and crisp enough to cast a mold was maddening - my friend Gail literally had to make me stop or I would have worked that poor little man to death! I take my hat off to all of you ladies - there's an extraordinary amount of finely detailed work that goes into what you do.

Mask


In the end, I wound up using my second mold to cast a PMC silver face (it's supposed to be Don Quixote), which I then modified and recarved to create a partial mask for a ring. It has yet to be fired, so I don't even really know if it's going to turn out, but I like how it's coming along. I also carved a bronze bangle in the second workshop last week, but again: waaaay more work that I was prepared for. It too still needs to be fired but as I was setting up to take the photo above, I noticed there's a whole section that needs to be "groomed" and fine-tuned - my heart just sank. There's already an entire day in that piece!

Last week was wonderful - I loved Barbara, and I loved her take on art and life and teaching. But I also learned there's a reason why I am so drawn to metal and hammers and torches, and why I merely dabbled in polymer and metal clay all those years ago. It's because they aren't my love... but I am deeply grateful all over again for the artists who make them such amazing mediums in the first place and for the ladies on this team who elevate them to art.

So that's what I'm learning these days - what about you?

Until next time -

Francesca


Thursday, September 19, 2013

Patience is a Virtue: Mould Making


Caroline of Blueberri Beads so enjoyed writing for our readers, she's written another article for our wonderful AJE readers. Today she covers mold making. Enjoy!
__________________________________________________________

I've had a busy week this week, all my kids are in school and I've had some time to make some plans and get organised. I did expect to be standing here after week 1 with armfuls of creations, but I seem to have just run around trying to do everything at once... I think I need a lesson in pacing myself!

So next week is going to be better, I have a plan of action and am working at things in stages. So I thought I'd share stage 1 of what I'm working on.

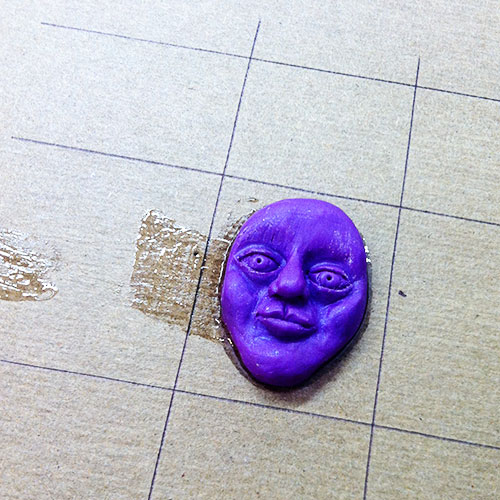
For my first project, I'm going to make a ceramic moon cabochon and set him in copper. So as I want to it to be repeatable, I first need to make a mould.

I have discovered a great way of making really sharp moulds using polymer clay and RTV moulding silicone which I'm going to share today.

I use Super Sculpey original to make my masters. Although I like to sculpt in clay, the polymer makes a much better mould as it's less porous and so far, has worked every time! Unless ceramic clay is glazed, the liquid silicon will stick to it and destroy the mould when you come to take out the master.

Here are the moon faces ready to make in to moulds.


The moulding compound I use is the same as the 2 part putty, but comes in liquid form. I didn't really get on with the 2 part putty and found it difficult to use around anything that wasn't flat. The liquid type is much more cost effective, so you can make a decent size mould that should last for a long time.


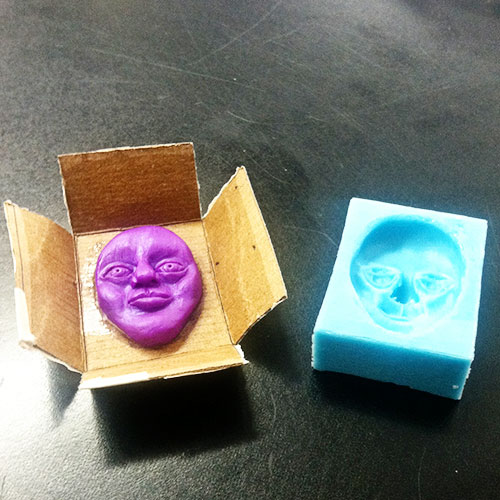
To hold the master and the moulding compound, you will need to make a container, I've found thick cardboard works really well. Make it into high sided boxes.


Roll a sausage of Blu-tak and stick it around the bottom edge of your master and stick it in the box. The blu-tak will stop the silicon from seeping underneath and keep your master from moving about.

Weigh and mix the 2 parts of the moulding compound in a cup taking care not to add too many bubbles. The type I'm using is condensation cure and has a working time of about 15 minutes so don't hang about too much! When the mixture is an even colour it's ready to pour.


Pour it into the mould in a slow stream, this helps to remove any bubbles that are there from the mixing.

When the mould is dry (I leave mine overnight) peel off the box and remove the master. You might need to trim it a bit with a scalpel blade to make sure your clay comes out easily, and that's it! To use with clay, I brush a bit of oil in to help it release.

Here's the clay when it's just come out of the mould,


And here they are after being trimmed and cleaned up, drying out ready for firing.


And after promising to be patient, I was in a rush and put these in to fire on Sunday and put the wrong program in, completely missing the slow ramp section of the firing. I opened to kiln a few hours later to lots of little exploded moons... Good job I have moulds!

-Caroline 


Monday, August 12, 2013

Texture Texture Texture

Texture is one of the things I love most and use as much as possible in everything I make!
You can make a texture mold off of so many things you might not even think about.
I'm going to share some of my tried and true favorites and some newer ones I've discovered fairly recently.
While putting together this post I walked around the house and found several brand new things to take molds of that I had never considered before and some I just hadn't gotten around to yet.


Above I've made a mold of an inexpensive lace doily and I really love the look.
I've been using this mold for awhile now and show some finished Copper pieces using it.


This is a new one! I think when I bought it for my show table display I considered trying to make a texture of it but I never got around to it. While I was thinking about this post I remembered so I went and got it and I really like the result!


Now this one is kind of an odd one but it turned out well. This is one of those sticky mat things you cut and put in your cupboards to set dishes and glasses on.
Not bad.


I love this one!!
It's a WigJig!!
Yup, makes great little dots!


Above you'll see the results that look like stone.
The texture is taken from the candle holder pictured below.
It really looks like stone and is up at the top of my list of favorites!


While the above isn't my favorite it's not bad. This is a serving tray.
Not quite enough definition for me but I might use it again.


This Gold Charger Plate I wasn't so sure about. The dots are so tiny I wasn't sure if the texture would be too find, but it turned out much better than I expected.
It's actually much better looking than the picture shows.
Goes to show you, you gotta give it a try cause you never know!!


And last but not least!
I think this might be my favorite of the bunch, I've played around quite a bit with it and I love the little twigs and things I've made with it.
It's a shingle or a piece of siding, not sure to be honest, don't even know where it came from.
It's got such a variety of texture on it I'll probably make even more molds from it.

I'd love to know what kind of strange things you've made molds of,
the sky is the limit!!


Kristi

Saturday, August 3, 2013

Mini Tutorial ~ Wildflower Molds for Bead Making

Hey everyone! As promised, today's post is another mini tutorial. Two weeks ago I shared the new wildflower molds I was working on. Are you ready to see the results?


Well… they all certainly were not as fabulous as I was hoping… the top four molds worked fine and had good detail, but the bottom four were not so great — some parts were either too deep or didn't show at all. Yes, the bottom two really are flowers, you just can't see the impressions!


Time to make more molds! Today's post was going to be on the bead making process, but since I needed to make new molds I thought I'd share that part with you first and then next time we'll start on the beads. So here goes…

(The molding compound I use is a 2 part 5 minute cold molding compound by Art Clay World USA)


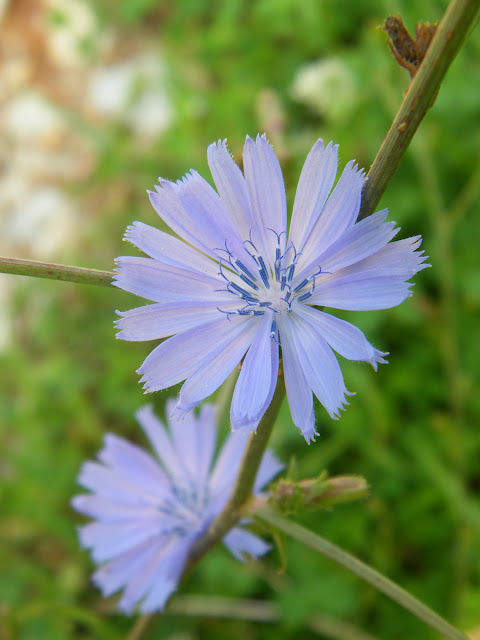
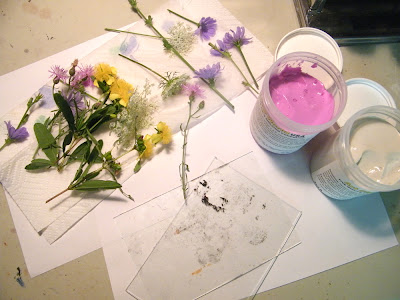
Of course, I started with another trip out to my front yard and the fields surrounding my house. Living in the country sure does have its advantages! I picked more flowers than I needed — I wanted to have plenty for experimenting. I also made sure to pick some leaves too.

One of the main reasons half of my first molds didn't turn out well is because I was just blindly pressing flowers into the molding compound and had no way of knowing until the mold cured how the flower would actually look.

So this time around, I took all the bulky flowers and first lightly flattened them under a piece of glass. This allowed me to see how the petals would be arranged in the mold, and to carefully put them in place if needed before making the mold.


After flattening under the glass I pressed the flowers and leaves into the molding compound. When pressing the flowers in, I'm always careful to take note of the thickness and bulkiness of the different flower parts. For the mold above, I pressed the petals of the flowers deep into the compound, while only lightly pressing the flower's base — I want the main focus to be the petals and a big bulky base pressed in to deeply can easily ruin that effect.


More flower smashing! Not really — press just firmly — enough so the petals stay in place.

You'll get the best leaf impressions if you use the backs of the leaves where the veins are most raised. I like to add a little extra contour to my molds by pressing deeper on and AROUND the leaves, petals and anything I really want to standout. Adding that extra contour gives the finished casting a more raised look.

You can see that extra contouring here — around the leaves on the rectangular mold…

And here — I gave this mold a slight dished-out contour so the casting will be slightly domed.


* * *

Once all the molds cured it was time to try them out. Here are the results of some testing — all the molds worked nicely this time around!


Alight, now it's your turn! Go out, enjoy the fresh air and pick some flowers… and make some molds! In two weeks I'll show you a few new beads you can make with your molds.

Have a fun!


Saturday, July 20, 2013

Working with distractions

Yesterday, Linda shared how she had been inspired by the flowers around her while she and her husband were away celebrating their 40th wedding anniversary. That got me thinking about how distracted I've been from my studio, wanting to enjoy my own surroundings. It's so hard to stay in the studio making the same "old" beads over and over again when so many lovely things are growing and blooming outside!

So this morning I went out with a plan to enjoy that distraction by capturing some new inspiration and putting it to good use!


Back inside I got out my molding compound and got busy…

Here my new molds are curing. In just a little bit I'll pull the flowers out and see if I have anything worthy of new beads—that will be my post in two weeks! See you then!


What things have been distracting you from your studio this summer? Have you found a way to harness that distraction and turn it into inspiration… and maybe a new creation? Do share!