Showing posts with label workshops. Show all posts

Tuesday, July 28, 2015

BeadFest 2015!

It's that time of year again when the AJE team swings into final preparations for BeadFest in Philadelphia... except that this year, it appears we've changed things up a little. I'm the only one teaching (for the first time) and Jenny Davies-Reazor is the only one vending. The others are just coming to play, which is a refreshing change (for them) from the annual craziness that usually accompanies BeadFest prep (you can read a bit about last year's preparations here, here, here and here).

Susan Kennedy's prep from last year

Or at least I hear it's a refreshing change. Because since this is my first time teaching at BeadFest Philly, I'm obsessing a little about making sure I'm completely ready.

My bullet journal overfloweth
The good news is that I'm excited about the workshops I'm teaching - they're fun and two of them are a really good fit for people who just want to get started with metals. While I was discussing all this with the other AJE team members, they thought it might be a good blog post so... here you go!

Friday, August 21 - Roll Printing and Keum Boo

I've written before about my love of roll printing and especially the patterns that are available from Rolling Mill Resource. Tracy was kind enough to help me put kits together for this workshop, which is going to incorporate roll printed designs with keum boo - one of my other favorite techniques.


The addition of 24k gold to sterling silver makes such a statement - and it's surprisingly simple, too. I'm looking forward to introducing folks to the process, which will really just scratch the surface of the possibilities it offers. It's a great workshop for people who want to get an introduction to some of the characteristics of sterling silver and two simple processes for embellishing it.

Saturday, August 22 - Welcome Home Jewelry

My friend Gail and I designed this jewelry set for our very first Roadhouse metals retreat last year - and if I'm being honest, it sort of kicked our butts! I've reworked the design a bit to make it a little less intimidating and now I think it's a fun project for either a confident beginner or someone with a little bit of soldering experience under their belts.


We'll also be making earrings to go with this pendant, so students will learn a cool method for creating embellished earwires and will also have the opportunity to set small stones in bezel cups. It's a good multi-technique project for anyone wanting to up their metals game.

Sunday, August 23 - Chain, Chain, Chain!

I adore this project - so simple and easy, and such an elegant result! We'll be introducing fusing principles with an easy pair of earrings, just to get everyone started, but the star of the show will be this embellished loop-in-loop chain bracelet.


I've heard this called by all sorts of other names, but I just call it embellished loop-in-loop - and since I'm a sucker for handmade chain, I make this one a lot because of its ease of construction and elegant profile. And the little balls... well, you all know I love balls. This is a perfect project for someone with absolutely no experience, and students will leave with two finished projects!

So are you planning to come to BeadFest this year? If so, I'd love to meet you and say hi - and since there are still spots open in these workshops, we could even have a little playdate if you'd like! Don't forget to stop by Jenny's booth and ogle all her gorgeous work - I'm sure she can even arrange for you to take some of it home with you as your very own.


Hope to see you in Philly! Until next time....


Tuesday, November 18, 2014

Glass Craft Expo!


One of my goals for 2015 was to expand my teaching venues beyond Roadhouse Arts - and I was a little nervous about it, because there are some seriously awesome teachers out there. (You know that little voice in your head that wonders how you measure up? Yeah. Me too.) After a lot of back and forth, my friend and business partner Gail Stouffer finally suggested that I send applications in to Glass Craft Expo, and come up with some projects that would introduce metalwork to a very glass-oriented audience.


So I did.

And all four classes were accepted.

source
(Yes, I was a little excited.)

I had never sent teaching applications out because I was intimidated by what I thought the process was going to be, but it turns out to have been a lot easier than I expected. I spent some time imagining what metalworking techniques might be of interest to someone who loves glass, based on some of the things I learned in the first year I worked with glass. Putting myself in the shoes of prospective students is one of the things I do regularly when I'm developing my regular projects and classes, so this didn't feel particularly alien to me - but I also asked glass artists I know (especially my friend Gail Stouffer!) what they would want to know if they were just starting out with metals. Then I wrote up the descriptions, put together the sample projects and snapped some photos.

Classic Glass: Bezel Setting Cabochons


Bezel setting is one of those things beginning metalsmiths generally find very intimidating - I was one of them. There is very little that I find more rewarding that watching someone in that mental place achieve success with this technique - and all with a culinary torch, even with larger pieces.

Sticks and Stones: Prong Setting


Making organic prong settings for flat-backed cabochons is easier than it looks, and the results can be quite dramatic. It can also be done with a simple culinary torch, which makes it a terrific technique for the "kitchen table" jewelry maker.


This is a simple, uncomplicated cuff that combines some very useful techniques for people just starting out with metal: annealing and forging copper, drilling holes in glass cabochons, texturing and cutting metal, and creating and setting rivets out of copper wire.


I love this one! Some simple texturing and basic soldering techniques yields a unique, customized bail that can be added to any cabochon or pendant with a front-to-back hole.

* * * * *

I am so excited - and a little nervous! - about teaching at such a huge venue. I am sure I'll have some tips and lessons learned after I've actually done the teaching part, but for now I'm working on making all the glass cabochons I'm going to need. And if you're going to be in Las Vegas next April, I'd love to see you - make sure you stop in and tell me you're part of the AJE community!

Until next time -


Tuesday, March 25, 2014

A new appreciation


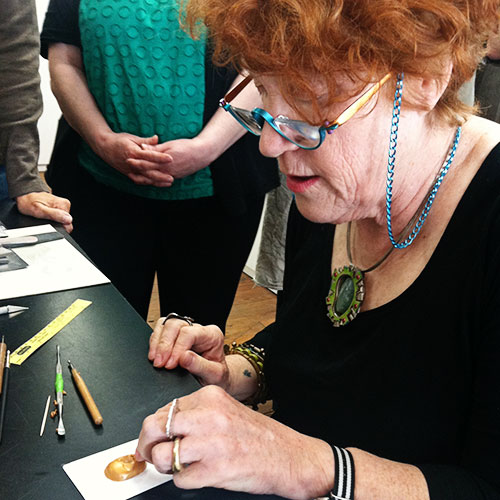
I had the great privilege of spending the better part of my week last week with award-winning artist Barbara Becker Simon.

Screen Shot 2014-03-17 at 3.13.04 PM

Barbara is loads of fun. She is an engaging, knowledgable, and patient teacher and she takes great care to ensure that every student in the room is successful, regardless of his or her experience level. We hosted two workshops with her at Roadhouse Arts, and I was able to multi-task so that in addition to serving as a co-hostess, I got to be a student!

BBS-Teaching

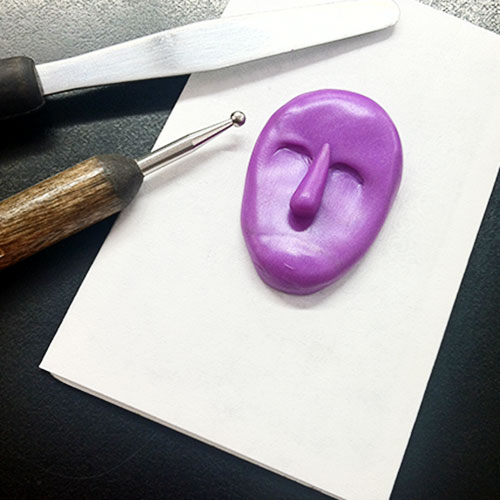
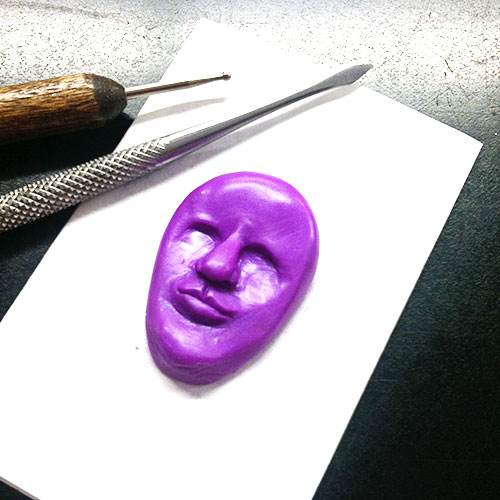
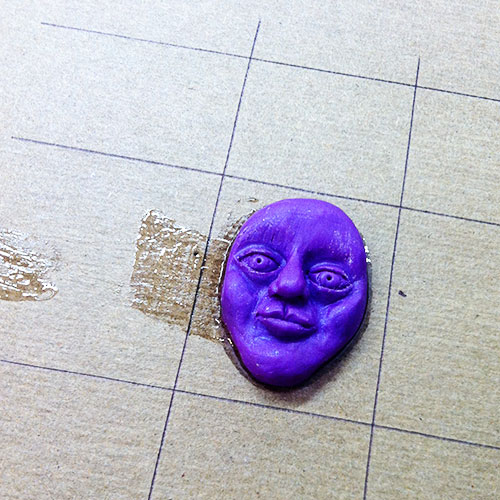
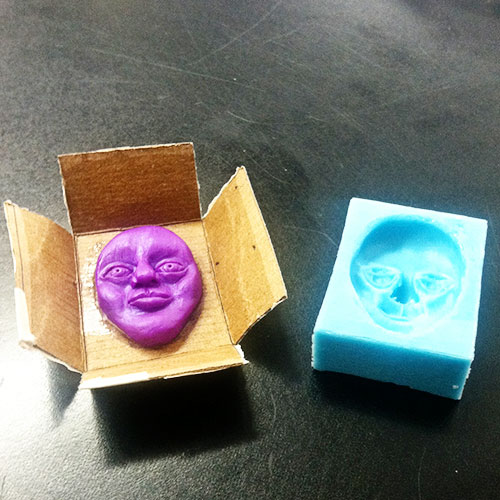
Although I dabbled in polymer clay years ago, I was never very good at it. The first workshop last week was all about creating faces in polymer clay so we could create molds to use with metal clay. Since I have never been good at literalism - seriously, I can't draw a round circle to save my life - the idea of creating anything resembling a face seemed a little far-fetched to me. To my great surprise, Barbara's expert tutelage walked me through a process resulting in a little polymer creation that actually looked a lot like a face!

Face-1

Face-2

Face-3

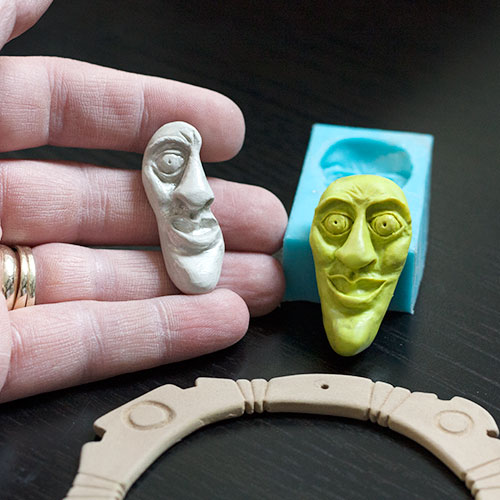
Unmolded

I have to tell you I have a whole new appreciation for the work of the clay and polymer artists who are part of the AJE team. The careful, painstaking effort required to make the polymer model clean and crisp enough to cast a mold was maddening - my friend Gail literally had to make me stop or I would have worked that poor little man to death! I take my hat off to all of you ladies - there's an extraordinary amount of finely detailed work that goes into what you do.

Mask


In the end, I wound up using my second mold to cast a PMC silver face (it's supposed to be Don Quixote), which I then modified and recarved to create a partial mask for a ring. It has yet to be fired, so I don't even really know if it's going to turn out, but I like how it's coming along. I also carved a bronze bangle in the second workshop last week, but again: waaaay more work that I was prepared for. It too still needs to be fired but as I was setting up to take the photo above, I noticed there's a whole section that needs to be "groomed" and fine-tuned - my heart just sank. There's already an entire day in that piece!

Last week was wonderful - I loved Barbara, and I loved her take on art and life and teaching. But I also learned there's a reason why I am so drawn to metal and hammers and torches, and why I merely dabbled in polymer and metal clay all those years ago. It's because they aren't my love... but I am deeply grateful all over again for the artists who make them such amazing mediums in the first place and for the ladies on this team who elevate them to art.

So that's what I'm learning these days - what about you?

Until next time -

Francesca


Tuesday, November 19, 2013

Taking this show on the road...

Regular readers of this blog may remember that in September, I drove to Washington state for a week-long metal retreat which I co-hosted with the very awesome and talented Melissa Muir. It was my first time making a long trip to do work elsewhere, and I was very challenged by the process of trying to figure out what I should take with me.

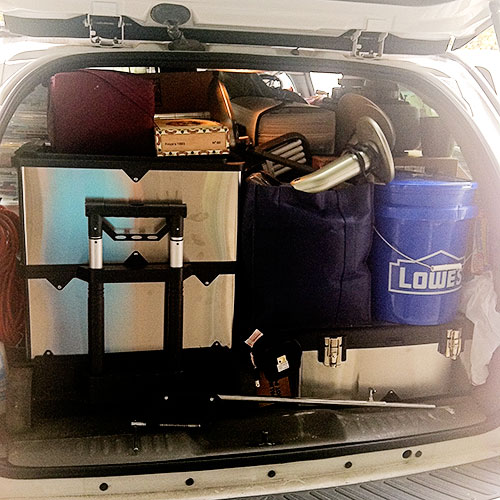
I think I took more than I really needed.


Road-Trip-9

Don't judge. And in my defense, my best friend Kimmy brought a few things.

But even the packing was a good learning experience. I thought I'd share with you my favorite travel accessory and my least-favorite, to give you some idea of what worked and what didn't work.

Road-Trip-8

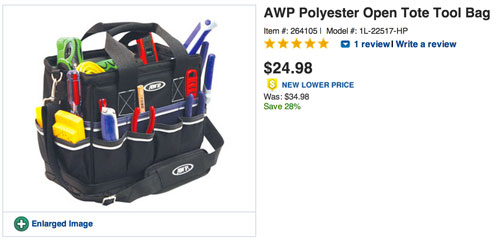
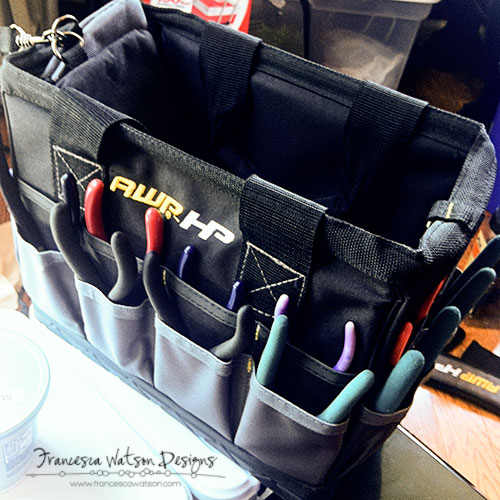
This AWP tool tote is one of my favorite non-tool purchases of the last year. It is extremely sturdy with a thick woven canvas stitched around a metal frame. The bottom and lower part of the sides is fitted with a rubberized coating that protects it from moisture, so you don't have to worry so much about where you set it down - just wipe it off! And as you can see, the price is right and it holds a TON of stuff.

Road-Trip-1

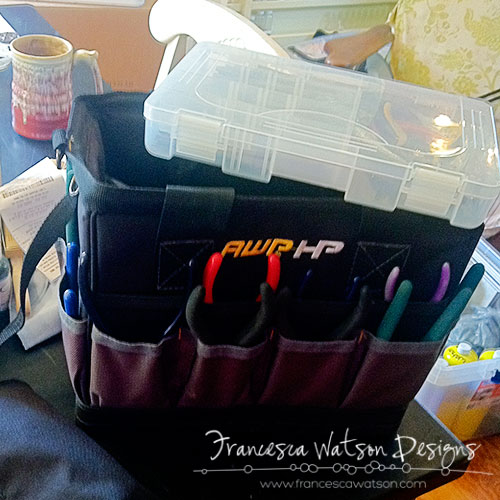
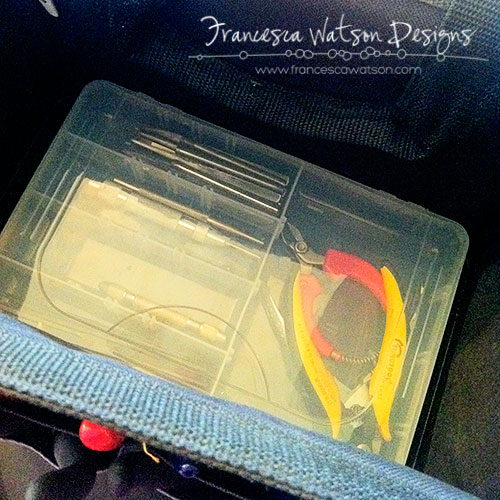
That plastic organizer is included, and it fits snugly in the bottom of the tote.

Road-Trip-2

I used it for small items and sharp items. There was plenty of room in the large open compartment for my punches and cutters, and I used the narrower areas on the left for my needle files, chasing tools, center punches and a pin vise.

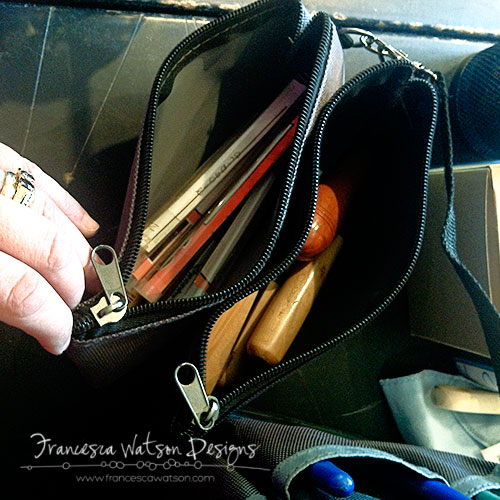
Also included are two zippered bags that clip to the tote with a long lanyard.

Road-Trip-3

I used one for all my saw blades and the other for my burnishers, ring clamp, and stone setting tools.

There are two tiers of pockets around the outside of the tote. The lower tier is gusseted, so they open a little wider than the upper tier, which are stitched closer to the sidewall of the tote. The pockets held literally all of my pliers, my favorite stubby hammer, Sharpies and more... with room left over.

Road-Trip-4

In the main section, I was able to fit a bench block, all my sanding and finishing materials, some work towels and last minute odds and ends. Since I got back, with my studio packed up for the move, I've rearranged it and the center section now holds a bench block, a sand bag, sanding materials, a saw frame, a bench pin/anvil combo, my magnifiers, and an assortment of hammers wrapped up for travel. I took this with me to the Richard Salley class I took recently, and it had literally everything I needed to do the projects. I am an enthusiastic fan of this tote, especially given its $25 price tag.

Now, here's something that worked a little less well:

Road-Trip-7

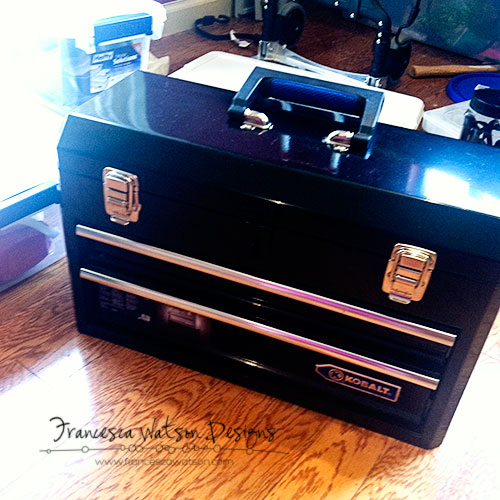
Kobalt has a steller reputation for high quality products, and in general I'm a fan. I got this tool box because I wanted something sturdy that could transport my metal bench items, and it certainly had plenty of room.

Road-Trip-6


Road-Trip-5

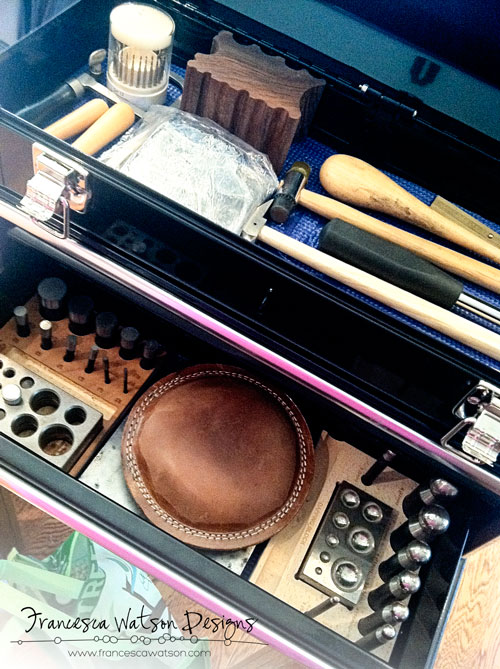
Here's the problem, though. All that metal bench stuff? It's really (REALLY) heavy. Really heavy. Once I loaded this up (and packed a bunch of shop towels in the drawers to keep things from moving around) it was too heavy for me to lift - and I was really nervous that the plastic handle on the top of the lid would just snap off. I managed to get it on a dolly and muscle it down the stairs and into the car, but it was not in the least bit convenient. I will say that having it next to my worktable created some good organizational space, but overall it wasn't a good fit for travel. To be clear, the problem was that I was loading the toolbox up with more stuff than it was designed to carry, so the problem isn't with Kobalt. That said, I would recommend they consider making this toolbox with a sturdy metal handle (perhaps with a rubberized grip) instead of the plastic.

So while I'll probably repurpose the toolbox for our household tools, I am an enthusiastic fan of the AWP tote. Since I can't afford to own two sets of my most-used tools, I'll be using it a LOT to transport things to and from the new studio when I need to work at home. And, of course, there's always NEXT year's metal retreat!

How about you? Do you have a favorite travel accessory for tools and materials?

Until next time!


Tuesday, October 1, 2013

ArtBLISS!!

Cindy Wimmer (author of the new book, The Missing Link) and Jeanette Blix (owner of Fundametals) are the co-creators of ArtBLISS, a weekend retreat in Sterling, VA.  ArtBLISS was created four years ago to provide three days of fun, jewelry-related classes to all of us arty-types!  I had the pleasure of attending the first, second, and fourth (this) years.


Art Jewelry Elements was represented at ArtBLISS this year by Melissa Meman!!!! Karen Totten, Jenny Davies-Reazor, Diana Ptaszynski and me!

 Diana


Jenny

 Me


I took two classes this year: Thin Gauge Sheet Metal Workshop by Stacie Florer; and Worlds of Color Polymer Clay by Christine Damm. Stacie is a delight as a teacher, and Christine is so enthusiastic about polymer it's catching!  I had a lot of fun - I have not really worked in metal before like this, and don't do much with polymer either.  I wanted to expand my horizons!

Here is a photo of a pendant I made in Stacie's class - I LOVE it!  I learned to cut, form and rivet thin gauge sheet metal!


And these are earring pendants I made, but they are not patinaed or tumbled yet.  I am still deciding if I want to add rivets to the bottom to dangle some beads (I'm thinking yes) so I have to wait to get my little riveting gadget in the mail!  And rivets...  Did I mention ArtBLISS makes you buy MORE things than you already have?


There are finished beads I made in Christine's class - again, I LOVE them!  I had so much fun with polymer clay.


And here are beads that are in the process of being completed.  I need to order some oil crayons to use on them (there's that BUY more stuff again!!!!).


On Saturday night we had a vendor night, and got to sell (and trade) some of our beads to the attendees of the workshop.

I highly recommend you check out ArtBLISS next year - it will be their 5 year anniversary and I hear they want to plan some really special things!