Saturday, March 2, 2013

Polymer Clay How To - exotic bloom kaleidoscope cane

Probably my most favorite technique in polymer clay is sculpting, but every so often I'll do some caning too. I'm all about intricate detail so of course, I love the fine details that can be achieved in caning.

My most favorite cane design I've done so far was a kaleidoscope "Exotic Bloom" cane. I actually first made it a couple years back… I think it was maybe my 4th or 5th cane. Beginner's luck possibly, but I was so thrilled with how it turned out and it ended up fueling so many more cane designs.


So, for your enjoyment today, I'm going to share it again! I hope it inspires you to get out your polymer and try something new!


It all starts with a skinner blend - this one is going to be the bloom's center. The blend is rolled up, reduced and cut into 8 pieces.


The arranged center. This kaleidoscope cane is made up of 8 identical pieces, so I only need to make half of the floral design.


Next I make the bloom petal blend and reduce it.


I roll the reduced blend through the pasta machine to make thin stripes. I wrap them over one side of the center and the bloom is finished.


Now for the leaves - another blend this time in greens and yellow. This is my favorite leaf blend.


I add veins and shape one half of the leaf - remember I only need to make half the design.


Here I've reduced the bloom and leaf so they're the same length.


And now for the brain cane! This one is my first. I have to say it turned out pretty well, but then again a brain cane is a bit hard to get wrong - unless of course you don't like the color arrangement ;-).


A quick run through the pasta machine to put the blend and green together. Then I fold up the cane, reduce it and cut it in thirds.


Fitting the brain around the bloom and leaf.


Almost finished.


One last blend to fill it in.


And now it all goes together - I cut the original "half" cane in half and put the two pieces side by side to form a whole. Then I cut this "whole" cane in fourths and put the pieces together forming a square.


A border of brown completes the cane.


So now you'd probably like to see what I made with the finished cane, right? I actually didn't have any finished creation in mind when I originally made the Exotic Bloom, but at that time I was in a decor making craze (yes, that was before I did lots beadmaking!) so naturally it quickly became a vase:


And then a pen. (Second one on the left.) My brother is a woodworker and convinced me to make some pen blanks for pen turning. We had so much fun creating these together!


And of course, I also eventually made some beads and jewelry.


What new things have created in polymer clay recently?


Friday, March 1, 2013

Announcing the March CoM winners!


Thank you to all of you who left comments on the March Component of the Month giveaway post - the giveaway competition is now closed and the winners' names have been drawn out of the hat (well, out of a pottery dish that usually sits on my bookshelf). Drum roll please!

Congratulations to 
 Stephanie Weiss
Niky Sayers
Kathy  (Northern Light)
Carolyn (Carolyn's Creations)
Jess Green

I will email you all tomorrow!


Thinking Big

I have been getting to know Joan Tucker and Lana Turner of Off Center Productions this year.  They only live about 20 minutes away from me.  In January, Joan asked me if I would design a necklace for their booth display in Tuscon.  She wanted something showy, that would grab people's attention and draw them into the booth.  So I selected the biggest pendant of hers that I could find, along with some accent beads.

Designing this necklace became an interesting challenge for me. When you start with a very large pendant, then everything must be scaled up to achieve a pleasing balance.  I loved working pretty much without any size constraints.  It became a great creative opportunity.


The picture above shows my design process at the very beginning, when I was just trying out different possible combinations of beads.  Eventually I decided against the carnelian at the top of the necklace and substituted the copper chain you see to the left of it. I ditched the two copper disc beads, but kept Joan's two ceramic disc beads.


At this point I was ready to start wiring all the components together.  I marked my round nosed pliers with a sharpie so that all my loops would be the same size.

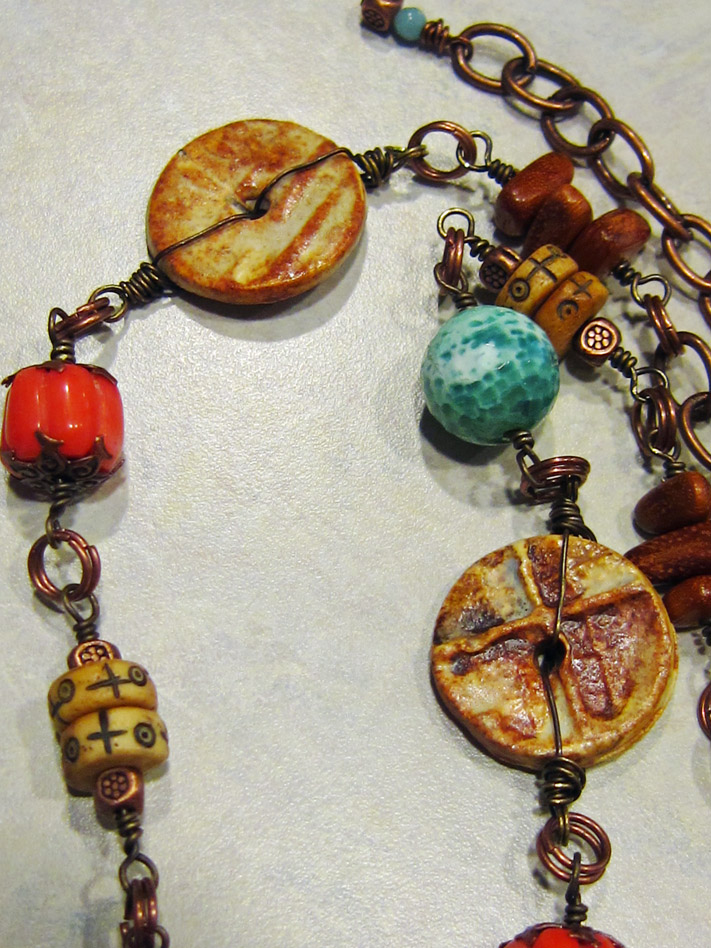
I wanted to top these pretty melon shaped coral beads with copper bead caps, but the only ones I had were too curved to fit properly on the flat ends of the beads.  So I smashed them - the bead caps, not the coral!  Once they were flat, I curved just the very tips of the bead caps downward.  Perfect fit now.


When it came time to wire on the batiked bone beads I found that their holes were so large that they wobbled on the wire, making them droop sideways at times.


So I got out some size 8 seed beads and filled up the holes before re-wiring the bone beads.
The seed beads stabilized the center so that the bone beads remained perfectly centered on the wire.


I also spent time deciding how I should end the necklace.  There were two holes on the end of the pendant, but it seemed like it would look stupid to just have two dangles there, on either side.  Instead I bought some copper fringe chain and looped it between the two holes.  Then I created a dangle of coral and a dzi bead that I strung on waxed linen cording.  This made a graceful and large-scale finale to the necklace.

Unfortunately I was running late the day I was going to bring the necklace to Joan.  So I just set the necklace on the kitchen counter and quickly snapped a few mediocre-quality pictures.


Joan took a picture of my necklace and other necklaces, in their booth in Tuscon.  But she didn't get a chance to take many more pictures because...


Someone wanted the necklace and bought it on the spot!


So now I can say that, although I have never been to Tuscon; one of my necklaces has!

Linda Landig
Linda Landig Jewelry