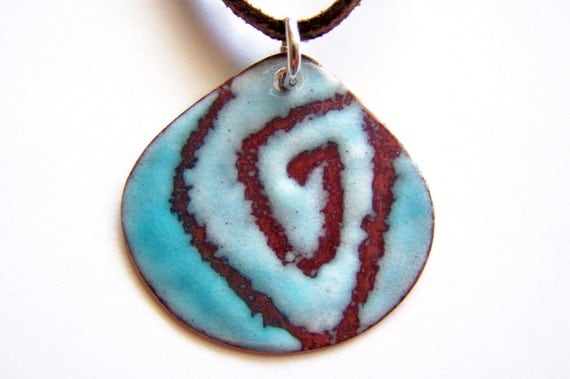
Showing posts with label torch-fired enameling. Show all posts

Saturday, March 22, 2014

Color Inspiration Saturday...

I was thinking this week of creating some copper components to enamel for earring pairs that could be mixed and matched, but wasn't really sure what colors I wanted to incorporate, then remembered all the inspirational Pinterest photos I've seen featuring Pantone's Colors for Spring 2014. We have all been touting Radiant Orchid, Pantone's Color of the Year for 2014...why, even Karen Totten did a great blog post last month about the color. It is a bright and gorgeous color...one of my favorites of all time!  But, what about those other colors for Spring 2014 that Pantone included in its picks? I decided to find out...here is the list.  Look at these gorgeous spring shades!

Photo courtesy of www.ofdist.com, via Pinterest

I started going through my enamel stash to see what I had to match...some would have to be mixes of shades to get as close as I could, but I chose 4 to recreate for now.


Don't look at my crappy enameling job...these were sort of experiments and as such were done pretty quickly.  They will need some tweaking, but these are my versions of Celosia Orange, Freesia, Placid Blue, and Sand.  I put them in some different combos...lots of possibilities!


For you torch-fire enamel enthusiasts out there, my recipes are easy.  Pretty basic, and as I said, aren't perfect, but pretty close!

  • Placid Blue - Robin's Egg
  • Freesia - base of white with Egg yellow transparent
  • Celosia Orange - Sunset Orange
  • Sand - Nut Brown

Oh, and by the way, you can get a pretty good Radiant Orchid using white, or off-white as a base with Raspberry transparent on top!

Hope your day is drenched in color!


Melissa Meman
Melismatic Art Jewelry
Art. Life. Love.

Monday, March 3, 2014

February Component of the Month Challenge Reveal - Fluttering Hearts!

I am so honored to be part of this group of talented, kind and generous jewelry artists here at Art Jewelry Elements!  One of my favorite things about being part of this team is participating in these Component of the Month challenges...it is so much fun to receive such gorgeous, unique pieces from these wonderful artists.  I have to say it is sort of humbling when it comes your turn to be on the 'component provider' end!

For February, I decided to offer hearts that I hand-cut from copper, shaped, then torch-fire enameled. The finishing touch was the addition of colorful glass frit.


Below is our team of designers for this month.  I can't wait to see what everyone created!  How about you!

Guests...
Lori Bowring Michaud 
Kathy Lindemer
Kim Bender 

AJE Team...
Melissa Meman
Jenny Davies-Reazor
Rebekah Payne
Caroline Dewison
Kristen Stevens
Keirsten Giles
Sue Kennedy

Oh, by the way, the lucky winners of  Caroline's beautiful moth components for March are  Niky Sayers (SilverNikNats) and Helen (HelensHarvest)

Tuesday, August 13, 2013

Creating "Art"

Last month, I entered some jewelry pieces in a local juried art gallery show. It was kind of a big step for me - I've had my work in gift galleries before but never anyplace "serious." And since submitting the pieces involved creating around a "theme" and preparing an artist's statement, it was WAY out of the box for me. So I thought I'd share some of the process with you!

The theme of the show is "Texas Heat." If you aren't from Texas, perhaps this Colby Jones cartoon will help you understand a little bit about our climate.


(Side note: It was not quite 100 degrees here yesterday; the day before it was 108. I actually said to someone on my way to a meeting that I was glad it was "so much cooler." Not kidding.)

The first challenge was to create a piece or series of pieces that could relate to Texas Heat. Since I am currently obsessed with enamels, I decided to torch-fire some forged panels of copper in a series meant to evoke the progression of the immediate after-math of a fire through the regrowth that happens months or years later. Here is a really bad photo of those panels.


The "immediate aftermath of devastation" is on the left; the "inevitable rebirth" is on the right.

I was pleased with how these turned out - the torch firing left some charred edges that I didn't stone away because they played into the theme. And I loved the colors - this photo doesn't show it well, but I used a mixture of transparent and opaque enamels so that the reds seem to float in the green, sort of like flowers sometimes seem to float in a sea of grass.

Then I was stuck with trying to figure out how to set them - I had to be careful not to bend them and crack the enamel. After some trial and error, I designed slot and tab bezels for the ends and prong set the panels into the resulting cradle. Here are a few shots of my process:

Preparing to test the slot and tab idea.

Tabs dry-fitted into their custom sawn slots with a bead of paste solder ready for firing.

One of the textured backplates with the sawed slot.
You'll have to use your imagination, because I completely forgot to take photos of the prong portion of the adventure. (Enter dream sequence music here!)

Ta-da! The completed pieces.


So there I was, happy with how the pieces turned out... and I had to write an artist's statement. Wait, that's not quite right. I had to write TWO artist's statements: one for my overall approach to my work and one for the pieces or series I was submitting.

And "I make jewelry because I like pretty things" wasn't going to cut it.

I'm going to be painfully and transparently honest here: I loathe artist statements. Loathe. With all due respect to people who think artist statements are important and meaningful, they often wind up sounding - to me - like badly-written and very pretentious wine descriptions. ("A faint oaky bite marries perfectly with the long-legged whisper of citrus that tantalizes the..." What??!) But I had a glass or two of wine, girded my intellectually-deficient loins, and dove on in.

Four excruciating hours later, here's what I came up with:
While fire can wreak havoc and bring destruction, it is also the age-old natural agent of necessary growth and change. Stands of timber and open stretches of prairie alike benefit from being "burned off", so that old dead growth is cleared away and returned to the earth as ash to nourish future growth.  This series of necklaces is a reflection of the effects of the extreme heat of the Texas environment, and – taken together – is meant to evoke a sense of the immediate aftermath of a fire or drought through the inevitable period of recovery, rebirth, and regrowth.    
Not a whisper of citrus or an oaky bite to be found, my friends.

Here's the truth: this was a really good exercise for me. It was painful at times, and I have way (WAY) more hours in these pieces and the entry process than I can ever hope to recoup, even if I'm fortunate enough to sell one or more of these pieces. But it forced me to do several important things:
  • I was working against a rock-solid submission deadline. Deadlines are a good thing for me.
  • I had to think hard about what I was creating and how it fit into a pre-determined theme.
  • I had to figure out why I was creating these pieces and why they spoke to me and then figure out a way to describe that in a way other people could relate to.
  • I had to problem-solve a new type of construction (to me) without ever having learned it from someone else. I really like problem-solving.
So in spite of the fact that I felt hugely self-conscious and inadequate in making and describing these pieces, I'm grateful for having forced myself through the process. I have no idea if this makes them "art" or not, or makes them any more "art" than the work I normally do, but I can tell you that these pieces have greater meaning to me.

It doesn't hurt that I found out yesterday three of the four were accepted into the show!

::happy dance::

So are you pushing yourself to work outside your comfort zone? If you're not, identify some places where you can push the envelope a little - you never know what might come of it! 

Until next time -


Friday, August 2, 2013

A New Color Adventure: Enameled Beads

I spent an afternoon at a friend's studio last week, learning how to torch fire enamels.  I've been wanting to learn for a few years now.  I love playing with color, so this seemed to be right up my alley.

I was so excited when my friend, Christine, offered to show me the basics.  Unfortunately I was so focused on playing with the enamel, that I forgot to take any pictures in Christine's studio. :(  But here is what I came home with.

This is very obviously a beginner's attempt.  The top left bead doesn't even appear to have color on it, although it is shiny.  But here's what I love about enamel:  I can just fire this black bead up again, add enamel, and it will look fine. It is a very forgiving medium.  Next to the black bead is one that is ivory color.  It looks a bit darker in the photo than it actually is.  Next to it is one that was supposed to be ivory with an overlay of green, which is just barely noticeable.  On the bottom right is a blue bead, that could probably benefit from an additional layer of enamel.  The green speckled one was my last bead.  I started with 2 coats of blue and then I scattered green frit on it and got the speckles.  The 2 headpins have a nice layer of color, but some of it chipped off the ends.  I've since read that headpins can be a bit tricky.

Before the day was out, I'd ordered enamel supplies from Barbara Lewis's website and I ordered her book from a local independent bookstore.  I was so giddily happy that night. Enameling was like color heaven for me.

A few days later, my goodies arrived.


I tore open the box! Oh!  Wow!  I felt like a little kid on Christmas morning!

I have my biggest show of the summer in a few days and I'm currently in full panic mode.  So I haven't really had time to play with my new "toys" yet.  As soon as the show is over, this will be my next focus and I'm raring to go!

In the meantime, I've have an extensive enameling Pinterest board, which has tons of inspiration and tutorials, in case you'd like to check it out. I've also gathered up some wonderful samples of torch fired enameled jewelry to share with you here.  Enjoy!

AJE team member, Melissa Meman, sells both finished jewelry and enamel components. I hope my enamels will look this pretty someday!   Here are some examples.


Sue Kennedy, also creates enamel components.  Wouldn't these be pretty in some autumn jewelry?  Fall is coming up faster than you think.


Or, if you don't want to let go of summer yet, you can try these pretty lilac beads.


Ellianne's shop focuses exclusively on torched fired enamel jewelry and components.


And here's the shop that originally started my love affair with enamel, Teka and Zoe.  I am the happy owner of two pairs of earrings from this shop, (these are actually, probably kiln fired, not torch fired, but I find her work very inspiring and I want everything in her shop!!!).


So stay tuned for "The Further Adventures of Linda's Enamels".  I'll keep you posted.  What is something that has fired up your creative enthusiasm recently?

Linda

Saturday, July 13, 2013

Saturday Share - Necklace Tweak

So, a few Saturday Share posts ago, I challenged folks to finish an unfinished, languishing, pitiful piece that you forgot about, or were stuck, or were perhaps procrastinating on.  A couple of you answered my challenge and showed your results...Bravo!  In my case, I finished a piece that I had set aside for a while, having created copper and torch-fired enamel elements to coordinate with gorgeous SueBeads I had been hoarding.  If you recall, I wasn't really happy with the end results...I sort of rushed to get it together so that I could actually write about it here, but it wasn't my best work.

Here is the original...I got such wonderful comments and suggestions from you guys...thank you! There was too much negative space, or at least the negative space that is there is boring..sort of sterile...a pity, since I love the colors I chose and the layered enamel with Sue's gorgeous lampwork really works.

So, I pulled the necklace back out and started playing. Part of me wanted to completely tear it apart and redo, unfortunately the flowers are layered and wired onto the base frame, so that would entail redoing everything.  One of the suggestions on the original post was to bend the frame so that it wasn't so "straight" and linear.  That is what I tried first.


Wow, just a little tweak of the wire to take it out of the straight line really made a difference.  I re-formed the loop for the clasp as well.  Oh, I also 86'd the czech glass dangles...they were too distracting and didn't hang the way I wanted.  Still, not quite right.


Anothe great suggestion was to fill the negative space with something...I liked the vining suggestion, so I made some copper headpins with balls on both ends.  I wrapped them around the smaller flowers, then coiled them around my round nose pliers, then pulled them out and positioned them to fill in...I decided one would look cute om the lampwork blossom dangle. At this point I debated adding the czech glass flower dangles back in, or perhaps adding some of my leftover lampwork into the chain, but I finally decided against it.  Something still wasn't right, though.


As a last tweak, I curled the ends of the base in a bit more, so there wasn't so much dead space between where the chain/clasp attached and the flowers...much better!

Here's the before and after again...

Before...

and After!
Thanks for your comments and suggestions! I'm very happy with the necklace now...I still need to make earrings!

So, Happy Saturday...go tweak a piece you are not happy with!!

Melissa Meman
Melismatic Art Jewelry
Art. Life. Love.

Tuesday, May 21, 2013

In love with enamels...

Last year, I learned to torch-fire copper pieces with Thompson un-leaded enamels, and I was instantly smitten. For someone who loves every process related to metal - banging on it, heating it, folding it, piercing it - the addition of color was a heady prospect. And torch-firing is just the kind of muscular, instant-gratification process I am drawn to.

Vintage copper stampings with torch-fired enamels

Then, for Christmas, my best friend gave me this amazing book.

Amazing book - go buy it!
So, first of all, if you have any interest in enameling at all, The Art of Enameling by Linda Darty must become part of your studio library. As in "not negotiable." It is comprehensive in scope, detailed and thorough in its explanations, and filled with stunning photographs. Seriously - you need this book in your library. One of these days, I'll post a more thorough review, but the Cliff notes version is this: Awesome. Buy it. (Non-affiliate link - I just think this book rocks.)

As if I don't have enough techniques on my plate to work on perfecting, I began to long for an opportunity to try my hand at kiln-firing enamels. I adore the organic results that are possible with torch firing, but the back side of every piece is inevitably scorched from the direct contact with the flame, and I was envisioning a combination of the two techniques: torch-fired front side with kiln-fired counter-enamel on the reverse. And then a great deal on a Jen-Ken enameling kiln fell into my lap, and I jumped at it.

Mine is similar to this but also has a door in the front for accessing the firing area for enamels.

We're in the process of readying our house for sale, and I'm reluctant to take the time now to make the studio changes necessary for a kiln enameling center, so the kiln is sitting in my garage and I'm left trolling Pinterest. I can't stop thinking about it, so I thought I'd share some of the inspiring pieces I've stumbled across in the last few weeks.

Ruth Ball Enamel Design (source: Pinterest)
I love everything about these - the colors, the metal work, the movement. And I love that while each of these is similar, each is unique with its own distinct feel - and the settings are clearly handmade and designed for the piece.

Angela Gerhard (source: Pinterest)
Reds are a finicky color in enamels - quirky, hard to fire true, and prone to failing if all the elements aren't precisely right. Angela uses red a lot in her work, and always successfully. I am very fond of this trapezoidal shape and the gorgeous soft matte finish on the red is terrific. (Note also the gradation on the black and red piece - wow.)

Carly Wright (source: Daily Art Muse)
Carly Wright's website is one of those places where it's possible to wander and linger for a very long time. Her work is so unusual and beautiful, and I love both her artist's statement (which is simple and without the self-reverential tone of many I have read) and her explanation of her process. The Daily Art Muse article where I found her work described her as "painterly" and I think it fits.

Beth Novak (source: Beth Novak)
Every single thing about Beth's work sings to me. Her metalwork is gritty and organic, and the enamels she adds to each piece are crisp and specific.

So these are the things I'm drooling over these days - and, if I'm being honest, I am at once certain I will never ascend to these heights and hopeful I might make something that approaches this beauty. The kiln in my garage is impatient to get started. And, I suppose, so am I.

What about you? What new technique is calling your name??

Until next time!


Saturday, March 9, 2013

Saturday Share - Playing with Torch-fired Enamel Compound Elements

You all know of my love for torch-fired enameling by now!  There are so many techniques to learn and master with this immersion style of enameling, a la my guru, Barbara Lewis.

This week I have been playing with combining enameled components by firing them together.  There is a learning curve, for sure!  Once you have the pieces you want to combine fired, putting them together so they form one cohesive element is the tricky part.

If all components have holes, it is a bit easier...just line them up on your mandrel and re-introduce in the flame until the enamel starts to get glassy and use your pulling station or tool (pliers/tweezers) to make sure they come into contact and stick.

Here are few sets I put together...


When one or more of the elements don't have a mandrel hole, it gets a bit more complicated...if one piece has a hole and you can get it hot enough and turn it around on the mandrel just so, you can add the other component with tweezers/pliers.  You can also use a firing tripod and trivet if you don't mind the bottom piece sticking a bit.  

Here is a pair I am happy with that I did in this fashion...


Another set I tried, I just couldn't get the top component to stay where I wanted, and the bottom layer overfired while I played :(  Practice, practice, practice!!

For more information on combining enameled components together in this manner, check out Barbara's Ning site...she has some great video tutorials.

Our own Sue Kennedy has become a master of this technique....here is a pair of her cool compound beads.

From our own Sue Kennedy of SueBeads
So, all you torch-fired enamel artists out there?  Have you tried making compound beads?  Any tips or issues?  Success? I would love to hear from you!

Happy Saturday!

Melissa Meman