Showing posts with label organization. Show all posts

Wednesday, November 11, 2015

Compulsive organization and preparing for a show...


Organizing is my super power.

Some may say I am a bit compulsive about getting things organized, keeping things organized.... but its just me. Virgo, former teacher me. As many of you know I do maybe a dozen shows a year. Indoors, outdoors, hot and cold, dry and wet... There are a few fantasy/faerie themed shows I do, and love... one of them was last weekend in Baltimore, MD: FaerieCon. In prepping for this show I do get a little compulsive in my planning and organizing...

My FaerieCon display from 2014. Post is here! 
Crowded, isn't it? For the three day show I have a space that measures 6' x 3', and it is a very, very expensive square footage. How to make the most of that and showcase tiles AND jewelry? How to make a visually appealing display that doesn't overwhelm the viewer? I plan it out. Every square inch. I review pictures of last years display ( seen at beginning of post) and do a mock set up in the basement.
2015 FC mock up in the basement. 
There are some years ( especially for Beadfest) that I will use the printed photo like a map. Number the spaces, create a map key... Other times I just refer to the photo and do a layout sketch on my journal/ Could I just skip the pix and sketch in my journal? Yes, but I like to make sure I have the proportion of the boxes/trays/display correct as that will influence what I place there.

Version 1. Jewelry grouped by style, tiles hanging in the back. Large dryad sculpture anchoring table. 
There are a few advantages of this mildly compulsive planning in my opinion. When I am setting up and may be stressed/late/distracted/tired.... I don't have to think. The decision are made. Thats really comfortable to me when there was SO much frantic preparation finishing work and packing for a Con like FaerieCon. So I arrive and I can settle into it. Im less stressed and more ready to enjoy the event when it begins. Its also faster. No try it/ change it/ rearrange issues. 
Thursday night - stage one complete. 
Once the show started Friday, I completely forgot to take pictures. Very happy Jessica snapped this one! My display worked well - and was actually a lot less crowded than other years. Things sold, and I restocked my Mythic Nature Tiles inventory for "Creative Procrastinations and Whimsical Necessities" shop in Shepherdstown WV! Now I need to head back to the studio and make. more. stuff.... 

Friday - all set up... 
We had a wonderful weekend, filled with amazing art, creativity, music, and costumes. The Good Faeries were good, and the Bad were oh so bad! Until next year.... 
A few faces from FaerieCon


Tuesday, April 22, 2014

Dysfunctional Studio Tour

I've been "living" in my new Roadhouse Arts studio space for almost four months now, and while there's a lot that I really love about it, there are also some things that aren't working for me.

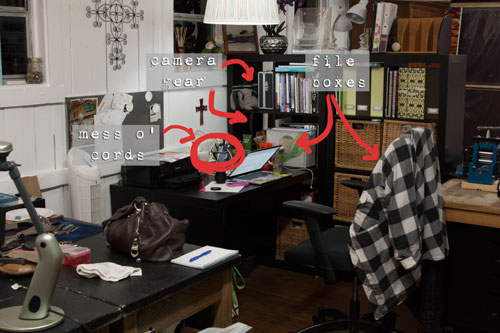
My little admin area needs to be reworked. I spent a huge chunk of the day yesterday working through the paperwork that had accumulated, both for my own business and the Roadhouse side of things, and everything is caught up. While that makes me happy, I think the backlog started because the workflow wasn't well-organized to begin with.

Admin-Area

I have two file boxes now, and the segregation of things will help. The smaller one contains the stuff I get into more frequently; the larger one is longer-term. But I still don't have the right space to stash either of them - my camera bag and equipment is taking up two entire cubbies in my wall unit. And I don't like the nest of cables and power strips on top of the desk. I just ordered this remote switch and I'm hoping it will solve the problem while still allowing me to turn lights on and off without having to crawl under my desk.

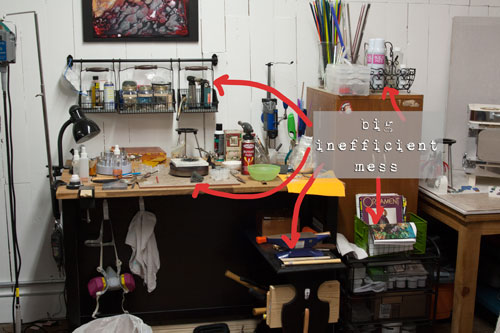
My metals and fabrication area would benefit from a little tweaking. I have an Ikea kitchen island set up for sawing and soldering, so I can see things close up without having to bend over or wear my magnifiers.  The problem is that most of the great storage the unit includes (two metal shelves) is pushed up against the wall so I can't get to it.

Soldering

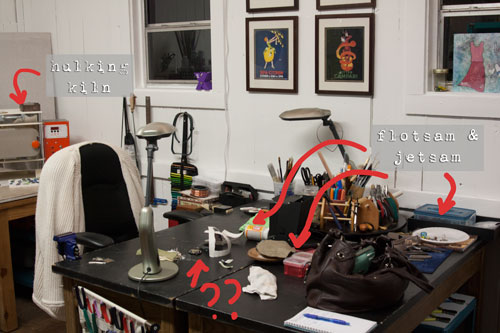
I also have two old science tables pushed back-to-back that are supposed to be for layout, design and fabrication work, but as you can see from the photo, they wind up being a collection area for all manner of flotsam and jetsam that have little to do with current projects.

Working-Table

I had convinced myself that rolling my chair between the two stations would be fine, but the truth is that the floors in this old building are so unlevel that "rolling" is an exercise in frustration. This also makes pulling the island unit out to get at the long-term storage a serious pain in the neck, because everything (and I mean every.single.thing) has to be shimmed to within an inch of its life in order to avoid punches, beads, wire and any other curved or roll-ey thing from just making a run for it the moment it gets set down.

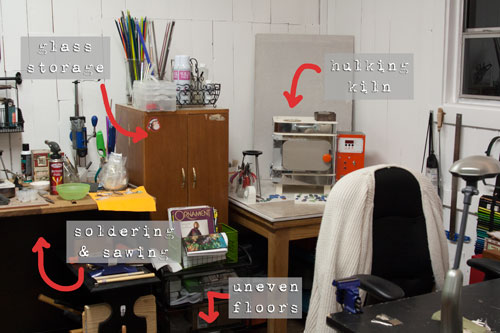
Glass-and-Kiln

And then there's my kiln and glass area, which just sort of squat in the corner taking up a bunch of room. I don't think it's an efficient use of space, but I'm kind of stuck because that's where I had the dedicated plug installed for the kiln. And I don't think I'm making the best use of the space along the one main wall.

I'm considering a pretty significant reorganization that includes separating the two science tables and using one to create an "L" shape with the island sticking out into the space. This would put the storage shelves on the island facing my admin area, where I could use the extra storage. The other science table would go where the island was and be primarily for mixed media work. (That's a subject for another post. "Living" with mixed media artists is starting to mess with my head, I tell you!!) I could also use it for larger project layouts, when I have multiple or complex pieces going.

So... any suggestions? I'm really open to any and everything - the space just isn't working well, and it's not because I don't have enough to work with. Let me know what you think and I'll update you in a future post.

Until next time -


Friday, February 14, 2014

Reorganizing My Jewelry Studio

If you've been following my posts then you know that I've been experimenting with polymer clay and torch fired enameling recently.  I've also been slowly adding a few metalsmithing techniques to my skill set.  This is all wonderful except.... When I set my studio up in our spare bedroom I had mega-tons of beads, but no torches, hammers, enamels, polymer clay, pasta machine etc.  Well you get the picture.

As I added more things that didn't have a designated space, my computer desk got overwhelmed with junk tools, metal and clay.  My computer got ousted to the living room, my studio floor became littered with papers, magazines and whatnot.  Add this to the fact that I am  not a naturally organized or orderly person and you have chaos! 
It was getting so bad that I couldn't even find space to work. I was becoming annoyed and thus began avoiding my studio. I finally had enough!  So I began burrowing out of the mess.  Unfortunately I didn't take "Before" pictures right away.  The pictures I do have were taken about a week after I began Operation Studio Renewal.  You know how things actually get worse before they get better?  These pictures attest to that.

I'm not all done yet, but I thought I'd post some mid-project pictures.  Maybe it will motivate you to tackle whatever organizing your studio may need.  And I know it will help me follow through to the end of the job.

I'm actually typing this post at my desk, but here's what it looked like near the start of the project.
And this evening it looks like this.
Here's a daytime shot from Wednesday this week.  I've got the polymer clay pasta machine on the left side of the desk.  It can stay set up there, but out of the way. 
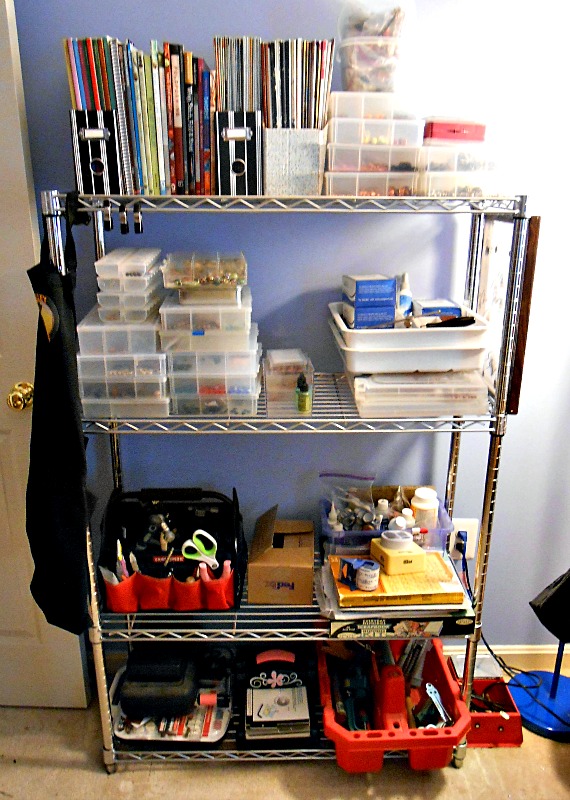
The  polymer clay and tools were scattered all about, but they are now nicely corralled on shelves to the left of the desk. Here's what the shelves looked like before I went to work on them.
The shelves were not a complete disaster, like my desk was.  They were somewhat organized, but I needed to make room for the polymer clay and enamels without having to invest in new shelving or expensive storage items.

Another goal I had was to reduce visual clutter, as well as physical clutter.  I think I've accomplished both goals here.
Let's start with the top shelf.  My before picture shows that I had the same white plastic storage drawers up there initially, but they were all stacked at varying heights.  And then there were smaller purple storage boxes stacked up on the right side of the shelf.  Its hard to see in the before picture, but on the left side of the top shelf was also a round plastic jar of furnace glass beads.

I removed the purple boxes and the furnace glass and I spread out the white drawers so they are all the same height.  Now the eye can rest on that shelf comfortably and not be jarred by all the conflicting heights, colors and storage boxes.  The only non-white item now is a wood and papier-mâché diorama from Mexico that is on top of one of the storage drawers in the corner.

The 2nd shelf down is mostly empty right now, but that's OK.  I'm not done cleaning the whole studio yet and I might still need the space.  One trick to give yourself extra space for smaller items is to use hanging wire baskets that hook onto the shelf above.  You can see that I've used one of these above the second shelf.
I'm quite pleased with the 3rd shelf.  I picked up a number of these inexpensive, white cardboard boxes at IKEA.  They are a bit tedious to assemble, but they are sturdy, come in at least 3 sizes and are white, to go with the other things on the shelf, (though they come in colors too).

I moved all my polymer clay supplies into these boxes and used my trusty label machine to label each box.  There is still extra room in the boxes for more, as I expand my stash.
 I've also organized a shipping station for items purchased in my online shops.  I used to keep padded envelopes, bubble wrap and tissue paper in baskets under my work table.  Thank you cards were next to my work table.  Business cards were on my antique printers cabinet, postal tape was in the kitchen.  Oy vey!  One of the cardinal rules of organizing is to put like with like.  This is so much better!
You are probably curious about where I actually make my jewelry.  I've just barely started organizing it, so its mostly still a wreck.  But you will notice that I've cleared a small bit of real estate in the center of the table and even this little work space has re-sparked a creative drive in me that I welcome.

So that's it for now.  I'll do an update when I finish the task.  Do you have any handy organizing tips to share with us?  I know that many creative types struggle with organization and we can all benefit from one another's hard won tips!  Do share!

P.S.  Happy Valentines Day.  AJE loves our readers!


Linda
Linda Landig Jewelry – ArtFire 
Linda Landig Jewelry – Etsy


Wednesday, October 16, 2013

The Perfect Organizational Tool, Plus a Tutorial to make it more Attractive

Today we have a special treat for you! Tracee Dock recently emailed me (Jen Cameron) about a cool revolving organizational bin she found, then decorated. I asked her if she would be willing to share it with our AJE readers. As you can see, she agreed to. Enjoy!

----------------------------------------------

Last week I met with local Kansas City area bead artists and designers, Tanya Goodwin and Sharyl MacMillian Nelson for brunch to share creations. Then we were off to a crafty girl's favorite place to shop: Harbor Freight and Tool!  I did not get out of there without a couple of purchases AND amongst them a new organizational item to share.  Sharyl kindly lent me her 25% off coupon for this nifty organizational spinner.  

Here's a picture of the spinning organizer in the box.  $19.99 before the coupon.


Here's the pieces and parts!  


To line the trays, I took some 12" scrap book paper...paper clipped four pieces together and traced the bottom of one of the trays and cut just inside the lines for a perfect fit! 


I have to admit I was temped to spray paint it, but there were a lot of black shiny pieces to prep and since I had the paper and it was going in my basement to hold clay cutters I resisted and besides....I was really excited to put it together.  I like projects like this!

Next the assembly and yes there were over 70 little nuts and bolts to fasten on the dividers, but it went fast once I got the rhythm and it was a great day to sit on the screen porch with a project.


So here's the finished project!  


I really can't believe I waited so long to come up with something this good to organize tools I use ALL the time.  It holds all my cutters...divided by shape with a couple of sections left to spare.


I can't help but think I'd like to have another one for my studio upstairs.  There are certainly lots of things up there that could use homes too, and I might just pick up a can of turquoise spray paint for the next one. I've also got some more great papers I'd love to use for another!


Find me on Etsy:


Ceramic Bead Artist

Tracee Dock /  The Classic Bead


---------------------------------------------


If you have something you think our audience would enjoy reading, please email me at jennifer.glassaddictions@gmail.com. 


Wednesday, July 10, 2013

The Brain Dump System

Today I'm going to introduce you to my simple plan to keep from going insane. I have dubbed it the Brain Dump System.

Between prepping for Bead Fest Philly, transporting two very intense and driven kids around to their various things, (one wants to single handedly improve and increase mass transit and got himself an internship with the city bus service without any parental assistance. The other wants to be an actress/dancer on Broadway and has play rehearsals, drama camp, dance class, and is in a film currently shooting locally), two houses to care for, bills to pay, pets to feed and care for, summer parties to host, etc etc etc.

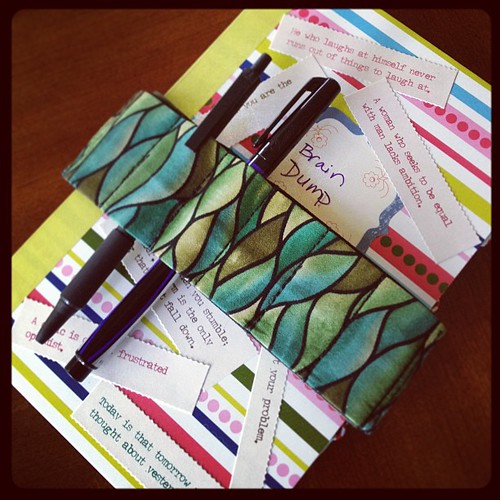
  Brain dump journal with bandolier jen cameron glass addictions

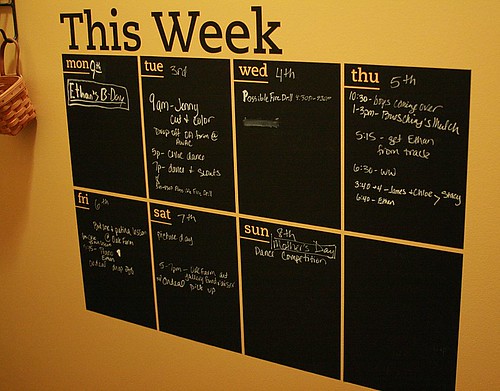
 I have a system for keeping track of our daily agendas involving Google calendar and a weekly chalkboard calendar (photo is from May 2011)


Chalk Board Vinyl Calendar


These two things working together help make sure I always know where and when. However, it's the "to do's" that were killing me. I was trying to remember them. And doing them on my phone just didn't work well for me...

Last weekend I was at the store and ran across a 4 pack of cute journal sized notebooks clearanced for $4. That was when the idea was born....I bought a pack of the notebooks.

They were located right next to the scrapbooking aisle. So I picked up a few inexpensive things that would make the book functional AND cute. I am pretty sure they all came from the "Smashbook" line.

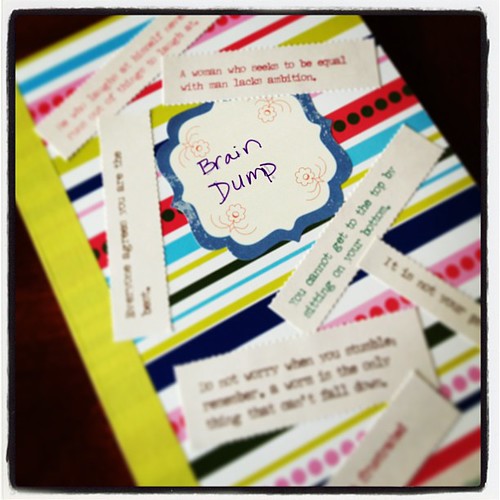
First I added the blank sticker and titled it Brain Dump. Then randomly glued some "fortunes" from one of the scrapbooking things I picked up.

  Brain dump journal jen cameron glass addictions

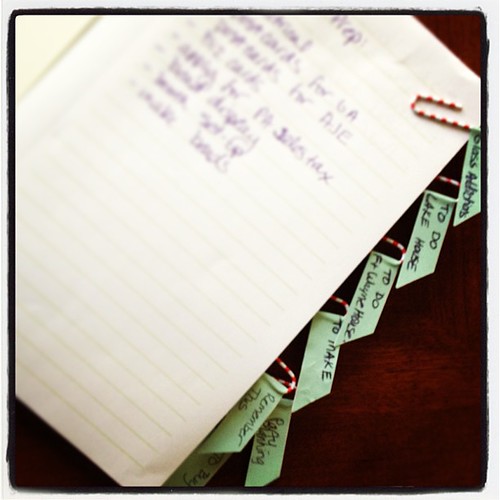
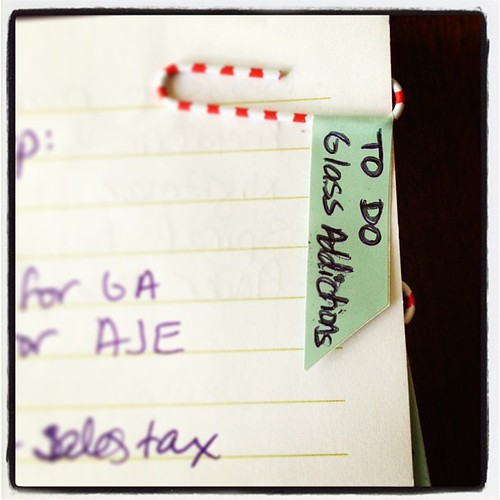
I also picked up some red and white striped paperclips that came with little adhesive flags and labeled them for my needs.

Brain dump journal paperclip dividers jen cameron glass addictions


Here's a close-up of one of the tags. How you label your tags depends on your needs. But I have so many to do lists under separate categories, that 3 of them are specific to business, house, and lake house in addition to other categories: to make, to buy, party planning (yes, I do a lot of that), and Remember This (for misc stuff). I have a couple leftover paperclips I can use if needed.  


Brain dump journal paperclip dividers jen cameron glass addictions
 

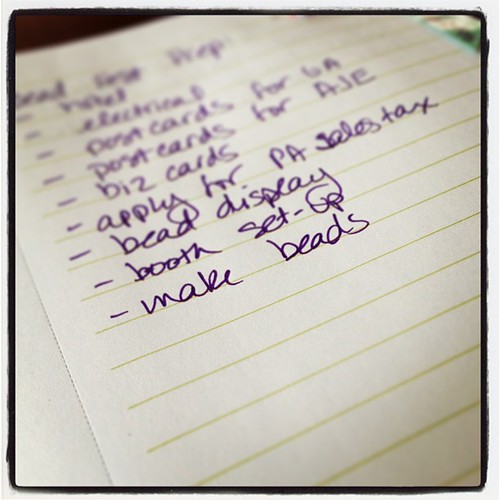
As soon as I started "dumping" all my to do's onto the page rather than trying to keep them filed in my brain, I already started feeling less stressed. I even have a list of specific beads to make for Bead Fest.

Bead Fest to do list


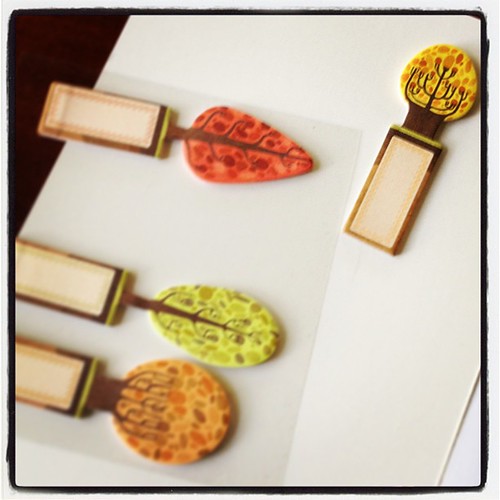
I also found these super cute sticky notes/page markers that are stickers. Super convenient to just stick one set to the inside cover of the journal to use when I'm "on the road".

  Post it notes


 Lastly, I wanted to make sure I always have a pen with me to write with. After all, what good is a brain dump system if you can't write in it? I bought some of these journal bandoliers a while back as gifts. I forgot to give them (oops) and took one to use for myself.


Brain dump journal with bandolier.


Hope this inspires you to create a system that works for you!

-Jen Cameron


Saturday, June 15, 2013

Saturday Share: My Dark Secret, Part 2 (Hey, look what I found!)

Previously on "My Dark Secret", Melissa reveals that not only is she a procrastinator extraordinaire, she also secretly is very, very messy!  She made a vow to change all that and get her act together by today's episode. Will she be able to make good on that vow?  We'll find out after this word from our sponsor...stay tuned!

Riigghht...it is a sure sign that you have a terrible procrastination problem when you give yourself a whole 2 weeks and vow to clean up your act, then wait until 2 nights before your deadline to even think about tackling it!  I kept walking into the room with my main mess, then immediately remembering some terribly important TV show I wanted to watch, or dinner to cook, or bathroom to scrub (not)!

Thursday night I finally just took a deep breath and started....I decided to focus on the area off the master bedroom where the majority of my stash is.  Once I got started, and into it, I actually enjoyed it. Here are some before and after shots.


Before...
After!

Before...
After!
Before...

After!
My new space!
I must admit that there are still lots of little trays that need to be sorted, but instead of being all mixed up cluttering the table, I stacked them nicely and put them in the black rolling file box...my goal is to open that up and pull out ONE tray and not stop until it is empty...either restocking where the items go, or finishing the project that was started.  I like that I was able to bring in my magazines and books and include them in the space...they used to be strewn all over the place!

The big bonus of cleaning-up and reorganizing, aside from everything being all neat and orderly, is that you uncover cool things you forgot you had, or in my case, had been looking for and thought was lost forever!

Buttons from my dear Mother's stash!

Fun flea market finds from my last trip to Lucketts with the girls!

Products of wonderful classes with Stephanie Lee and Richard Salley that I procrastinated on finishing!

Thought these were lost forever...6/20 enamel I bought LAST YEAR! and  images from  an art deco Opera posters calendar I planned to use in some mixed media.

Last, but not least...score!  Thick copper wire I came across at the hardware store, steel wire,  sterling square wire and a piece of thin sterling sheet.  I completely forgot about this buried treasure!
I decided not to do anything with my basement space where my enameling station is for now...my hubby and I have made a pact to take one room at a time and really organize, clean and revamp.  The area in my dining room is ever changing depending on what I am working on, so while I didn't concentrate on it, I was able to put away some of the boxes and tools in the main room, which helped.

Now, the responsibility is mine to keep things this neat and tidy.  So, how about you?  Many of you said in your comments that your spaces also need a cleaning day!  Were you able to accomplish it?  If so, congratulations!  If not, it's okay...I hope I have inspired you to think about it!

Melissa Meman
Melismatic Art Jewelry
Art. Life. Love.