Showing posts with label display. Show all posts

Wednesday, November 11, 2015

Compulsive organization and preparing for a show...


Organizing is my super power.

Some may say I am a bit compulsive about getting things organized, keeping things organized.... but its just me. Virgo, former teacher me. As many of you know I do maybe a dozen shows a year. Indoors, outdoors, hot and cold, dry and wet... There are a few fantasy/faerie themed shows I do, and love... one of them was last weekend in Baltimore, MD: FaerieCon. In prepping for this show I do get a little compulsive in my planning and organizing...

My FaerieCon display from 2014. Post is here! 
Crowded, isn't it? For the three day show I have a space that measures 6' x 3', and it is a very, very expensive square footage. How to make the most of that and showcase tiles AND jewelry? How to make a visually appealing display that doesn't overwhelm the viewer? I plan it out. Every square inch. I review pictures of last years display ( seen at beginning of post) and do a mock set up in the basement.
2015 FC mock up in the basement. 
There are some years ( especially for Beadfest) that I will use the printed photo like a map. Number the spaces, create a map key... Other times I just refer to the photo and do a layout sketch on my journal/ Could I just skip the pix and sketch in my journal? Yes, but I like to make sure I have the proportion of the boxes/trays/display correct as that will influence what I place there.

Version 1. Jewelry grouped by style, tiles hanging in the back. Large dryad sculpture anchoring table. 
There are a few advantages of this mildly compulsive planning in my opinion. When I am setting up and may be stressed/late/distracted/tired.... I don't have to think. The decision are made. Thats really comfortable to me when there was SO much frantic preparation finishing work and packing for a Con like FaerieCon. So I arrive and I can settle into it. Im less stressed and more ready to enjoy the event when it begins. Its also faster. No try it/ change it/ rearrange issues. 
Thursday night - stage one complete. 
Once the show started Friday, I completely forgot to take pictures. Very happy Jessica snapped this one! My display worked well - and was actually a lot less crowded than other years. Things sold, and I restocked my Mythic Nature Tiles inventory for "Creative Procrastinations and Whimsical Necessities" shop in Shepherdstown WV! Now I need to head back to the studio and make. more. stuff.... 

Friday - all set up... 
We had a wonderful weekend, filled with amazing art, creativity, music, and costumes. The Good Faeries were good, and the Bad were oh so bad! Until next year.... 
A few faces from FaerieCon


Friday, October 30, 2015

Steampunk Carnivale - an Experiment in Show Vending

I don't do shows.  Well, at least not in several years - the few I've done in the past have been less than successful.  While I am always happy to sell my work, finding the right demographic for beadwork is difficult...and frankly, I'd rather be beading than just about anything else.  That being said, awhile back I had decided that the next show I would have a table at needed to fit a few requirements -

  • be within a few hours drive of home
  • relatively inexpensive fees
  • be a show I've attended in the past
  • have friends also vending, preferably sharing a table
  • time to make non-beadwork jewelry - something able to sell in the $10-$50 price point
SO...this year my friend Mel, a couple of her artist friends, and I decided to split a 10x20 space at the Knoxville Steampunk Carnivale.  I actually (briefly) met Mel at last year's show while she was vending her leather and ceramic wares.  We didn't become friends until earlier this year, and shortly after that we were talking about some sort of joint table at this year's show.  

This show seemed to meet all of my above criteria, and also had the bonus of being an event I would have attended anyway.  It is so much fun to get all decked out in steampunk regalia...and have a scruffy little town like Knoxville turn out so many other awesome steampunkers.  Since we lived in Knoxville for 3 years, we have many friends in the cosplay/arts/crafts/lLARP/maker communities - a homecoming and reunion all in one!
Alice in Wonderland theme necklaces
Circus acrobat necklaces
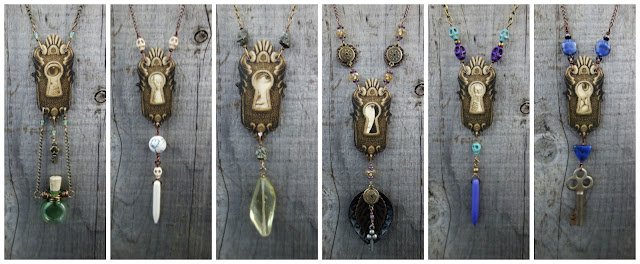
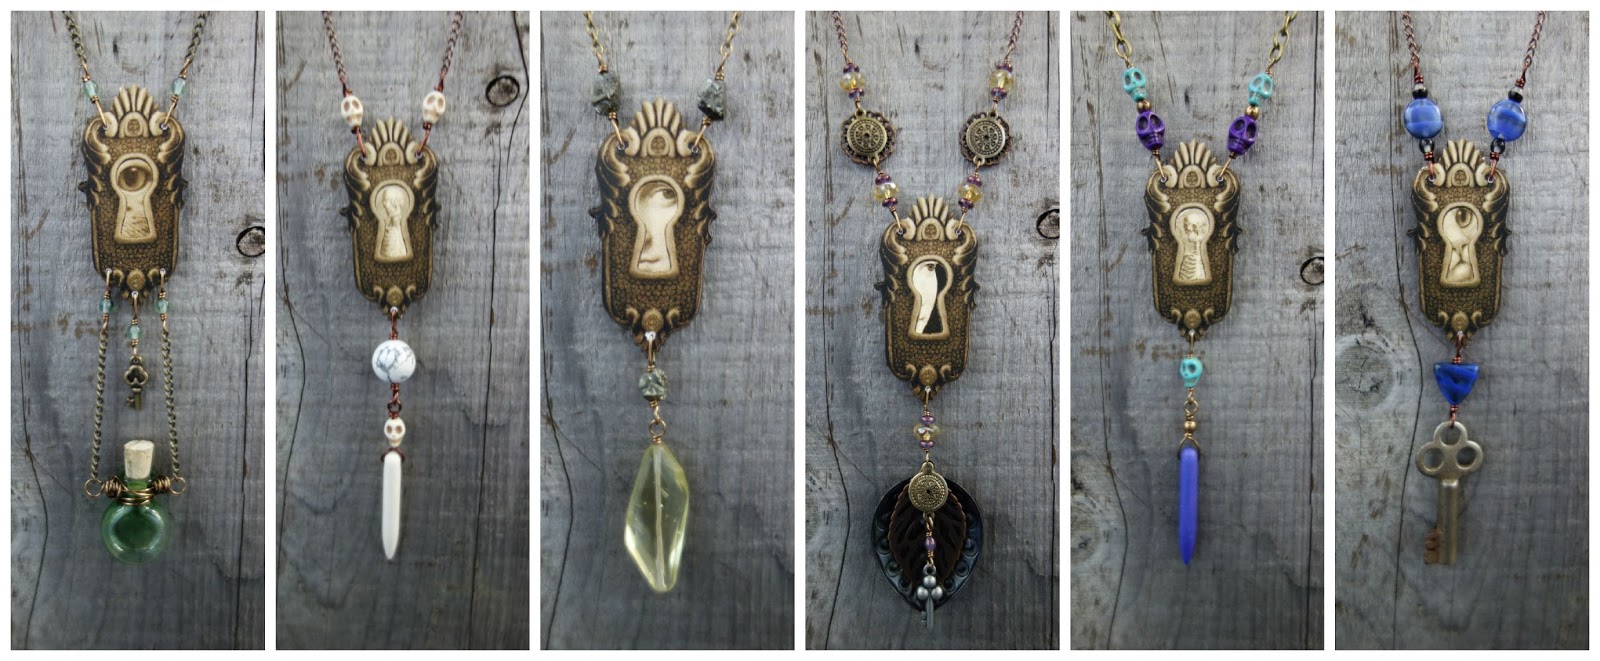
Escutcheon necklaces
I had fun coming up with some new merchandise for this show, especially these necklaces - incorporating laser cut wood and paper components from PorkChopShow.  I've had these for several years, waiting for the opportunity to make a bunch jewelry with them.  It was also nice to break out my under-used dremel, and do some drilling.  
I also made a slew of leather and silk cuff bracelets, embellished with metal, mica, lace, and a few other random things.  I discovered while making these, not only can my little domestic machine tackle more leather than I had expected...but also that my metal hole punch works on multiple layers of leather and fabric...and on mica!!!
For the new work, I had to come up with some new displays.  I used my trusty wire crate shelving panels to make two flat stands that I covered in fabric - I used these for the wood necklaces. Driftwood from my friend Steve became the perfect thing to drape and wrap the leather bracelets around. 
For my beadwork, I used a mixture of white ceramic decor, and driftwood necklace busts (also made by my friend Steve).  I like the mixture of refined/organic/architectural/human - it seems to fit my work well.  Also, my pieces have a tendency to not only overwhelm the normal cardboard necklace display busts...but also topple them.  With displays like this, I know that my work will stay safely where it's placed.  
I displayed earrings on little cardstock mason jars - hanging from a weird metal drum-shaped side table.  The slots in the sides were the perfect width for lining up lots of earrings.  Next time though...I need to affix a lazy susan to the bottom...everyone wanted to rotate the earring rack!  
An almost panoramic shot of our whole set up - with Mel and her leatherwork on the left, my jewelry on the far right.  The room in the middle was for the last member of our group, Constance, who brought her prints and paintings.  At first I was worried that we wouldn't look cohesive, because our table coverings were all different colors and materials.  But between Mel's leather merchandise, Constance and I working in similar colors, and the leather covering the rest of the tables, some how it managed to work!  ***unexpected bonus of leather table covers...being able to tape your breakable displays down***
How could you not enjoy a show with these characters meandering around, enjoying the music, and fondling your work?  I had so much fun all day long - chatting with old friends, making new ones, hanging out, talking about my work, walking around and talking with other artists and vendors about their work.  I still need to work on my introversion...but overall, I managed ok.  
Our 4th booth-mate Jamie and I, having a good ol' time!
So, by now you're wondering how I did, right?  We will just say, I made more $ than I have at any other show to date.  I was not expecting to sell any of the beadwork pieces, but I did alright with the wood necklaces, and also sold a pair of earrings and a cuff bracelet.  The event was hugely under attended from last year, with fewer vendors, food trucks, and one of the major attractions pulling out.  The show was very poorly managed and under advertised...that alone would dissuade me from vending again.  But from a "fun" standpoint?  I had a blast - 100% success!

Monday, August 24, 2015

Bead Fest 2015 - our views

Bead Fest 2015 was spectacular. Beads, buddies, buying, bartering with artist friends in trade.

The day after.
Those of us that were there are a bit hungover from the bead bounty, and sit fondling our loot, planning, imagining... But let me take a few minutes to regale you with images from the weekend! Thanks to all my AJE team members for the pictures, this post is a team effort! 


Sue sends in the group shot from our annual AJE dinner! Sorry that Francesca had to miss due to a snafu with class kits... 


Jenny:  1. the view from the "inside"... 2. Meeting AJE reader and friends Melissa Trudger in from Australia! 3. Vintage treasures from my neighbor Echo Artworks. 4. Harry Boardman - artist and sometimes "bead slave" to Heather at HMB  Studio. 


Diana: 1-2. Class sample from chainmaille daisy class- and classmate Sue. 3. Finally meeting Francesca! 4. Photo ops with friends and AJE readers!


Francesca: 1. First class, all serious. 2. Last class, true colors. 3. Rockhounds and metal smiths - R. Salley, Francesca, G. Wilson. 4-5. students at work! 

Linda: 1. Anne of Gardanne Beads. 2. Michelle McCarthy and her ceramic beads. Linda and me at my booth.

Lesley: 1-2. Assisting Cooky Schock in the Braided wire bangle class, Sandi V. at work. 3. The delightful Mak of Maku Raku. 4. Wire bangles from Cooky's class. 5. Maku Raku treasures. 6. Cooky at work. 

Saturday night's all right for bead friends! 


Now I'm off to unload the car, and look at my loot! Have a great Monday...

Friday, October 17, 2014

Layers. AKA art camping 101

Fall. The crisp air, apples, leaves in warm hues... and fall festival season. I was headed to my last outdoor show of the year earlier this month, and I decided to document the whole procedure. 

AJE postcards and mailing list book front and center, naturally!

I do at least 9 shows a year, sometimes 12... and they run the whole gamut. Outdoor arts festivals, indoor gallery type shows, weekend themed events/conventions, and even a bead show thrown in there for good measure! I do the most shows among my AJE teammates. I asked them: most do bead shows, a few do a sampling of craft shows as well.

I make ceramic pendants. And tiles. And architectural sculptural shrines. I am at heart a mixed media artist. I make and sell quite a bit of mixed media jewelry, using my pendants and artisan beads. Its the mixed media uniqueness that I feel is my "niche" when doing an arts festival - undoubtedly populated by many jewelry artists. My pendants and tiles are unified by content and design; I have developed these original designs in parallel. There are shows that put me in the "ceramics " category, others call me "mixed media", some specifically "jewelry". The vagaries of the jury process is surely a tale for another day.

I have been doing this for ten years! Sure, there are people with fancier set ups than mine. You can haunt Pinterest for amazing displays - but I am here to tell you - they aren't always practical. If you are traveling, you can't make three trips and bring fancy props and a dress makers dummy. There is no space in the car and no time! You can sign up for online seminars telling you how to sell jewelry at a craft show. That's great - but until you try it, that person's experience is just talk.  Find your own balance...

Here are my thoughts on layers. Packing in layers. The layers of constructing a fast, friendly, functional display... and living to tell the tale.


1. Tent and side walls. 4' table. 6' table. Shelving boards. Tall directors chair, weights. 

2. Tiles and shrines packed in medium sized flat totes - for stacking and b/c clay gets heavy... One tote with display items, one  with bags, tissue, wrapping paper... 

3. Blue IKEA bags: plexi risers for building levels, fabric for skirts and drapes, large sculpture, table leg risers, bungees... Crate of frames for jewelry display. Small tote - "office" box. Knucklebuster (b/c you never know...) cards, notebook, all paper stuff. 


4. Shutters, jewelry totes, banner. And the final view pictured below. Hanging panels on top, secured with bungees so I am not decapitated in traffic... And I still have room to see! 

( Overnight bag, cooler in front seat. )

My Scooby. A normal car, not a tank. It does the trick!
Art on the Avenue in Alexandria, VA is a one day arts festival. Its immense, over 10 blocks long. Set up from 7:30 on. Show runs 10-6. Its a 14 hour day door to door - and thats a local friend's door! When you arrive: 
  • squeeze your car in amidst your neighbors, find your 10' spot... 
  • vomit the goods onto the sidewalk... 
  • sneak car out to park it... ( good luck. Street parking!) 
  • Set up tent, tables, weights, art... 
  • Vend from 10-6 rain or shine. 
  • Pack it, stack it, fold up tent. (Tear down in one hour MAX! Because the police are there to reopen the street to traffic. )
  • Hike to car, maneuver car to your spot amidst sheer chaos of fellow vendors... 
  • Load car, drive away. Drink wine. 

The first layer: the infrastructure. 

Coffee. Tables. Skirts to hide all your junk. 
Drapes over the top. Hanging panels. 

Levels. Shutters for earrings. 
Hiding from camera (unsuccessfully). Hair clip for set up hair. 

Display items in place: frames for pinning necklaces, cigar boxes... 
Curtain sheers behind hanging panels were the best $20 I ever spent! Crinkle fabric easy to pack, but provides a neutral backdrop behind my work. Tent sides are too heavy, and don't allow air flow. 

Done. From drive in to ready in 2 hours. No, I don't do a rug when I am an pavement. No room in my car! Cardboard boxes on left: neighbor. He wasn't done yet. 

After many different layouts, I currently like this L shape. Open enough to encourage people to come in, and ample room behind tables for me to make sales. Did I mention that the spaces at this show are like 10' 2"? Yes - we all have 10' tents. HA. It's that tight. I plan my flow to allow me room to work, a path out to front, but not an opening large enough to invite unwanted "cut through". You would be amazed... 

Panorama shot for fun.

The office area. Writing up receipts, making sales, wrapping work, hiding food, back stock trays of jewelry... and the best gadget ever: a power bank for recharging phone! ( Told you to pack your Knucklebuster in case...) 

I could go on, and on... and I may in future posts. Neighbors - good and bad. Booth buddies and booth babes - a precious commodity. Pet peeves, horror stories... but for now this top layer is enough. 

It can be a great fun, rewarding day. It can be exhausting. But I like it...


Friday, May 2, 2014

Freeform Friday: Cigar box displays


There are as many different ways to display jewelry as there are variations of jewelry itself. From hand made to professional, from rustic to sleek... Pinterest boards exist solely to categorize and save brilliant ideas. I wanted to share with you something that I do, it works for me, and my style... 

First, a few comments on style. (stepping up on soap box...) You are doing a show. Look over the inventory you have amassed. You have a personal style, and its showing. Is it sleek lines, and glossy finished, and a modern aesthetic? Is it detailed, highly decorative, lots going on? Is it earthy, rustic, organic? I think its important that you display "fit" your style. By its very nature it needs to present your work in the best light, safely, and with style, yet without distraction. Display is the supporting actor role, not the star, but the two have to relate well in camera. 

I like to use plain wood, and solid colors in my display. Muted, earthy tones, very "woodland". I also have space constraints. Sometimes I see complex fancy displays and  wonder if  the artist has a trailer, or a van. (Confession: I have an irrational dislike of mini vans.) I have a small car/SUV and I have to pack tent, tables, chairs, ceramic tiles, display, office, packaging, clothes... you see my dilemma. So no mannequins, no drapes and chandeliers, ( Yup, I've seen it). I need compact, sturdy, versatile, easy to pack pieces. 

Enter the cigar box: 

Here is a brief photo essay of what I did for mine. I have used cigar boxes for a few years, setting them open with pin-able space in the lid. I decided to turn them sideways and make a freestanding display piece with pin-able areas on both sides. 
Two wooden cigar boxes and one raw pine folding tray thing from the craft store.  Wooden cigar boxes are available at a Tobacconist's or some liquor stores for a few dollars. 
Oops. Blurry. (Reread Jen's post regarding iPhone pix.)
On left: the original flange inside. On right: Flange removed. It pulls out. 
Measure twice. Cut once. This is 1/4" foam core. Use a very sharp blade  to cut  a clean line. 
Make sure they fit! For these standing displays, I measured pieces for top and bottom- that will become L and R. 
I use ultra suede fabric in jewel tones as that works for me and my style. Fabric is cut with ample margins, maybe 1.5-2". Glueing corners first, I use an archival PVA glue as thats what I have for other work. After corners are glued, I glue the sides like I was wrapping a present. And I use tape to hold it all down while glue dries. Shh, don't tell. 
Weight pieces down while drying. Interesting trivia: those rocks are from the  beach in Newlyn, Cornwall, UK from my honeymoon. Yes, I have carried them around for 17+ years.  Hang on - you will see the finished one at the end... 

Who's gonna see the inside? 
For the smaller hinged frame of raw pine - cost $1 at the craft store... I mixed up a wood tone of acrylic paint. (Yellow ochre and burnt umber) Brushed on a watered down layer, watching for drips. It dries intently as the wood is thirsty. I don't seal or varnish these. I could, but I am usually too impatient.  

Now lets see these boxes in action: 

This box was the first of its kind. It has division I created to keep my ceramic pendants separated.  I like displaying  one of each style up top, and other color options of the designs in the bottom. The fabric at bottom is draped in and adhered with double sided tape. I can leave these in the box, close it and be done! 
The foam core is a pin able surface, if you pin at an angle. The fabric is forgiving and hides marks. 
I tend to do a mock-up of my display as I prepare for a show.These boxes are very versatile and easily reconfigured as space allows. There! On the right - the deep red fabric. That the new standing cigar box. I will display necklaces there.
Here is a booth picture from last fall, where you can get a sense of the wood tones and colors I use, as well as the boxes in use. As I write this its raining like crazy! I have a show this weekend, outdoors... and the location is currently very, very wet. I will try to post some pictures on the AJE Facebook page of my real display once we are dry, set up, and happy on Friday. So please stay tuned! 

I would love to hear what you think! Have a weekend filled with sunshine! 

Jenny 

www.jdaviesreazor.com