Showing posts with label molds. Show all posts

Saturday, October 25, 2014

Reposting an old favorite… pressed flower bead how-to


Hello again! And welcome to another post re-run. There's not all that much exciting and new in my studio these days—every day is all about making more of the same—sleepy critters, speckle beads, rustic tribal birds, leather feathers, etc, etc… and pressed flower beads. Lots of pressed flower beads.


I really love making them! Especially with winter quickly approaching—I want to enjoy the summer flowers just a little bit longer. And so, today's post is one of my pressed flower tutorials I first shared with you a year ago. I hope you'll enjoy seeing a behind the scenes peek at my work… and maybe you'll be inspired to try making some for yourself! Enjoy!

--------------------------------------------------
I hope you all haven't gotten bored of my pressed flower beads already… I have two more how-tos for you today. These are quite a bit more simple than my last design, but they turn out looking like you put a lot of time into them. And it's all thanks to a nicely textured mold! :-)

Here they are…

1. Choose 2 molds (or texture sheets) of the same or similar pattern. Roll equal size balls of polymer for each bead.
2. Sandwich a polymer ball between the two molds.
3. Press firmly using a small glass dish so you get even texture.
4. Ta-da! your nicely double-sided textured currently hole-less bead!
5. Before removing the polymer from the mold,  gently cut the hole — this way that pressure won't distort the texture. I used a large leather punch for my cutter.
6. Bake for an hour and cool.


Next, paint your donuts…

And enjoy that nice texture…


Now we're going to make some wrapped beads…
1. Chose a mold or texture sheet with a long or repeating pattern. Roll same size pieces of polymer — this time lengthen them into sticks.
2. Press firmly.
3. Wrap to form beads. I used a crochet hook for my beads.
4. Ready for the oven. Bake for an hour and cool.

Paint…

Go make something with them!!

See, that was pretty easy… and made some fun new beads! I hope you'll give these a try. What new creations have you been working on? Making anything with polymer clay lately?


--------------------------------------------------

And… back to the studio I go… all the unfinished beads are calling me! Wishing you each a very creative weekend!

Rebekah Payne


Tuesday, March 25, 2014

A new appreciation


I had the great privilege of spending the better part of my week last week with award-winning artist Barbara Becker Simon.

Screen Shot 2014-03-17 at 3.13.04 PM

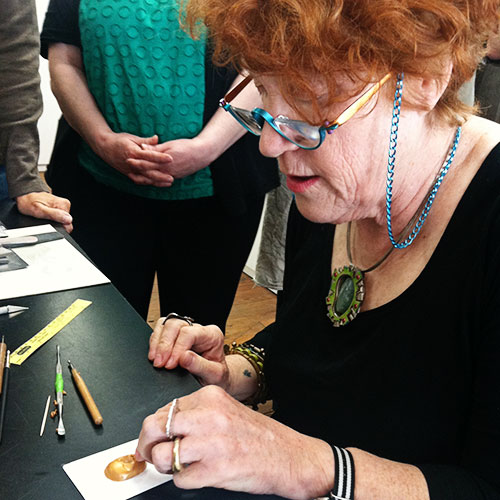
Barbara is loads of fun. She is an engaging, knowledgable, and patient teacher and she takes great care to ensure that every student in the room is successful, regardless of his or her experience level. We hosted two workshops with her at Roadhouse Arts, and I was able to multi-task so that in addition to serving as a co-hostess, I got to be a student!

BBS-Teaching

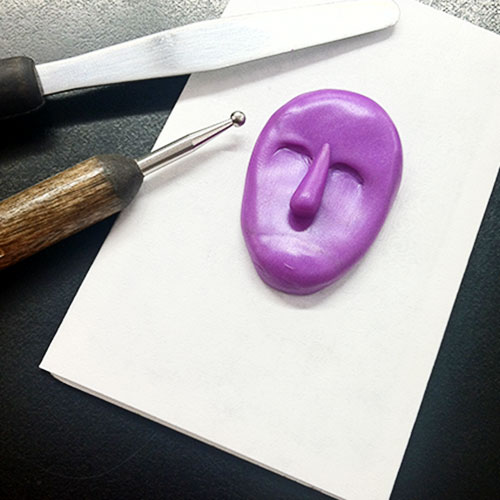
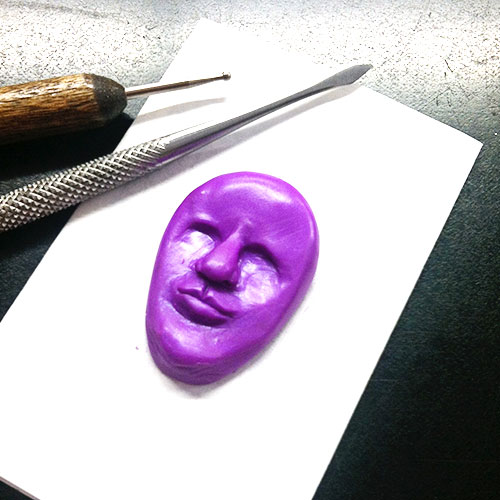
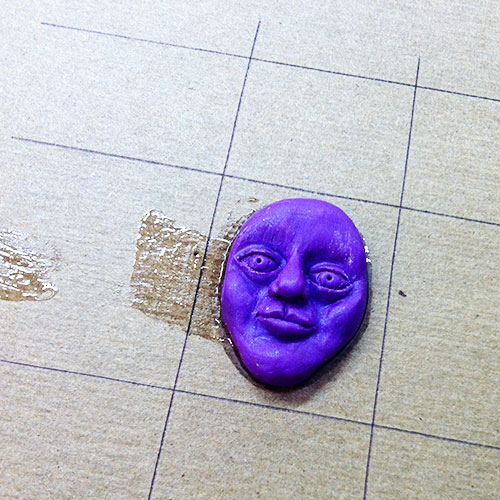
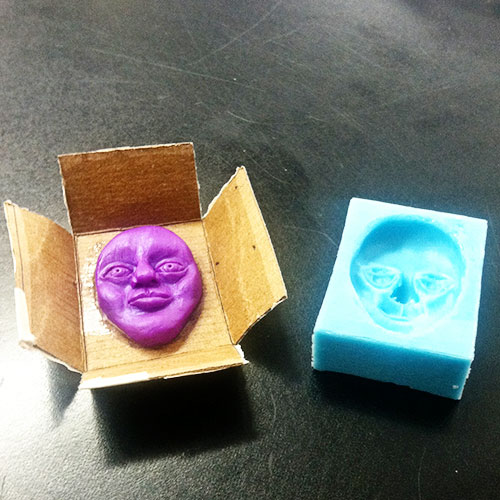
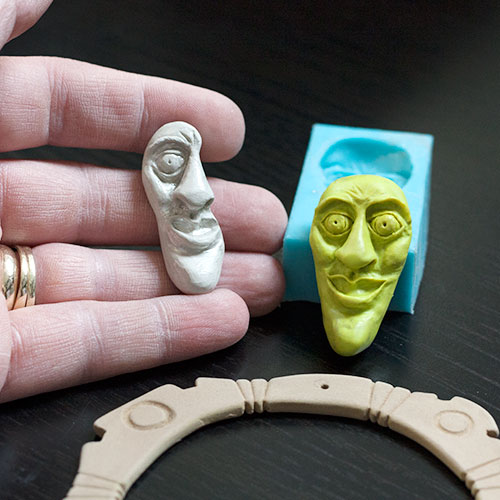
Although I dabbled in polymer clay years ago, I was never very good at it. The first workshop last week was all about creating faces in polymer clay so we could create molds to use with metal clay. Since I have never been good at literalism - seriously, I can't draw a round circle to save my life - the idea of creating anything resembling a face seemed a little far-fetched to me. To my great surprise, Barbara's expert tutelage walked me through a process resulting in a little polymer creation that actually looked a lot like a face!

Face-1

Face-2

Face-3

Unmolded

I have to tell you I have a whole new appreciation for the work of the clay and polymer artists who are part of the AJE team. The careful, painstaking effort required to make the polymer model clean and crisp enough to cast a mold was maddening - my friend Gail literally had to make me stop or I would have worked that poor little man to death! I take my hat off to all of you ladies - there's an extraordinary amount of finely detailed work that goes into what you do.

Mask


In the end, I wound up using my second mold to cast a PMC silver face (it's supposed to be Don Quixote), which I then modified and recarved to create a partial mask for a ring. It has yet to be fired, so I don't even really know if it's going to turn out, but I like how it's coming along. I also carved a bronze bangle in the second workshop last week, but again: waaaay more work that I was prepared for. It too still needs to be fired but as I was setting up to take the photo above, I noticed there's a whole section that needs to be "groomed" and fine-tuned - my heart just sank. There's already an entire day in that piece!

Last week was wonderful - I loved Barbara, and I loved her take on art and life and teaching. But I also learned there's a reason why I am so drawn to metal and hammers and torches, and why I merely dabbled in polymer and metal clay all those years ago. It's because they aren't my love... but I am deeply grateful all over again for the artists who make them such amazing mediums in the first place and for the ladies on this team who elevate them to art.

So that's what I'm learning these days - what about you?

Until next time -

Francesca


Saturday, September 14, 2013

Picking Flowers… on Etsy

It's no secret that flowers have been on my mind and filling my studio these past several weeks. And with summer quickly coming to an end (autumn is my favorite season and holds a special spot in my heart, but I still am always sad to see summer go) so, sadly, are the flowers and other growing things. I'm enjoying them while I can! And hoping to make a few more new beads too!


Yes, I love to make beads, but I also love to see the handiwork of other artists — few things are more inspiring — everyone has their own interpretation, yet we are basing it off the same inspiration. Maybe you're using the impression of nature itself, or maybe you are starting with the raw medium of your choice and carefully copying nature's design, giving it a new and stylized form — thankfully nature will not sue us if we copy its designs!


The bead artists of Etsy (a few of whom are my fellow blog writers here at AJE) always have something lovely to share. I hope you enjoy my picks today!


If you notice, the colors of my picks started with soft colors, then a pop of brighter colors, and finally turned to browns. I'm taking one last look at summer… and then I'll be ready for shades of autumn… and all the creativity that accompanies them.

(P.S. That oak leaf from suburbangirlbeads is now mine, all mine! :-) This autumn-loving girl couldn't resist.)


What has inspired you lately? Do you feel that your creativity changes with the seasons? Do share!


Saturday, September 7, 2013

How To ~ Two More Pressed Flower Bead Designs

I hope you all haven't gotten bored of my pressed flower beads already… I have two more how-tos for you today. These are quite a bit more simple than my last design, but they turn out looking like you put a lot of time into them. And it's all thanks to a nicely textured mold! :-)

Here they are…

1. Choose 2 molds (or texture sheets) of the same or similar pattern. Roll equal size balls of polymer for each bead.
2. Sandwich a polymer ball between the two molds.
3. Press firmly using a small glass dish so you get even texture.
4. Ta-da! your nicely double-sided textured currently hole-less bead!
5. Before removing the polymer from the mold,  gently cut the hole — this way that pressure won't distort the texture. I used a large leather punch for my cutter.
6. Bake for an hour and cool.


Next, paint your donuts…

And enjoy that nice texture…


Now we're going to make some wrapped beads…
1. Chose a mold or texture sheet with a long or repeating pattern. Roll same size pieces of polymer — this time lengthen them into sticks.
2. Press firmly.
3. Wrap to form beads. I used a crochet hook for my beads.
4. Ready for the oven. Bake for an hour and cool.

Paint…

Go make something with them!!

See, that was pretty easy… and made some fun new beads! I hope you'll give these a try. What new creations have you been working on? Making anything with polymer clay lately?

Now that we've spent quite a bit of time on these pressed flower beads, I think I should maybe blog about something else next time. After all, I don't want you to get bored. Any ideas? I love to talk polymer and beads! I'm taking suggestions!


Thursday, August 29, 2013

Folklore Friday - faience of Egyptian amulets


Welcome to the third, and final installment in the Ancient Egyptian amulet series. Today: the material faience. - prized for its intense blues and versatile for its inexpensive, even humble origins... 

I think my interest in faience is twofold. I love clay, and the alchemy of firing and glazing. I am continually inspired by Art History. And that color! I could dive in and get lost. It really resonates with me... 

To the right is William. Have you "Met" him? (Art history humor! Forgive me...) He is a famous piece in the Metropolitan's Egyptian collection. He has his own page in the shop!  How he became a celebrity I do not know - but he IS made of faience... 


The Egyptian word for faience is "tjehnet" meaning "shining, dazzling". Archaeological evidence dates the use of faience to as early as 3500 BCE. It was developed as a substitute for lapis lazuli and was used for beads, amulets, statuettes, bowls... 
Vessels, a shabti figure*, and a beaded netted collar. 


Comprised of finely ground quartz, lime, copper oxide, water, and a binder/gum arabic - this was a recipe of common ingredients, easily sourced in the area. The materials are mixed with water to form a paste, them molded or modeled and fired when dry. The paste is thixotropic - and hard to work with as it is much less plastic and malleable than clay. The interesting thing about this material ... it is self glazing!  The term is "efflorescence of glazing" - glaze materials ( water soluble alkali salts) are mixed with quartz. As the water evaporates, the salts migrate to the surface, recrystallizing on the surface. When fired= glaze. 

Knowing that - take a look at the detail in these amulets of Egyptian deities: 

In my research recently I have found recipes and may attempt mixing up a batch of Egyptian paste in the fall when I return to the Ceramics studio /classroom on my regular schedule. In the past I have used "Egyptian Paste" from art suppliers like Dick Blick. (At the writing of this article, I could not find this prepared version for sale. Recipes for making  from scratch are readily available with a Google search.)

 Its like trying to sculpt peanut butter - the consistency is so gooey! As per the ancient methods - I found bisqued ceramic molds the most user friendly: they are porous, and absorb moisture quickly, allowing the molded paste to release, and drop out easily.


The challenge is patience. The paste is best left alone... as the crystals form on the surface as the piece dries. Sometimes patience is tough... Shown here are a few samples done when researching this material.

I love the colors and the history of the materials. For all its quirks - I do think I am inspired to give it another go!

Thanks for following this exploration! I would love to hear what you think... 


Until next time - 

Jenny


www.jdaviesreazor.com


*The ushabti was a funerary figurine used in Ancient Egypt. Ushabtis were placed in tombs among the grave goods and were intended to act as substitutes for the deceased, should he/she be called upon to do manual labor in the afterlife. They were used from the Middle Kingdom (around 1900 BC) until the end of the Ptolemaic Period nearly 2000 years later.
References: 


Saturday, August 17, 2013

How-To ~ Inside Outside Pressed Flower Beads

Hey everyone! It's bead making day for my new flower molds and here's another how-to for you… enjoy!!

Choose your favorite mold (I hope you tried making some new molds!) or texture sheet. Roll and cut equal size pieces of polymer. This way, even though these beads are hand shaped, they'll all be roughly the same size.

Next, roll the polymer into balls and press firmly into the mold, pushing the polymer over the textured surface.

Gently shape each cast piece into a bowl shape, taking care not to mash the detail on the inside. Pierce. Bake for 15 minutes and cool.

Now cut another piece of polymer — one for each "bowl" you've already shaped, but this time using less polymer — you want this outside layer to be thinner. (For the "bowl" I used 1 1/2 rounds of polymer, and then for the outside texture I used only 1.) Roll into rounds and press firmly into the mold, again pushing the polymer out over the textured surface, and also try to make it a little larger.

Rub a little liquid polymer over the baked "bowl" and gently press the outside layer in place. My beads have the stem detail, so I was careful to line them up on both the inside and outside.

Trim and blend the edges.

Pierce holes through the outside layer, piercing them from the inside out so they line up. Bake for 1 hour.

Paint, stain, color, seal… whatever!


And ta-da!! New beads!

Have fun!


Saturday, August 3, 2013

Mini Tutorial ~ Wildflower Molds for Bead Making

Hey everyone! As promised, today's post is another mini tutorial. Two weeks ago I shared the new wildflower molds I was working on. Are you ready to see the results?


Well… they all certainly were not as fabulous as I was hoping… the top four molds worked fine and had good detail, but the bottom four were not so great — some parts were either too deep or didn't show at all. Yes, the bottom two really are flowers, you just can't see the impressions!


Time to make more molds! Today's post was going to be on the bead making process, but since I needed to make new molds I thought I'd share that part with you first and then next time we'll start on the beads. So here goes…

(The molding compound I use is a 2 part 5 minute cold molding compound by Art Clay World USA)


Of course, I started with another trip out to my front yard and the fields surrounding my house. Living in the country sure does have its advantages! I picked more flowers than I needed — I wanted to have plenty for experimenting. I also made sure to pick some leaves too.

One of the main reasons half of my first molds didn't turn out well is because I was just blindly pressing flowers into the molding compound and had no way of knowing until the mold cured how the flower would actually look.

So this time around, I took all the bulky flowers and first lightly flattened them under a piece of glass. This allowed me to see how the petals would be arranged in the mold, and to carefully put them in place if needed before making the mold.


After flattening under the glass I pressed the flowers and leaves into the molding compound. When pressing the flowers in, I'm always careful to take note of the thickness and bulkiness of the different flower parts. For the mold above, I pressed the petals of the flowers deep into the compound, while only lightly pressing the flower's base — I want the main focus to be the petals and a big bulky base pressed in to deeply can easily ruin that effect.


More flower smashing! Not really — press just firmly — enough so the petals stay in place.

You'll get the best leaf impressions if you use the backs of the leaves where the veins are most raised. I like to add a little extra contour to my molds by pressing deeper on and AROUND the leaves, petals and anything I really want to standout. Adding that extra contour gives the finished casting a more raised look.

You can see that extra contouring here — around the leaves on the rectangular mold…

And here — I gave this mold a slight dished-out contour so the casting will be slightly domed.


* * *

Once all the molds cured it was time to try them out. Here are the results of some testing — all the molds worked nicely this time around!


Alight, now it's your turn! Go out, enjoy the fresh air and pick some flowers… and make some molds! In two weeks I'll show you a few new beads you can make with your molds.

Have a fun!