For today's post, I'd like to share how I made my bumblebee connectors for last months AJE Theme Challenge. The theme was summer and I decided I wanted my design to portray a summer's garden, so I came up with these mixed media connectors to design around.
My version is made in ceramic clay, but it would work equally well in polymer or air drying clays.
To begin, you will need clay, and decorating colours (either glaze or paints), wire, and metal sheet, plus tools.
Take a small lump of clay and roll in to a long egg shape.
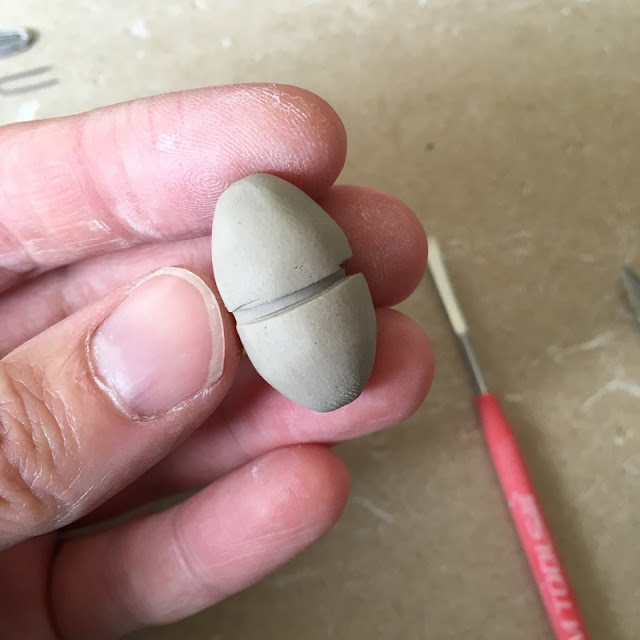
Divide the shape in half by pressing a line around the centre.
Using a flat tool, smooth each side of the line to remove the sharp edge.
Choose which end you want to be the head and divide that section in half as before, by carving a line around the centre.
Draw an eye shape on either side of the head, pressing around the edge of the line to make the eye stand out.
Clean up the carved areas with a damp paintbrush.
Using a knife or other thin sharp tool, start at the rear of the bee and scratch lines in a circle to start adding the texture of the fur.
Continue adding the fur texture in rings around the body of the bee stopping at the head.
On either side add a slot through the middle section of the body. This needs to be wide enough to add the wings so check the thickness of your metal. If working in ceramic clay, make sure you allow for shrinkage.
And finally, add high temperature or other wire to turn the bee in to a link.
Originally I was going to glaze these in black, but decided that wasn't very summery, so I went for a rusty matt brown.
To make the wings, I drew the shape on to a sticker and put this on to copper sheet for cutting. I used temporary stickers so I could peel the original off and use it again for the others to make sure that each wing would be the same shape. Each wing has a tab where it can be inserted and glued in to the body.
To add texture on to the wings, I decided to etch them. Stop out fluid was painted on and they were etched for about an hour and a half.
I don't always like the wobbliness that is created with the etching fluid, but it gives the wings a brilliant texture.
After treating with Liver of Sulphur and tumbling, the bees were ready for assembly.
Using a toothpick, I put two part epoxy resin in to the slots on the bodies and added the wings, holding them in place with a rubber band while the glue set.
And here's one of them in the finished necklace.
I think copper and clay work really well together and my brain is buzzing with ideas for other ways to incorporate metal into new work.


Th etched wings are a fantastic addition to the bees
ReplyDeleteThis is so inventive! I know you mentioned this in your post for the challenge but only now I understand how you made it (as I have never worked with clay)!
ReplyDeleteWhat a great design! Thanks for sharing how to make the bee. Your directions are excellent.
ReplyDeletewow. I love those :)
ReplyDeleteVery nice nd thatnks for the tutorial!
ReplyDeleteOh it was sheet! I thought it was metal clay and all the shrinkage rates had my head hurting. This is brilliant.
ReplyDeleteVery imaginative thanks for sharing.
ReplyDeleteThanks for sharing .Great to see how one can use clay in various ways .More please!!!
ReplyDeleteBrilliant! Looks awesome.
ReplyDeleteThanks so much! Hadn't thought of mixing some etched metal with clay. I just might need to make some of these with poly clay because they are so cute!
ReplyDeleteOh Caroline, I love your bees!!! You've given me a reason to finally be brave enough to use the bronze clay I've had for a long time! Thank you so much for sharing these cuties!
ReplyDelete