Monday, July 4, 2016

Mixed Media Bumblebee

Firstly, I'd like to wish all of our US Readers a Happy 4th July. Hope you have a wonderful day!

For today's post, I'd like to share how I made my bumblebee connectors for last months AJE Theme Challenge. The theme was summer and I decided I wanted my design to portray a summer's garden, so I came up with these mixed media connectors to design around.


My version is made in ceramic clay, but it would work equally well in polymer or air drying clays.

To begin, you will need clay, and decorating colours (either glaze or paints), wire, and metal sheet, plus tools.

Take a small lump of clay and roll in to a long egg shape.


Divide the shape in half by pressing a line around the centre.


Using a flat tool, smooth each side of the line to remove the sharp edge.


Choose which end you want to be the head and divide that section in half as before, by carving a line around the centre.


Smooth the edges again.


Draw an eye shape on either side of the head, pressing around the edge of the line to make the eye stand out.


Clean up the carved areas with a damp paintbrush.


Using a knife or other thin sharp tool, start at the rear of the bee and scratch lines in a circle to start adding the texture of the fur.


Continue adding the fur texture in rings around the body of the bee stopping at the head.


On either side add a slot through the middle section of the body. This needs to be wide enough to add the wings so check the thickness of your metal. If working in ceramic clay, make sure you allow for shrinkage.


And finally, add high temperature or other wire to turn the bee in to a link.


Originally I was going to glaze these in black, but decided that wasn't very summery, so I went for a rusty matt brown.


To make the wings, I drew the shape on to a sticker and put this on to copper sheet for cutting. I used temporary stickers so I could peel the original off and use it again for the others to make sure that each wing would be the same shape. Each wing has a tab where it can be inserted and glued in to the body.


To add texture on to the wings, I decided to etch them. Stop out fluid was painted on and they were etched for about an hour and a half.


I don't always like the wobbliness that is created with the etching fluid, but it gives the wings a brilliant texture.


After treating with Liver of Sulphur and tumbling, the bees were ready for assembly.

Using a toothpick, I put two part epoxy resin in to the slots on the bodies and added the wings, holding them in place with a rubber band while the glue set.


And here's one of them in the finished necklace.


I think copper and clay work really well together and my brain is buzzing with ideas for other ways to incorporate metal into new work.


Friday, July 1, 2016

The Jackalope: Creative collaboration.


Creative Collaboration
Or an idea shared: different artists, different mediums

The plan was hatched after a festival, to create and collaborate all new work for an upcoming show. The players? Jane Star Weils - fantasy and mythic painter and Jenny Davies-Reazor - fantasy and mythic sculptor/jeweler. Two friends, two artists, two redheads. What could go wrong?

I suggested a jackalope. While most commonly associated with folklore of the Wild West, there are horned hares that appear in illuminated manuscripts as far back as Ancient Persia and Medieval Europe. (Further reading on the jackalope here)

Jane sent me this - and it is awesome:
original drawing by Jane Star Weils 
So I headed to the studio and started to sculpt... Originally I planned to do 2 one-of-a-kind tiles... but the Facebook response was so popular that I cast the tile. I can now press jackalope tiles to my heart's content.

Sculpting from my reference photo
SO many glaze possibilities!
Jane and I decided to do this collaboration because we were sharing a space and vending together at the uniquely magical New York Faerie Festival in Ouaquagua, NY. We had special approval from the organizers as sharing usually is discouraged. Our themes of mythic inspiration, gods and goddesses, totem animals and symbolic icons are shared from paint to clay, from colored pencil to polymer. Here we are set up overlooking a babbling brook - I kid you not! 

Our home away from home - Jane on the left and yours truly on the right. 
Our side "yard" and natural installation/altar
 While we did not sell out of jackalope items - it was great fun! I adore Jane's work and was thrilled to have permission to do this - use her images, etc. I think she also enjoyed seeing her creation come to life in beads, and 3d.  I have to state here that I used her image with her express permission - and thats the only way I could have done this. Sure, there are other jackalope images I could have referenced... but that wasn't the point here. It was a motivating, inspiring challenge, shared marketing and the like. (Other artists friends had their jackalopes represented as well - in leather masks... sorry no pictures though...)
Jackalope in situ

The photocopied images transferred to the polymer with a greenish cast that I thought was perfect. I did 2 pieces but tried to kept the colors a bit more neutral to appeal to a wider audience.

Image transfer on polymer with beaded bezel
I would love to hear what you think! What is your favorite mythical animal? Have you ever collaborated with another artist? 

For me - home from FaerieLand- its back to the glaze cave... 
Until next time! 


Wednesday, June 29, 2016

Playing With Beads and....Air Plants!!!

I'm sure I don't need to admit to being a bead hoarder here and I'm sure I'm not the only one, Right?!
And as much as I love my mini printer tray bead storage, with all it's wonderful little spaces to keep all my lovely beads neat and organised (and that I lusted after for sooooo long) it still makes me feel just a little sad thinking that realistically it may well be years till some of those treasures see the light of day (other then the occasional fondling), So after Sue's wonderful post Rainbow Bead Garden Stake Project I got to thinking how else can I display those beads that are just too cute to leave in a draw (other then just blue tacking them randomly the walls, yes I do that)!

Then one day at the garden centre I saw an air plant display and... "light bulb".


So to make your air plant display you will need
  • A large piece of drift wood (or an interesting rock)
  • Some air plants and moss (mine are from Love Tilly)
  • Silicone rubber sealant
  • Air plant fertiliser
  • A selection of animal and mushroom beads
  • Some interesting crystals, tiny stones or even tiny shells


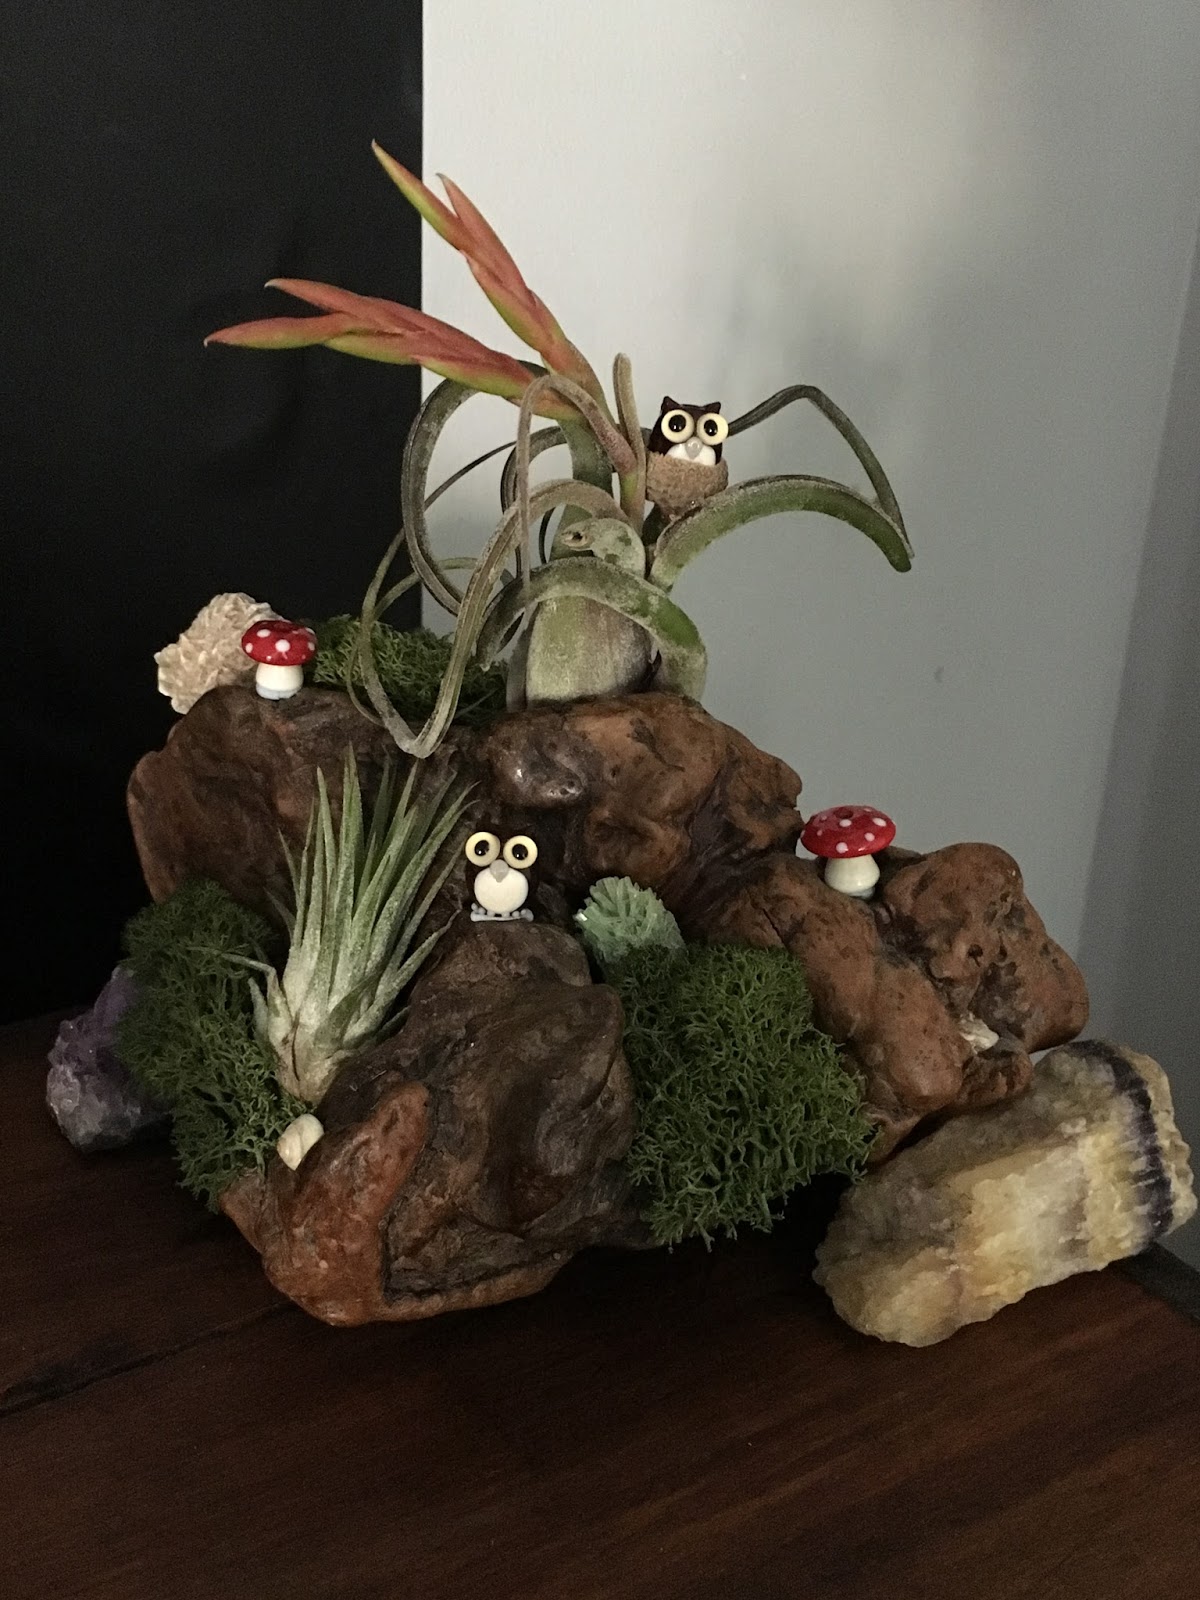
The first thing to do is to have a play around and get a rough idea of where you want to place things. I used one of the larger plants at the top of my drift wood in the hope that it would resemble a tree and a smaller plant in the middle with lots of moss around the bottom. 


Once you have decided where to put things then comes the glueing. The Silicone rubber sealant that you can get especially for the air plants is some what of a pain to use as it takes a few hours to dry. It suggests that you use rubber bands or wire to hold things in place while drying but I found this some what fiddly so as you will see in the next photo....


I held everything in place by propping things up or leaning heavy items on top of the things being glued. I glued an acorn cup into the "tree" as a birds nest and a few crystals and shells here and there for a bit of colour.


When the Silicone rubber sealant is dry then comes the fun part, adding the beads! Now of course I did not use the sealant on my precious (insert Gollum style voice) beads, because that would be daft and then I would not be able to use them! So instead I used blue tack....


One little owl in the nest and another on the ledge (I think I will need to replace him with a hedgehog or a lamb) and a couple of random mushrooms, oh and I am sure I have a pair of tiny rabbits some where! And there you have it a little display piece for some of your lamp work beads which has now got me thinking how cool would a desk top zen garden look (one of those little sand gardens) with beads instead of stones and a little wire wrapped rake with a tiny lamp work bead handle!!!

I would love to know if and of our readers display your beads in an unusual way?