Showing posts with label lesley watt. Show all posts

Wednesday, July 27, 2016

Bringing the Green Man to Life


Some months ago I made this wall tile of a sleeping green man and ever since then it has sitting in my studio waiting to be glazed and brought to life. I have to admit that it's probably taken so long because I've done very little work on this scale and was a little nervous about being able to translate the picture in my head into reality. A special chemistry occurs when you glaze fire a piece of ceramic and it doesn't always produce the result you were expecting. With beads this is not really a problem but with a piece such as this that took so long to create it can make or break the finished piece. But there comes a time when you just have to take a deep breath and dive in and I'm sharing that process with you today.


This tile will be be wall mounted so the back won't be seen but since it was a little bit messy for my liking I used a green underglaze to tidy it up a bit. Underglaze doesn't melt in the way glaze does so I would still be able to prop it on its back to fire it.


In my minds eye I saw my green man as having a foliage of a mottled green with some leaves picked out in a darker green for contrast. I also wanted to pick out the veining and try to give some depth to his features, maybe giving the impression of bark around the eyebrows. To achieve this I settled on using two oxide washes and two glazes.


Oxide washes create a staining effect which can either be used alone or layered with glazes to alter the effect of the glaze. To begin with I used a Rutile wash (which creates an ochre finish) to pick out some of the veining on some of the leaves. Once the wash was dry I wiped it back form the surface areas leaving it just in the recessed veins.


Then I went for an Iron oxide (which gives a dark brown finish) on the remaining leaves and around the facial features and again wiped it back form the surface. I actually like the finish this wash gave at this stage so I'm thinking I might make another of these and just use washes on it - a bit like a sepia version.


Next comes the glaze proper. The majority of glazes in their wet form bare very little resemblance to their finished colours with many of them being a shade of red which is why you need to have a clear idea in your head of what you want to achieve. It certainly won't look that way during the process of glazing but that's what makes it so exciting when you open the kiln to see the transformation.

I used a crushed crystal glaze appropriately called 'speckled forest' for the central area. This type of glaze contains crystals which melt and flow during firing to produce lovely colour and pattern effects. If you look closely you can see these crystals in the uneven texture of this glaze.

The perimeter leaves I glazed with a smooth dark green glaze - again appropriately called 'Forest pine'. I also used this glaze to pick out and enhance the eyebrows.


So, once he had been left to dry fully it was time to (hopefully) make the magic happen and put him in the kiln. I only takes about three hours to fire this type of clay but I have a very heavily insulated kiln which takes an awfully long time to cool down so it was a bit of a nail biting wait until it was cool enough to take a peek. When I did my first reaction was phew - he's still in one piece and my second reaction was he has a spot right on the end of his nose!


But once he was was out of the kiln and cooled down fully (glaze colours can continue to change as the glaze cools fully) I decided I was pretty happy with the result. The spot on his nose is one of the crystals and doesn't impact the finished look - trees after all are not blemish free. I love the speckled effect and the contrast of the glazes and I got the bark effect I was looking for around the eyebrows.


All in all, a pretty successful project which I plan to revisit in the future...green is after all my favourite colour!

Monday, October 19, 2015

Beading Beyond Jewellery

Regular readers may remember from my last post that I acquired an addiction for bead embroidery on my recent trip to the USA and since my return I've been getting lots of practice on Jewellery pieces. But after a while I began to think that there was maybe more I could do with art beads and seed beads (in fact any beads) beyond jewellery and so I started to play around with some other mediums.

Now of course I know this is not an original idea and there are people out there using beads and embroidery to create stunning works of art such as the hugely talented Michelle Carragher who works on costumes for film and television including costume extravaganza - Game of Thrones.

House of Stokeworth Sigil - image © MCE/HBO 2015
If you don't know Michelle I would highly recommend taking some time out to visit her web site and take a look at her exquisite work.

Michelle Carragher Embroidery
Needless to say my attempts don't come close to Michelle's work but I've had great fun doing something completely different and stretching my creative muscles. I started off with one of Jenny Davies-Reazors pretty crow cabochons and after bezeling that decided to let loose and freestyle with a selection of beads. I could have gone on forever with this but eventually started to think OK - what am I going to do with it now..?

Felting is another new addiction of mine so I decided to try combining the two, finally mounting the piece in a shadow box frame that I stained to match and backed with some hand made paper. Not too shabby for a first attempt froI thought.


Another Cabochon of Jenny's inspired me to make this little wall hanging of a harvest goddess. I was desperate to use some of the dyed curly sheep's locks I'd bought at Sarafina Fiber Art and they worked really well for her wild windswept hair.  I used Czech glass leaves and flowers, seed beads and embroidery to embellish the piece and now I just have to work out how to mount it but, as I've decided to do a series of season goddesses that will probably happen once they're all completed.

Harvest Goddess by Lesley Watt
These pieces are all quite small and I really like working in this format. I have a number of art beads in my stash that I've never managed to create jewellery with because they too big for my design style but these have proved to work really well as miniature wall art. This abstract needle felted piece is designed around a large polymer pendant by Roberta Warshaw and is bezeled and embellished with seed beads.

Setting Seed by Lesley Watt
My favourite to date is this mixed media piece which includes my first attempt at wet felting - great fun and much more to come! I picked up the cabochon at Lisa Peter's Russ's  booth at Bead Fest and it immediately made me think of a moon. This is also a very large piece and I was doubtful I would create jewellery around it so I bought it with the specific intention of trying something different with it and I'm so pleased that it came out just the way it was in my head. The hare is made of polymer clay which I drilled tiny holes in and attached to the felt with seed beads. More curly wool locks and more beads add the finishing touches.

Chasing the Moon by Lesley Watt
I bezeled this lovely ammonite cabochon by Susan Kennedy with no real idea what I was going to do with it - I've found bezeling is something I can do whilst watching (or at least listening to) TV in the evening so I tend to get through a lot this way!


I just happened to have put some old woollens in a hot wash to turn them into felt and when this one came out was a perfect match for the cab. It's a really nice thick felt so I decided to try out a purse with Sue's cab as a focal with seed bead embellishments... it's a work in progress but it's coming along nicely.

https://www.facebook.com/theajewellery
My team mate Jenny has been using beads in her mixed media art for a good while now and has been a huge source of inspiration for me on this journey. When I stayed with her in the summer this piece was a wall hanging was a work in progress -  finished it's just stunning and I'm very proud to have one of my moon gazing hares at it's heart.

Beaded Wall hanging by Jenny Davies-Reazor
This felted setting for one of my hare totems has such as lovely ethereal quality...

Mixed media wall hanging by Jenny Davies-Reazor
I was honoured to have my fox totem in this shadow box piece which is currently being exhibited at a show at the Newark Arts Alliance in Delaware.

Mixed media wall hanging by Jenny Davies-Reazor
Do a quick search of Pinterest and you'll find plenty of other artists who work beads into their art - here are just a few I found...

This beautiful shrine by Larkin Jean Van Horn incorporates a porcelain owl cabochon by Laura Mears and hand stitched beads.

I Went to the Woods by Larkin  Jean Van Horn

I love the way these vintage bottles by Zinnia's Art have been embellished with all sorts of mixed media and ephemera including beads...

 Zinnia's Art
Embellished Bottles byZinnia's Art
A beautifully beaded dragon mosaic by Hobbymix.


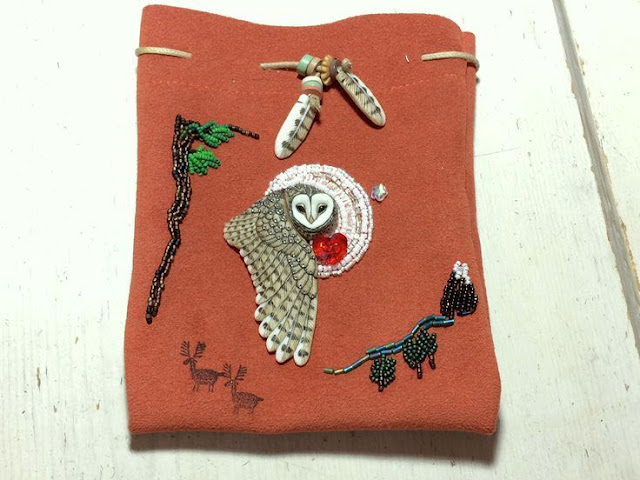
Totem bag featuring another Laura Mears cabochon and seed bead embellishment.

Totem Bag featuring a Laura Mears Cabochon

And finally s Day of the Dead shadow box shrine from Mixed Media Artistry with porcelain skulls by Laura Mears.

Day of the Dead shadow box shrine by Mixed Media Artistry

I'm looking forward to seeing where this takes me and will keep you posted on my progress and if you use beads in creative ways other than jewellery - we'd love to know so please do share.

Lesley
THEA elements

Friday, August 7, 2015

The Journey - Part Two

“Life lessons are not journeys traveled in straight lines but are crossroads
formed years and miles apart.”
In my last post I shared some of our team's early work, with the thought of encouraging you on your own creative journey.  Its fun to look back and see how far we've come.  It helps to put things in perspective and it gives encouragement that the future will bring continued progress.

In Part One of this series, I highlighted the journeys of Karen Totten, Jennifer Cameron, Melissa Meman and Niky Sayers. Today let's take at look at Lesley's, Sue's and Rebekah's early work.

Lesley Watt
Lesley started out designing jewelry.  Later she branched out into making jewelry components as well.  Here is an early necklace and earring set she made, before discovering the world of art beads. Lesley says that, "This was the starting point of my design career and it highlights how much I've learned and how much more depth and breadth there is to my work now.
Discovering art beads was a transformative experience for each of the the Art Jewelry Elements team members.  Lesley has made art beads in polymer clay, metal clay and most recently she has been working in stoneware clay.  Here is a picture of her first ceramic beads from 2013.  Lesley says, "I was really excited about these and they still make me feel like that because it was the start of a huge passion that teaches me something new with every batch of beads..."
And here are a few more of Lesley's early ceramic beads.

Sue Kennedy
Sue started making lampwork glass beads about 10 years ago in a class with Mike Mangiafico.  She says, "They only had ugly colors and short rods back then for us to use - there are so many more colors now. You can see the obvious flaws - the wonky beads, the off-center dots, the bubbled up clear glass. But I also see many beads that have great dimpled ends and a hint of talent!"
Sue goes on to add, "These are beads from my next class with Mike (the first class was a sampler I believe). You can see marbles, plunged dots, "caterpillar' beads, hollow beads, how many spacers can you fit on a mandrel beads, an off-mandrel bead etc. And again, wonky beads and not so pretty beads. But more and more practice. Mike was very encouraging to me and I'm so glad he was, because I have been very happily making glass beads all these years."

Rebekah Payne
Rebekah found so many great pictures to share, that several of us encouraged her to do a blog post just about her own development as an artist. I'll just share a sampling of her early work here.

Rebekah is well know for her sleeping critter beads. Here is what they looked like before they became beads! Rebekah says, "The rooster "Button" was my first critter sculpture in polymer—I made him in early 2002. My little beagle, Suzie and the brown owl on the burned tree came next, probably in 2003… somewhere in between there and 2004, I made the chinchilla. I loved chinchillas at the time!! I made the falcon, other owl, and the song birds (and a bunch other birds!) in 2004 for an art contest and to raise money for me and my sisters to adopt a horse.
And here are some of Rebekah's earliest pendants. She states, "I was thinking of making jewelry to sell and these are my first attempts at making my own pendants in polymer from early 2005. The photo makes them look much better than they really are in real life for some odd reason… Thankfully I used the wrong kind of finish and they have a case of the "everlasting stickies", so no one will have to own them!

"This one is one of my first dragon necklaces I made in 2007 for my short, but unsuccessful venture on eBay. I'd been working on this dragon style off and on for about 2 years at this point. My painting was starting to reach a point I liked with the blending of colors… my sculpting skills still need improvement though! Loved seed beads back then!"

I hope you have enjoyed this little bit of reminiscing. All of us are on a journey. None of us can know where it will lead us, but we can savor the trip.

I'll share more early work in my next post.  Till then, enjoy the trip!
Linda

Thursday, July 30, 2015

Tutorial - Beaded Spiral Wire Bangle


Today I'm sharing with you another design featuring one of my favourite fusions - macrame and wire work which combine to create this lovely rigid beaded Bangle. You can adapt this to your own style with your choice of beads and can also change the weight of the piece by using a heavier gauge wire

Materials
2mm copper wire
0.60mm copper wire
Focal bead, accent beads and spacers
Copper head pin
10mm heavy gauge closed jump ring
Cutters round nose pliers
Bench vice

Note: This bangle measures 6 1/2 inches (2 1/3 inches diameter). You will need to adjust your wire requirements for the finished size you require and to take into account the size of the beads you use.


Step 1
Cut an 8 ½ inch length of 2mm copper wire. Add the focal beads, centre on the wire and mark the position with a sharpie. Remove the beads and secure one end of the wire in a bench vice.


Step 2
Cut 2 3ft lengths of 0.60mm copper wire. With one length and working from a mark out towards the end of the core work a macrame half square knot spiral pattern until 1 ½ inches of the core wire remains. Use 2 pairs of pliers to pull the wire taught. Instruction for a macrame half square  knot can be found here.


Step 3
Remove from the vice, wrap one of the wire tails around the core 3 times and trim. wrap the second tail it over the first and trim. 


Step 4
Add the central beads for the central section, return the core wire to the vice and repeat steps 2 & 3 on the other side,


Step 5
Add a bead to each end of the core wire and turn a simple loop.


Step 6
Take a 10mm copper jump ring and place it over the close tips of a pair of round noses pliers. Open the pliers to make an oval jump ring.


Step 7
Gently shape the bangle over a mandrel then open the loops one at a time, attach the jump ring and close the loops.


Step 8
Make a beaded dangle and wire wrap to attach to the oval jump ring.


Step 9
Use Liver of sulphur to patinate, polish back to your preferred finish and tumble if desired.
           
And there you have your completed bangle...

Heart  bead by Josephine Wadman Designs
Mini melon beads by Pebble Dreams

I hope you enjoyed this tutorial and if you give it a go don't forget to share your makes with us on the AJE Facebook page.