Showing posts with label creation is messy. Show all posts

Saturday, March 15, 2014

Running Out of Space

I don't know about you, but I constantly find myself running out of workspace. If I'm working up against a deadline or with limited time, cleaning up is last on my list and I go from one table to the next, until all work surfaces have been covered. Being an organized person goes out the window and if I'm not careful I find myself working on the floor! I think you all know about that little open workspace that eventually closes down to about a 3 inch by 3 inch section—time to clean up!

Or pull out the little old rickety tv tray and keep right on working!

Yes, that's me right now! I'm loving this little table—it has become my little studio away from the (messy) studio. I've done almost everything on it so far, except leather burning, as I don't want to burn the house down if it tips over.


Notice the empty organizers on my jewelry table—at the moment they're serving no purpose other than taking up table space. They're brand new and intended to help me organize those boxes of stuff lying on the floor. Right now I'm thinking it would be so much easier to fill them with new beads that arrive already separated in their own baggies. ;-)

Tea dyed fabrics, molds, paint swatches, leather feathers… and this is actually a tiny bit neater than normal. I know I'm in trouble when I start stacking things on top of my pasta machine (top left)!

This weekend that will end and I'll finally clean up (and maybe possibly vacuum too) and hopefully be ready to start fresh on Monday (or Tuesday). I don't like to be distracted with cleanup when I'm working, but it does eventually get to a point where when I look around all the stuff lying around in various stages of completion really gets on my nerves. Not to mention all the paint dust and polymer crumbs, and little bits of wire that are all over the place.

Always after a good cleaning, I feel ready to take on new things. I feel inspired and invigorated… if that makes any sense. No? I'm not sure it does to me either, but hey, if it works… I say go for it!


So, what about you? Do you like a pristine work area, or are messes a minor issue to you? Do you love reorganizing or is it your worst enemy? Do you have a simple work area that's easy to tidy or does cleanup mean cleaning an entire room or studio for you? Do share!


http://www.treewingsstudio.com/


Tuesday, November 20, 2012

The Creative Life

It's been about six months since I left my regular job to come home and make a go of living the creative life. In part, this was nothing more than self-preservation - I was walking through one of those hugely painful and ultimately very rewarding periods where every single event winds up being an opportunity to look deep and examine the stuff that still needs to be dealt with in your life. Good and necessary but there's only so much of that a person can take before they just need a break, you know?

So the last six months has been about learning what it means to live a creative life. I was pretty sure - when I was longing for it - that is was going to be all about watering my plants in loose flowy dresses and drinking a second cup of coffee on my deck in soft sunlight and having a perfectly clean house and producing piece after piece of stunningly beautiful jewelry to fill my Etsy shop in no time at all.

Disaster
A disaster. Not stunningly beautiful. Not going in the shop.
Um... yeah. Not so much.

And I won't show you what my studio looks like this morning, as I rearrange it for the third time in six months. (But do check in Friday for an in-depth studio tour and a glimpse into the studios of other AJE contributors! We're going to have a lot going on here for Black Friday!) 

Surprisingly, in spite of my many years in small business management, the biggest challenge for me in my new life has been time management, in particular becoming disciplined about the amount of time I give to the one-of-a-kind pieces that are an expression of my delight to be in the midst of a learning process and the production mind-set that allows me to turn out many more pieces in a shorter period of time.

Multiples
Multiple earrings, same design, managed to get them done in 1-1/2 days.

Glass-Necklace
An indulgence: I made every link of this chain and the glass cabochon too.

I've really indulged my love for the one-of-a-kind stuff, and haven't been very good at being disciplined about developing designs that I can create in multiples. The earrings above are an example of one successful attempt at an approach to multiples. For some reason, I volunteered to donate earrings to gift bags for a Gail Crosman Moore artist retreat at Allegory Gallery this past summer - and then panicked a little when I realized that my usual "one at a time" approach wouldn't work. I managed to get all 15 pairs done - including the designing, the cutting and fold-forming of the leaf elements, and a few disastrous missteps - in a day and a half. The necklace above, on the other hand, was days in the making - I made every single element myself, every link in the chain, even the glass cabochon. It'll take me a long time to fill the shop if I spend all my time on pieces like that!

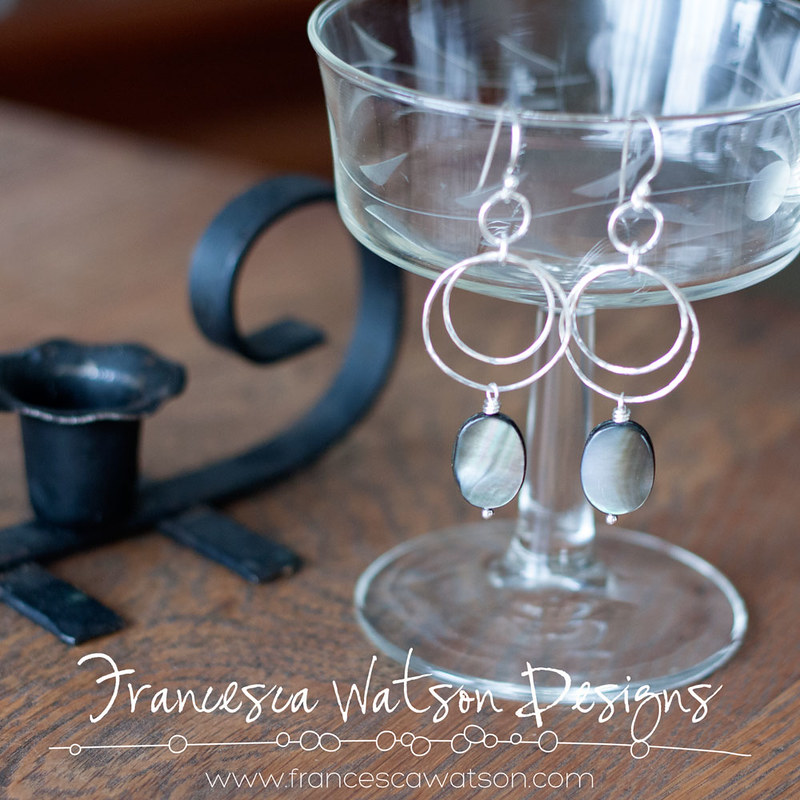
Double-Hoops-2
Double hoops with shell drops.
Double-Hoops-1
Double hoops with Czech glass tulip drops.

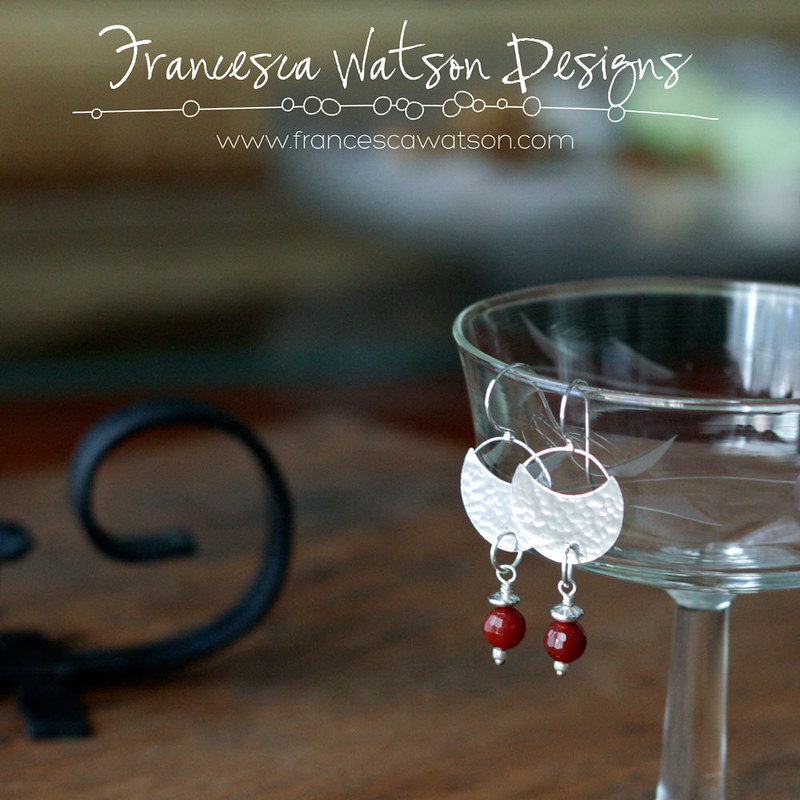
3-4-Moon
3/4 Moon Series - hammered silver with carnelian drops.

3-4-Moon-2
3/4 Moon Series - hammered silver with Czech glass drops.
These designs are ones I keep returning to time and again - standard components that I can create in multiples and then make more unique with the addition of different beads and colors. But I don't have the balance right yet. There are still too many days when I sit with a worktable overflowing with materials and my mind goes completely blank - I can't think of one single thing to do with the things in front of me. 

I'm still learning.

My teammates here at Art Jewelry Elements do a stunning job of striking that balance. Several of the more recent articles here have featured component work by Sue Kennedy, Kristi Bowman, Lesley Watt, and newest AJE member Rebekah Payne. If you missed them, go back and check them out - this team is an inspiration, especially for someone so new to the process of living a creative life.

But I'm still learning.

Now if you'll excuse me, I have to go put on a gauzy flowy dress and water my plants.

Until next time!


Friday, July 6, 2012

Being brave with your Design- Pushing the limits of your materials- "Siren's Song" necklace

Hello friends!

I am excited to share one of my newest designs! I got brave and pushed the limits of my materials so I wanted to encourage you to do the same. After all, some of the best designs come from doing things that may not turn out. My art teacher used to say "No Risk, No Art!" Wow, who knew that would stick?! ;)

This design was just one of those things that kind of stuck me as I looked through my bead box. A long while back I received the beautiful patinated wings from my friend, Staci Smith of SL Artisan Accents. I remembered having this gorgeous Mermaid charm from Green Girl Studios and thought that the two would go beautifully together. I was in a really sea inspired mood. I blame that inspiration on Karen, Staci and the new Creation is Messy glass color, Poseidon.
Here was the hideous messy of my desk with my lone design in the center lol. 

Here is a closer look at my pattern I had laid out. See my mermaid in the center with the wings? Here she was just layed on top. Now to figure out how the heck I was going to assemble her! The hole for the mermaid was at the top of her head. The wings hole was in the center of the wings and on the wing tips. I tried EVERYTHING to get them rigged together. I tried cording, wire working, NOTHING was working :(

Then.... I had a thought.... What if I made a hole in her back with my dremmel? *GASP* Was this a good idea? Well pewter was soft, right? Her design was nice and solid and there was a nice thick spot I could drill inbetween her back and hair. *Inhales deeply* Ok, I'm going to go for it.

I pulled out my dremmel and attached the smallest rounded drill tip I had. I held my breath(literally. Yeah, you may not want to do that part ;)) and gently drilled into her back on one side.  Then I moved her to the other side and began gently drilling.....
I felt the drill release as I had hit the other side! SUCCESS! I moved my dremmel away and peered into her back. Yep, light! I did it! There was still enough of her hair over the hole I created to be substantial! *WHEW*

I typed in with text where the hole is since it's a little hard to see.

Here you can see the holes in the wings and if you look really closely you can see a little mark on her left arm where the hole is. Now to get her together.

I took my c-lon cording and genly wove through each wing and through her back about 3-4 times. I then pulled tightly and tied a knot. I then tied a knot in each loose cord, snipped them a little past the knot and gently melted the ends to prevent fraying.

Look how perfect she looks! The wings look like they were created especially for her! :D I was so delighted that not only did my bravery pay off, but at the exquisite design I had just created.


I went to work stringing, and wire-wraping, knotting, crimping. I added in a wonderful nested loop connector that I had received from Karen.

I tied on some sari silk in some watery colors and used one of my new watery sea anemone ruffled discs.
I added a string of my Sea Opal wing dings, a beautiful podish clasp from Bokamo designs, some patinated chain from Karen, and a Lichen spacer from Staci.


Here you can see the whole necklace design :) I just adore this new piece!

I was in my pajamas while I was busily making my necklace, so when my sister showed up I ran to her to model my newest master piece! She arrived  in a pretty black dress with her beautiful olive skin and sparkling blue eyes. I drug her outside in the sunlight and clicked some photos.


Here you can see her wearing my necklace along with the earrings I created with the gorgeous earring bases I received from Staci in my happiness box :)

Here is a pic of the earrings.
 
 I encourage you to be brave with your designs and push the limits the next time you sit down to design. 

Anything is possible!

xo Genea