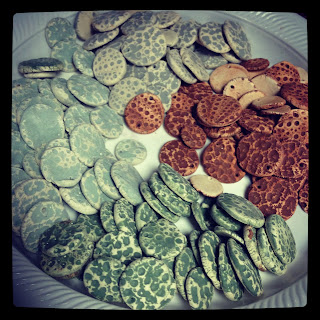
I love, love, love the deep chestnut brown patina that is possible with copper... but it took me a long time and a lot of experimentation to perfect the process so I could get it consistently. The thing I love best about this is that the resulting patina is very dimensional, which may be hard to see in these photos - but give it a try yourself and you'll see.
Start with a copper piece that has been pickled, neutralized, and brushed clean with a brass brush. The "neutralized" part of that is really important - use baking soda in solution with tap water. Un-neutralized pickle on a piece of metal can react to the patina and sealants over time.
 |
| This piece is really clean - what you're seeing are reflections on the metal. |
Place the piece on your soldering block (choose a clean spot!) and gently heat it with your torch until it darkens. Make sure it's completely dried off before you do this, since the water can leave mineral deposits on the metal as it rapidly heats and evaporates.
Quench the piece, then use a green scrubby and running water to clean it. Don't use soap! Just the green scrubby and a little elbow grease will be enough to brush back the patina on the high points and even out the color. Be sure to dry the piece thoroughly before moving on to the next step - any water left on the piece will dilute the patina as it comes in contact with the metal.
 |
| Sorry this is a little out of focus! |
Get your work area set up with the darkening liquid patina of your choice and either running water or a water bath nearby. I use Novocan Black in this demonstration, but liver of sulphur gel works great too. Then, quickly submerge your piece in the liquid and take it right back out, putting it in the water bath or rinsing it under running water. Really: just dip it in and take it out, then rinse it thoroughly.
Repeat this step several times - dry off the piece, dip it quickly into the patina, then rinse thoroughly. Every other dip in the patina, use the green scrubby to even out the color - no soap or cleanser, just the scrubby and some water. After anywhere from four to six dips in the bath, you'll have a beautiful, even deep brown patina with highlighted texture.
 |
| Sorry this one's out of focus too! |
Put the piece in a tumbler for at least an hour - if you have a vibratory tumbler, you can get the same effect in 20 minutes or so. You're looking for a deeply burnished surface that glows, and you'll start to be able to see the dimensionality of the patina.
 |
| Toss in a piece of large link copper chain to tumble with your piece - it helps create a random organic texture. |
 |
| After an hour of tumbling, these pieces have mellowed to a beautiful, deep chestnut. |
Use your fingers to rub a little bit of Renaissance Wax (I love that stuff!!) into the surface of the piece. A little goes a long way, but you want to make sure you get thorough coverage. Set the piece aside and allow to dry for at least 15 minutes - longer is better. Then buff with a soft cloth.
 |
| All of these pieces have had Ren Wax applied, but only the center one has been buffed. Note the matte appearance of the other two? |
The Renaissance Wax will continue to harden over several hours - this is my favorite finish of all because it is so durable and imparts such a pretty glow - not too shiny, just right.
 |
| All the pieces buffed. |
So that's how I do it - I get consistently deep, rich, dimensional color and beautifully highlighted textures with this technique, and the finish is extremely durable and stable.
Do you have any tips to add? How do you add patina to your copper?
Until next time!


