
I am here to fully admit that my Christmas planning and crafting does actually begin after Halloween. I know this goes against some of you and frankly I hate that the stores are putting up Christmas decorations even before, however I need to start then. The reason....cross stitching.

Before I discovered beadweaving I was a quilter. Before I was a quilter I was very heavy into cross stitch and even though the quilting and beading had me setting my cross stitch aside and all but forgotten, Christmas revives my love and need for it again.
When I first got married we had a real tree and used the easily replaceable ornaments with just a few exceptions. I was always intrigued by the ornaments my Mother in Law would make. I do love all things handmade so it goes without saying I wanted to try. I started simple with bead kits similar to these

As you know sometimes tree sap can ruin an ornament so some are long gone. After my daughter was born we discovered we could no longer get a live tree due to her allergies. That is when I started cross stitching ornaments. I knew I wanted to have a Santa themed tree so at first I did what ever kit I could get my hands on.


That is when I first discovered Mill Hill bead kits and I knew I needed them for my tree. I think that is really where my love of seed beads started. . I love stitching those tiny beads onto the paper and bringing each one to life. I love how the beads sparkle in the lights of the tree. Here is what I have made over the last couple of (dare I say it ) decades.

This year my husband gave me a new kit and it was a challenge but WOW it is pretty.

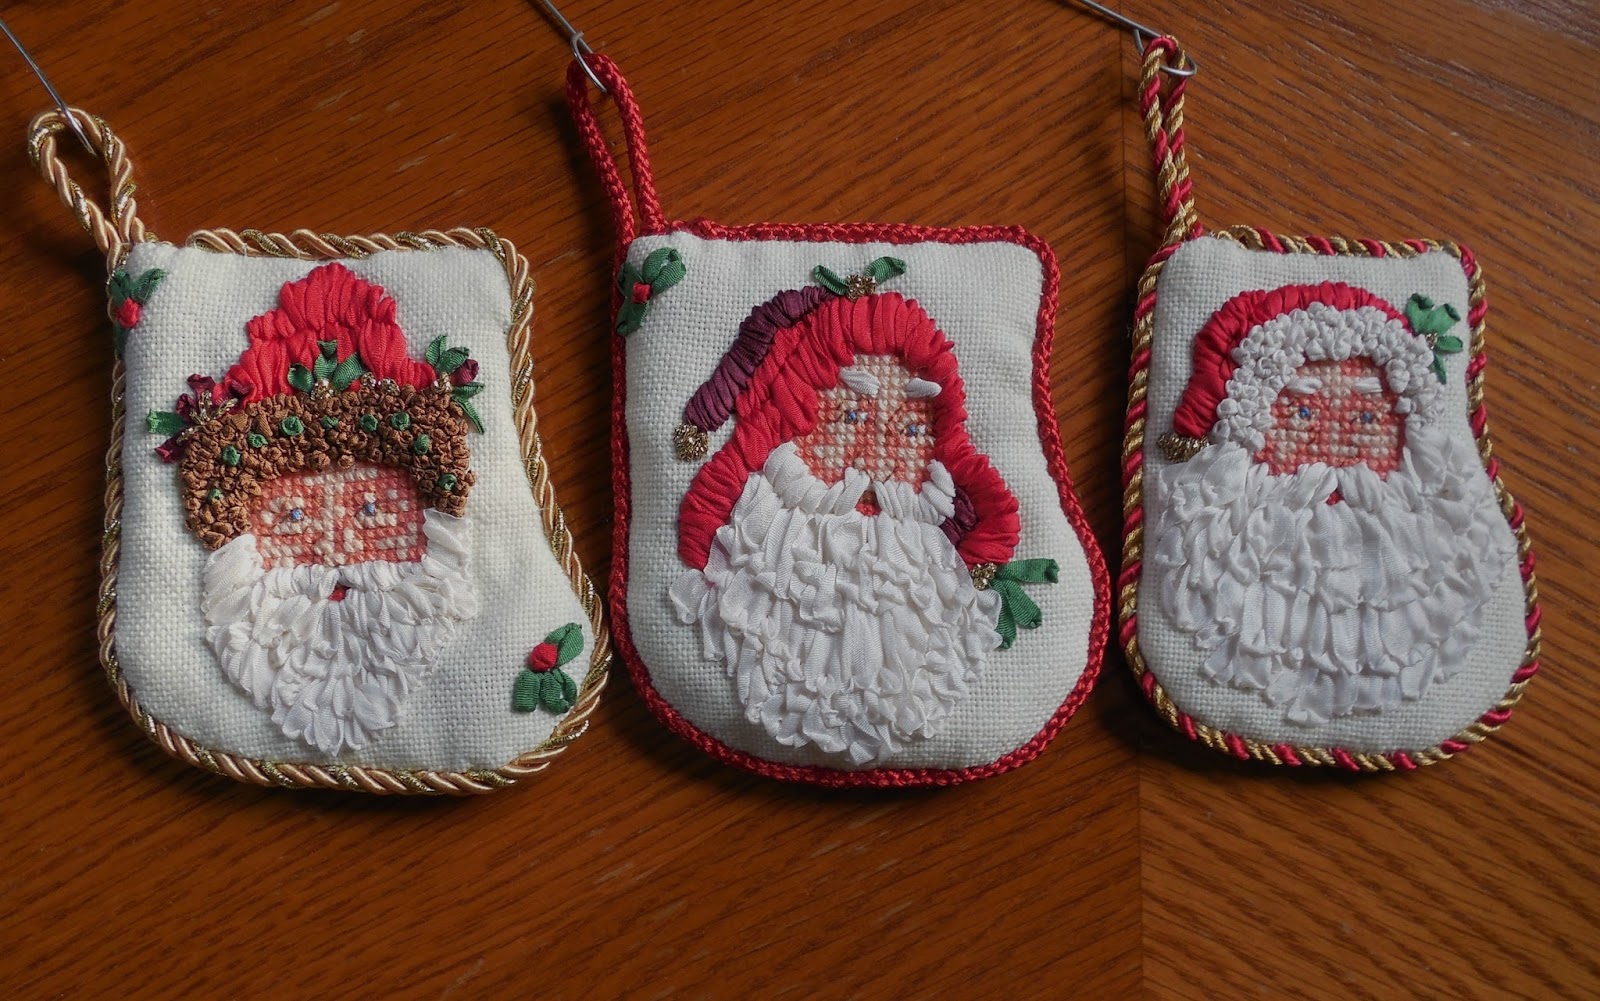
Of course since most of the time the only place I could get the bead kits was at my local cross stitch shop I would always look for new stuff. That is when I found these little tartlet kits the shop put together by an artist named Pat Thode.

I think I have acquired the whole set as I have completed one or two a year. I still have about three left to complete.
Here is the two I completed this year.


Last year I also discovered designs by Foxwood Crossings that were attached to mini sleds. I really had fun with them and cant wait to get another set.

Also last year I discovered that one of my all time favorite designers Just Nan had come out with these amazing little mice and I had to have it.

Isnt it amazing? My friend Maria gave me another Just Nan kit that I was able to get done before the tree went up.

Adding all of these to the handmade ornaments I have made with my friend Maria, been gifted by other friends and of course the ones my mother and my kids have made remind me of all the memories over the years and how happy it was to stitch and collect each one.
Happy Holidays to all of you!


Before I discovered beadweaving I was a quilter. Before I was a quilter I was very heavy into cross stitch and even though the quilting and beading had me setting my cross stitch aside and all but forgotten, Christmas revives my love and need for it again.
When I first got married we had a real tree and used the easily replaceable ornaments with just a few exceptions. I was always intrigued by the ornaments my Mother in Law would make. I do love all things handmade so it goes without saying I wanted to try. I started simple with bead kits similar to these

As you know sometimes tree sap can ruin an ornament so some are long gone. After my daughter was born we discovered we could no longer get a live tree due to her allergies. That is when I started cross stitching ornaments. I knew I wanted to have a Santa themed tree so at first I did what ever kit I could get my hands on.

That is when I first discovered Mill Hill bead kits and I knew I needed them for my tree. I think that is really where my love of seed beads started. . I love stitching those tiny beads onto the paper and bringing each one to life. I love how the beads sparkle in the lights of the tree. Here is what I have made over the last couple of (dare I say it ) decades.

This year my husband gave me a new kit and it was a challenge but WOW it is pretty.

Of course since most of the time the only place I could get the bead kits was at my local cross stitch shop I would always look for new stuff. That is when I found these little tartlet kits the shop put together by an artist named Pat Thode.

I think I have acquired the whole set as I have completed one or two a year. I still have about three left to complete.
Here is the two I completed this year.


Last year I also discovered designs by Foxwood Crossings that were attached to mini sleds. I really had fun with them and cant wait to get another set.

Also last year I discovered that one of my all time favorite designers Just Nan had come out with these amazing little mice and I had to have it.

Isnt it amazing? My friend Maria gave me another Just Nan kit that I was able to get done before the tree went up.

Adding all of these to the handmade ornaments I have made with my friend Maria, been gifted by other friends and of course the ones my mother and my kids have made remind me of all the memories over the years and how happy it was to stitch and collect each one.
Happy Holidays to all of you!


