Showing posts with label business tips. Show all posts

Tuesday, April 21, 2015

Tools we can use: Square

I am finally getting settled back into my (more or less) normal routine after teaching at Glass Craft Expo in Las Vegas. I taught four very full classes over four days, and had the best time - my students were terrific and the venue and management staff were incredibly organized, accommodating, and thoughtful. I really could not have asked for a better experience.


One of the things I had to plan for in getting ready for this show was taking payment for materials fees and the tools and other things I'd brought for sale. I haven't had an online shop in a while (more about that in a minute), haven't done shows in even longer, and haven't done much selling when I am on the road. So.... I had to revisit the Square, which had been sitting in my desk drawer gathering dust for weeks months years.

source
Amazingly, my account was still open and still linked to the right bank account. All I had to do was update some contact info and my logo and I was ready to go.

In the time since I've been gone, Square has made some improvements... significant improvements.

For starters, they've greatly expanded the "staff" mode, making it much easier to get help when you need it without sharing passcodes and log-ins. And you can fine-tune access as well, so that helpers only get to work with the stuff you want them to.

Since I brought a teaching assistant with me, this was enormously helpful. Even more helpful was that I was able to use the Excel spreadsheet I'd used for planning purposes as an upload for all my inventory and pricing, so there was no duplication of effort - and although that process did take two separate steps, it was super easy and fast.

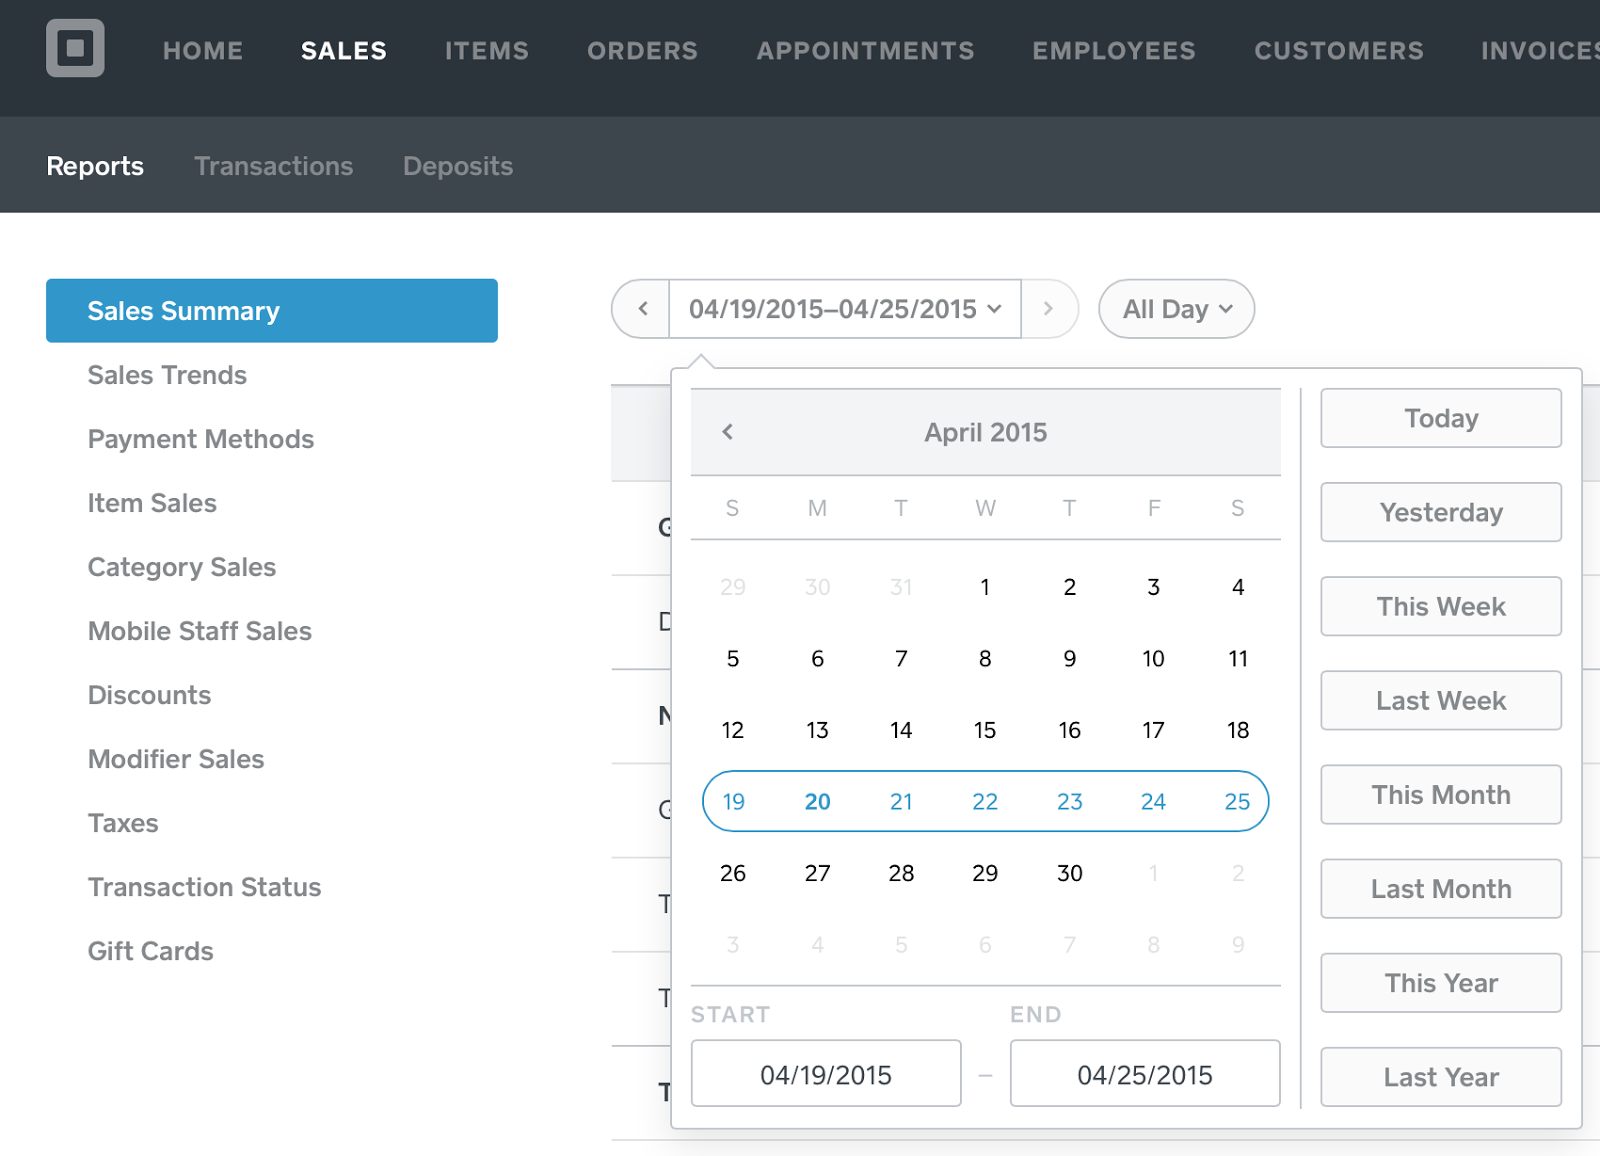
Square has also greatly expanded its reporting capabilities:


I was extremely impressed with the range of reports available in their free account - lots of opportunities to dig down and get a picture of what's going on with your sales.

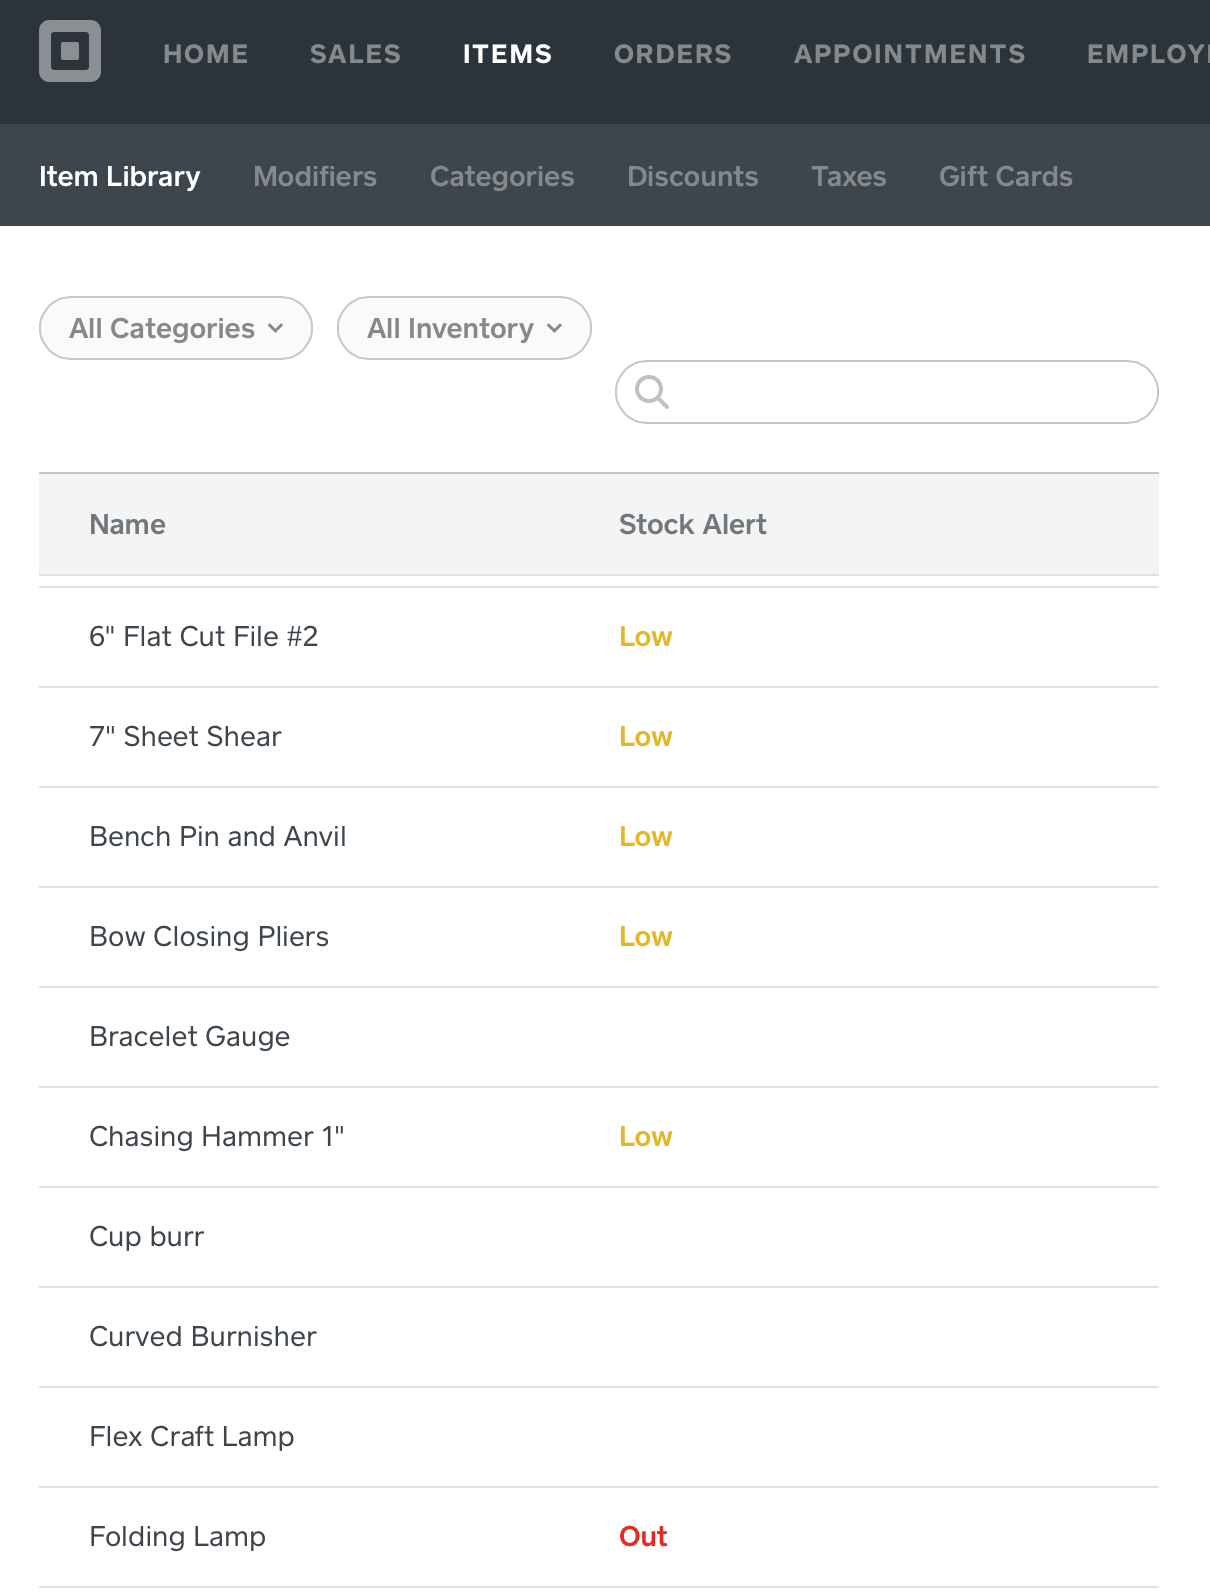
And inventory management is great too:


Square allows you to accept cash and checks, too, not just credit cards, even if you're not using a connected cash drawer. 


And if a customer wants to pay some cash and some other form of payment, you can do that too.


The Square worked fast and flawlessly, even when we had spotty cell reception. Ringing up the students was as simple as just touching an inventory or item entry, or adding one on the fly - which was also fast. And promptly at 5:00 every afternoon, Square bundled up all that day's sales, deducted their fees (which are a super-affordable 2.75%) and deposited them in my bank, where the funds were immediately available the next day. Automatically.

I didn't discover until I got home that Square also allows you to send invoices:

There are all sorts of other features I haven't played with yet, including a for-fee feature that allows you to use Square as the place to capture customer information for marketing purposes and an app that connects Square directly to our Quickbooks file so you don't have to do any kind of duplicate entry. And there's apparently an embed function that allows you to post things for sale on your own website and then direct people to Square to make the purchase. Square also hosts Square Market, where you can post items for sale if you don't want to create your own website, and with things going south over in Easy-Land, lots of folks are looking for alternatives (including me, because it is way past time for me to get my stuff together and create an actual online shop). Best part of that deal? No listing fees, just the usual processing fees when you make a sale. 

The bottom line is that in addition to kicking butt on the road for a fraction of other credit card processors, Square has the potential to combine a number of different business functions in one place and creating all sorts of efficiencies. And frankly, I can use all the extra time I can get! If you're looking for a way to accept payments on the road or online, I highly recommend checking out the Square. I'll report back if I add any of their premium features and let you know how they work for me.

Until next time -


Tuesday, January 27, 2015

Consignment: Some Do's and Don'ts

Like most of you, I'm a member of a number of online forums that talk about various aspects of creative life, everything from the business side of things to more technical how-to's. One question that crops up often is whether and how to put one's art into brick and mortar shops on consignment. Since I am both an artist and a gallery owner, I thought I'd put together a few tips for anyone who might be considering going this route.


What is consignment?

It's important to understand what the consignment arrangement entails. You retain all ownership of your work, which you temporarily loan to the gallery or shop for them to sell on your behalf. When they sell the piece, they pay you the sale amount, less an agreed-upon consignment fee to cover their operating costs. This arrangement is not the same as wholesale selling, where you are paid up front for your work for a price less than what you would sell it to the general public.

What are consignment fees?

I've heard a lot of people say in online discussions that they think consignment fees are a rip off. I get it: you've worked hard to make something lovely and giving 25%, 40% or even 50% to a shop to sell it for you feels painful. But with so much of the jewelry market having moved to the virtual world in the last few years, it's easy to forget what goes into the traditional sales model, starting with all the overhead. A gallery pays rent and utilities, maintains a website, sends out emails and promotions, pays advertisers, and pays staff, taxes, and insurance. They do that before they have sold a single item, which then incurs credit card fees and packaging costs (even if it's just a small shopping bag). If you were going to sell "in person" (as opposed to online), whether you were selling at a market venue or opening a store of your own, those are all expenses you would incur on your own. Those expenses would, in turn, either increase your per piece price or reduce your overall profit. Either way, they'll cost you something in the form of booth and credit card fees, packaging, displays, transportation to and from, and - potentially - loss from theft.

The Roadhouse Arts Gallery, all decked out for the holidays. Everything you see is consigned to us.
How should I pick a consignment partner?

More than any other thing, I think this is the most important decision. It does you no good to have your inventory (read: dollars) tied up where it will not sell. Here are some of the top questions you should be asking when you're evaluating potential consignment partners.
  1. What is their target market? There is a difference between a fine art gallery, a gift gallery, and a fine craft gallery. I am not saying that one is better than another - but I am saying that they work within different price ranges and target different clientele. Does your work fit the overall "vibe" of the shop? Is the work by other artists of comparable quality to yours? Where do your prices fall in the overall offerings of the shop? For example, if you are a maker of boho chic jewelry, you probably don't want to be in a sleek, modern shop with lots of steel and glass. If your work generally sells for $200 and $300, you don't want to be in a shop where they mostly sell things under $100.
  2. What are you getting for the consignment fee? One of the commenters on a recent forum discussion told a story about a gallery that wanted a 40% consignment fee... and she was responsible for coming in and cleaning her jewelry to make sure it was presentable. Let me be really clear here: any gallery or shop that doesn't attractively merchandise your work and keep it clean for their customers doesn't deserve to have your work. Period. The consignment arrangement is intended to be a win-win for both artist and shop - you are providing quality inventory at no up-front cost to them, in exchange for which they offer you an appealing, professionally managed storefront in which to sell it and access to their customer base. They should also be handling credit card fees, packaging, and displays.
  3. Is there a contract? Never, ever, under any circumstances, do business with a gallery or shop that won't put your agreement in writing. Ever. Make sure you are very clear about what is covered by the consignment fee; how often you can change out your inventory; how loss by fire or theft will be handled; when you will be paid for sales; and who is responsible for paying transportation of the goods to the gallery or shop and back to you. Make sure someone at the gallery signs off on a written inventory of the items you deliver to them, so you have something for your records. Ask how often you can get an updated inventory from them of the things they still have on hand - and then make it a priority to compare that list with the sales you've been paid for so you can catch any losses early in the process.
An early glass display at Roadhouse Arts, featuring work by Lisa Meyer and Gail Stouffer
What if I can't afford to pay a consignment fee?


I recognize that pricing is a touchy subject, but I'm going to wade in and be as direct as I am able: most makers of high-quality jewelry aren't charging enough for their work. And here's why: because they are undervaluing their time. There are all kinds of formulas out there about how to calculate your pricing, but at a minimum your wholesale price needs to include something for your materials, your time to produce the piece, and profit. Yes, profit. If you sell wholesale - or consignment - you need to be able to make a profit on the wholesale price. How many times have you heard (or said yourself) something like, "I don't care about my time... as long as I make a little something more than the cost of the materials." Two things: your time has value, and profit isn't a dirty word. If a 40% or 50% consignment fee means you won't make any money on your piece, it may mean your pricing is too low.

That said, I recognize this easier said than done. You obviously have to keep the market in mind as you're selling. If you're just starting out and you don't yet have a workflow in place that lets you capitalize on efficiencies or repetitive processes, your pieces will have more time in them - and that will make them more expensive. Focus on creating designs based on techniques you have down cold, so that the cost of your time doesn't skew the end cost of the piece, either on the high side or the low side.

One other comment on pricing: never, ever undercut your consignment pricing. What your pieces sell for at a consignment shop or gallery should be exactly the same price that same piece would sell for online, at a show, or off your bench. Remember that when you sell through a consignment shop, you're saving costs you would pay if you sold it yourself: packaging, credit card fees, postage, listing fees, promotional discounts, etc.

What if things go bad....?

Take a deep breath, keep your cool, and stay professional. Every consignment agreement should have a duration - your things stay with them for 90 or 120 days and then everyone touches base to see if it's working. If the sales aren't what you expected, have a conversation with the owner or manager about what is selling and see where your things line up. Is it a price issue? Style? Quality? These kinds of conversations can be really valuable, because they can be (can be) objective feedback that will make you better in the long run. That said, if the shop isn't keeping up their end of the agreement - the displays aren't being refreshed, your jewelry is dirty or untagged, you aren't getting paid, whatever - pull your stuff.

And... make absolutely sure you're doing your part. Do your pieces reflect your best work? Is it being delivered when and how the shop or gallery has requested? Are you responding promptly to requests for information or more inventory?

* * * * * * *

This is the tip of the iceberg - there are obviously many details I haven't covered here, and honestly... consignment isn't for everyone. I took an unofficial poll of my AJE teammates before writing this post, and they were about evenly divided between happy experiences and horror stories. Remember to never put all your eggs in one basket - the trick to making a living as an artist is to develop and maintain multiple streams of income. Consignment is just one element of a long-term business strategy. Hope this brief summary was helpful!

Until next time -


Thursday, April 17, 2014

Throw out that expensive camera

I refer to my iPhone 4S as a camera that is also a phone. With a few easy to learn skills, it's difficult to take a bad photo with an iPhone and several other brands of phones. I'm often surprised when people share bad photos they've taken with their phone, because these phones take such great pics. I share photos of my work taken with my phone all the time. I even use them in listings.

Don't get me wrong. I also use a nice camera to take product photos...specifically a Canon EOS Rebel XTi that I got about 7 years ago with a macro lens I've had for a little over a year. Since I got this phone, I find the process of taking photos, uploading to the computer, editing, then posting them online to be TEDIOUS. I've never had a desk job and find that I have a difficult time working on the computer more than 1 hour at any given time.

For example, I like how my headpins look held as a "bouquet" in my hand using my phone and  natural light, cropped, with no other editing:


Better than the photo of them in the photo tent using a macro lens:


To try to help you take better camera phone photos, I grabbed a couple pieces out of my jewelry box. I purposely took bad photos, then took better photos to illustrate the difference. 

Example #1

The first photo has at least two major problems. While there's natural light, it's direct late afternoon light, which is harsh, casts lots of shadows, and adds a lot of gold to the photo. Since I prefer to do as little editing as possible, the golden glow and shadows are unacceptable. The other big thing that's wrong is that the photo is just plain boring. The shot is too wide. 


These photos were all taken on my kitchen tile. So to correct for the shadows and gold color cast by the sun, I moved to an area that wasn't in a patch of sun. That is the ONLY difference I made. These photos are completely unedited. However, it's still boring (and completely uncropped). 


This next photo, the key is still in direct sun, but I've angled the phone and come in as far as I could for a more interesting shot. It makes a big difference to the interest level of the key, and the glass looks really sparkly in the sunlight. However, I do NOT like the shadows being cast for a product shot. If it was simply an "artsy" shot to share on Facebook or Instagram, this would be totally acceptable. 


The next photo of the key is close-up, slightly angled, and out of direct sun-light. The ONLY editing I did was to crop it into a square-ish shape. 


When trying to get up close and personal with your jewelry (or other product), it's best to get the camera as close as possible then crop further if needed. Do not use the zoom feature. Here's an overdramatized example. 

Original unedited uncropped photo taken too far away:


What happens when keeping the camera at the same distance but zooming in instead:


What happens when you crop the original photo taken at a super wide angle. The quality isn't perfect (because I cropped this an excessive amount as an example of the difference), but it's a heckuvalot better than the photo above.


Do you know how to crop your photos on your phone? 

On my phone, when looking at a photo, it looks like this. Click on the edit button at the bottom. 


Then perform the correct function. Crop is that overlapping square symbol on the bottom right. Flipping the photos (which I clearly did) is bottom left. 


Example 2:

What's wrong with this photo? Golden sun casting shadows. Some areas look washed out. The angle is too wide. 


The color and light is better, but the angle is too wide. And it looks like maybe I didn't focus this one where I wanted the focus to go. 


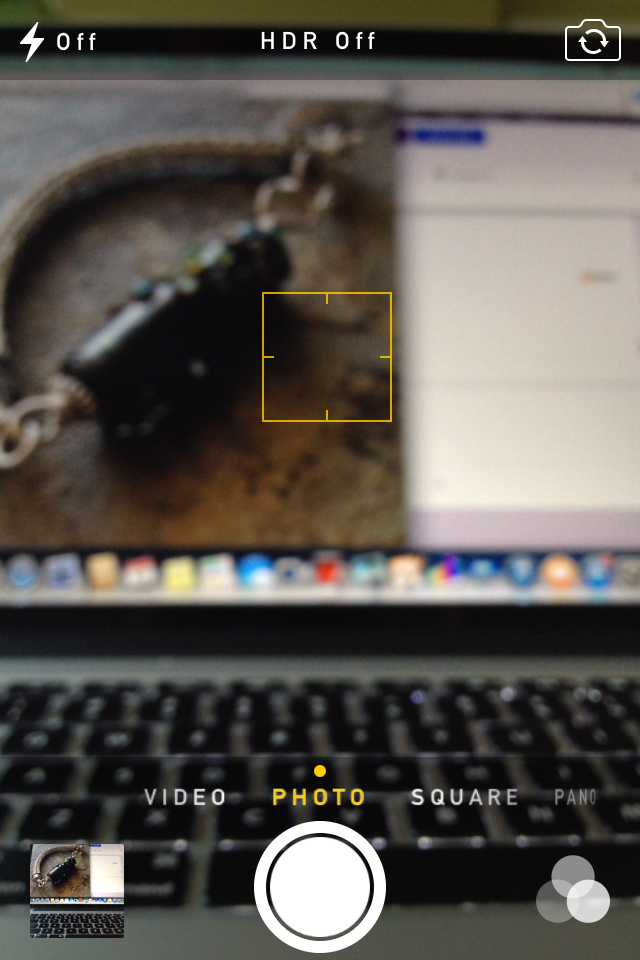
How does one adjust the focus? I can tell you how to do it on my phone, but it's kind of tricky to show it. Use your finger to touch the area of the screen on the object you want to focus on. The other thing this does is automatically adjusts the color/lighting to the object your focusing on to (usually) make it better. 

Here's a screen shot of the camera working on focusing right after I've touched a spot on the screen. The yellow square is the area I am having the phone focus on. Once it's focused, the square goes away. 


The next photo the bracelet fills the frame and isn't bathed in bright golden light. 


And remember that if you do super tight photos, you will want to show multiple views. 


And for the final example, I photographed this gorgeous beaded necklace by Kristen Stevens using one of my Nightmare Insomnia beads. Shadows, sun, too far away to see any of the detail that makes this necklace so special. 


The next one it has been removed from direct sunlight. The lack of shadows helps show a bit more of the detail, but it's still too far away to really draw the viewer in. 


And here is the focal portion with the camera held as close as possible and at a more interesting angle than straight above. You can now see more details in the piece than before. 


The above photo was cropped in Instagram. I used zero filters on it. If I'm selling a piece, I prefer to use no filters so the color looks as accurate as it possibly can. 

However, sometimes I use filters when I'm just showing a piece. I mostly like how the filters highlight certain areas of the photo and add a small border without any actual work. Below are three different filters of the photo above. Having comparisons like this can show you exactly how the filters change the look of the piece you're photographing. The change can be subtle, or striking.  

Mayfair:


Hudson: 


Sierra: 


In the above photo, we get a good look at the focal. But what about the rest? We (your potential customers) want to see the beading. And the clasp. So change the view, rearrange, move the phone. Here's another view of the same necklace above. The focal is blurred and moving off into the distance. The beading is front and center. Notice the empty space in front? All these aspects of the photo work together to create interest, tension, and to keep the viewer's eyes moving. 


And here is the same exact photo, but using the XPro filter on Instagram. It makes the background fade away and adds more emphasis to the beading. I love this look! 


Will I ever really throw out my digital SLR camera? Heck NO! But knowing how to take great photos with a smart phone really makes having an online presence easier. 

Go forth and take great photos!

-Jen Cameron


Wednesday, April 2, 2014

There's an App for that

Computers revolutionized the way we do business, and now smart phones and tablets have made running a business in the digital age mobile. I thought I would share a few of my favorite apps that have made it possible to be on the road and still get things done without a computer, a day planner, a notebook, and a knuckle buster. 

For clarity, I'm working with an iPad 2 and an iPhone 4S. I don't know about Androids or any other types of smart phones or tablets, but I'm sure they can run many of the same apps or have a similar app. 

Square: 

I've been using square for a few years and it has made my life, and many other business owners lives easier. Even my hairdresser is using it now! 


The first year I used it, some customers were leery, others amazed. Now most of have seen one in action or at least seen the commercials for them. But it's so easy to use. Go to the Square website to sign up and get your FREE card reader. Go through the registration process, download the app to your phone and/or tablet, and you can take credit cards anytime anywhere. Without monthly fees for the privilege of a merchant account, without huge per transaction fees. And Square automatically initiates a transfer to your account on file the next business day. 

I cannot tell you how much Square has saved me compared to the inexpensive merchant account I used to have. The bank where my business accounts are kept actually tried to talk me into their version of Square. I read the informational sheet they handed me and laughed. I told the teller no thanks because they still want to charge a monthly merchant account fee plus the per transaction fee was much higher. She said they came up with this to compete with Square. I told her they need to keep trying. 

I know Paypal has their own card reader, and perhaps others do as well. I know nothing about them and recommend research before making a decision for which one you want to use. 

TurboScan:

I have one of those all-in-one copier/printer/scanner. But it's slow. And it's in the basement. And it's so darn inconvenient. And sometimes I am at the lake, which has an inexpensive laser printer, but no scanner. One day I needed to email or fax a document, but I was out of town and would have had to go to Kinko's to accomplish this. So I searched for a possible app and found TurboScan. And I have used it for all kinds of things. Yesterday I used it to email my contract for Bead Fest Philly in August. 

Here's the app in the app store. It also shows what the opening screen looks like. Get your document and click on camera.


Set your document on a dark background for best results. Then click the shutter button at the bottom. 


It automatically cuts out the background for you, but you can tweak it if you want to. Then a screen comes up where you can change how dark the writing is. I've always stuck to the darkest setting. 


The next screen gives you the option to change properties and give the document a name (center bottom), email (left bottom), or add another page to the document (right bottom)


Here's the page that comes up if you click on the pen in the center:


And options for distributing your document: 


Evernote:

What I love most about Evernote is you can add something to it, and it updates it across all your devices where you've installed it: phone, computer, and tablet. I've barely begun to scratch the surface of what this app can do, but I love it. 

I'm not very good at carrying around pen and paper. I always have good intentions, but it never happens. Evernote is where I record my business mileage. I have another note where I collect quotes. You can take a photo of something and write notes about it so you aren't wondering later why you took that picture or what you wanted to remember about it. Write lists. Upload your beading patterns or any PDF to it. I love this thing. It's my pen and paper. 


Facebook Pages: 

If you're on Facebook, and you have a Facebook page for your business, you need Pages. It allows you to update your page as your business. You can upload photos you've taken with your phone to your page. Without Pages, you can't really interact with your community to your full potential. And if you have multiple pages, you can easily switch between each page. 

Instagram: 

Supposedly people (mainly the younger crowd) are leaving Facebook in droves for places like Instagram. My customers aren't teens, but who knows how long it will be before us older people follow in their footsteps (if at all?). But that's not the only reason I love Instagram. I love photos. And I love sharing photos. Instagram has fun effects AND it's so easy to share these photos to other platforms like Facebook, Twitter and Flickr. And I can take a photo of something right out of the kiln, take a photo, edit it, and share it with a few clicks. 


Camera:

I know, this one comes pre-installed on your phone. But I use it more than any other app and it has saved me SO MUCH TIME in uploading a kazillion photos to the computer, sorting, editing, then sharing the photos. 

In fact, my next blog post (in two weeks) will be some tips on using the camera on your phone to take better photos of your work. 

Until then,

-Jen Cameron