~ ~ ~
I've been having fun playing with WoolyWire, a wonderful fiber and copper wire product that is handmade by Nellie Thomas of WoolyWire Etc. Nellie hand dyes fibers and spins them onto solid copper wire. WoolyWire can be bent and twisted, just as you would do with any 24 gauge wire, and it brings with it so many possibilities for adding color and texture to your jewelry designs.
A couple of weeks ago I got the idea to try braiding three colors of WoolyWire and then wrapping the wire around a large channel bead to create a pendant. I'm in love with the result!
This pedant is easy to make and the results are stunning. Here's how.
Materials:
3 packages of WoolyWire in a pleasing color combination (you won't need it all, don't worry)
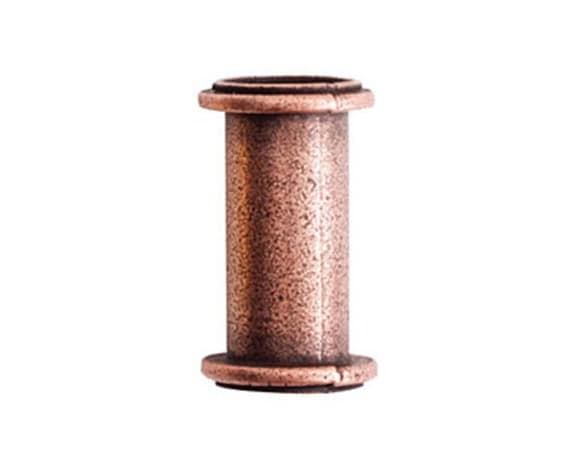
1 large or medium channel pendant (available at WoolyWire Etc.)
2, 7-8 mm bicones in coordinating colors
1 decorative headpin with a 3 inch long wire, (mine is from Sue Beads)
23 inches of 1.5 mm leather cording in a coordinating color (mine is from Classic Elements)
2, 1.5 mm end caps (all my findings are from Shipwreck Beads)
1 lobster claw clasp
4, 7.25 mm Vintaj jump rings
GS Hypo Cement
Tools:
Flat nose or half round pliers
Round nose pliers
Wire cutters
A clipboard
Binder clip or "bulldog" clip
 |
| Large Channel Pendant |
Directions:
1. We are going to work with the full 3 foot lengths of the WoolyWire, so do not cut them yet. Push the WoolyWire down about 1 inch on one of the wires, exposing the copper wire in the center.
Bend the exposed copper wire at a right angle.
2. Fold a small portion of the other 2 wires down flat, so the wire end is not sticking up. (The picture below shows only one wire partially flattened. You need to completely fold it over on both wires.)
3. Holding the three strands close together, wrap the exposed copper wire around all three strands, binding all 3 of them together. Press the end of the copper wire down and tuck in, using the flat or half round pliers. I trimmed the extra fuzziness on the end, but that is a matter of personal preference.
4. Place the three wires beneath the clip on the clipboard. This will secure the wires while you are braiding.
5. Braid the wires, just as you would braid a child's hair. 6. Stop braiding when you think you have enough braid to wrap around the channel pendant. The length can be adjusted later, if needed. Secure the loose ends with a binder clip.
7. Glue the the top ends of the WoolyWire just beneath the rim of the channel pendant. Set aside until the glue is dry. Unfortunately I don't have pictures for all of the steps, but the rest is really straight forward.
8. Once the glue has dried, start winding the WoolyWire braid around the channel pendant. You may like it wrapped loosely, or you may want to push the braid upward a bit so you can add a few extra wraps around the channel pendant. Adjust to your liking. When you get to the bottom of the pendant, cut the WoolyWires about an inch or so longer than needed to wrap to the bottom of the pendant. Push back the WoolyWire about one inch on one of the wires. Fold over the other 2 wires, like you did on the top end of the braid. Wrap the exposed copper wire around all three wires and glue the end of the braid at the bottom of the channel pendant.
9. Assembling the pendant: Thread one bicone onto the headpin. Then add the channel pendant, fitting the open end neatly onto the top of the bicone. Add another bicone on the top and make sure that both are seated firmly into the ends of the channel pendant. The bicones serve to stabilize the pendant, by filling up the large holes on either side. Using the wire from the headpin, create a double wrapped loop at the top of the pendant. If you make a small loop, like I did, you can attach it to the leather cord with a jump ring. If you make a larger loop, you can thread the pendant directly onto the leather cord.
10. After the pendant is threaded onto the leather cord, add a small drop of glue to one end of the leather and inside one of the end caps. Place the leather end into the cap and hold in place till the glue sets. Repeat on the other side.
11. Attach the lobster claw clasp to one end with a jump ring. Make a short chain with the other 3 jumprings and attach them to the other end cap. The clasp can be fastened to any of the 3 jumprings, making the length adjustable.
If you have questions about any of the steps, please feel free to ask. I will be happy to answer your questions in the comments section.
Wear your WoolyWire necklace with pride!
Linda


Oooooo what a great idea!
ReplyDelete