Showing posts with label earring tutorial. Show all posts

Monday, July 18, 2016

Flower Headpin Earring Tutorial

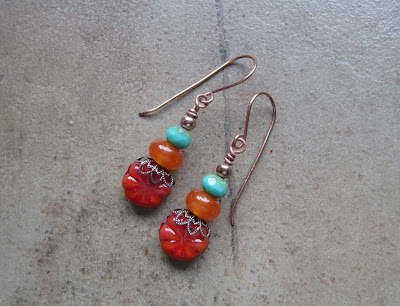
I've been making these cute flower headpins for a while now, and while I love to make beads and components, I rarely make jewelry anymore.  I decided I wanted to write a tutorial for something you could make with these!

So of course it took me a while to come up with something, but I really like what I made!  Here is your supply list:

  •  pliers
  • chainnose pliers
  • roundnose pliers
  • cutters 
You'll also need the following components:
 
  • glass flower headpin
  • glass lampwork spacer bead
  • czech picasso bead in blue
  • copper round
  • copper or brass filigree beadcap
First, add the filigree beadcap onto the headpin.  The beadcap is round and this headpin is not, so you'll need to manipulate the beadcap to fit onto the glass part of the headpin.  It's rather simple to do - just use your pliers to gently bend the beadcap onto the glass flower, and then when you've got it going, use your fingers to finish the job! Don't bend too hard with the pliers or you'll mar the beadcap.

Here's what it looks like bent over.  Then the rest is simple - string the beads onto the copper headpin with the lampwork spacer first, then the czech bead, and then the copper round.

Finally, make a wrapped look and add your ear wires and you're done!  I quite like these earrings, they are very summery and nice and solid without being too weighty.

You can find the flower headpins in my etsy store, SueBeads.  I hope you enjoyed this tutorial!

Susan Kennedy


Monday, June 27, 2016

Summer! Flower Disc Bead Earring Tutorial

Since we're all in Summer mode here at AJE, I thought I'd share a tutorial for some earrings I made with my flower disc beads.  I made these beads a while ago, but in a rustic style:

Since then, I've started making them with the glass that I am currently obsessed with (from GG Glass):

What came to mind for me was a tutorial I wrote for a magazine called Bead It Today (August 2013) which has since gone out of publication.


I also referenced this tutorial post by Jenny Davies-Reazor where she made earrings with enameled discs.

In this case I used flower petal beads I had made, and a swarovski crystal heapin to make the design pop.  Today I'll show you my flower disc beads and two designs you can make!

I'm using my red flower disc beads, and two teeny tiny rubber o-ring beads I got from Yvonne at MyELEMENTS on etsy.

I'm also using some awesome headpins I got from our own Jennifer at Glass Addictions.

Add the flower disc bead, then the bumper bead, to the glass headpin.

Using your chain nose pliers, fold the copper wire over, preeeeeeety close to the bumper bead.  The bumper bead is going to help you (hopefully) from breaking any glass in case you tighten too much.

Use your round nose pliers to make a wrapped loop.  In this case, you really only want to wrap about one time, to make the earring hang right.
Then cut the copper wire very close to the loop, making sure not to cut the rubber o-ring - it would be aweful to waste that gorgeous headpin by having to start over!

 Here's what it looks like!  Make sure your heapin and loop on the back are oriented in the right direction - if they aren't, adjust as necessary.

Here's the back - what you're going to do is use your thumbs or your thumb and a plier to push the loop up toward the glass flower bead - using the pliers very gently - and get as close to the glass bead as you can.
Here you can see how the heart design on the headpin and the loop are oriented so that dangle will hang correctly.

 Make another, and add your ear wires!


Here's another quick little tutorial using different beads.

This time, I thought these beads would look good with gold findings.

I started out wanting to use these awesome gold beads, they go so well.  However, I didn't have headpins with a big enough to head to use them, and even though I tried to use a little filigree bead cap (flattened out) it just didn't look right.

So next I got out my gold flower heishe beads, but they were just too small, and I didn't have bigger ones to use.
So, in the end, I decided to use these gold round beads, and they look fine.  However, when I get a chance, I'm going to redo them with those awesome textured gold beads above!

Working in the same fashion as above, add your gold round, the flower disc bead, and the small heishe (that I decided to use as the bumper) to the headpin.


And again, in the same manner as above, make your wrapped loop and push the loop up as close to the glass flower disc as possible.  On this set of earrings, it actually works well to put the ear wire in the loop before you push the loop up to the glass flower disc bead.


And your finished earrings:

I'm sure you can think of other ways to use these flower disc beads!  You can find them in my SueBeads etsy store, and in some of my trunk shows on FaceBook.  I am also happy to make some on request!

Susan Kennedy


Friday, July 10, 2015

A Touch Of Sari Silk Earring Tutorial

Last week I purchased some gorgeous lampwork beads from fellow AJE writer, Sue Kennedy, of SueBeads. I couldn't wait to get started, once they arrived. I made these earrings right away and today I'm going to show you how I did them.
               
Materials:
1 pair of earwires
About 8-10 inches of 20 gauge wire
1 pair lampwork beads (These are from SueBeads)
I pair of ceramic charms (These were made by me)
About 8 inches of sari silk, ribbon or fabric
Bead caps to fit the lampwork beads.
Tools:
2 flat nose or half round pliers
1 pair round nose pliers
Cutters
1. Cut the wire in half. Take one of the wire pieces and begin making a wrapped loop at the widest end of your round nose pliers.
2. Slide the ceramic charm onto the wire and complete the wrapped loop with just one complete wrap. Cut the excess wrapped wire and pinch it down with your pliers.
3. Cut the length of sari silk or ribbon in half. Some people prefer the sari silk to have a very rustic, frayed appearance. Others like it a bit tamer. I'm in the latter group, so at this point, I trimmed the frayed sides a bit. Still frayed, but a bit neater. Go for whatever look you like best.

4. Poke one end of a piece through the wire about a quarter of an inch in from the end. You can leave it a bit longer if you prefer and then trim it to your liking once the earring is complete. If you have trouble poking the wire through the fabric, cut the tip of the wire at an angle, to give it a sharper, narrower end.
5. Slide the ribbon up toward the top of the wire. You are basically going to fan-fold it now. So fold the ribbon over and punch it through the wire again. Now fold it back the other way and punch through once more. When you are done, you will have 2 folds and the sari silk will have been pierced 3 times through the wire. Trim the remaining end of the sari silk.
6. Slide one of the lampwork beads onto the wire and then place the bead cap on the wire and slide it down onto the bead.
7. Gently snug all the components together and make a wrapped loop. Attach the earwire and repeat for the other earring. If you wish, you can put a little FrayCheck on the ends of the sari silk, to prevent them from fraying near the wire.
8. Insert earwires in your ears. Go forth and look amazing!
These earrings are available in my web shop, and similar charms are available here.
Linda
 

Tuesday, July 7, 2015

Jellyfish Earring Tutorial

Over at Earrings Everyday, they have a monthly Inspired By Challenge.  June's challenge was Tide Pools!  I was all over that!  You can see my post here on my blog. Here's what I made:

I thought I'd post a tutorial for these earrings.  They were a little fiddly, but fun to make.

Supplies you need:


  • 2 Lampwork Disc Beads
  • 6 Enameled Head Pins
  • 2 Ear Wires
  • 2 Jump Rings
  • 4 Daisy Spacer Beads
 Tools you need:

  • 2 Sets of Chain Nose Pliers
  • Wire Cutters
  • Round Nose Pliers

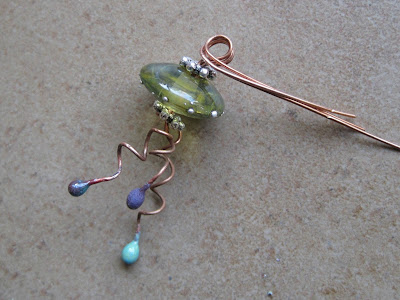
First, twist your headpin around the round nose pliers to make what would resemble a tentacle! You'll have three lengths, one short, one medium and one longer. 

This is what it looks like after you twist it a couple of times.  Make sure you make the end at a 90 degree angle - this will help when you put the daisy spacer bead on the wires.
Do the second short headpin in the same way, and compare them to make sure they are relatively the same.
Finish all the headpins, making sure that the pairs are about equal in size.

Next, you'll start putting the headpins in the opening of the daisy spacer.  This is where it might get a little fiddly.

Just work the headpins through the hole and make sure the daisy spacer will stay and not slip through the headpins.  You'll just have to work through this a little!
Then add your disc bead and the second daisy spacer.  You can adjust the tentacles after you finish your wrapped loop.
 Take all three wires in the chain nose plier, and make a 90 degree angle with them.

 Then take your round nose pliers and make your wrapped loop.


When you're done with the wrapped loop, use your wire cutter to cut the excess wire as closely as you can.  You may need to use your chain nose pliers to push the wires in, and make sure there are no sharp ends sticking out.

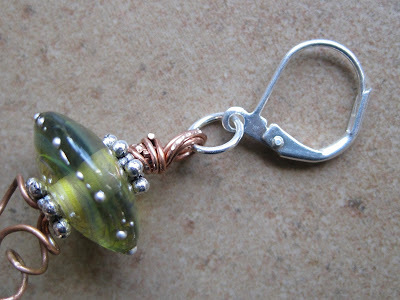
When you are satisfied with your wrapped loop, and you adjust your tentacles to look the way you like them, add the jump ring and ear wire to the loop.


And there you have your finished earring.  Make the other one, and you have a pair!  These don't have to be earrings either, you can make one and use it as a pendant on a cool ocean themed necklace!

I hope you enjoyed this tutorial!  You can find disc beads and enameled headpins in my SueBeads etsy store right now!

Susan Kennedy