Just two weeks ago, I didn't know such a thing as a pin to necklace converter existed, so I ordered a couple to use. They look nice and I love the clean lines and the idea that it is such an easy accessory to use to make your jewelry more versatile.
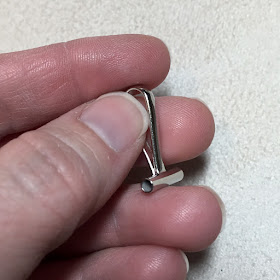
A couple things bothered me though. The number one problem was the size. If you look at the photo of the brooch below, you'll see that the converter tube is much shorter than the pin. This results in lots of sliding around. I haven't tried wearing it like this, but I'm pretty sure I wouldn't like the effect.
So I started thinking of ways to create my own pin to necklace converter. I came up with two different methods based on whether your pin is horizontal or vertical that I am going to share with you.
First up is making a pin to necklace converter for a horizontal pin. (a side note: I am assuming you have basic wire working skills. If not, mention it in the comments and I can recommend some online videos to watch)
You will need:
-12-18" of 18g wire depending on how long you want the bail to be and how long the sharp pointy part of your pin is.
-18" or so of 24g wire.
-basic wire working pliers and cutters
-small wrap n tap pliers
-thin steel mandrel or a scrap piece of heavier gauge wire (like 16 or even 18)
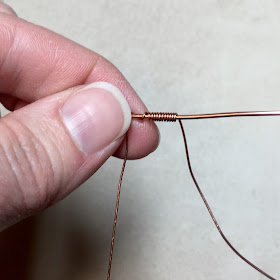
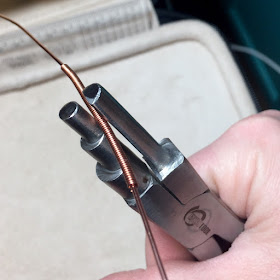
Step 1: Get the 18g wire relatively straight. It doesn't have to be perfectly straight. Just straight-ish. Begin coiling the 24g wire around the center of the18g wire. This will be your bail, so decide how much coil you want for the size bail you think will best suit your design and coil enough wire.
Once you've got the appropriate length coil, cut the excess 24g wire, then slide the coil as close to the center as possible.
Grab your wrap n taps, and placing those in the center of the coil, slowly begin to shape your bail.
Here's about what it should look like:
The next couple steps are a bit fiddly, and you will end up slightly disturbing the perfect shape of your bail, but we'll fix it at the end.
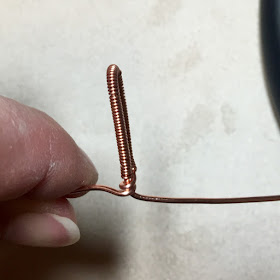
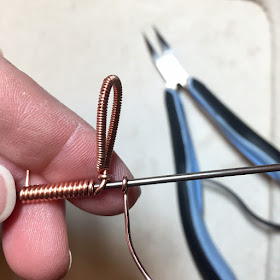
If there is a longer piece of 18g wire without a coil, use that to wrap around the other end of wire, forming a wire wrapped loop. You do not need more than 1 or 2 wraps.
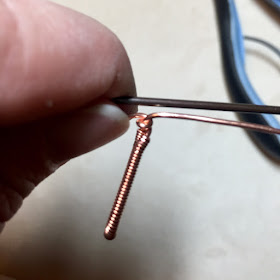
Assuming you want your bail to go directly on the necklace, you will need to bend the ends of the 18g wire to go perpendicular to the loop. See photo below.
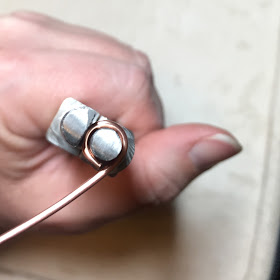
Once you've bent the wire ends to perpendicular, you will use a steel mandrel to coil the 18g wire ends. Using your non-dominant hand, hold the loop and the end you are not working with. Try to keep them still by bracing them against the mandrel. This is very fiddly, just go slow and be methodical.
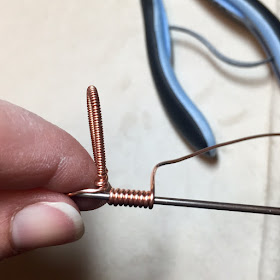
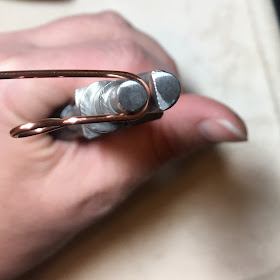
Continuing to coil the 18g wire around the mandrel.
Once you've done one end, turn the entire thing around and start coiling the other end.
Test the fit of your pin converter and cut coils as needed for the converter to fit. Here's what the finished product looks like:
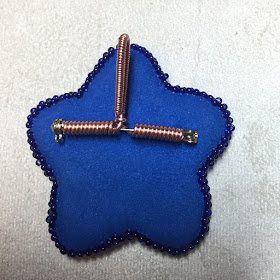 |
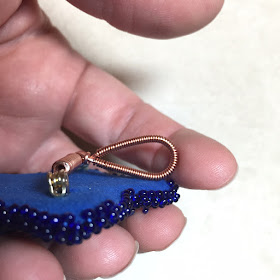 |
To make the vertical pin to necklace converter, you will need
-Approximately 6" of 16g wire
-basic wire working pliers and cutters
-small wrap n tap pliers
Grasp the very tip of the 16g wire with small wrap n tap pliers and make a loop.
Place the wire with the loop through the pin. Estimate how long you want your bail to be to complement your design.
Using small wrap n tap, make the loop for the bail. Wrap in a typical wrapped loop. You can lightly hammer the loops if desired.
Here's how the vertical pin to necklace converter looks.
Any of the things in this tutorial can be altered to better work with your designs. You can also do the coiled bail on the vertical if you prefer.








Made my day! I am constantly making beads with no thought how to hang them as pendants. I have used the button back cup shaped converters but for flat backs this is genius!
ReplyDeleteGreat idea! Thank You!
ReplyDeleteThank you for sharing. This is a great idea.
ReplyDeleteTo avoid sliding, before adding the pin, slide a few very small silver beads onto the pin. Then add the converter, with a couple more small silver beads. This will stop your sliding and make the converter scalable to all size broaches you'd like to wear as pendants! Just thought of the idea when reading your piece! Love the idea and think I'll make a couple! :-) Catatac
ReplyDeleteCool! I need some tools!
ReplyDeleteThank you for the tutorial. If u want to use the premade converter, you can try adding beads on each side to fill the gaps so the converter won't slide.
ReplyDeleteThanks for sharing!!
ReplyDelete