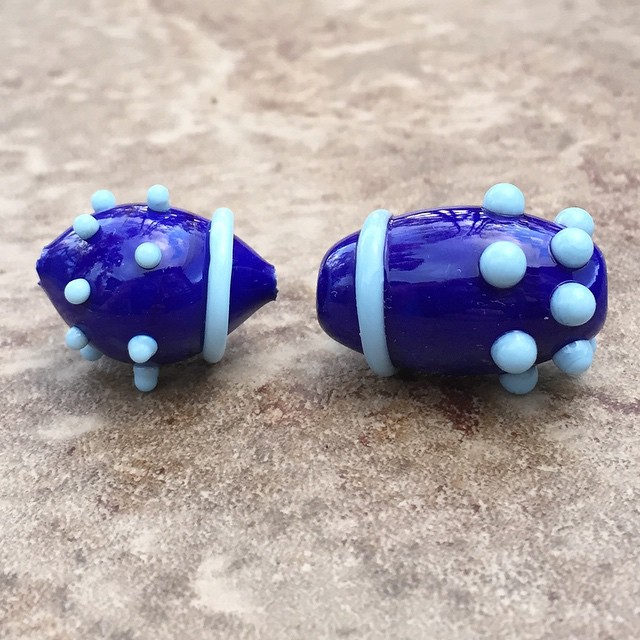
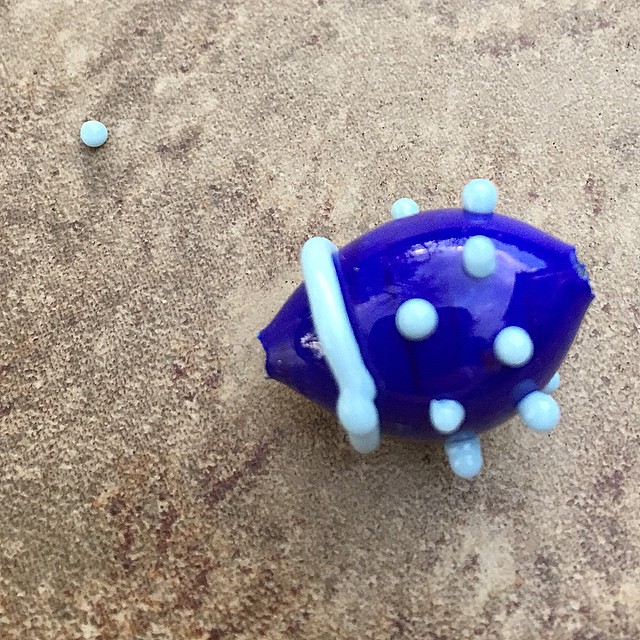
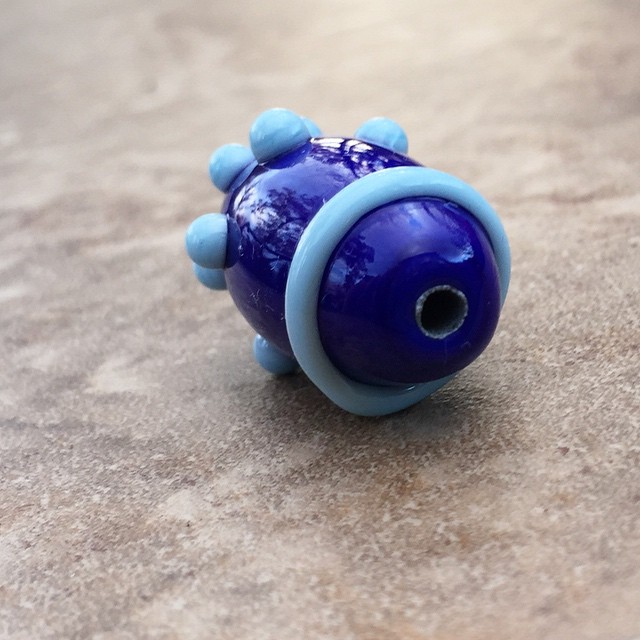
Why is the bead on the left bad technique? Let me count the ways! I tried to cram as many as possible onto a single bead in the hopes it could be inducted into the Fugly Bead Hall of Shame (I'm pretty sure that's a thing).
First of all. Raised dots that aren't sufficiently attached to the bead. These WILL break off. In fact, you can see the dot that fell off as I tried to remove the bead from the mandrel.
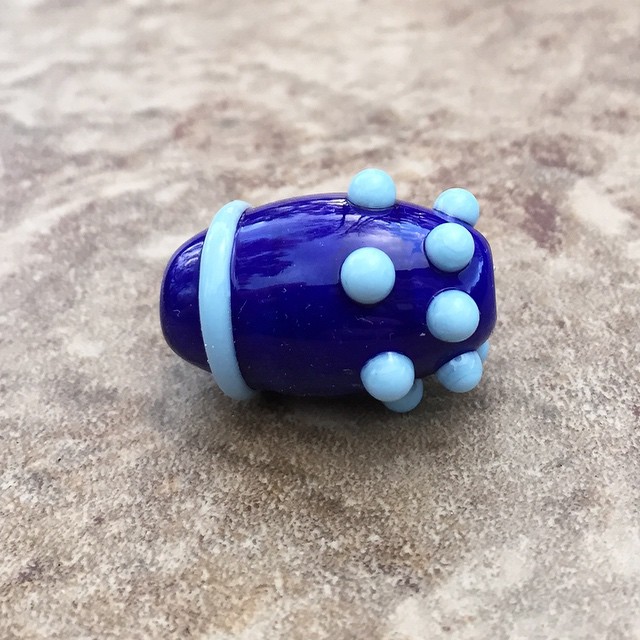
How can you tell if the dots are well anchored to the base bead? The base of the dot that meets the bead, will not have undercuts....meaning, the base will not be narrower than the body of the dot. See the dots in the "good" bead below. They are firmly attached to the bead.
Same with raised stringer designs. If the stringer work has undercuts where the stringer meets the bead, it will break off. See how the stringer below looks like it's just sitting on top of the bead?
The "good" bead below has stringer that is securely attached to the base bead. You can see how it is melted into it rather than still looking fully round in shape.
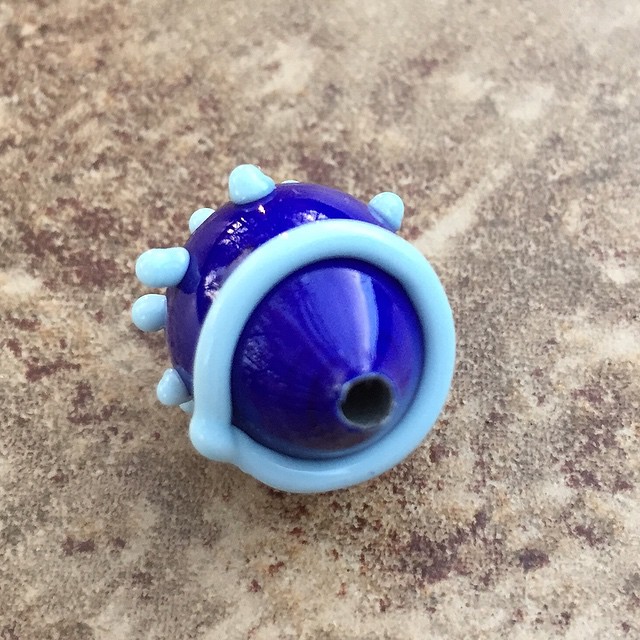
I would like to point out that a HUGE no no is when bead makers leave bead release in the bead holes. Properly cleaning the bead release involves diamond drill bits and a tool to use the drill bits. I personally like my battery powered Dremel for that. Not too powerful, but gets the job done. Unfortunately, the battery was dead and the light was fading. So, yeah, my good example still has bead release. However, beads you buy should have the release already cleaned out for you. So check the holes. If it isn't cleaned out, it will flake FOREVER. Fyi: craft store lampwork beads still have the bead release in the holes.
The next thing you want to avoid when buying lampwork, is bead holes with sharp pointy edges. Let's take a look at the comparison photo again.
Those sharp pointy bead holes: #1-are not structurally sound. They WILL crumble, chip, and break. #2-will rip beading wire and cord. #3-sharp and dangerous for skin. #4-ugly #5-proof that the lampworker hasn't learned how and/or hasn't taken the time to properly shape the bead.
The bead holes should be puckered or at the very least, flat. If they are pointy, they should not be offered up for sale.
Another thing you can see in the photo above, the bead on the left is VERY off center and looks "pregnant." While an off-center bead can be an aesthetic preference, it should be noted when considering your designs and preferences.
The one thing I couldn't reproduce without possibly causing a total explosion, is the crack that results from improper annealing technique. You have the right to ask the lampworker how they anneal their beads. The proper method is annealing each bead as it's made in a digitally controlled kiln. Some will batch anneal, which means to make all the beads, and cool them in a fiber blanket then place all of them in a kiln at once and anneal them. All I have to say is no. This is NOT good annealing technique and has a failure rate high enough that I would never do it.
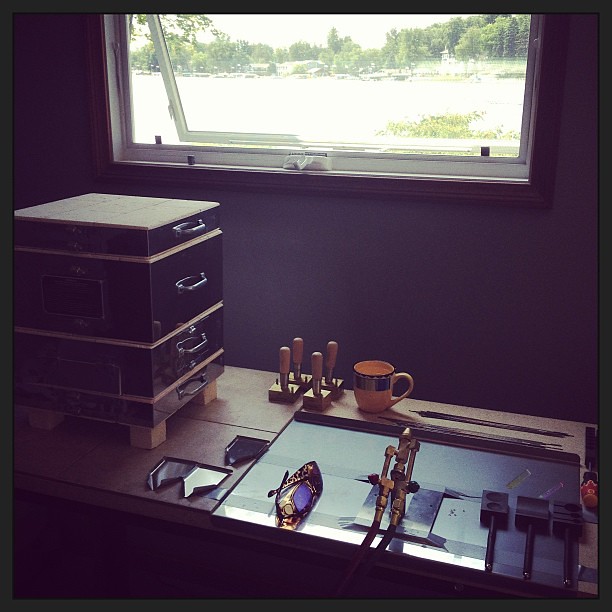
As you can see in the photo above, in my lake cottage studio set-up, my kiln is to the left and held (soaked) at 950F during my entire torch session. As soon as I finish a bead, it gets popped into the kiln and held at that 950 degrees until I force it into the cooling (annealing) cycle. This cycle SLOWLY brings down the temperature, allowing all the molecules in the glass to line up properly. A glass bead properly annealed will not shatter, but rather bounce on concrete (it WILL chip though! So don't try it. It IS glass after all).
Part of the reason I decided to write this post is that I've noticed a huge influx of lampwork being sold that shouldn't be offered up for sale and I prefer people who are spending their hard earned money on lampwork are able to spot quality beads. Because if they buy beads they are ultimately unhappy with, it poisons them against buying lampwork in the future.
Some of the sellers of these beads are new beadmakers and super excited to be making their own beads. They should be! But selling them is maybe not the best thing. Here are some of my VERY early beads from 2005. Ugly ugly ugly.
When I started making beads in 2005, my daughter was only 4 years old and loved every bead I made like it was treasure more precious than gemstones and gold. She is now 13 and was cleaning her disaster area (bedroom) a few weeks ago and unearthed this bracelet she made with some of my first beads. Her tastes have changed (thank goodness!) and she gave them back to me. LOL! I am so glad to have these early beads so I can see how far I've come. And I'm so glad no one BOUGHT these beads...



Hi Jen, As a regular lampwork bead buyer, thank you for the detailed insight. I'll certainly look at beads in a different light.
ReplyDeleteVery useful guise Jen - I certainly made mistakes in my early buying days.
ReplyDeleteMost of what you mention as a mistake I mistook as quirkiness of handmade beads, now I know better - thanks
ReplyDeleteWhat a wonderful primer in well-made lampwork beads. Thank you so much for sharing!
ReplyDeleteThat's a great post, thank you for the useful information.
ReplyDeleteThank you for sharing this info with such clear photos to illustrate your points. I took a lampworking workshop once and all my beads looked like your example of a horrible bead. Fortunately I didn't have the audacity to offer my fuglies up for sale.What that workshop did for me, though, was to develop a deep appreciation of all the skill that goes into the making of quality lampwork beads. You're a pro and I love your work.
ReplyDeleteThank you Jen! Great piece. I dunno..I kinda like that one at the upper left in your hand! ..the blue/purple with the orange sides...the colors are great!..really!
ReplyDeleteHi Jen, Thank you for this wonderful post on what to look for in a good lampworked bead.
ReplyDeleteGreat post! Thanks for doing this one!
ReplyDeleteGreat post! I know I have purchased beads in the past without realizing their problems and have had them fail in designs...not fun!
ReplyDelete