Showing posts with label handmade pendants. Show all posts

Friday, September 12, 2014

Digging Into The Bead Fest Stash

Anyone who has been to a big bead show knows the excitement of coming home with a handful or a truckful of new beads.  Well maybe not a truckful, but lots of new treasures.  For a few days you just stare at them lovingly and fondle them tenderly.  But eventually the urge to create overcomes you and you start to dive in.

I was exhausted after Bead Fest and spent a couple of days mostly alternating between bead fondling and napping (wherein I dreamed about beads and beady friends). But then the creative urge surged again and I was off and running.
Earrings by Linda Landig Jewelry, Beaded Beads by Sue Beads.


So this week I began wondering what my fellow AJE team members had been doing with their new Bead Fest treasures.  I hope this bit of eye candy will inspire you to pull out your own new (or old) beads and give yourself the gift of some creative time.

Lesley went on an earring making binge!
Earrings  and bronze bead caps by Thea Jewellery. Teardrop headpins by Sue Beads. Enamel pieces by Ann Gardanne.  
Melissa made these striking earrings for our August Component of the Month Challenge.
Earrings and textured copper components by Melismatic. Leather feathers by Tree Wings Studio. Headpins by Glass Addictions. 
Jenny also combined her metalsmithing skills with some Bead Fest treasures.
Riveted and impressed copper by Jenny Davies-Reazor.  Pewter drops by Green Girl Studio.
Diana fed her passion for chainmaille by stocking up on supplies while at Bead Fest.
Bracelet by Suburban Girl Studio, with a chainmaille kit from HyperLynks.
 Have you been to a bead show recently?  What was your favorite purchase?  What did you create with it?  Do tell!

-Linda


Friday, April 25, 2014

Clay Hoorray!

Its been a wild and wonderful two weeks since my last post.  At the time I was beginning to create polymer clay beads, charms and pendants.  In the meantime I have taken up ceramics!!!  I am so excited about both of these ventures!  But the ceramics story will have to wait until another post.

I promised I'd share the outcome of the polymer clay pieces I had started two weeks ago.  For some reason they came out of the oven very darkened.  Not at all the bright, pretty colors they began with.  I was really disappointed.  I don't know if I had accidentally set the temperature too high, or if the oven temperature suddenly spiked or what.
 I freaked out for a bit, but then my rational mind (I do have one, I think) kicked in and I realized that I could just paint them and the darkening would never show or matter. 

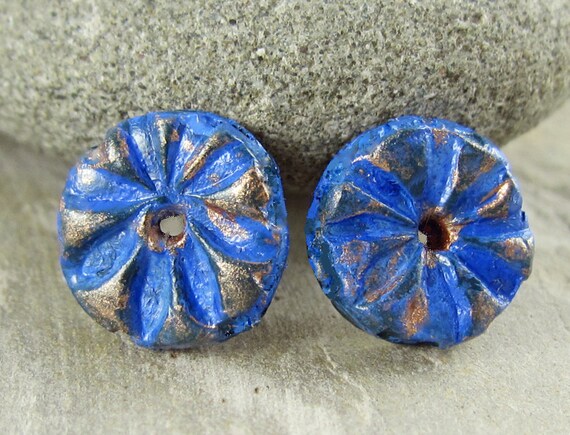
So I mixed up some blue acrylic paint with a dab of green and a dab of white.  I wish I had paid attention to the proportions, because it turned out to be a beautiful, vivid cobalt blue.  But, as usual, I was just winging it, not being precise or systematic. So I guess I can call these "one of a kind" now, because that exact color is never going to happen again!
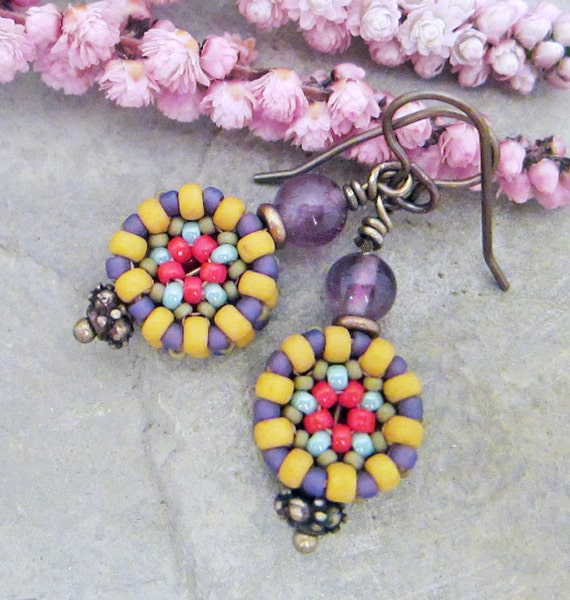
I added coppery metallic highlights on the raised surfaces and I love how they turned out!  Its always a delightful bit of serendipity when your original plans are spoiled, but things turn out even better in the end!

This is my favorite pair of earring charms from this group.  All of these are in my Etsy shop.
Originally I'd intended to list my polymer clay components on Etsy, but I've changed my mind.  I've decided to put all of the components in my ArtFire shop instead.  I'll keep the three items above on Etsy until they sell or expire, and then I'll move them to ArtFire.

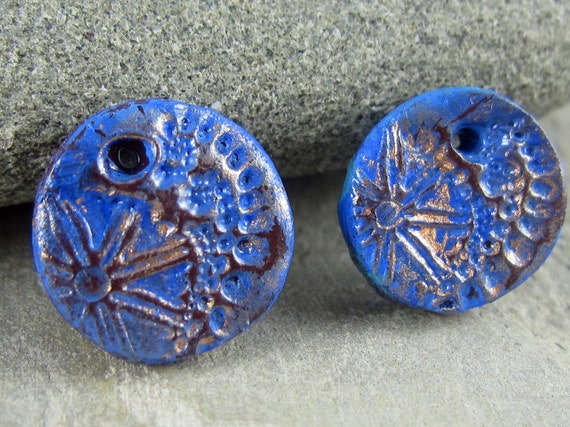
I have 2 component listings on ArtFire so far. This is the pair I wrote about two weeks ago, where I created the texture by just using the edge frame on a Christmas stamp.  I like the architectural look these have.
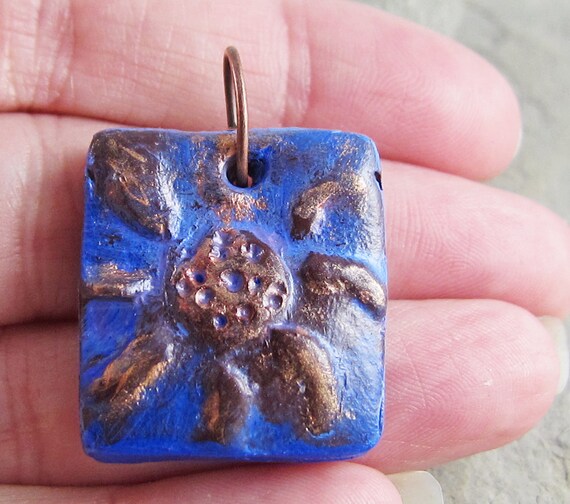
Since I was "into" painting at this point, but had run out of my super blue mix, I decided to improve on a previous heart pendant that I had made.

I applied several layers of paint on this pendant and I adore how it came out. What do you think?  Paint is my new best friend!
What projects have you botched that turned out better in the end?  I would be fun to hear your stories.


Friday, April 11, 2014

Making An Impression

Lately I've been experimenting with different ways to make impressions in polymer clay.  Let me show you what I've been up to.

I've been going through my collection of stamps to see which ones could be useful with polymer clay.  Originally I'd put that Christmas ornament stamp (top, left) with the "not useful" stamps. The ornament was too large for a pendant and besides, I didn't really care for it either. When I took a second look at the stamp this week, it occurred to me that its not necessary to use the whole stamp. I realized that parts of the stamp could make very attractive components. See the checkerboard pattern at the top and bottom of the stamp?  I made an earring pair with that pattern, (top right). Next winter, I'll use the snowflake in the center for earring charms.

I had 2 rectangular stamps, one of which made the pendant in the second picture and another which is shown in the bottom pair of pictures.  I didn't have any circle cutters that were small enough to make earring charms, so I used the cap from a highlighter pen.  It was a bit difficult to get the cap to release the clay, but I managed.

I've found that a cutting mat helps me to make nice straight cuts.  All I have to do is line up my tissue blade with the lines.  Sometimes a more organic shape is called for, in which case such precision is unnecessary.

When I was wandering around Michaels awhile ago, I came across these inexpensive textured foam squares in the children's craft section.  I haven't tried them yet, but I'm thinking that they will be a fun way to texture the polymer clay.

I didn't have any of the scratch foam that several of our AJE team have written about, so I tried using a foam meat tray.  I tried different tools for carving it and had the best luck using the tip of a pair of chopsticks (above, left).  It works, but is not easy to do. I found it worked best with simple designs.  It wasn't possible to do any detail work on the foam. I think I'll have to investigate the actual scratch board.  

The top right was just an experiment.  I cut out holes in the green clay using the end of a cut down straw.  Then I cut the same sized holes in purple polymer clay and inserted the purple into the green.  It wasn't difficult and although this pendant is not great looking, I can imagine possibilities for using this technique in more sophisticated ways.  I cut this piece out with the clear plastic lid that you see to the left of the pendant.  Somehow air got trapped inside the cap when I pressed it down into the clay.  As soon as I let go of it, it made a loud POP and it sprung up into the air!  Caught me by surprise for sure!!!

The bottom left picture shows all the items I made in this session, except the cut-out pendant.  

At the time of this writing, I haven't finished painting all the cured pieces.  However, I can give you a sneak peek of the rustic pendant I made with the meat tray foam. I'll be back here in 2 weeks to show how all components turned out after painting.
Linda
Linda Landig Jewelry – ArtFire 
Linda Landig Jewelry – Etsy