Monday, January 18, 2016

The History of Pearls - V & A Museum Video

Many years ago I inherited a very traditional triple rope of cultured pearls from my grandmother and later a single rope from my mother but to be honest they never really did much for me. Once I started making jewellery however, I discovered that there is a lot more to pearls and began a bit of a love affair with them, especially the Baroque and subtly coloured varieties which I've used in my designs every since.

Last week I discovered this video about the history of pearls on the Victoria and Albert Museum website. I thought it would make a nice change form one of my written posts and at about 8 minutes long it's perfect for a quick coffee break so get a brew, put your feet up and enjoy!


Pearls from Victoria and Albert Museum on Vimeo.


Friday, January 15, 2016

Natural resources - Free Treasure

Hunting for natural treasures is one of my favourite pastimes. Sadly one that I don’t get to do as much as I did. I could often be found up the side of a hill filling my pockets with my own bodyweight in rocks, on a beach hunting for shells and glass, or even scanning gravel drives for interesting bits and bobs. They are a fantastic (and free) resource for using in your jewellery.

Pebbles on the beach
“Beachcombing is an activity that consists of an individual "combing" (or searching) the beach and the intertidal zone, looking for things of value, interest or utility. A beachcomber is a person who participates in the activity of beachcombing.”
Beach combing

Most people in the UK are lucky enough to be no more than a couple of hours from a beach and winter is the perfect time to wrap up and head out to look for some treasure. After storms you can find all sorts of wonderful things fallen from the rocks, washed up by the tide, or unearthed by the waves.


Hunting after a storm

It’s very important to consider safety before you head out, particularly in bad weather. Always make sure someone knows where you will be and when to expect you home, and stay away from cliff faces and edges. Find out the tide times and make sure know when to expect the tide to return. A lot of UK beaches have sand banks where you can become stranded in an instant after the tide comes in behind you so make sure to keep an eye on things as you’re collecting.


Fossil on the beach

Another thing to consider is how much heavier you will be when your pockets/rucksack are full. I know this from experience after rolling down a hill in Derbyshire when I lost my balance coming down after a good day collecting.
Jack & Jill 

As well as beaches - mountains, lakes, and even your back garden can be great places to find natural materials to work with. Fossils can be found inland and rivers and streams can turn up beautiful smooth pebbles and semi precious stones.

Amateur geology (known as rockhounding in the United States) is the recreational study and hobby of collecting rocks and mineral specimens from their natural environment.


I can dream of finding diamonds

If you know where to look and you have keen eyes you can find all sorts of wonderful things.

Some of my collection includes Blue John from Derbyshire,

Blue John

Rock with garnets from the West coast of Scotland.

Garnets

Pebbles from the Lake District polished in my rock tumbler.

Mixed pebbles

And my prize fluorite crystals from Derbyshire.

Square Fluorite Crystal

Hand polished fluorite crystal


And it’s not just rocks, a stroll along the beach in Falmouth turned up these treasures...

Sea glass


And other mixed shells, coral, and tiny mussel pearls from Scotland.

Coral & Shells


Mussel shell with pearls


Sparkly mica rocks collected from the banks of Loch Morar.
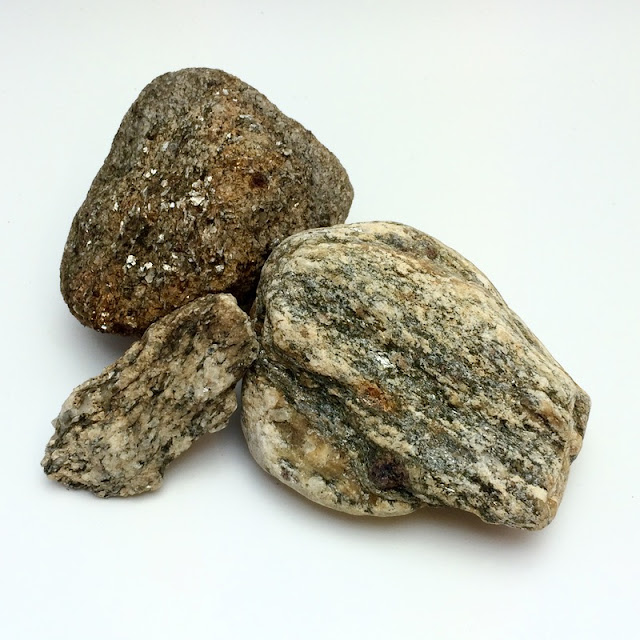
Rock with Mica


And finally, another prized possession, I didn't find this one myself, but it was given to me by a German Friend collected in Dorset. It's iron pyrite and I'd love to break it open but daren't in case it's really boring inside.


Pyrite nodule


I’ve not got as far as using anything I’ve collected in one of my designs, I think I just like collecting things! But some very talented people have….


GreenBirdBoutique
And our very own Niky created this stunning piece with a beach pebble.


Nike Sayers Artisan Jewellery


I’ve always loved the idea of creating from start to finish, and collecting your own components from the land around you is a fantastic way to do this.

So wherever you are, get out and get exploring! The Natural Trust website should start you off with some great places to visit http://www.nationaltrust.org.uk/lists/must-visit-places-for-fossil-hunters

And if you’re lucky enough to live in the US there are some incredible places to visit with really amazing precious stones.

http://www.fodors.com/news/top-7-places-to-3648


I think I need to book us a family holiday to go and hunt for some black opals!!!

Wednesday, January 13, 2016

No excuses soldering

So I decided this year that I will challenge some of my self imposed restrictions. Excuses I make... obstacles I present to myself. One of these is soldering. I studied metals in college. I fabricated things in sterling from simple to complex. Why aren't I soldering NOW as my work cycles back to jewelry from ceramic sculpture? Excuses.

All materials present and accounted for... note dust on pickle pot. 
Excuse #1 - The tools and materials are all so different from those that I learned on...
Sure they are! I was in art school 25 years ago! I learned on large propane and oxy/acetylene torches in a fully outfitted metals studio. We had a separate room for pickle, polishing and sand blasting.

As seen above - I HAVE the materials I need for an in home/studio soldering set up. Soldering pad, charcoal block, torches, pickle pot... Flux, solder... OK. So no excuses here.

1. Caroline's simple yet effective set up. 2. Niky's portable, fully functional set up. 3. Lesley's permanent soldering station
Excuse #2 - Safety and space
The picture above is a compilation of images from my dear UK team mates showing their soldering spaces. Umm. if Niky can do ALL she does in like 6"... OK no excuses there. 

Safety - Protect your work surface. Have a fire extinguisher in the studio. Don't wave the torch around... Hmm. I can do that. So no more excuses there. Lets set up a space shall we?

Ok - let's make this happen. 
What to make? Hmm. I have some great bangles from Nunn design that need charms. Yes - something good to wear to MEXICO when I take the Richard and Jane Salley class of a lifetime. Something to remind me that I am there to learn/relearn soldering.

A 2016 charm with soldered bail. a sweat soldered crescent. and sterling spiral. OK. Lets do this.

3 charms ready to assemble. one soldered loop, 2 sweat soldered layered pieces. 
DONE! Excuses vanquished. See below - pickle and patina! Not perfect,but a personal success. 

pickled and patina - NOT perfect! 

An auspicious start to the year... 

* Footnote - since originally writing this post I have spent that week in Mexico and SOLDERED ALL THE THINGS. Victory is mine! Details and eye candy coming soon!

Monday, January 11, 2016

Treasure lockets tutorial

One of the pieces I made quiet a few of last year were coin treasure lockets. It's no surprise that I love coins and I use them quiet often in my designs, but what I really love about these pendents is that they are rather simple and can be worn every day.

Coin Lockets
I like to try and make some jewelry that is not too out there and that my "non art jewelry friends" like too (some of my pieces have left some of them with confused looks on their faces and mumbling along the lines of "oh, that's.... different!" which generally means it's a "very artsy piece", which are the one's I like the best, but are not to everyone's taste), however these seem to go down well with everyone!

What you will need-
  • a pair of coins (here I have used Irish 3d coins)
  • 8mm cabochon
  • 0.8mm sterling silver wire enough for three jump rings
  • 5mm bezel wire
  • doming block & brass hammer
  • 400 grit sandpaper
  • Medium and easy solder paste
  • Soldering equipment
  • Dremel with a polishing wheel
  • Rouge
  • Nail buffer
Doming the Coins
  • First gently dome your coins, I use the size 7 and then size 6 on my block. But make sure you go slowly and do not hit them with too much force, you don't want to lose any of the detail on the coin, nor do you want to hit the coin so hard that it just cracks rather then domes (this I have done many times).
  • Sand the lip of the coin flat on a piece of sandpaper, aim for the flat edge to be about 1mm thick this means that your locket will sit together neatly. (I normally stick a blob of blue tack on top of the coin to hold it while sanding and then sand in a circular motion).
Cutting the Jump Rings
  • Using your sterling silver wire you will need to make a small pair of jump rings and one larger one to use as the bail (you don't need as many as I show in the photo I just tend to make them up in batches, or you could use pre-made ones) I use a 2.5mm knitting needle to make my smaller rings and the small end of my bail making pliers which is about 3.5mm to make my larger one. Once I have the coils wrapped I make a small grove on the top one with my cutters so the saw has some where to bite and then I saw by hand (slow and steady and please be careful of your fingers).
  •  If you are using bigger coins to make your lockets you may want to use larger jump rings and thicker wire.
  • Once you have cut your jump rings use a couple of pairs of pliers to close the small jump rings (don't worry about the large ones just yet).
Making the Bezel
  • Wrap the bezel wire around the stone and cut and file the ends to fit. Make sure the ends fit together perfectly and are spotlessly clean.
  • Using the medium solder paste solder the joint closed (please remember to follow all safety precautions) leave to cool.
  • Once cool check the bezel fits the stone and clean up the joint with a file.
  • File the base of the bezel wire so it is spotlessly clean, if it is not spotless the solder will not flow!
Soldering the Bezel
  • Sand the inside of one of the domed coins until it looks clean enough to solder (I use a small amount of sand paper and the tip of my finger), apply medium solder paste around the inside sanded edge of the bezel and place into the domed coin (solder side down). I then place the coin into a small hole in my soldering block so that it is flush against the surface and I can solder the jump ring on at the same time. 
  • Make sure you place the joint of the clean jump ring against the sanded and clean top of the coin so that when you solder it also closes the seam, once soldered leave to cool.
Soldering the Lid
  •  Sand the top of the domed coin that you will be using as the lid, place it on the soldering block as shown above, again with the solder paste over the opening in the jump ring.
  • Solder gently and leave to cool.
Set the Stone
  • Once both have cooled open your larger jump ring and place through the top and bottom of the locket, close and carefully solder closed with easy solder.
  • At this point your coins will be black, don't panic this is normal! For some reason pickling the coins will not remove any of the fire scale, so I just skip to giving them a light rub with a wire brush and then a gentle rub with the number two file on a nail buffer.
  • They can be left like this (with a little Ren wax) for a nice contrast so you can really see the hare or you can finish them how I like them, with a really beautiful high polish. For this just use a Dremel with a polishing head and a bit of rouge.
Amethyst Hare Locket
Of course this can be done with other coins and you can set all different types of stones too, here are some I made a while ago....
Farthings and Six Pences
But, please be aware that not all coins work. Newer plated coins for example tend to crack when domed and melt when soldered!