Monday, March 31, 2014

March Component of the Month Reveal

Today is the big reveal for my component and I'm bursting to see what everyone's made!


These luna moths have been handmade and carved from porcelain clay. After the glaze firing, they were coloured with precious metal lustres in gold, copper, platinum and lilac.

It was as much of a challenge for me as the rest of the team, as I hardly ever use my own components in my designs, but these moths are one of my favourite things to create so I had fun working out what to do with one!

As well as sending moths to members of the AJE team, there were two guest designers chosen to join us in the challenge.

I hope you'll come along and see what we've all created!

Guest Artists
Helen Simon – Helen's had to drop out due to a hand injury - get well soon Helen!

The AJE Team
Caroline Dewison – http://www.blueberribeads.co.uk 
Jenny Davies-Reazor - http://www.jdaviesreazor.com/blog/
Rebekah Payne - www.treewingsstudio.com

Caroline

Saturday, March 29, 2014

Make Your Own ~ Beaded Fringe Feather Focal

It's time for another tutorial! With my studio quickly becoming overrun by painted feathers, I'm finding myself thinking more and more about how to use them in jewelry. If you make beads or components, I'm sure you know that feeling—sometimes you make a new bead, but don't really know what to make with it. My feathers are perfect for earrings, but that's just a bit too obvious for me…


For my last tutorial, I made a wire-wrapped bracelet, so it seemed only right to make a necklace design this time—or in this case, a necklace focal. Enjoy!


Supplies you'll need:
- 20 gauge wire
- 24 gauge wire
- hemp cord
- assortment of small beads
- painted leather feather focal
(Ignore the 22 gauge wire—I thought I would need it and then changed my mind after taking this photo. :-)


Tools you'll need:
- tape measure
- round-nose pliers
- flat-nose pliers
- bent-nose pliers
- scissors
- tape
- glue


1. Using 20 gauge wire, make your focal bar with a wrapped loop on either end. You want this to be about 1 inch long between the wrapped loops.

2. Decide on the length of your fringe, double that length and add about 2 inches extra to accommodate knot tying. Cut 7 lengths of hemp cord, double over and tie onto the focal bar using a lark's head knot. Leave a little space between each knotted cord.

3. Put a piece of tape over the top of the cords to hold them in place while wire-wrapping.

4. Cut a 30 inch length of 24 gauge wire and wrap over the top of the fringe cords—wrap twice between each knot and once over each knot bringing the wire up through the two cords of each section. Remove the tape.

5. Here's how it will look when wrapped once.

6. Wrap back over the knots two more times.

7. Your fringe is ready for beads!

8. Glue and wrap the end of the feather focal to form a bail.

9. Chose the placement for the feather, string a few beads and tie a knot. (Remember my messy studio post? I found this lonely little polymer bird during the cleanup. :-) I really need to make him some friends.)

10. Randomly string the beads, adding a few knots here and there.

11. Wrap over the top of the knot using 24 gauge wire.

12. Curve the focal bar… and your done!! Go make a necklace with your new beaded fringe focal!


Happy Saturday!


http://www.treewingsstudio.com/

Thursday, March 27, 2014

WoolyWire Pendant Tutorial

I've been having fun playing with WoolyWire, a wonderful fiber and copper wire product that is handmade by Nellie Thomas of WoolyWire Etc.  Nellie hand dyes fibers and spins them onto solid copper wire.  WoolyWire can be bent and twisted, just as you would do with any 24 gauge wire, and it brings with it so many possibilities for adding color and texture to your jewelry designs.

A couple of weeks ago I got the idea to try braiding three colors of WoolyWire and then wrapping the wire around a large channel bead to create a pendant.  I'm in love with the result!
This pedant is easy to make and the results are stunning.  Here's how.

Materials:
3 packages of WoolyWire in a pleasing color combination (you won't need it all, don't worry)
1 large or medium channel pendant (available at WoolyWire Etc.)
2, 7-8 mm bicones in coordinating colors
1 decorative headpin with a 3 inch long wire, (mine is from Sue Beads)
23 inches of 1.5 mm leather cording in a coordinating color (mine is from Classic Elements)
2, 1.5 mm end caps (all my findings are from Shipwreck Beads)
1 lobster claw clasp
4, 7.25 mm Vintaj jump rings
GS Hypo Cement

Tools:
Flat nose or half round pliers
Round nose pliers
Wire cutters
A clipboard
Binder clip or "bulldog" clip
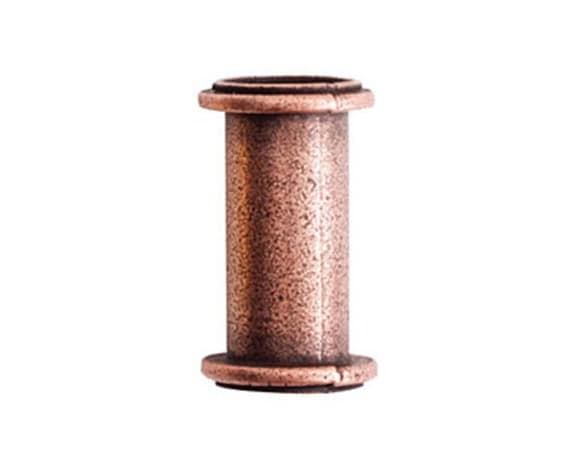
Large Channel Pendant

Directions:
1.  We are going to work with the full 3 foot lengths of the WoolyWire, so do not cut them yet.  Push the WoolyWire down about 1 inch on one of the wires, exposing the copper wire in the center.
 Bend the exposed copper wire at a right angle.
 
2. Fold a small portion of the other 2 wires down flat, so the wire end is not sticking up. (The picture below shows only one wire partially flattened.  You need to completely fold it over on both wires.)
 3.  Holding the three strands close together, wrap the exposed copper wire around all three strands, binding all 3 of them together.   Press the end of the copper wire down and tuck in, using the flat or half round pliers. I trimmed the extra fuzziness on the end, but that is a matter of personal preference.
4.  Place the three wires beneath the clip on the clipboard.  This will secure the wires while you are braiding.
 5.  Braid the wires, just as you would braid a child's hair.
6.  Stop braiding when you think you have enough braid to wrap around the channel pendant.  The length can be adjusted later, if needed.  Secure the loose ends with a binder clip.
 7.  Glue the the top ends of the WoolyWire just beneath the rim of the channel pendant. Set aside until the glue is dry. Unfortunately I don't have pictures for all of the steps, but the rest is really straight forward.

8.  Once the glue has dried, start winding the WoolyWire braid around the channel pendant.  You may like it wrapped loosely, or you may want to push the braid upward a bit so you can add a few extra wraps around the channel pendant. Adjust to your liking.  When you get to the bottom of the pendant, cut the WoolyWires about an inch or so longer than needed to wrap to the bottom of the pendant.  Push back the WoolyWire about one inch on one of the wires.  Fold over the other 2 wires, like you did on the top end of the braid.  Wrap the exposed copper wire around all three wires and glue the end of the braid at the bottom of the channel pendant.

9. Assembling the pendant:  Thread one bicone onto the headpin. Then add the channel pendant, fitting the open end neatly onto the top of the bicone.  Add another bicone on the top and make sure that both are seated firmly into the ends of the channel pendant.  The bicones serve to stabilize the pendant, by filling up the large holes on either side.  Using the wire from the headpin, create a double wrapped loop at the top of the pendant.  If you make a small loop, like I did, you can attach it to the leather cord with a jump ring.  If you make a larger loop, you can thread the pendant directly onto the leather cord.
10. After the pendant is threaded onto the leather cord, add a small drop of glue to one end of the leather and inside one of the end caps.  Place the leather end into the cap and hold in place till the glue sets. Repeat on the other side.

11.  Attach the lobster claw clasp to one end with a jump ring.  Make a short chain with the other 3 jumprings and attach them to the other end cap.  The clasp can be fastened to any of the 3 jumprings, making the length adjustable.

If you have questions about any of the steps, please feel free to ask.  I will be happy to answer your questions in the comments section.
Wear your WoolyWire necklace with pride!
Linda
Linda Landig Jewelry – ArtFire 
Linda Landig Jewelry – Etsy

Safer Silver Etching

I have been desperate to try out silver etching for a long time. I love working with etched copper and wanted to create the same effects on sterling. The only problem was the chemicals involved in the process. Usually silver is etched using Nitric acid, a highly toxic and corrosive liquid which emits harmful gases while eating away at the metal. As much as I love undertaking dangerous activities, the thoughts of messing around with strong acid worry me. So I’ve been looking for a safer alternative. 

My research started off looking in to different solutions for stripping the silver, I found ferric nitrate and silver nitrate. I have silver nitrate in my ever growing collection of raw materials for glaze mixing so I decided to go with that. Silver Nitrate is still a hazardous substance and should be treated with care. I wear a mask when mixing it and rubber gloves. Silver Nitrate won’t do any harm if it touches your skin as a diluted solution, it’s actually used for certain skin treatments, but it will stain your hands a lovely shade of brown, it won’t be apparent at first, but it’s light sensitive so the minute you go out in the sun, they will change colour… ask me how I know! It is also dangerous if you get it in your eyes. Always take proper safety precautions and use common sense!

To etch with silver nitrate you also need a power source and a few other bits and bobs which I will tell you about as we go along. The power source listed was a bench supply, I have one of those, but I wanted to try and see if the process worked the same as salt water etching, so I'm going battery powered!

So to start, I cut as close to a circle of silver as I could, and also cut a dreamcatcher design in vinyl to use as a resist. You can use all sorts of things to mask with, pnp paper, stop out fluid, and ironed on toner. But I haven’t had chance to test how they work yet, so I went with what I know! 


Here’s the silver ready to go with the areas I don’t want to be etched masked out. I also masked the back of the disc.


The silver piece needs to be suspended in the silver nitrate solution, so for this I used Aluminium wire wrapped around the edge so it was touching the silver and taped it on from the back.

The other supplies needed are a steel bowl, (I used a small water bowl from the pet shop) a D size battery and holder with terminals (not sure of the proper name for that!), a couple of crocodile clips attached to the positive and negative of the holder with copper wire, and a bamboo skewer.

100ml of water was put in to the bowl and I added 1 gram of silver nitrate. Always add dry ingredients to wet to save splashes! Stir with an old spoon until the crystals have dissolved, and the mix is ready to go. 

The bamboo skewer is placed across the bowl and the aluminium wire bent around it to suspend the silver so that it’s fully submerged, but not touching the metal of the bowl. 


The negative wire from the battery is clamped on to the metal bowl, and the positive is connected to the aluminium wire to complete the circuit. Once both crocodile clips are attached to the battery, the etching process will start. It’s not as fast a process as if you were using nitric acid. I left the silver in for about an hour to get a shallow etch, it could have probably done with twice that! 


If the etch is working you will see a grey fur appearing on the wire and the silver. You can see here how dirty the solution gets as it etches. To reuse it, you need to strain all the bits out and pour it into a bottle for storage. (I swapped the wire over before this picture for copper, as I wasn’t sure if it was working. I didn’t realise that the aluminium wire was coated, so after sanding it off, I switched back and it worked fine!)

I’ve been looking around for information to dispose of the solution and bits safely. When you’re finished with it, the solution can be neutralised using table salt. The advice given is to add salt until no more white precipitate is produced and then hand it over to your local hazardous waste disposal facility, the same as you would with ferric chloride used for copper. It has also been suggested that as it is silver, photography shops can help you get rid of it safely, as they send in their spent chemicals to companies that recover the silver.

So after the hour, I couldn’t wait any longer and took out the silver piece. 


This is how it looked when I first took it out. After a scrub with a scourer, I treated it with liver of sulphur to bring out the texture and sanded back lightly to reveal the pattern.


This attempt wasn’t deep enough to polish, when I tried it lifted all the patina off again, but I quite like it as a matt textured piece!

I can’t wait to try this out again and experiment, I can now do all the things I’ve tried in copper, but in Sterling silver!

Caroline


Wednesday, March 26, 2014

Embracing Change

There has been a recent need to reorganize and I lost my temporary studio or as my husband calls it the crafting storage room.  By needing to move it all again something became very apparent for really the first time as most of the storage has been hidden.  My stash as grown!!

This was my beading stash back in January of 2011 when I just started beading. 


It was so much fun to organize it all back then.

This is what my stash has grown to.

I thought with buying the two shelving units I would be able to store both beading and cross stitch supplies.  HA!!!!  and JOY!  My beads take up both shelves.

This is all my seeds and projects

These are my Art Beads!  Do you that back in 2011 I only had less than one box full?

These are my czech beads and crystals.I find it hysterical that with all those delicas I have no size 10 for a project I really want to do.

These are the beading books and magazines.
Do you find it fun to organize and see what you really have?

Kristen


Tuesday, March 25, 2014

A new appreciation


I had the great privilege of spending the better part of my week last week with award-winning artist Barbara Becker Simon.

Screen Shot 2014-03-17 at 3.13.04 PM

Barbara is loads of fun. She is an engaging, knowledgable, and patient teacher and she takes great care to ensure that every student in the room is successful, regardless of his or her experience level. We hosted two workshops with her at Roadhouse Arts, and I was able to multi-task so that in addition to serving as a co-hostess, I got to be a student!

BBS-Teaching

Although I dabbled in polymer clay years ago, I was never very good at it. The first workshop last week was all about creating faces in polymer clay so we could create molds to use with metal clay. Since I have never been good at literalism - seriously, I can't draw a round circle to save my life - the idea of creating anything resembling a face seemed a little far-fetched to me. To my great surprise, Barbara's expert tutelage walked me through a process resulting in a little polymer creation that actually looked a lot like a face!

Face-1

Face-2

Face-3

Unmolded

I have to tell you I have a whole new appreciation for the work of the clay and polymer artists who are part of the AJE team. The careful, painstaking effort required to make the polymer model clean and crisp enough to cast a mold was maddening - my friend Gail literally had to make me stop or I would have worked that poor little man to death! I take my hat off to all of you ladies - there's an extraordinary amount of finely detailed work that goes into what you do.

Mask


In the end, I wound up using my second mold to cast a PMC silver face (it's supposed to be Don Quixote), which I then modified and recarved to create a partial mask for a ring. It has yet to be fired, so I don't even really know if it's going to turn out, but I like how it's coming along. I also carved a bronze bangle in the second workshop last week, but again: waaaay more work that I was prepared for. It too still needs to be fired but as I was setting up to take the photo above, I noticed there's a whole section that needs to be "groomed" and fine-tuned - my heart just sank. There's already an entire day in that piece!

Last week was wonderful - I loved Barbara, and I loved her take on art and life and teaching. But I also learned there's a reason why I am so drawn to metal and hammers and torches, and why I merely dabbled in polymer and metal clay all those years ago. It's because they aren't my love... but I am deeply grateful all over again for the artists who make them such amazing mediums in the first place and for the ladies on this team who elevate them to art.

So that's what I'm learning these days - what about you?

Until next time -

Francesca