Tuesday, December 31, 2013

Looking Ahead

I really hate New Year's resolutions. For me, they just amount to one more reason to feel like a loser in February, when I've only made it to the gym twice instead of daily. (I know you know what I'm talking about!)

Photo from the I Hate Cigarettes page on Facebook - but I don't recommend the page. Gross, crude humor. This was funny, though.

Instead, I choose a single word every year that represents some aspect of my character I want to develop, and then I make plans and decisions based on how each applies to my one word. I'm still praying about what my word should be for 2014, but I think a similar approach to my creative work makes sense. There are a lot of skills I need to keep current, but what is the one technique I want to focus on developing and improving in the next year?

Easy.


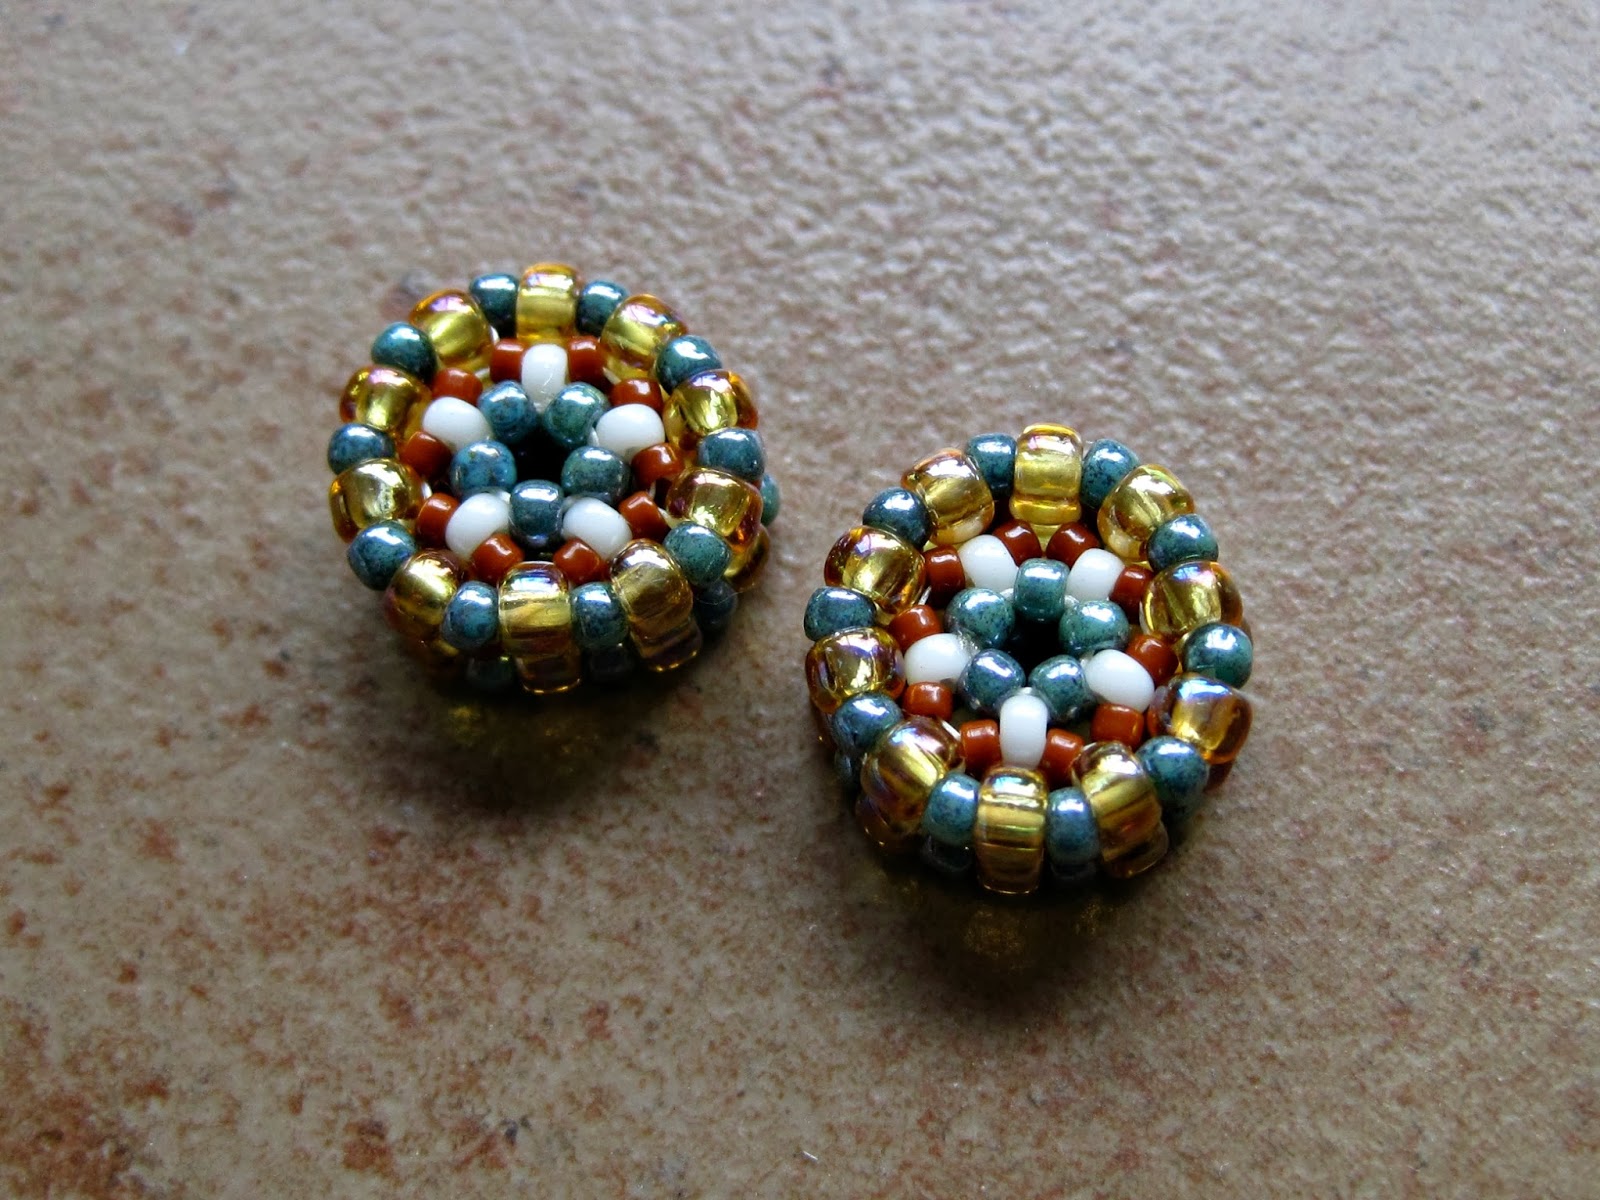
I have fallen hard for enamels. And I mean hard. Last Christmas, my best friend gave me Linda Darty's book on enamels and I never looked back. Torch-fired enamels have been my primary focus this year (my Component of the Month contribution this year were enameled pieces) but I have been itching to do more with kiln-firing and some of the more advanced techniques.


I've written before about artists who are inspiring to me, but I recently discovered another artist whose work with liquid enamels is mind-blowing.


Ken Bova has been experimenting with liquid enamels for several years now - and he has limited himself to using primarily white liquid enamel. Yet he gets an amazing range of colors out of that single element, by overfiring, direct firing, and scratching back to bare metal so he can use its oxidation as a design element. It's an intriguing approach: pick one color and test that color to its limits.


I'm also really interested in what happens with the addition of foils under transparent colors. Barbara Minor is an artist and teacher who's doing a lot of work with foils and decorative elements - I'd like to find a way to take a workshop with her this year!


So in addition to keeping my foundational metal skills current, I'm going to be doing a lot more with enamels this year. What's your focus going to be? What technique are you dying to explore or expand?

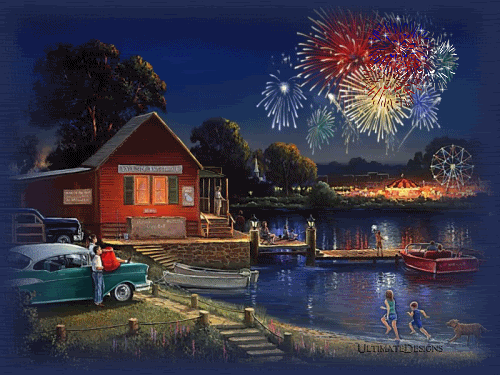
On behalf of the entire AJE team, I wish you all a very safe and happy new year's celebration. We'll see you in 2014!

Until next time -


Monday, December 30, 2013

2013 Explorations - The Adventure Continues into 2014

I have explored a number of new ideas this year... I will talk about just a few here.

Themed Bead Assemblies

All year, I've been wanting to play with the idea of putting beads together into a themed assembly or composition.

Cuckoo Clock bead assembly


Ideas I've been toying with include:
  • Cuckoo clocks with dangling leaf pendulums or possibly baby birds.
  • Log and branch slices, bark textures, and leaves, assembled in layers.
  • Trees with birds inside or on them, Bird houses with birds inside them.
  • Branches with leaves attached or hanging off them.
  • Treasure Hearts with a hollow space for a little arrow bead, or a flower bead, or maybe a bronze key, or who knows what?
  • Word Clouds - clouds that have little words all over them and letters dangling below like rain.
  • Bird houses with bird beads in them, eggs, and other little discoveries.
The idea would be that all the parts can be removed and used independently by the jewelry designer, or all together as a pendant or even an ornament. For example, the bird bead can be removed from the bird house and each can be used separately.

I finally got around to trying some of these ideas out...

Cuckoo Clock with tiny leaf charms
Cuckoo clock detail: a cobbled roof!
Log slice and leaf layered composition
Other "tree parts" for layered compositions: tree slices, leaves, seed pods, bark.
Owl in Tree Home
Owl in Tree Home
Owl Tree Details
Owl on branch
Branch assembly with tiny leaf charms

I plan to continue this exploration into 2014. I have been working on some sketches. I want to try a variety of themed assemblies for beads. I also want to try this for pottery and other media.


Other Thoughts for 2014 Based on Explorations Begun This Year...

This past summer, my husband Don had to clear some trees, and I asked him to make me some tree cookies (log slices).


I used these as little jewelry, bead and photo displays. They are wonderful and have inspired other ideas.... like this one with ceramic and wood elements (by the way this was also the inspiration for a version in ceramic, in the photos above)... I want to explore this further. I'm contemplating setting up a little woodworking bench for this!


The other day, Don split some hardwood cherry wood for our wood stove (from trees that had blown down in a fierce storm - so sad that this lovely wood could not be sold and used for furniture!)... I could not resist snagging a piece to use for photographing my work. The naturally split wood grain is so beautiful - so rich in the red cherry color! I definitely want to try some ideas using this in projects other than as a photo prop!


Well that's all I have in mind so far, for 2014, but honestly, they way I work is an inspiration will typically hit me and off I go in a new direction, working in the flow of ideas. So I can't really say for sure what I will be doing throughout 2014. Some or all of these ideas may get done or they may get displaced by some new exploration. We'll see!

Sunday, December 29, 2013

2013 and Beyond!!!

Hard to believe 2013 is coming to an end very soon!!
The technique I played with in 2013 is not really a technique but a medium. I have been wanting to jump in to Polymer clay for a couple of years, I finally did it this year.

I started with mostly painting these flowers and starfish.


then moved on to mixing color combinations
 and of course I had to start using Ammonite and Sea Urchin
 textures which have been a favorite of mine using PMC since I began in 2008.


Had fun with my Wonky Bead Blog hop!

Wonky Bead Blog Hop REVEAL

I can't say I have anything specific I want to learn in 2014,
 I just want to continue expanding my Polymer Clay techniques and continue working with Copper.
I want to play more with my own textures using
 Scratch Foam
 Photo Polymer Plates
 and my Sillhouette Cameo Machine.

Thank you all for coming along on this ride with me and I hope to continue with the fun in 2014!

animated fireworks photo: animated fireworks ambeaupic1.gif


Kristi

Saturday, December 28, 2013

This Post is Brought to you by...

the letter "S"! For me the past month, it stood for "stressed"...today it stands for "sick". I have had a nasty head cold since Christmas Eve and all I want to do is sleep. See, that starts with "S" too! I decided today that I would recycle one of my most popular "Saturday Share" posts. I has definitely been one of my favorite techniques for 2013 and I'm sure I will be using it a lot in the coming year...maybe with some new twists!  Thanks to all that have pinned and re-pinned it on Pinterest! I hope it has been a helpful technique and will inspire someone new today, that perhaps didn't see it the 1st go round! I'd also like to say Happy New Year to all of you, our wonderfully supportive readers...I wish you the most creative, happy, productive, peaceful year ever!

*~*~*~*~*~*~*~*~*~*~*~*~*~*~*~*~*~*~*~*~*~*~*~*~*~*~*~*~*~*~*~*~*~*~*~*~*~*~*
Happy Saturday, everyone!  For today's installment of Saturday Share, I decided to write up a quick and easy tutorial for the double headpins (for lack of a better name) that I use in connecting components, such as layered pieces or discs.  I have had several folks ask how certain pieces are connected and I thought this would be a good forum to share!


After struggling with balled headpins in connecting layered pieces and discs, I had a brainstorm one day.  What if, instead of balling up the end of 1 piece of wire, I somehow melted/fused 2 pieces so that I could use both "tails" to better stabilize my components to the base?  Imagine my surprise, that after twisting the wire together and sticking it in the torch, just like normal torched headpins, it worked!

Here is my method...start with a piece of copper wire.  I like 22 or 20 gauge.  Fold it in half, press together and twist until you have about an inch twisted.  Torch until you have the size ball you  want, quench, and untwist! Simple, huh!


It really is!  Things to watch for...make sure the wire is touching throughout your twist. Any segments that do not fully come into contact with the other wire will melt through, leaving you with a single pin, or worse, will cause the balled-end to fall off.  If you are using scrap wire, you don't have to loop at the end, just twist the 2 together, but make sure the very tips are touching. 

If you want to enamel the ball, do so as you would with regular torched pins, before you quench.

I thought this would only work with copper or fine silver, due to their fusing capabilities, but decided to try sterling silver and it works!  It also works with brass/bronze.

Layer your components in your desired configuration...thread double headpin through the holes and make sure you have a good fit.


With these 1-holed components, I wrapped the tails around my base form...usually in the opposite direction for a stronger and closer connection.


When I use a flat base to connect to, like these earrings, I like to punch 2 holes, like a button, and thread each tail through their respective holes, then on the back, flatten them and tightly coil them.  Since the ends are exposed with this method, you have to make sure any sharp edges or burs are filed.  I squeeze with my nylon-jawed pliers to work harden, then I usually tumble to strengthen as well.


There you have it!! I am sure that I am not the 1st one to figure this out!!  It is a really versatile technique and can be used in all sorts of ways!  I want to try fusing several strands together and do some wire weaving, but that's another day!

Thanks for stopping by...If you have any questions, let me know!

Melissa Meman
Melismatic Art Jewelry
Art. Life. Love

Friday, December 27, 2013

Ring in the new... with the January Component of the Month give away!

...We interrupt the regularly scheduled Freeform Friday post to entice you with a mixed media offering to begin the year in style!...

Best wishes to all! I hope the holidays were filled with friends and family, festivities and fun. The calendar draws to a close, and I am amazed to find 2014 around the corner! And with it - the January Component of the Month. 

We have been posting this week or so about techniques we tried, and liked in 2013. For me - it was keeping the mix in mixed media pieces! I love paper, images, text, resin, clay, metal... you get the idea... I made a batch of ceramic pieces, open back bezels for Beadfest in August, and wanted to do more... So here is the journey in pictures to our first CoM of 2014: 


I found this antique buckle in an antique store in Austin TX. Don't quite remember when - I was there visiting family... That same trip I found a tiny, old, decrepit dictionary. The two were destined to go together... 

The old and the new. 
 I made a mold of the original buckle from RTV silicone. These new pieces are polymer, and are wearing 4-6 colors of acrylic, accessorized with Gilders paste, and sealed. They will be filled with inspirational words selected from the treasure trove of vintage dictionaries that find their way to me. And resin, of course. 
I love wearing a word, as a message, a talisman, that is known to you, small and secret. You can choose to reveal it to others when you are wearing it. 


Now the holidays intervened - and these are not quite finished. They are drilled to hang horizontally, and I made a diverse batch... but they need their words, and resin. I hope you can imagine with me, and see their potential. ( I will update with pix ASAP!)

Would you like to start off 2014 with a bit of inspiration? With a creative challenge? With one of these pendants on your work table?


There will be three available to AJE blog readers! 


Here's how it works (please read carefully)…
  • I will giveaway 1 mixed media frame pendant to each of 3 winners selected randomly from those who leave comments below this post by midnight,  Monday - December 30th 2013. 
  • Please include your EMAIL address in your comment so that I can contact you ASAP should you win.
  • I will surprise you with a selection from this batch of pendants. No two colors or words will be exactly the same. 
  • Please (PLEASE) only leave a comment if you can commit to creating a finished piece and blogging about it on the reveal date.
  • The names of the 3 winners will be announced on Wednesday, January 1st, 2014! 
  • The blog reveal will be on Friday, January 31, 2014.

Thank you all for a great year! Here's looking forward to many more creative endeavors to come... 


Jenny
www.jdaviesreazor.com


Thursday, December 26, 2013

Wishes for the New Year

Today, I'm celebrating Boxing day with my family, we have everyone over for a big buffet for a nice relaxing day with some films for the kids and a few drinks for the grown ups. I hope your seasonal celebrations are in full swing, and you're enjoying the holidays!

As we reach the end of the year, here at AJE we're reflecting on our favourite techniques from the last 12 months.

This year, I've found a great new obsession... Sculpting with porcelain. It all started off with my hare beads, I discovered I loved modelling small forms in clay.


After finding I could shape clay in the way I wanted, this turned to making cabochons for beading and small art beads.


I love sea creatures, and my absolute favourite are Weedy Sea Dragons. For a more realistic finish, I've used china paints to colour him. These are fired on to the mature porcelain for permanent colour.


I'm hugely inspired by nature, and love anything cute. This bead was inspired by a picture you've probably seen shared on facebook of a sweet baby hedgehog.


And this bee on a flower was inspired by the bees in my garden going about their work all summer long.


I asked on my facebook page which animals people would like to see and one of the requests was an elephant.

And the very talented Leigh of JewllrLeigh turned it into this...


And Lesley from here at AJE suggested a pangolin


I've also discovered I love sculpting faces and hope to explore more of this type of design in the New Year.


Next year, I'm hoping to continue with the small sculptures, but I also want to go bigger using some of the skills I've learned to create some larger pieces using ceramics and mixed media. I also plan to create more jewellery as that has taken a bit of a back seat this year. There just aren't enough hours in the day to do everything I'd like! But I have a stash of silver, lots of copper and enough beads to sink a small boat, so I will be putting them to good use to create some new designs. I feel like this year has been a year of learning, I've flitted from one thing to another, finding out what I can and can't do and hopefully they will all come together next year in some great new work!

What are your plans for next year? I hope you'll share your creative hopes and dreams... will you be learning new techniques or expanding on the ones you have? We'd love to hear what you'll be doing!


Enjoy the rest of the Holidays!


Caroline

Wednesday, December 25, 2013

Merry Christmas from the AJE Family

Merry Christmas!

The Art Jewelry Elements family wishes you and yours a very Merry Christmas. We hope your day is filled with love and peace. And maybe a few minutes for yourself to spend time creating 

We have a special gift to give you. The gift of a new team member. The very talented and lovely Keirsten Giles will begin writing every other Sunday starting January 5th. She has already written a couple gems for you as a guest blogger, including this one on creating tulip bead caps and another on "organically grown" metal

With love, 

The Art Jewelry Elements team


Tuesday, December 24, 2013

In With The New!

Happy Christmas Eve!  In keeping with the theme of reviewing my work in 2013 and looking forward to 2014, I give you the following!

Lots of preparation goes into Bead Fest and then it's over like that!  This past Bead Fest, I offered several new options for my customers.

I had many sets of embossed beads - beads using brass presses to make an impression in the glass.


I offered cabochons this year as well; they can either be bezel set or stitched around.


I offered large focal beads; these ones are over an inch and a quarter.

 I made a lot of glass headpins on copper and steel wire.

 I made ruffle beads - if you purchased any, I'd love to see what you made with them!

 I made some buttons (although they did not sell).


And finally, I made ruffle discs, which were used as the May Component of the Month piece - you ladies did an awesome job with these!

What I'm looking toward in 2014 is to work with more mediums than just glass.  Taking a break from glass may make me realize that I want to get back to it (I'm already dreaming of a Carlisle Mini CC torch to get with my work bonus this year!). 

I got a start on my new goals a few months ago.  I purchased a tutorial from DatzKatz on etsy and got busy making beaded beads.  I love these, they are so much fun to make.  I had made the ones around a solid wood bead core before, and have a few tutorials for those as well, but these are quite fun!


I also did Sally Russick's Beading around a Cabochon challenge which I really loved!

At ArtBLISS, I took a Christine Damm class in polymer (my second class with her) and Stacy Florer's class in thin gauge metal and would like to continue working in these mediums as well.


What are your creative goals for the new year?  Do you want to work in new mediums?  Do you want to improve yourself in your current medium?  I hope that whatever goals you set for yourself, you see success and happiness in what you do!  Happy 2014!

Susan
SueBeads